 If you asked me what is the most enjoyable and satisfying art project you can do, I would probably say paint-by-numbers. It doesn’t matter if you consider yourself an artist or not, anyone can do a paint-by-numbers piece and they all come out looking exactly the same—amazing! Now, it has certainly been a decade or so since I did a paint-by-numbers work of art, but I thought it would be really fun to do an oversized one that I could hang in the house as “real” art and make it a Palm Springs scene to up the playfulness factor even more! Our favorite graphic designer Mara created a download for you so you can make your own amazing paint-by-numbers scene (whatever size you want), but here’s how I made my oversized version:
 Supplies:
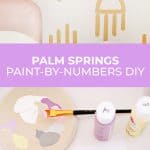
–Palm Springs paint-by-numbers download
-acrylic paints in various shades
-paintbrushes in various sizes
-pencil or grey colored pencil
-large canvas
-either an overhead projector with some transparency sheets to print on OR some carbon copy paper for tracing, and access to a Staples or Kinkos-type printer place
To make things a little more organized, I printed out a smaller version of the key (the scene that has all the numbers on each area) so I could keep it by me and reference it as needed without having to look it up on my computer each time. The download also has a list of all the colors you’ll need and you can tweak the selection as you’d like to compliment the colors in your home (change the color of the house, etc.). I also wrote the corresponding color code numbers on the top of each paint bottle so I could just match the number to the paint pretty easily when switching colors.
 So, if you have an overhead projector, you can print the outline document onto a transparency and trace the outside outlines of the scenes onto the canvas like I did above (projectors are so handy for that reason). If you don’t have access to an overhead projector, you can print the outline document the same size as your canvas as a blueprint print at a shop like Kinkos or Staples. Just lay your canvas on the floor with carbon copy papers covering the top (carbon side down), and then lay your outline print on top and trace it onto the canvas. That’s how I did my nursery wallpaper project when I couldn’t use the projector in there and it works really well!

If you do the overhead projector method, I would suggest using a grey colored pencil over a regular pencil if you can, just because a colored pencil will smudge less if your hand touches it while painting areas nearby.
However you get your lines traced, once they are outlined, it’s time to start painting!

It’s totally up to you where you want to start and how you want to fill in your painting, but I decided to start at the top and work my way down.


Another thing you’ll need to think about (in regards to your painting) is how many coats you want to do of a certain color if that particular paint is a bit thin when applied. There were some colors that I did multiple coats of to make it a more solid opaque look and others that I liked the look of less coats so they were a bit streaky and textured looking. Sometimes, even when buying all the same brand of paint, certain colors are more pigmented than others or contain more white in the shade mixture, so they don’t usually all cover with the same opacity.
 This is a great project to do over the winter or during dreary days as the scene is happy and bright and it gives you a really fun and creative indoor project that you can basically pick up whenever you have spare time. It was SO fun to fill in each section and watch the painting slowly come to life. If you are doing this as a smaller version, you can also print this directly onto some canvas paper so you don’t have to trace anything. If your printing options have an option to lower the opacity when printing, try and lower that to about half so your lines will print as a grey rather than black, so they’ll be less noticeable when painted over. Have fun—I know I did! xo. Laura
14 Comments
A really great project! Thanks so much for the download! Can’t wait to make this fpr my home office 😀
Many hugs from germany <3
Where did you get your overhead projector?!!!
Amazon 🙂
I am SO COMPLETELY EXCITED ABOUT THIS! Thank you. It’s going to be so fun!
I love the finished product, reminds me of graphics I used to watch in cartoons! It’s super cute. I can see the DIY process being very therapeutic too! 🙂
Charmaine Ng | Architecture & Lifestyle Blog
http://charmainenyw.com
It’s beautiful 🙂
I am so excited to do this! I’m an Ohio girl who loves Palm Springs! Looking forward to heading back there in March!
Although its basic paint by number but its still amazing 🙂
LOVE!!! Thanks for sharing it. Do you mind sharing the size of your canvas?
Hmm, I think it was a 30 x 40″ canvas!
Laura 🙂
I love it!! What a fun idea 🙂
This is so fun!
This is so perfectly lovely! What is the wallpaper? Did you make that as well?
So sweet!
I have an overhead projector and now I finally have a use for it! ????