 In planning out the nursery, I knew that I really wanted to do one thing in particular—a hand painted wallpaper design! Now, the next big decision was obviously well, what should I actually paint?? Thankfully, pretty early on in the process, I remembered how much I love this awesome painted hallway at a local coffee shop here in Nashville (Three Brothers Coffee), and I thought that a room full of simple painted symbols in a lighter color would be a really fun way to go. The other great thing about doing the symbol route is that I could pick and customize all the different shapes to be specific for her room, so I could pick things that were meaningful to us as a family (or just plain cute in general too!).
 First I had to decide what symbols I wanted to be on the nursery wall—talk about a tough choice! I didn’t want all of just one category of shapes. So I decided to have some of everything (nature, food, objects, symbols) to mix it up a bit. I made sure to include a pizza and a soft pretzel since she’s definitely been exposed to a lot of those so far! I did a lot of doodling the different items with a marker until I got one that looked just right for each symbol. I ended up cutting up one of the pages and taping it into the baby journal I’ve been keeping for her above so she could see a piece of her nursery design someday.
 Once I had all the shapes drawn out, I scanned them into my computer and then used Photoshop to arrange them in the order and size I wanted based on the nursery wall’s length and height. I was planning on just using my handy-dandy overhead projector to project the shapes onto the wall so I could easily trace the shapes from there, but once I had my transparency print out, it became obvious pretty quickly that I couldn’t get the distance back from the wall that I would need to in order to have it project all the shapes evenly (lines can get kind of warped with projectors if they aren’t projecting at the perfect angle, etc). Sooo, since Plan A was out, I had to come up with another idea, and I ended up using my Photoshop mockup to create strips of “wallpaper” that I could have printed out as blueprint/engineer prints at Staples. Then I hung the sheets up on the walls with tacks so I could transfer them from there. I set up the design so the walls across from each other in the room are repeat patterns, so I just had to print out the two different wall options, and then I would move the wallpaper to the opposite wall and repeat the process once I had traced the designs.
 In choosing the color, I wanted a pastel sort of lavender (with a tinge of pink to it). I ended up choosing Valspar Lilac Lane (it’s the one on the bottom right). In doing this sort of project, it was helpful to paint a few shapes on paper with the different shade choices and tape them up first to see which option I liked the best.
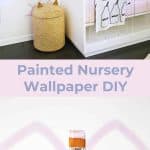
 You may be wondering, “OK, crazy lady, you printed out your temporary life-size wallpaper and attached it to the wall, but how did you trace the shapes from that point on?” Well, I bought a pack of carbon sheets (I had to tape a few together to be big enough), and then would tape it onto the wall behind the wallpaper at each spot where a symbol should be. Then I used the rounded end of a small paintbrush to lightly trace and transfer the design onto the actual wall. I made 4-5 of those big sheets so I could position and trace a bunch at once, and then move them all and trace that batch, etc., until the wall had all the symbols traced.
 Once they were all traced, I used a 1″ paintbrush and simply went over the traced lines to paint in my shapes! I also used a smaller brush to do a few of the smaller lines like eyes on the sun and heart and salt lines on the pretzel shape.
 Since I was using a lighter color of paint, I did have to go over the lines two times with paint to get a good solid line, and I had a little bit of wall color touch up to do in a few spots where the carbon paper rubbed off as I was moving the sheets, but nothing too drastic.


 AGHHH! SO CUTE!! Now, if you wanted to make this project one million times faster and easier, you could always just freehand your shapes onto the wall without the whole temporary wallpaper and tracing steps (just block out a few grid lines on the wall with painter’s tape to keep the shapes relatively even). I just have a bit of OCD when it comes to things being in grids or lines, so I apparently needed to have all the shapes evenly sized, evenly spaced, and perfectly traced for me to feel like it was “right”, but that may not be you! Anyway, I love that her room is a custom assortment of symbols that have personal meanings for our family or relate to this pregnancy so far (like my cravings for soft pretzels!), and I hope that she grows up to love it as much as I do! xo. Laura
29 Comments
I really like the colour scheme in the nursery!
Charmaine Ng | Architecture & Lifestyle Blog
http://charmainenyw.com
Great job! I’ve used this method several times for large murals and window painting when the projector just won’t cut it. It’s a lot of work but the result is flawless. I’ve had more success with buying a roll or carbon paper than the sheets. You can find rolls of carbon paper in alternative colors too which is great if you want to avoid graphite marks all together.
The nursery turned out great! Congrats Gummergal!!
You did an amazing job! I love that since it is hand-painted you were able to choose symbols that were really meaningful to you instead of settling with a generic set. It really makes the room more special and one day you’ll be able to tell your little girl the importance of each one. <3
This is so charming! I love that you can mix and match the images that you want to fit exactly your tastes. I’m in love with that big soft pretzel. I could see this is so many rooms outside of a nursery as well!
I love how fun and eclectic Laura’s nursery is! So unique from other nurseries I’ve seen!
http://www.wonderlandsam.com
Such a clever DIY! I was thinking of hand painting a herringbone-type pattern onto my son’s new nursery and was just going to do this freestyle but I love your idea of using carbon paper! I think you’ve just inspired some new ideas, thank you x
You’ve outdone yourself. This is so unique, yet not crazytown. Side note – I was recently reading about how babies grow to see colors. It might take them 6 months or so to see pastels. So don’t be hurt if your baby isn’t seeming to notice or focus on these right away. In time…
Wow what awesome wallpaper. One of a kind! Way 2 go. So happy your baby is going to have a creative mom.
I love this! So cute and creative and unique!
However, for future articles, I think it would be most respectful to replace the use of the word OCD for something like “perfectionist.” https://patch.com/new-jersey/hillsborough/why-you-need-stop-saying-youre-soooo-ocd-0
You’re a genious, this looks so cool!
https://www.makeandmess.com/
I just love that idea, it’s so so cool!! She’ll have such a fun room to grow up in! xo
Melodie
http://www.happymelodie.com
Oh my, that is so freaking adorable 🙂
Hi Laura, I love that you incorporated figures with a special meaning to you and Todd. But I can’t help but wonder, why did you use the omega, what kind of special meaning does that have to you?
I have a theology masters and did a few semesters of Greek 🙂
Laura
You are so creative!
That’s a FANTASTIC idea! What a cool project for a new parent! Love the designs and colours as well!
This looks so amazing. I’m in my early 20s but I definitely dig a bedroom with this wallpaper! So cute!
http://annescribblesanddoodles.blogspot.com
SO GOOD. My style icon, you never disappoint! XOXO!
I just love your nursery. We didn’t want to know the sex of our baby so I made a neutral woodland theme, when he was born he loved the fairy lights I draped on the ceiling, but hated his room, he preferred co sleeping. Hes 4 months and only now loving his room.
http://www.melodramaticadventures.com
This is gorgeous! You did an amazing job! x
The room is outstanding and you did such beautiful work. However, I know it might seem silly but I wanted to pass along why using phrases “I’m a little OCD” is harmful for helping end the stigma around mental illness. This article explains it better than I ever could– http://www.independent.co.uk/life-style/health-and-families/health-news/you-can-t-be-a-little-bit-ocd-but-your-everyday-obsessions-can-help-end-the-condition-s-stigma-a6699806.html
What a beautiful nursery! Would you mind sharing what kind of baby journal you are using? I am having troubles finding a cute one. Thanks!
I’ve just been using a small cute notebook to write things down in, nothing special 🙂
Laura
This is adorable! I’m obsessed!
Paige
http://thehappyflammily.com
How fun! Reminds me of icons we designed for my work’s website a couple years ago. Our goal was whimsy…and I think you achieved that same whimsical look here!!
Omg, super cute but I’m disappointed it’s not really wallpaper. Learning how to create wallpaper would be so good to know for smaller scale diys when you don’t want to modge podge. This is a mural. ?
WHERE is that cat hamper from!? It wasn’t in your original nursery tour and I need it.
love that you can mix and match the images that you want to fit exactly your tastes. I’m in love with that big soft pretzel. I could see this is so many rooms outside of a nursery as well!
I love this Article! it’s so creative and unique!
To know more about wallpaper installation and restoration, please visit our website:- https://www.highly-decorated.co.uk/