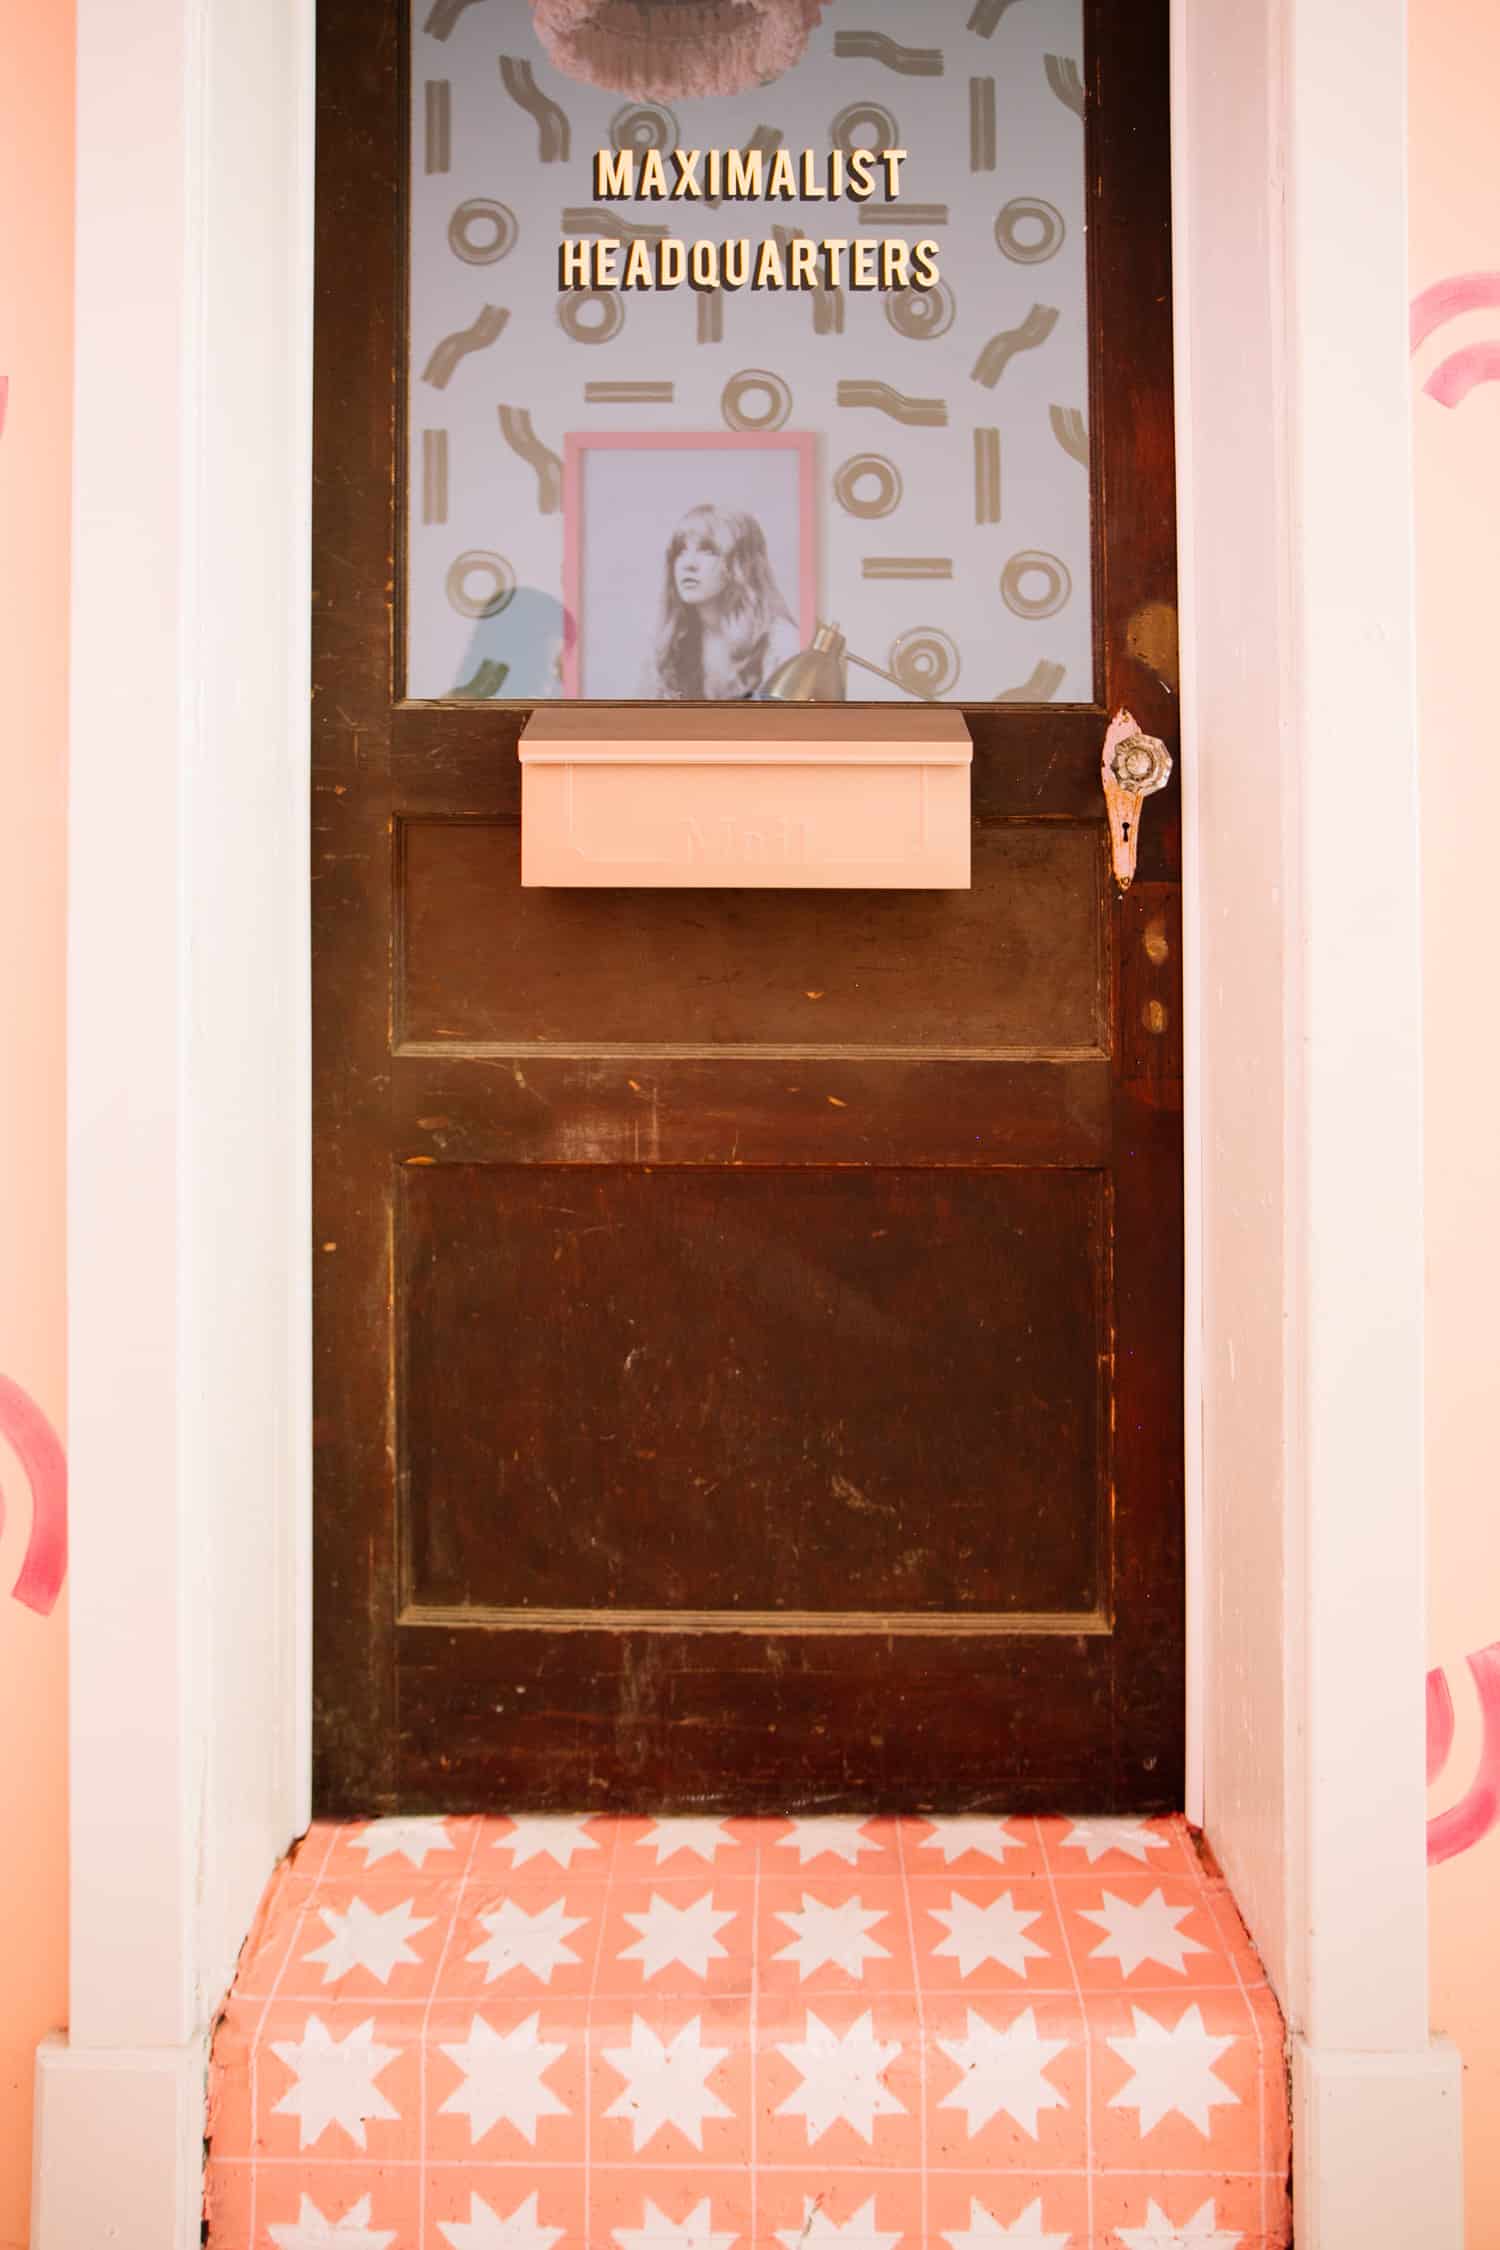
 Hi friends! Today, I am so excited to share the tutorial for the painted floor Collin did for our Apple + Oak office makeover. When we first began to plan the office, Allison told me she wanted a LOT of pattern mixing (which is so rare and SO FUN). I picked out a bunch of pink cement tile options, but when budget wouldn’t allow for tile and install we turned to DIY.
Now, this isn’t our first rodeo with painted tile. No, no, no. We have a pretty deep archive of painted tile projects, actually. See a few of my favorites here and here.
This DIY saved us thousands of dollars, but it was time consuming for sure. It cost only $85 to do this whole room, but be willing to spend up to 40 hours on cutting stencils, painting and detailing. 
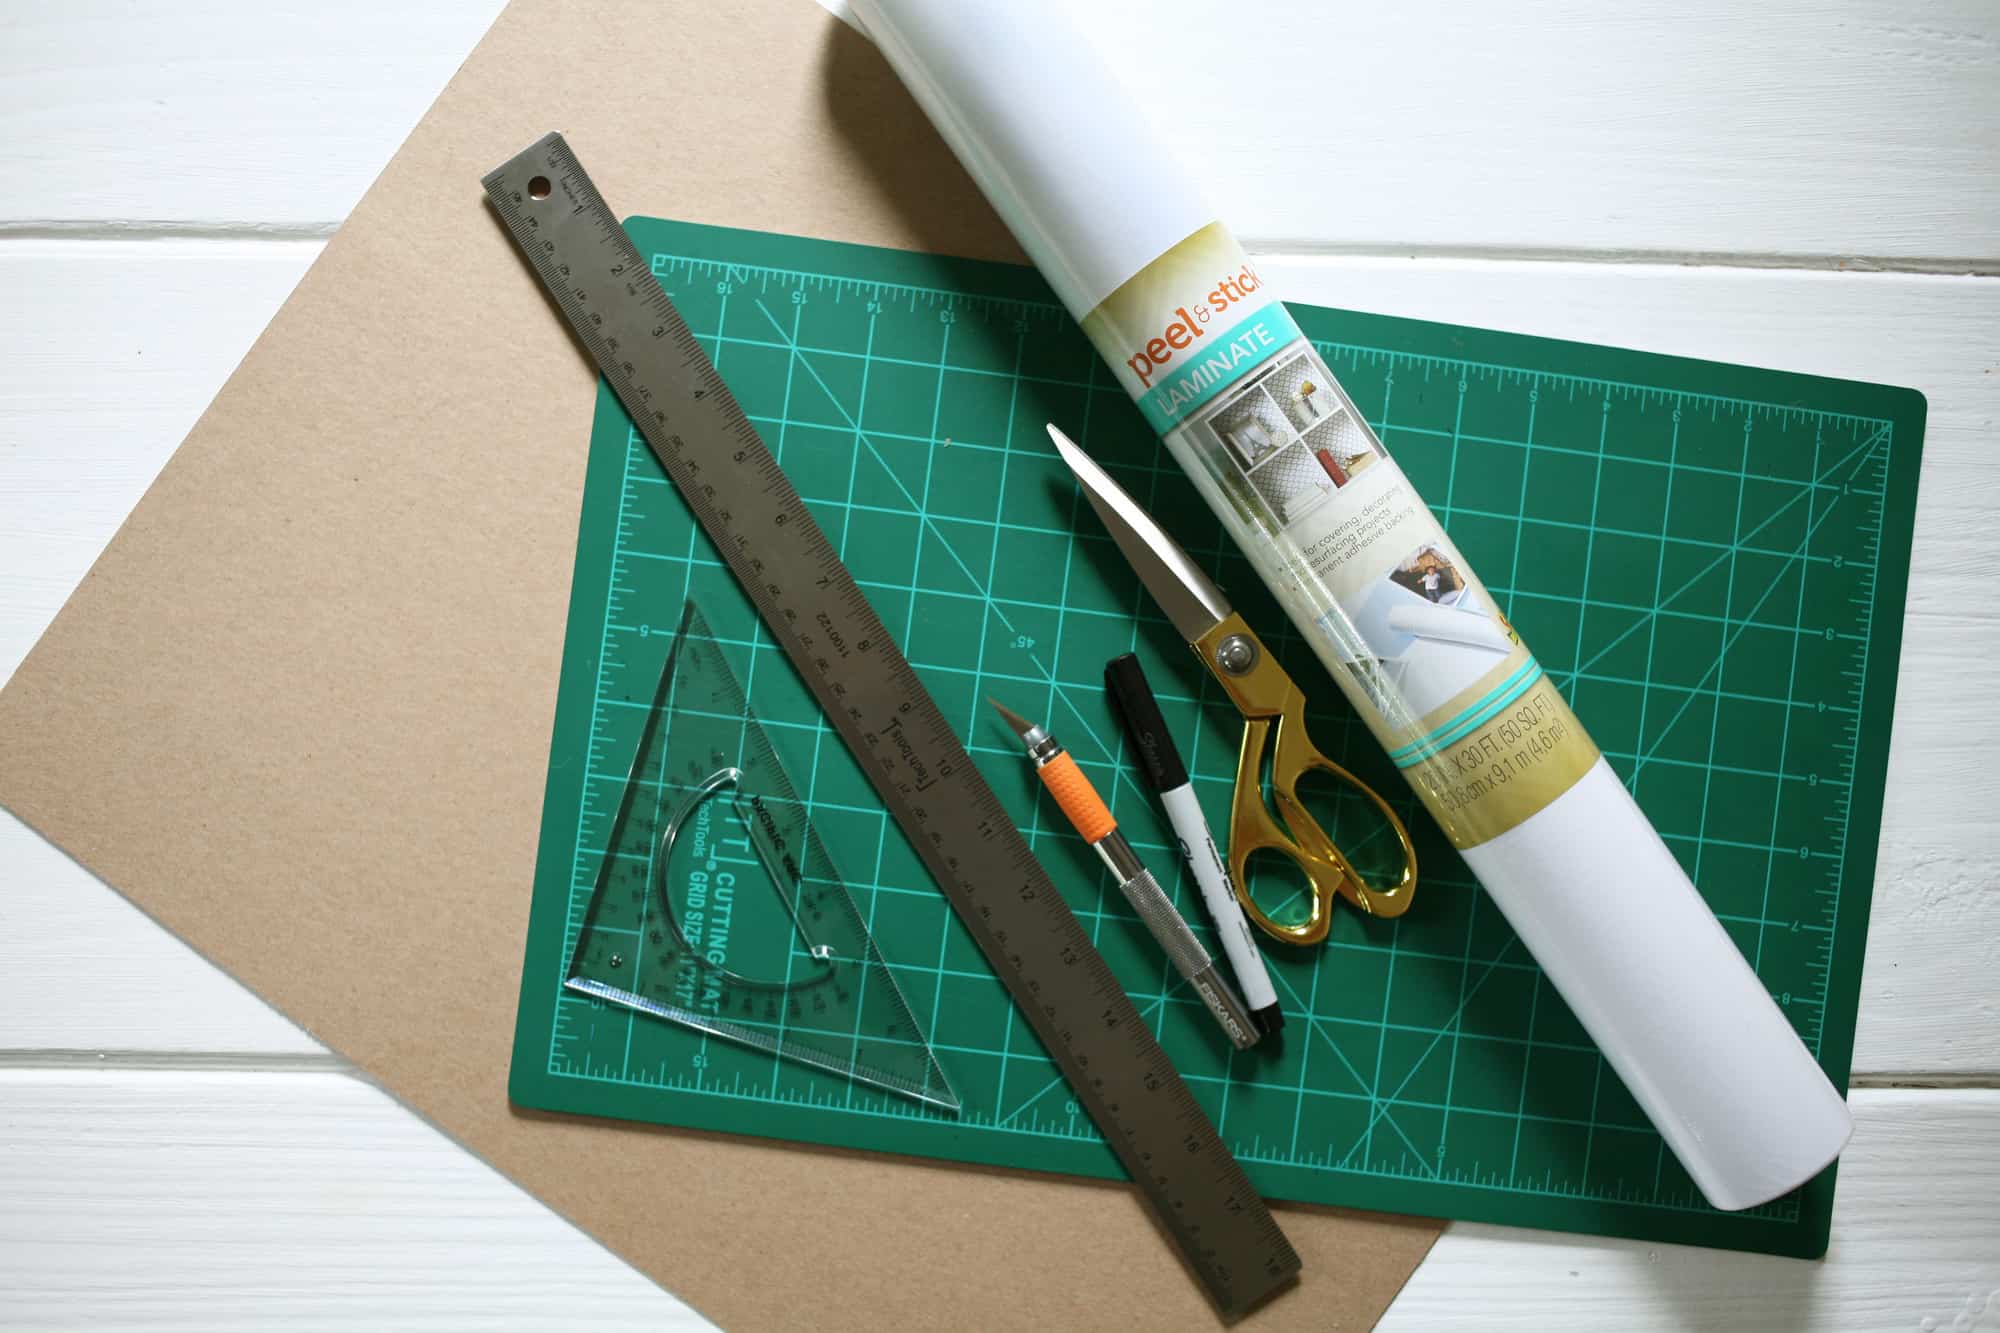
Supplies:
-roll of peel and stick vinyl contact paper
-piece of card stock or thin cardboard
–oil based paint pen
–porch and floor oil based paint
Tools:
-cutting mat
-razor knife
-scissors
–metal ruler with nonslip backing
-right angle ruler (optional)
-4′ ruler or level
-tape measure
-mini paint roller
Total $84.23
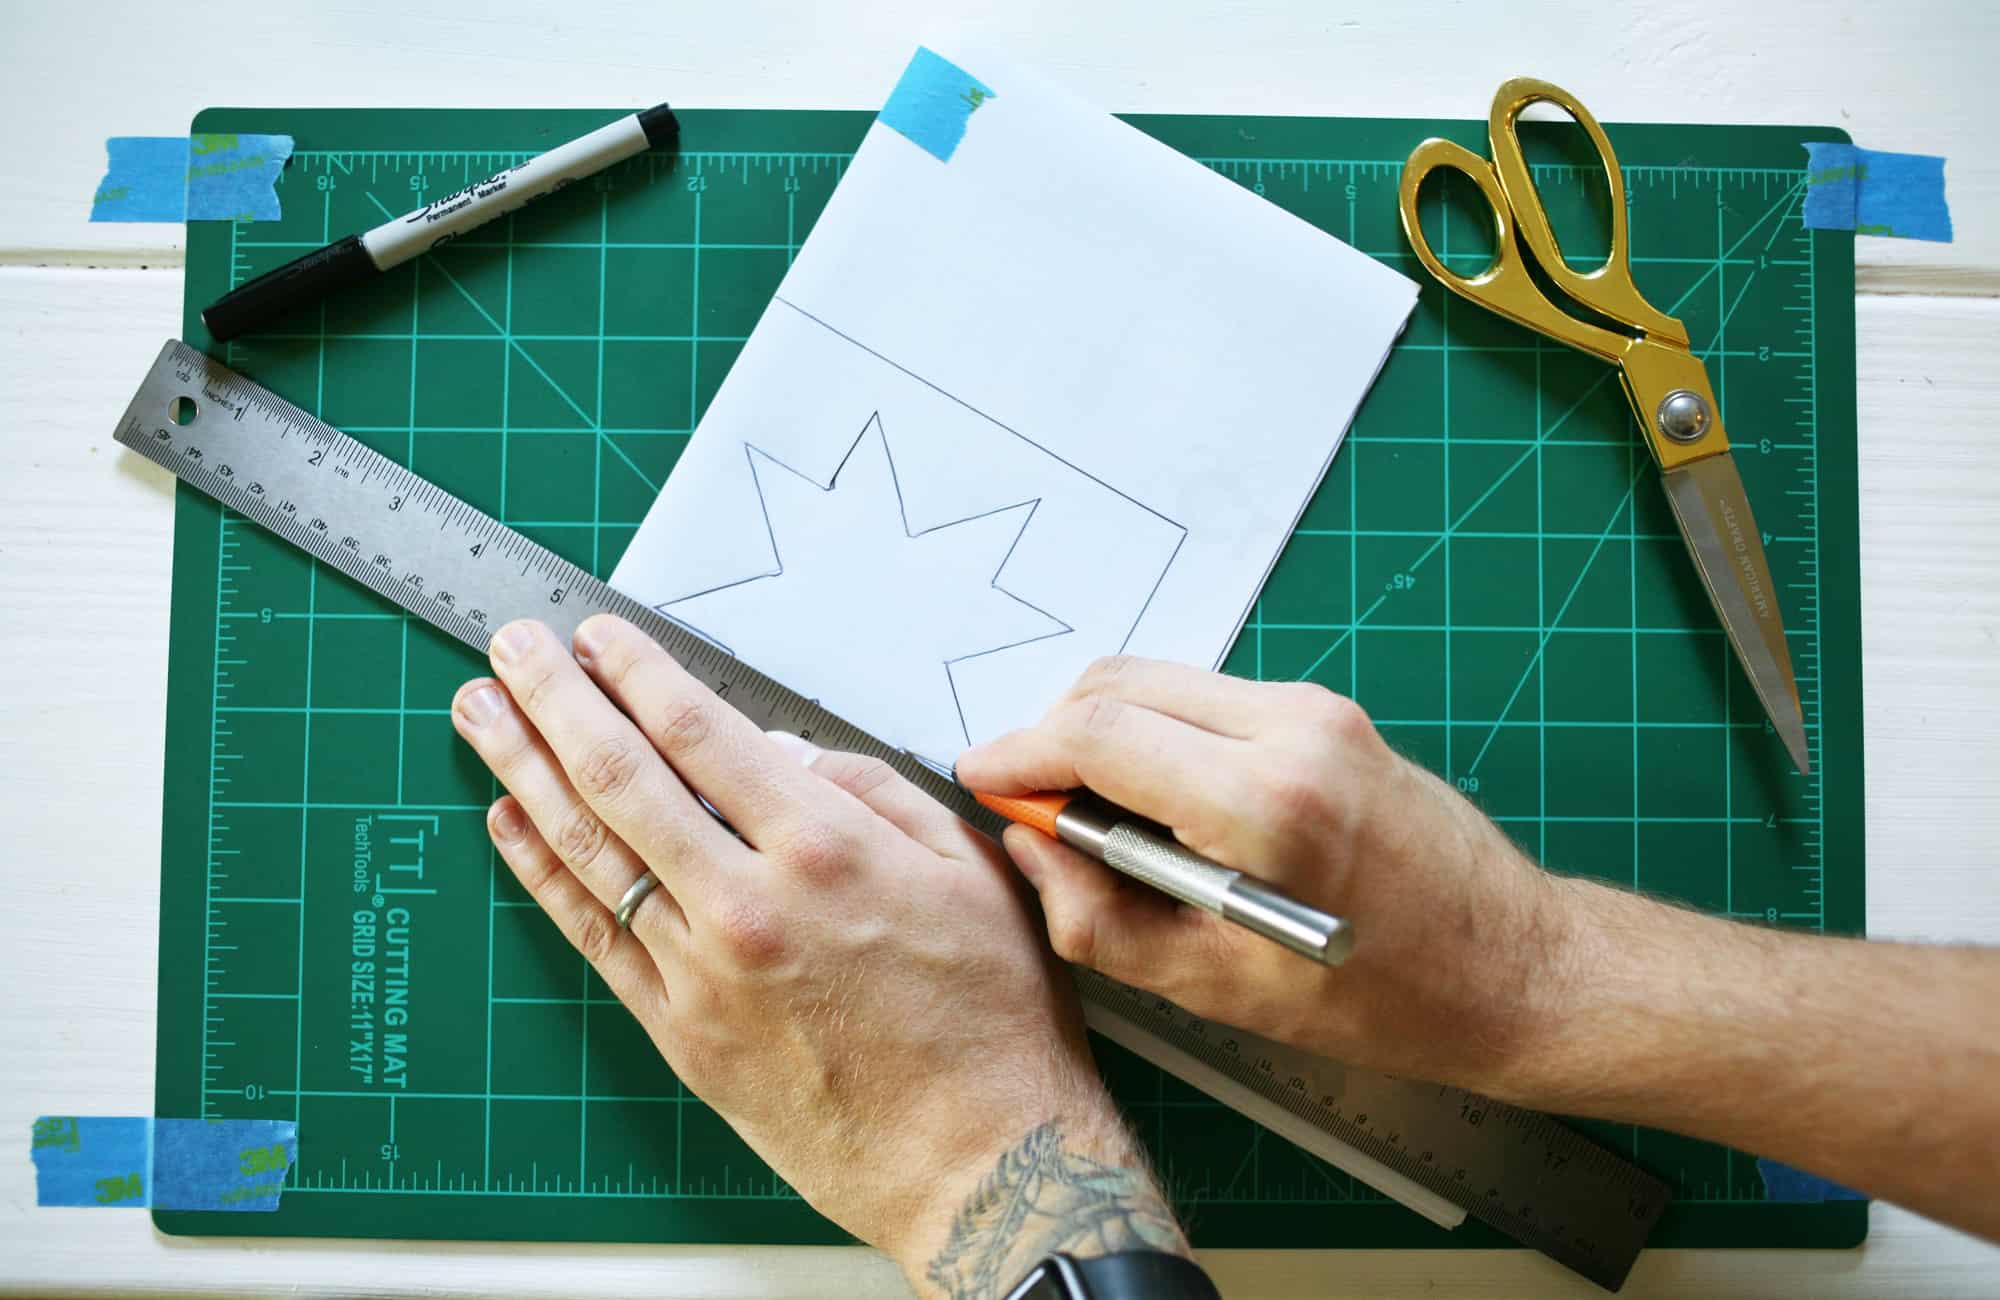
 To start, we’re going to trace and cut out a stencil out of the card stock. This is because you’re going to need to trace the star design lots of times onto the contact paper and it is super helpful to have this stencil on hand to speed things up a little because honestly, this one took quite a long time!
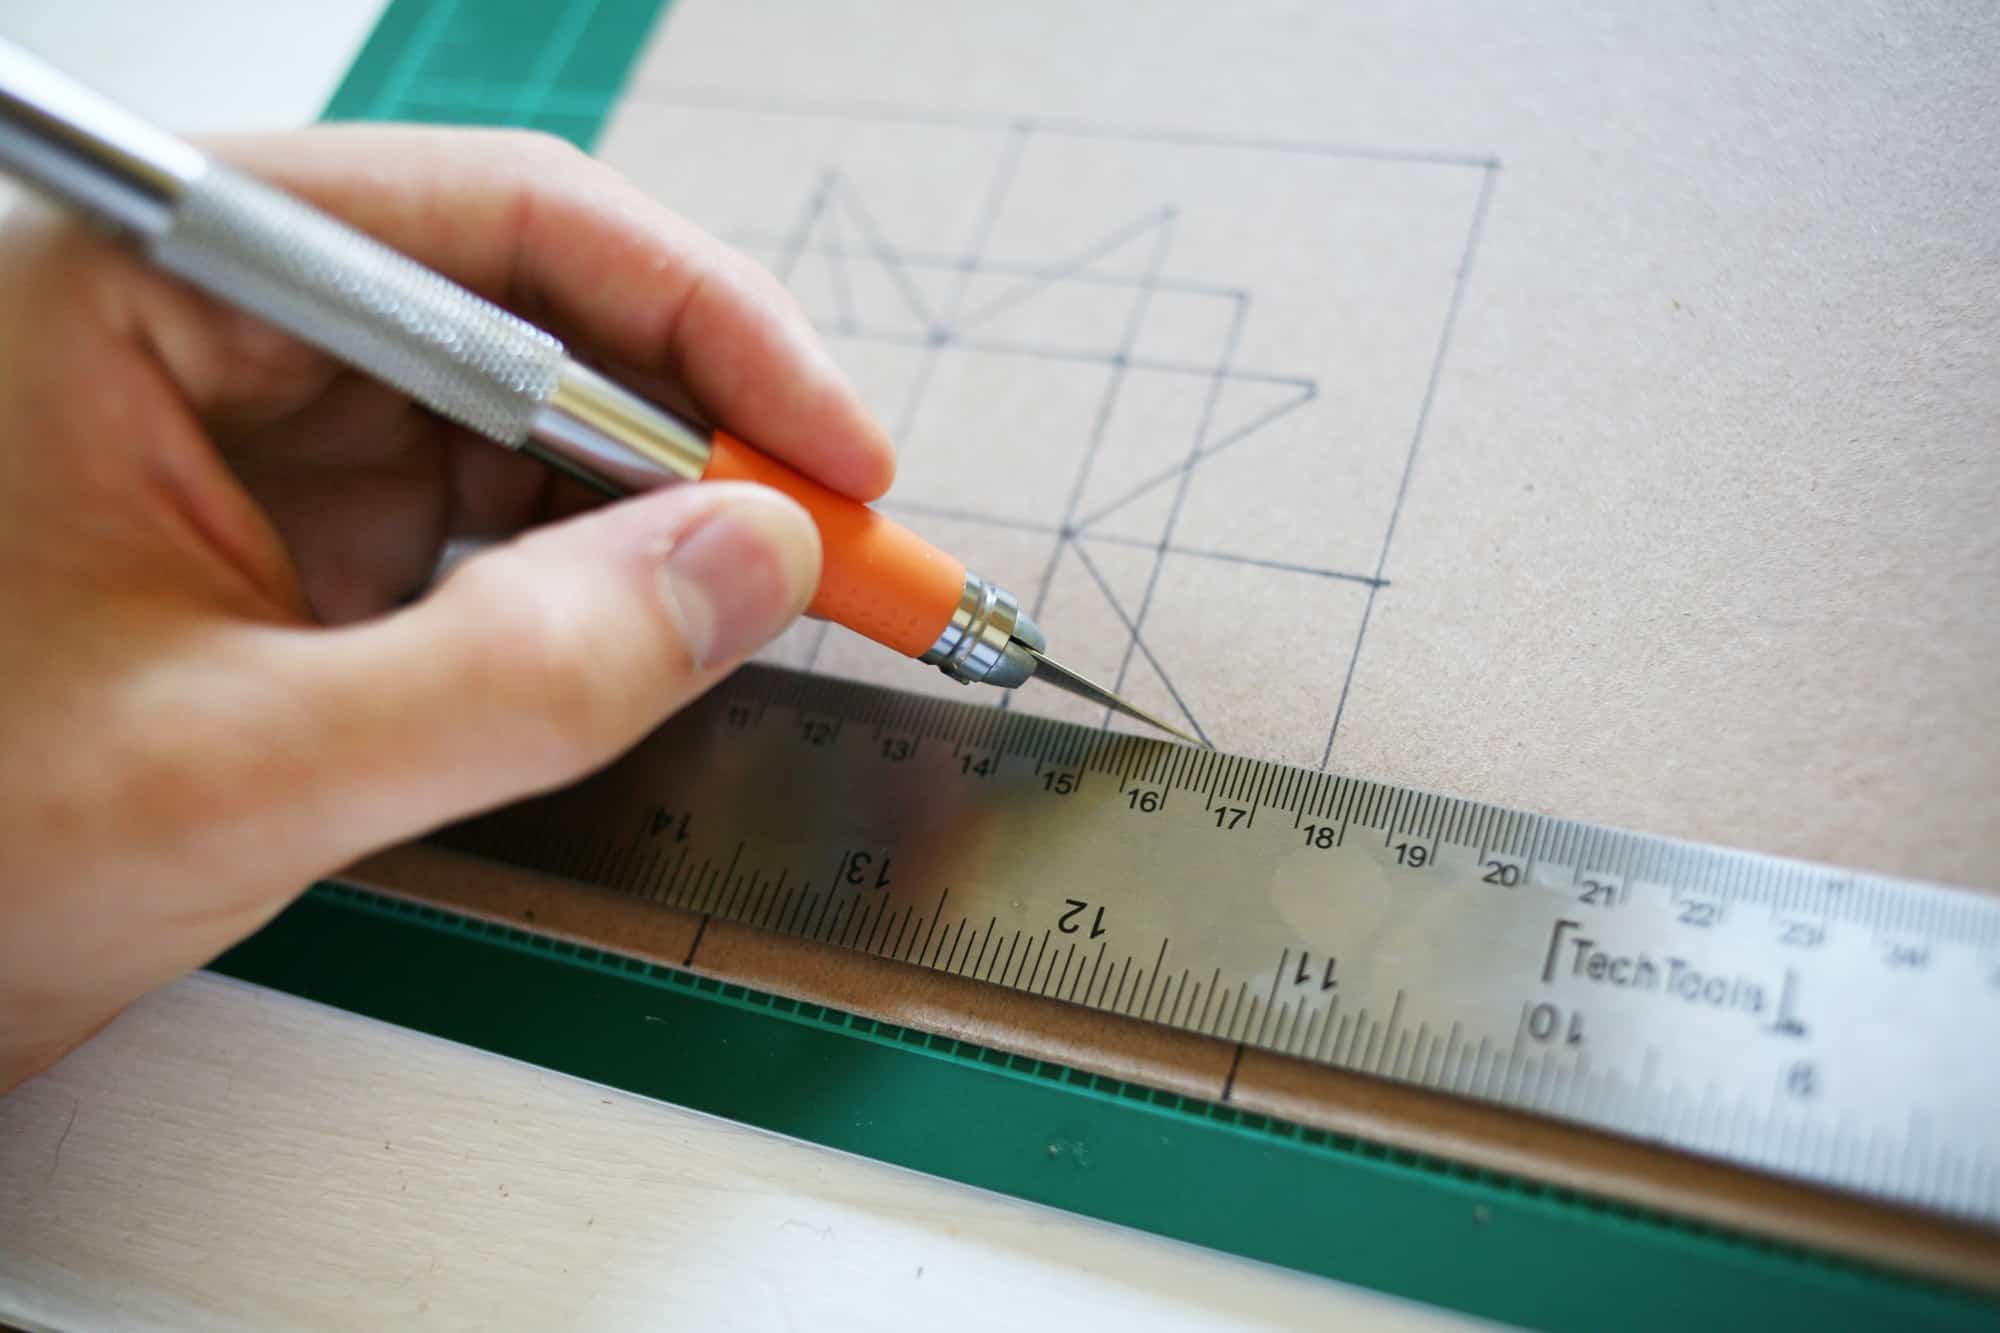 Take a sharpie and trace a 5″ square onto a corner of the card stock. You can make the size of your square bigger depending on how big you want your design to be, but we did 5″ “tiles” with our floor. Next, trace out your star design (or any design you want) inside of that square, making sure it is perfectly centered and cut it out using a razor knife and cutting mat.
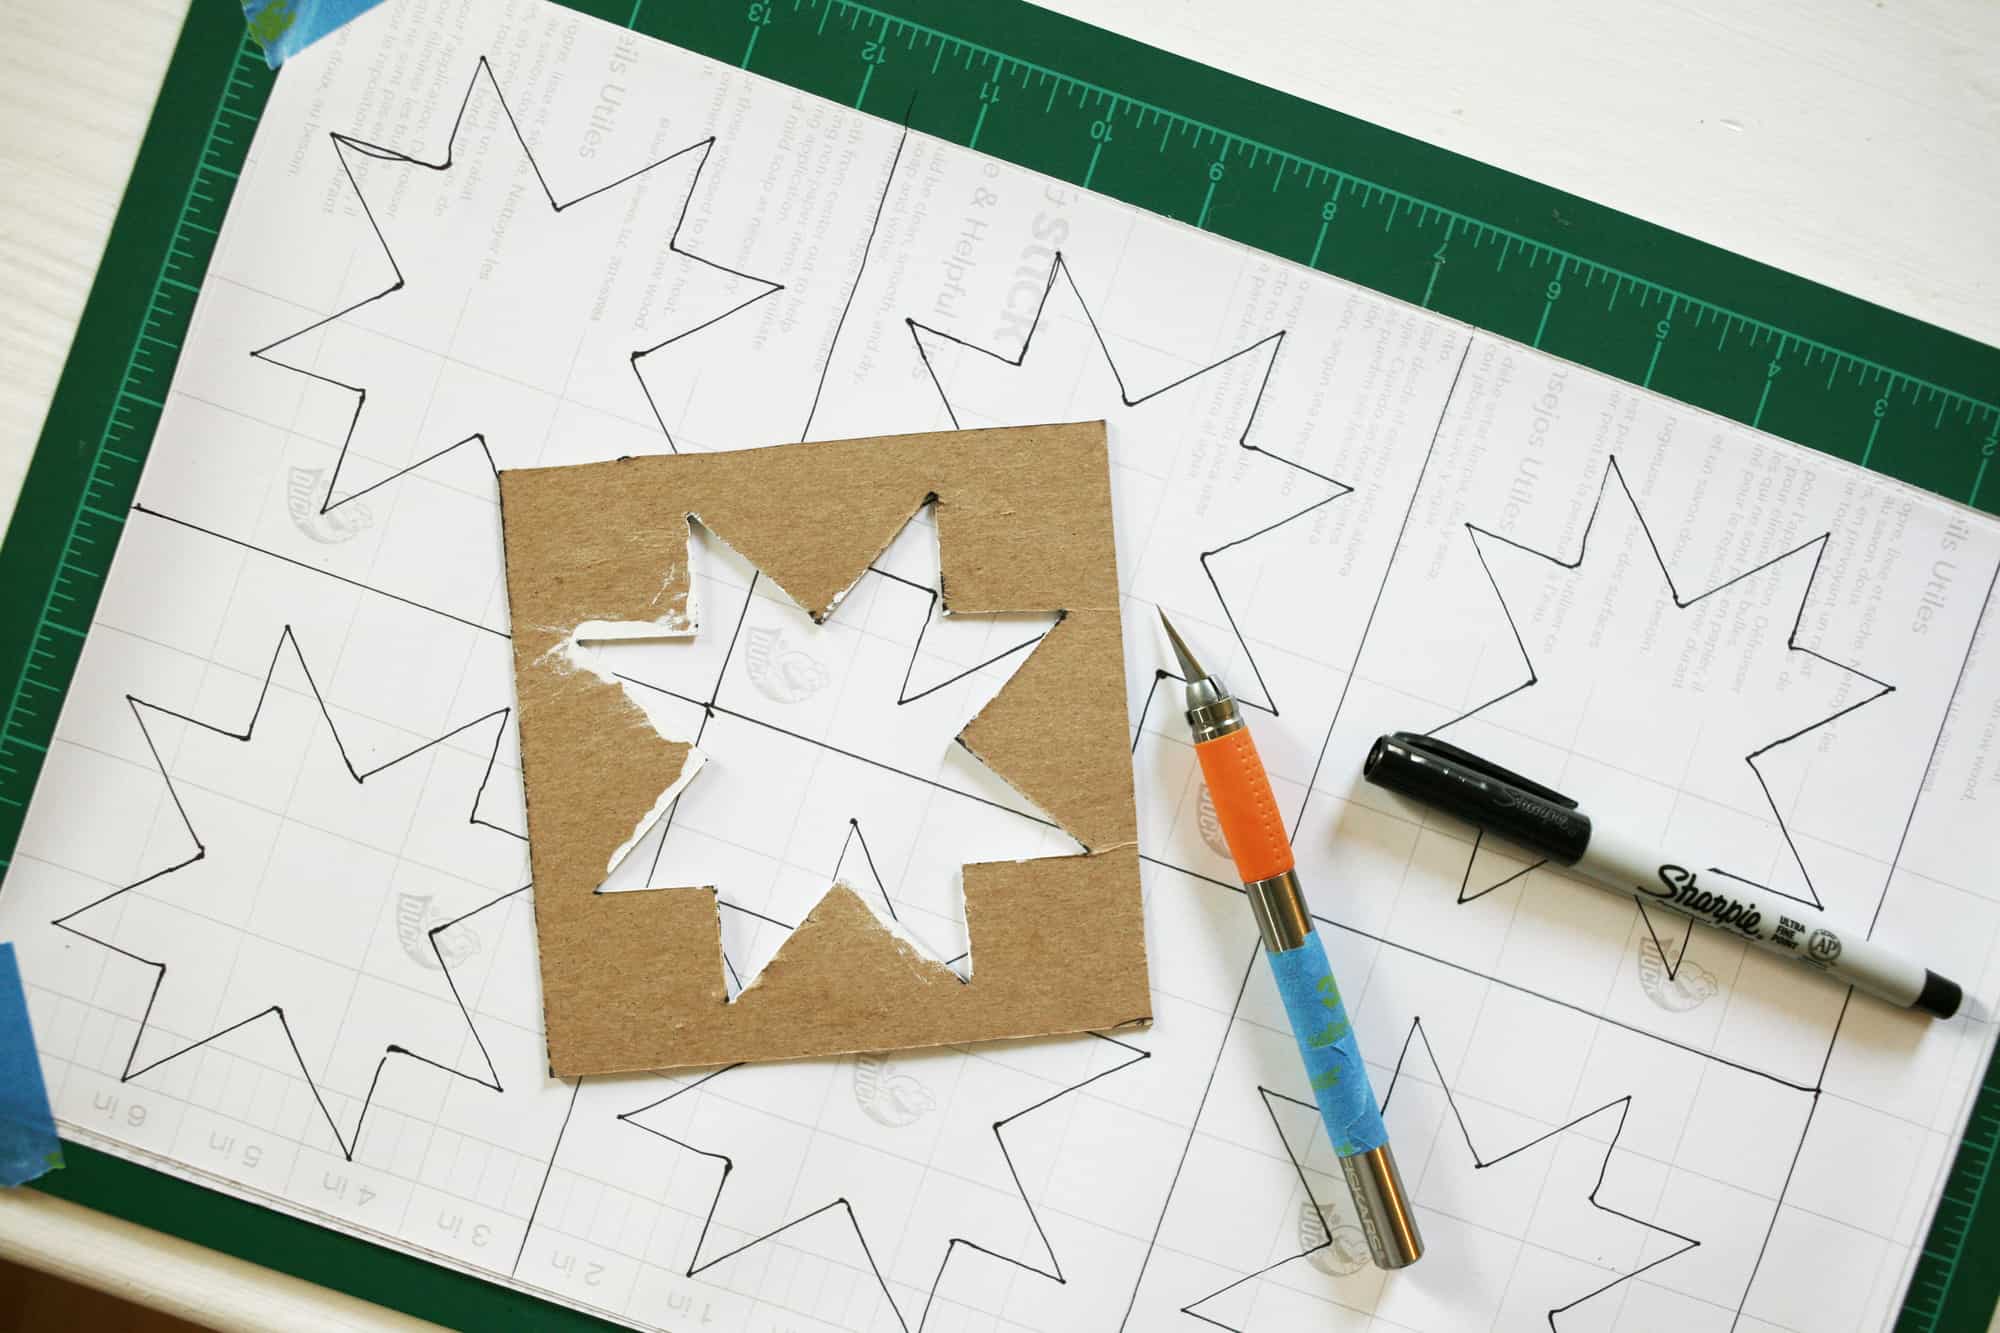 Unroll and cut 3 to 4 sheets of the vinyl contact paper, long enough to fit about six “tiles” on it. The back of the contact paper has this super helpful grid on it to help with this. Layer the sheets of contact paper and tape the four corners down onto your cutting mat and take your stencil and trace out six “tiles” as shown in the picture above. it may also be helpful to tape the corners of your cutting mat down to prevent it from slipping when making cuts. Safety first!
 The reason to layer the sheets of contact paper is so you can cut out multiple “tiles” at once as possible to again, speed things along because you’re going to need a lot of these tiles, depending on the square footage of your floor and also how big your “tiles” actually are. We were working with about 80 square feet and 5″ tiles, so i needed to cut out about 400ish of these contact paper tile stencils (yikes!). It took a a few days but the end result was worth it! Take your metal ruler and your razor knife and place the metal ruler and cut out the center star as shown above. This will take a good amount of pressure and focus, so be really careful not to cut yourself! Go slow and be safe.
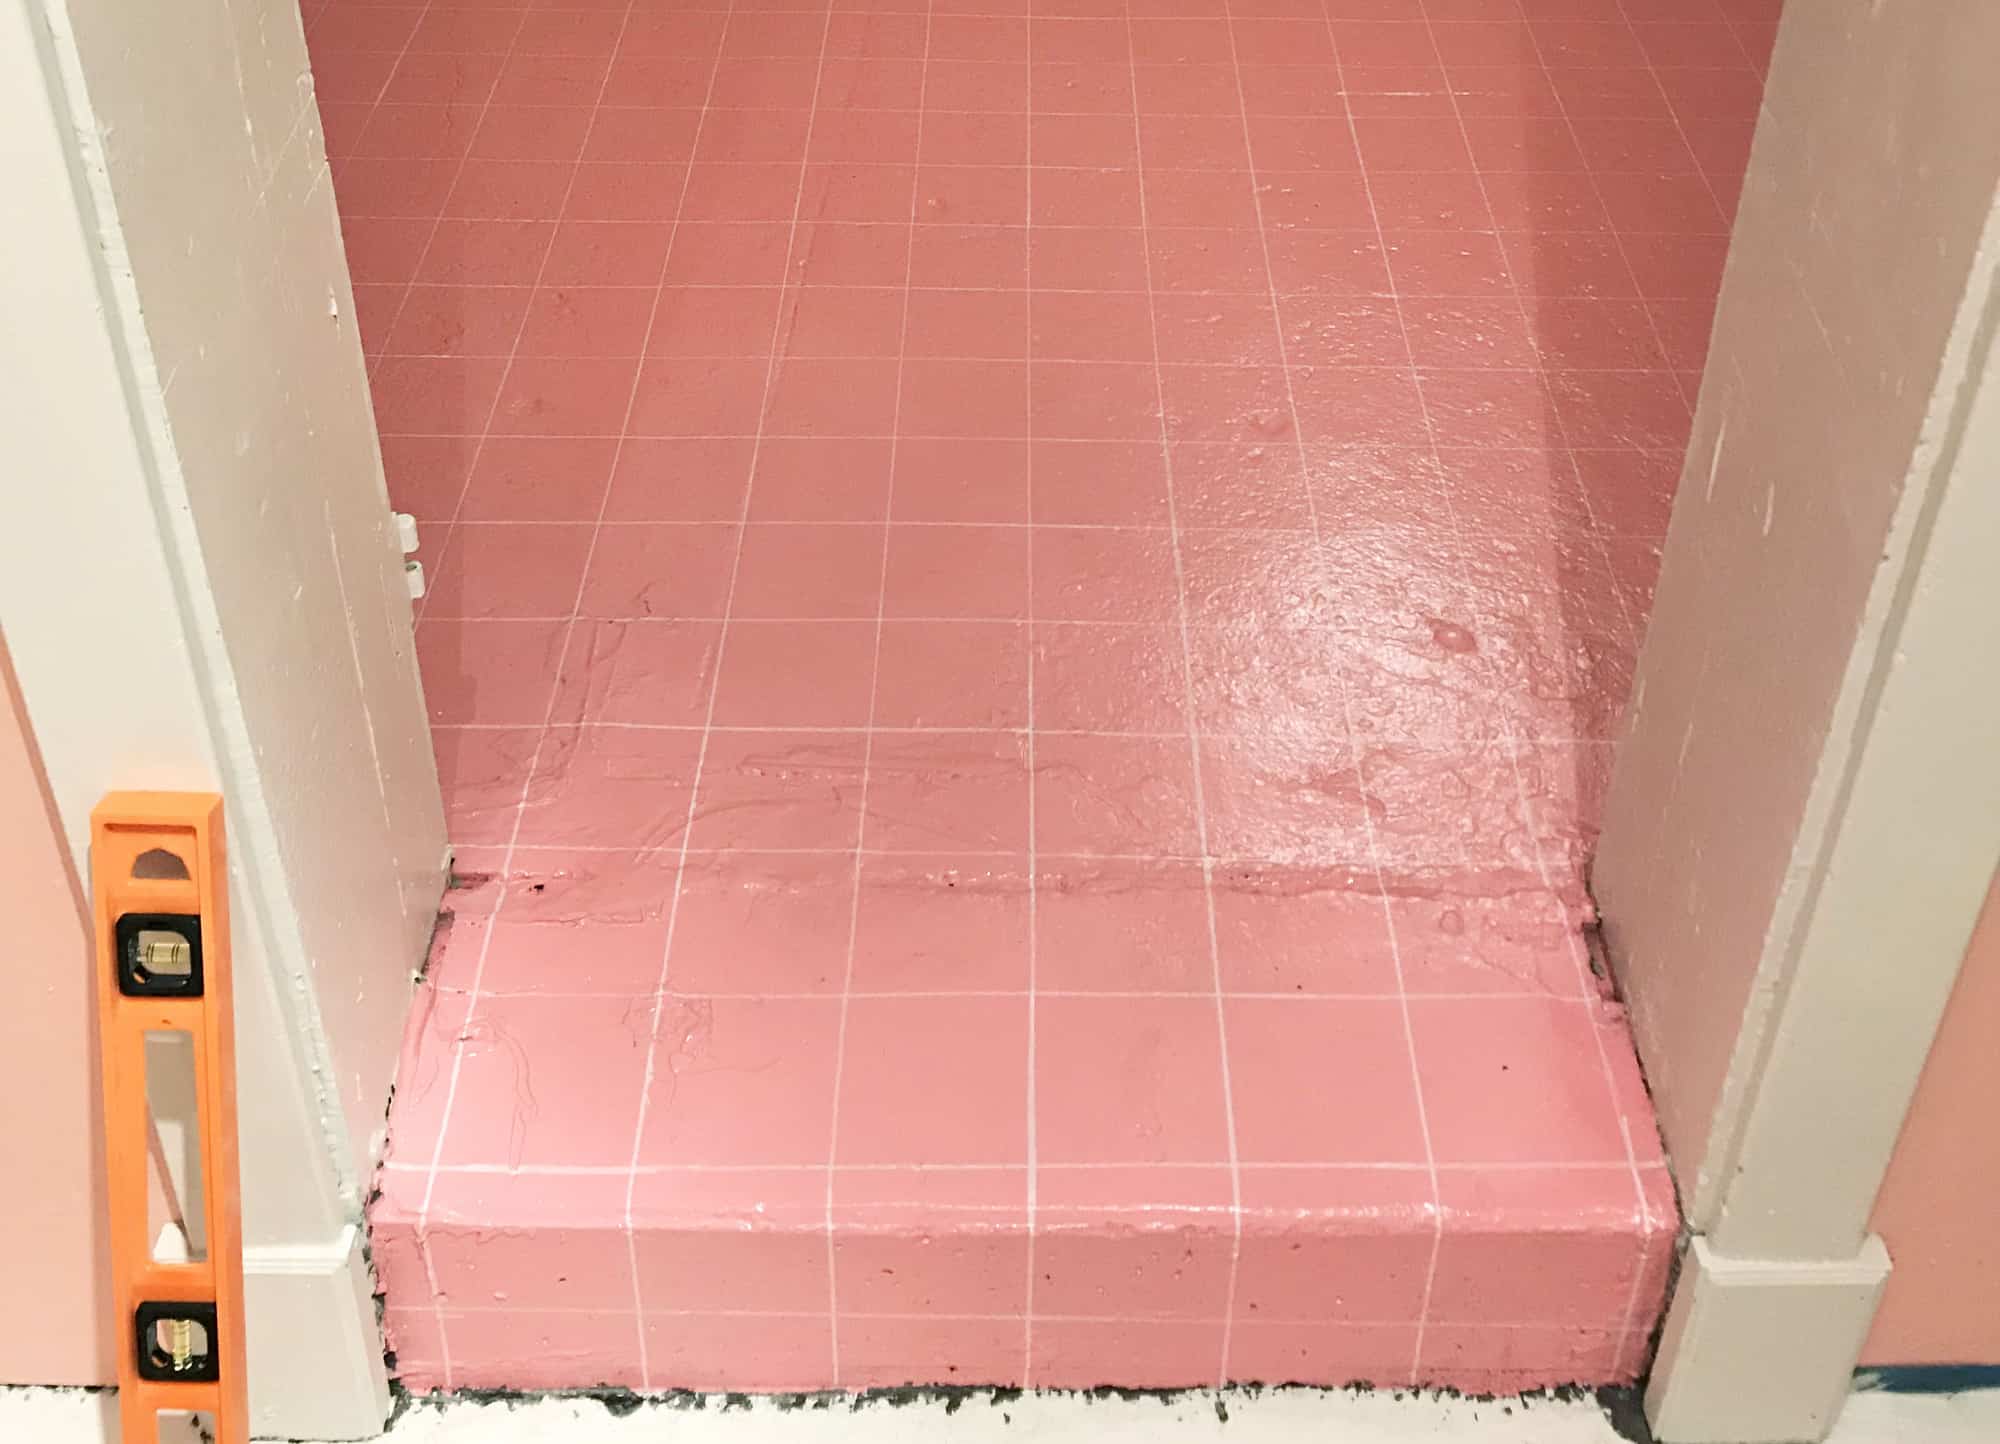
Once all of your contact paper stencils are cut and ready, it’s time to prep the floor. Make sure your space is swept and mopped thoroughly of all dirt and debris. If you are painting your floor first like us, use a oil based floor paint. Oil based paint is very smelly and takes 24 hours to dry, so make sure your space is very well ventilated and always wear a mask when painting with it! After it dries, take your oil based paint pen and your 4′ ruler and make a 5″ x 5″ (or whatever size you want) on the floor using the ruler to trace straight and even lines.
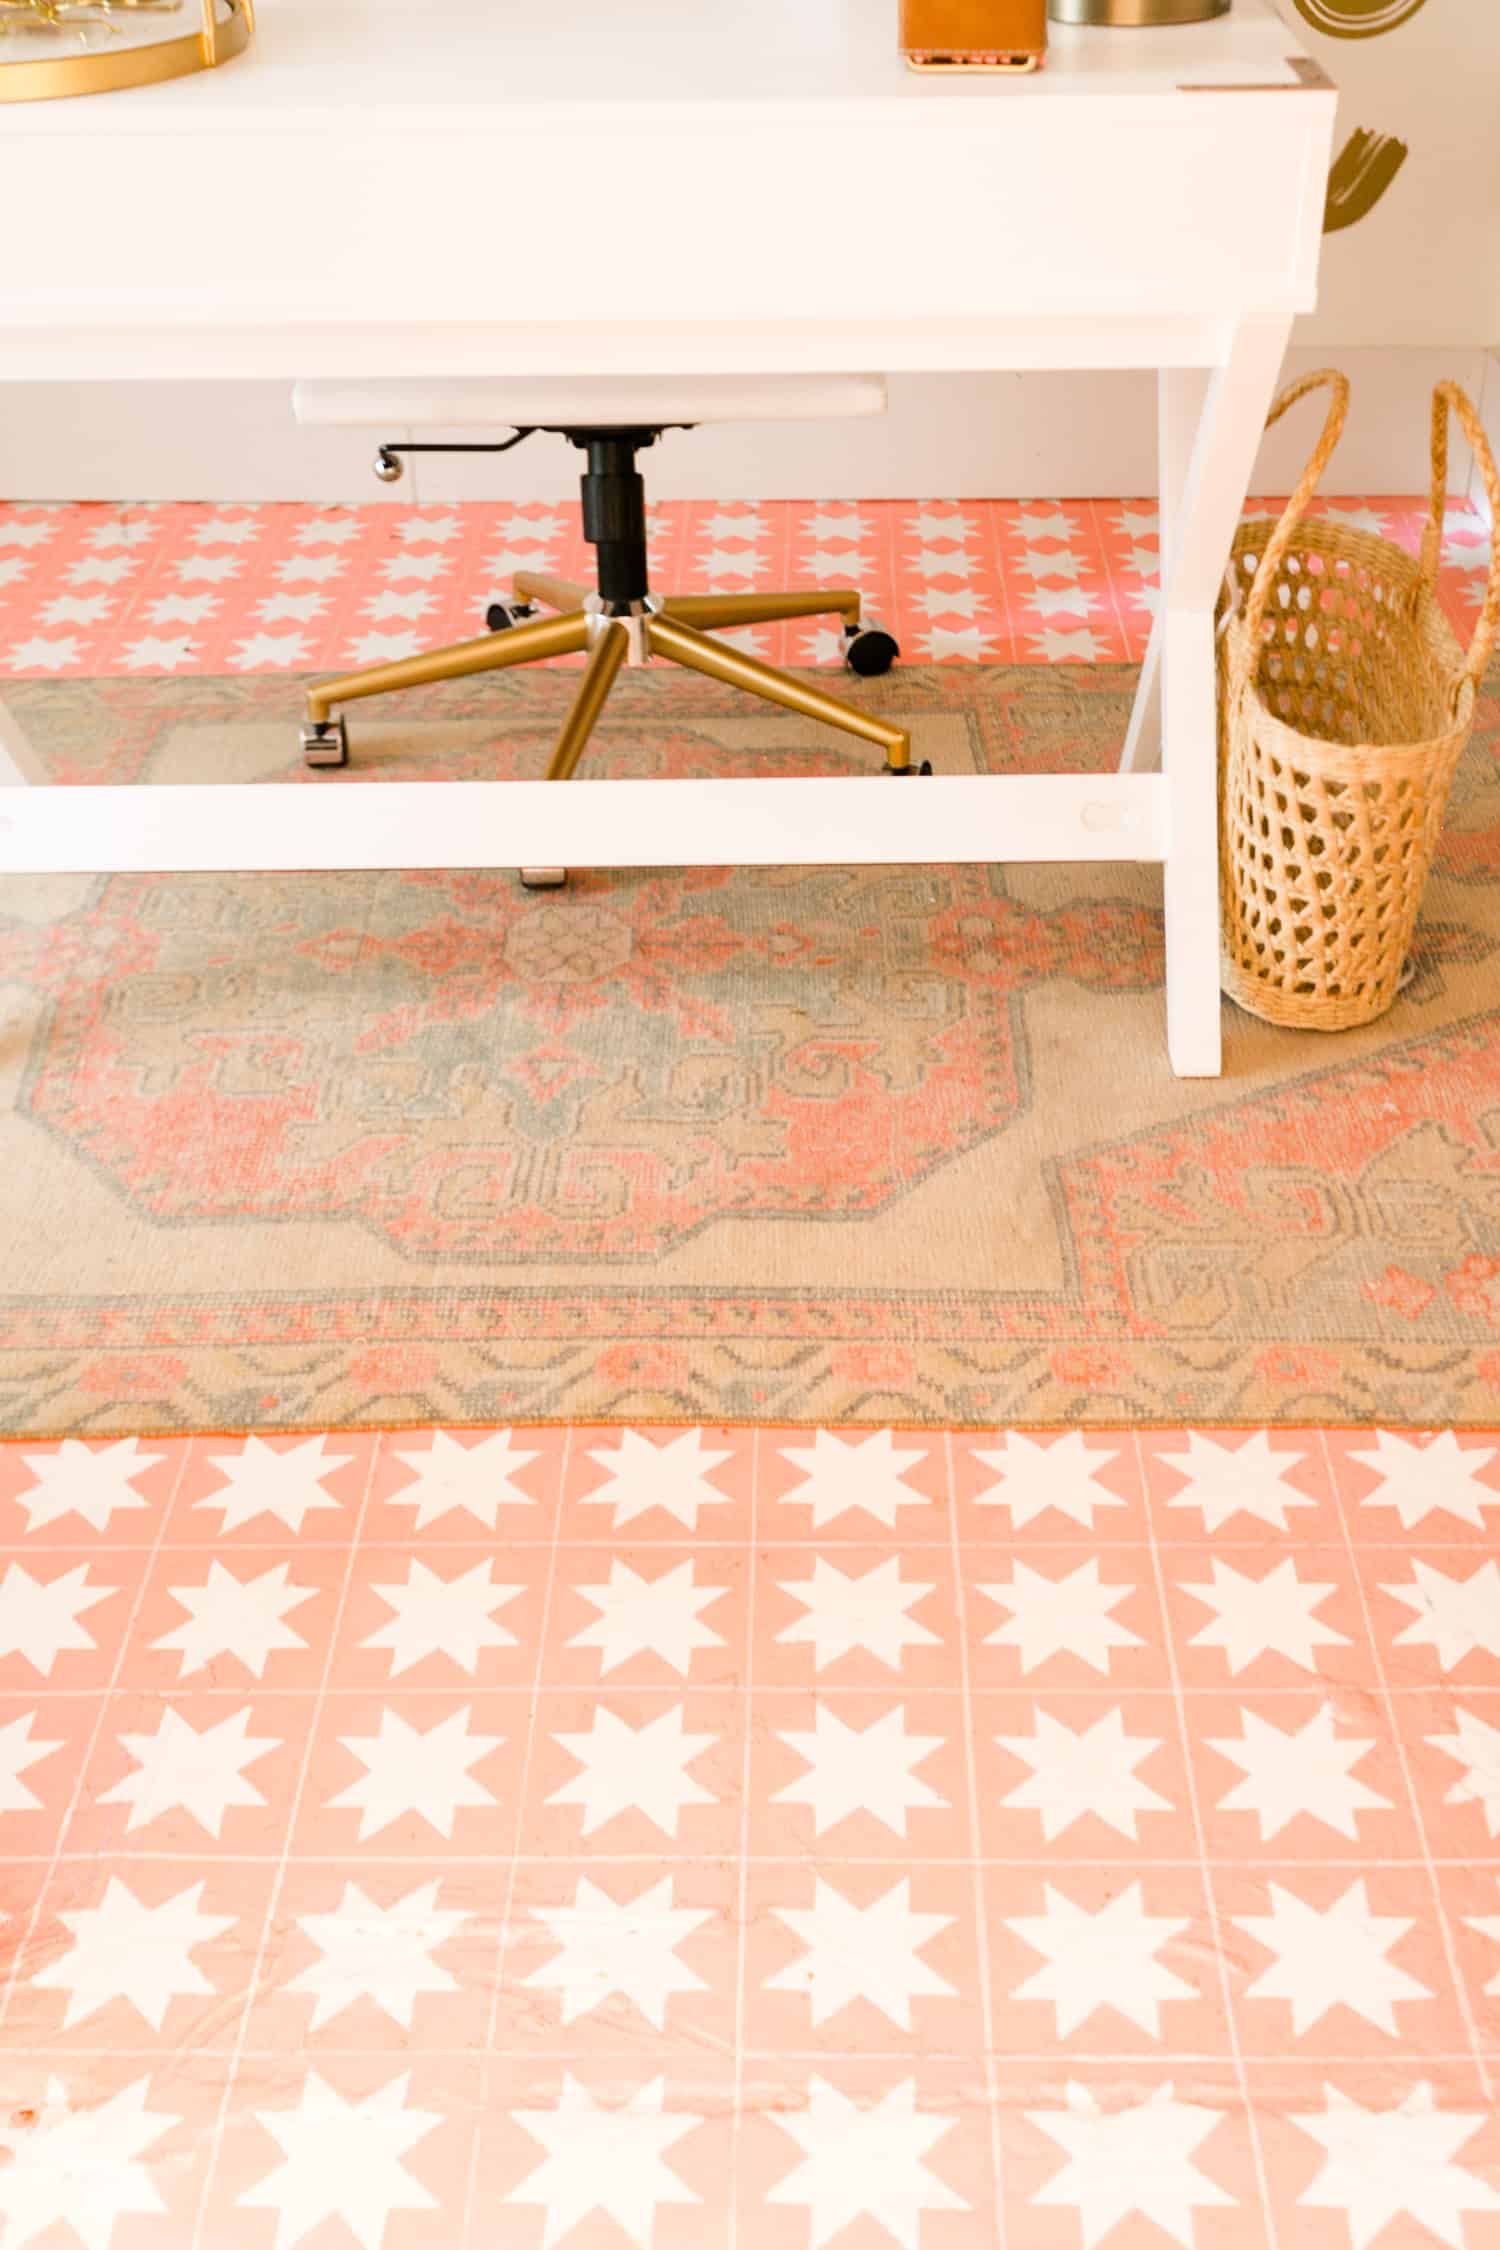
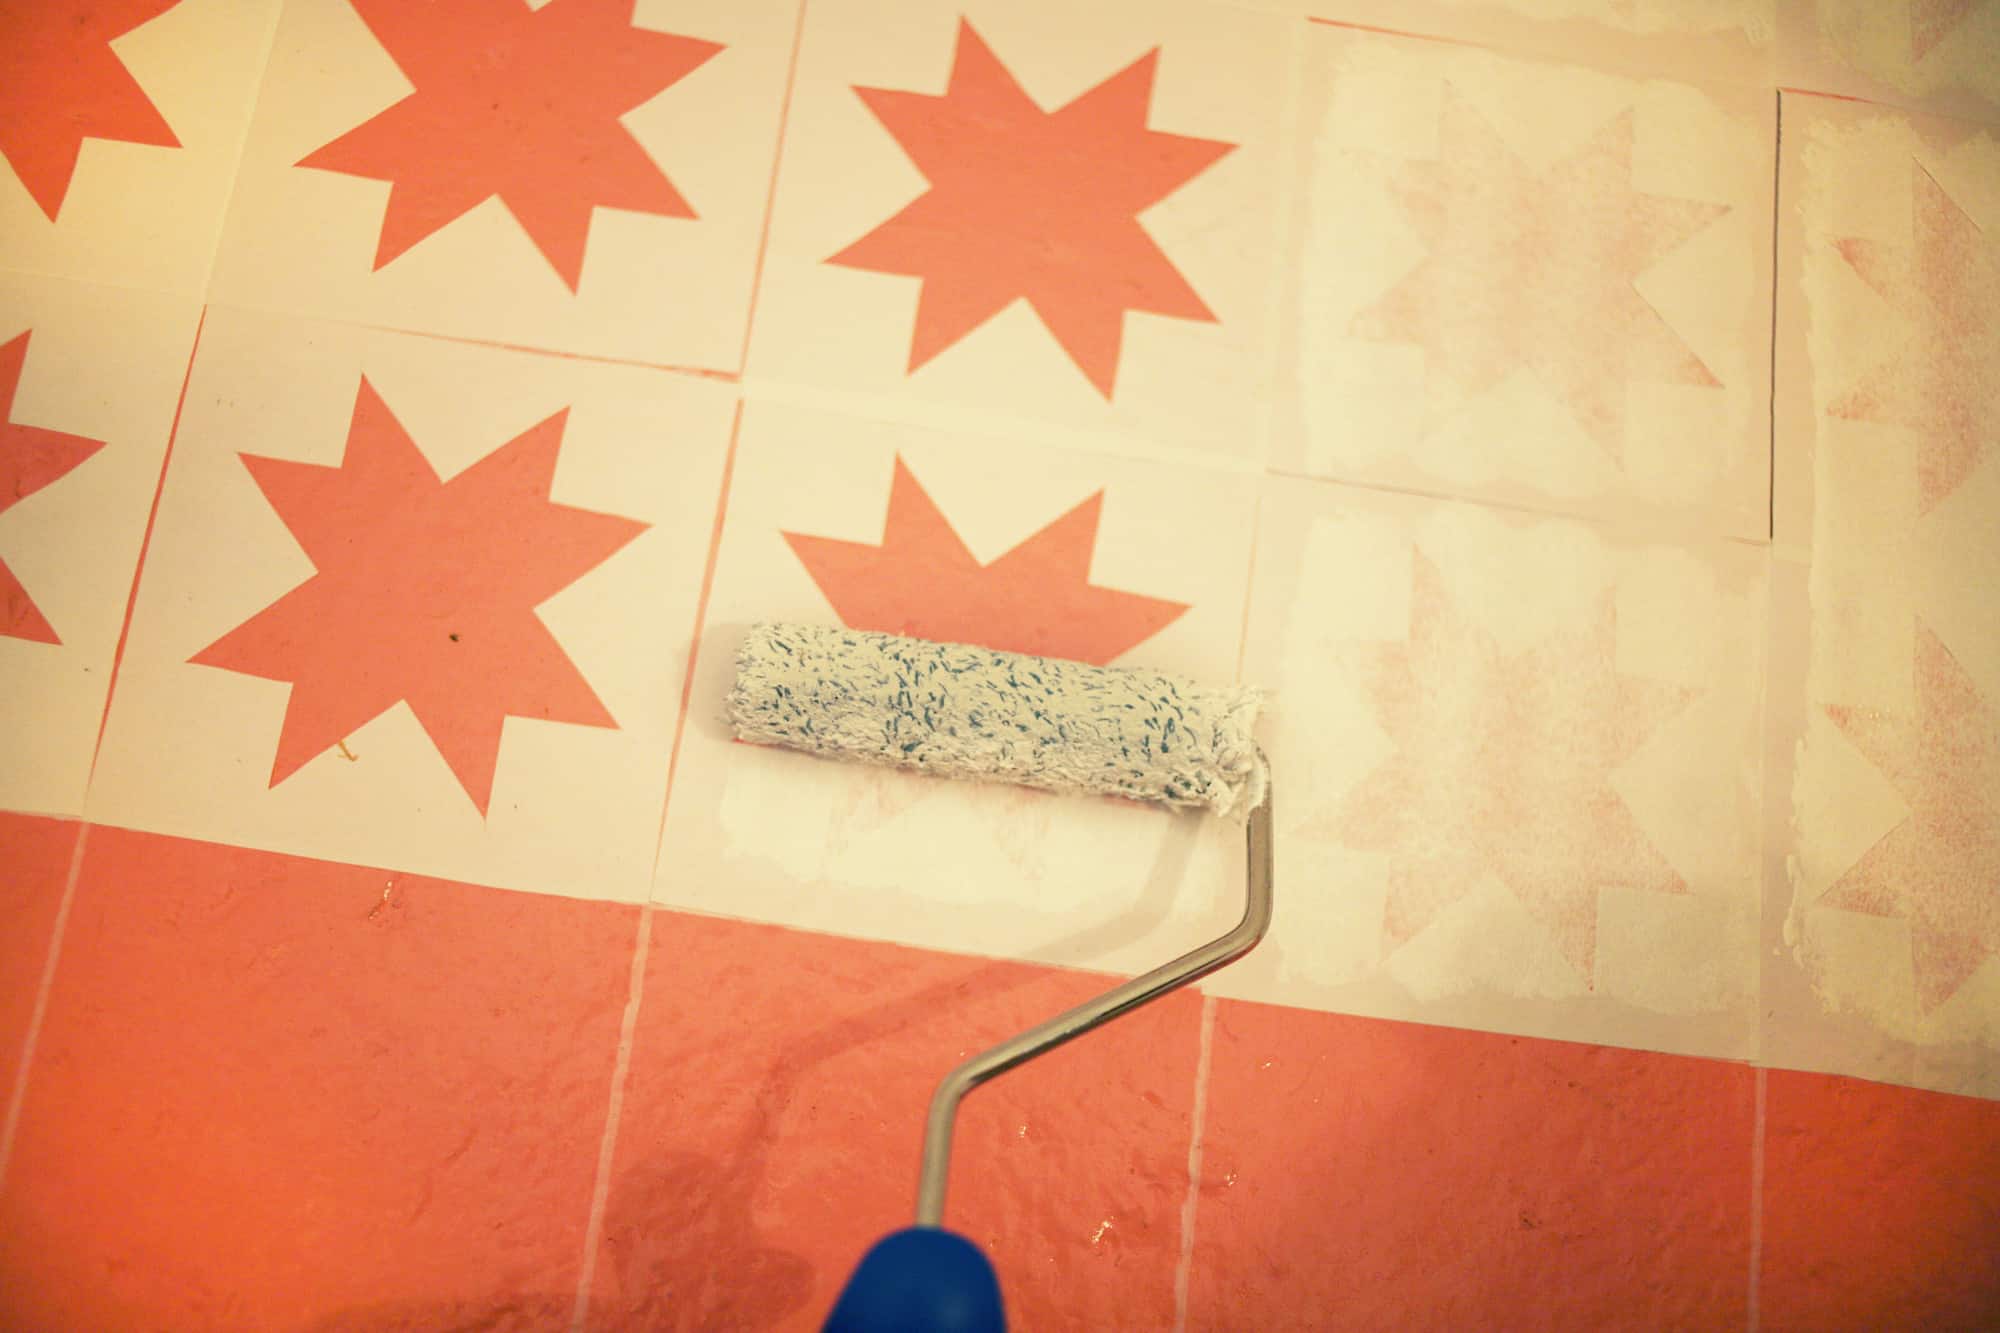 Peel and stick the tile stencils onto the 5″ squares traced out on the floor and with a mini paint roller paint over the stencil with white oil based floor paint. Wait 24 hours to do a second coat and wait at least 48 hours after the last coat is done to remove the vinyl stencils. This DIY definitely took a lot longer than expected, and there was also construction going on around our space while we were doing it, so it kept getting messed up. But overall, it was worth it because it was just a fraction of the cost of real tile and installation—only $85!
 P
P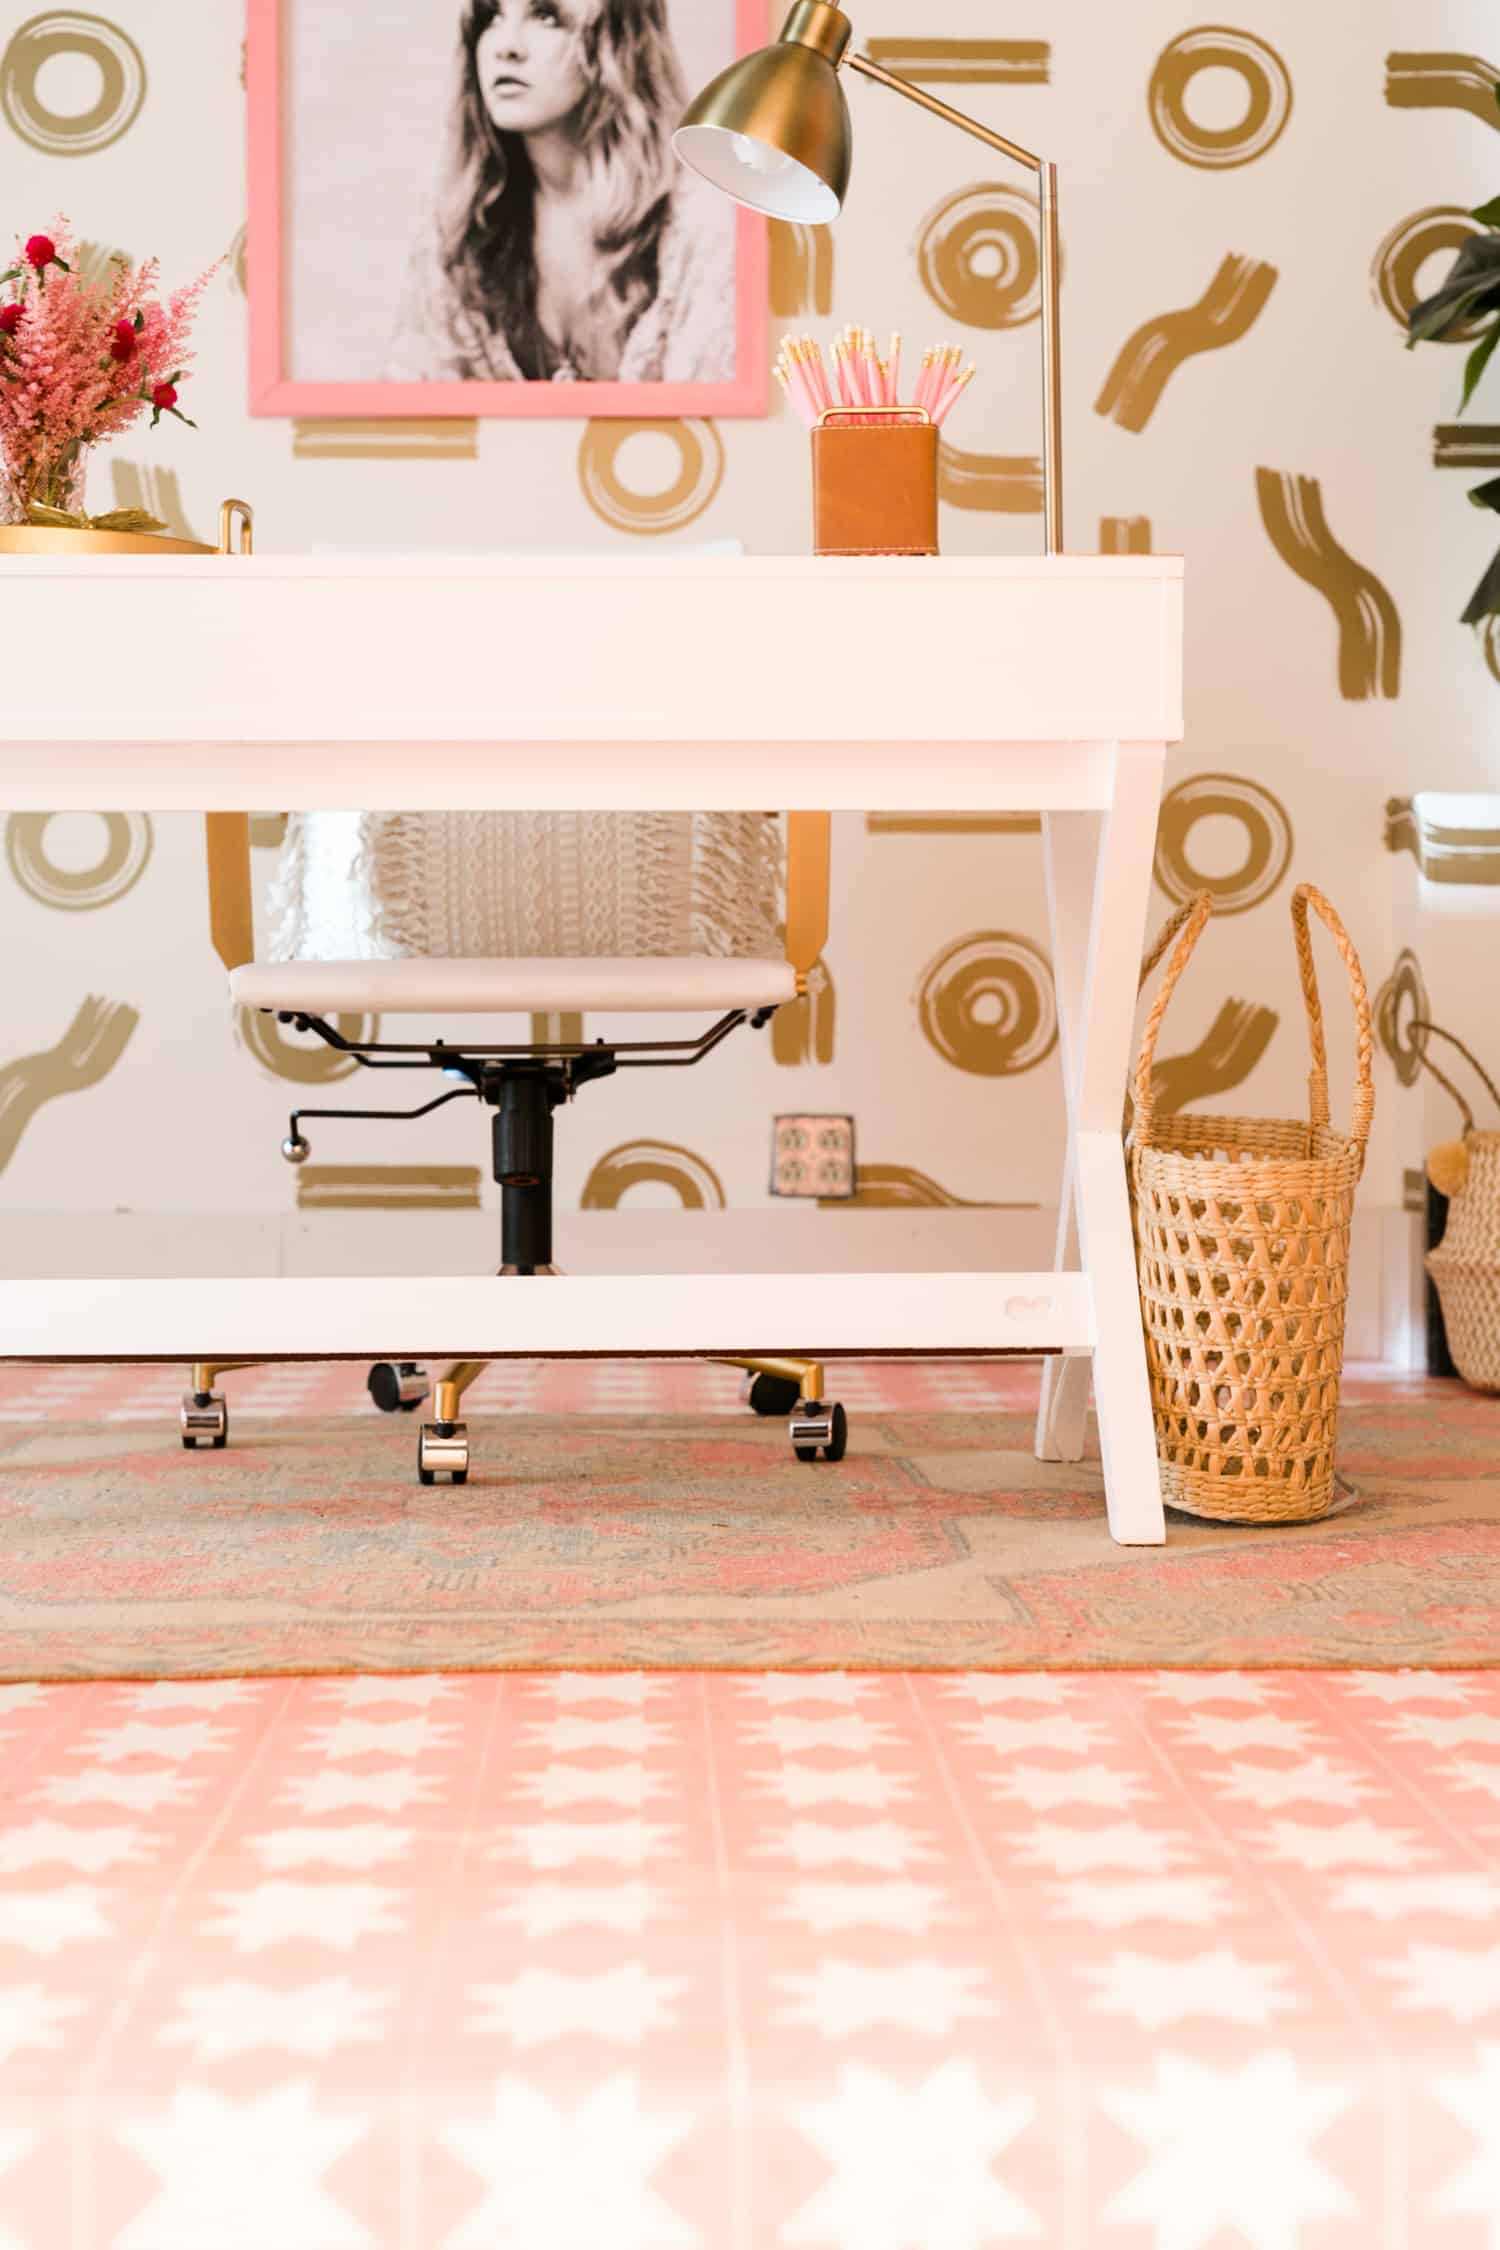 Isn’t it beautiful?! I’m so proud of Collin for this one. It’s a DIY dream come true!
xx – Elsie + Collin
12 Comments
I could never do this myself! It’s incredible!! :O
Charmaine Ng | Architecture & Lifestyle Blog
http://charmainenyw.com
this turned out great! but one question – is there a reason you created individual stencils for each tile instead of creating one from a stencil material and just reuse it?
Hi Windie,
Yes the reason is to reduce bleed. The contact paper bleeds much less since we were not using spray paint.
The work was definitely worth it – the floor looks absolutely amazing!
https://www.makeandmess.com/
Looks amazing! I cant believe this is a DIY!
This is an absolute dream! I would like to do something like this in my basement. Amazing xo
Sara Apperley
http://www.saraofhappy.com
Love this!! Next time I highly recommend using a cutter (like a silhouette machine). It would’ve taken no time for the cutter to make all those stencils!
This turned out SO cute! Wish I had the balls to paint my own tile!!
Woof Xo,
Michelle & Watson
https://www.watsonandwalls.com/
So gorgeous!! That level of precision is definitely outside of my skill set. I’m impressed! Please let us know how this holds up!
this is beautiful! just wondering — have you used this vinyl contact paper for floors before, and how does it hold up over time?
Ah contact paper—so smart! I love how this turned out. Would like to try doing this someday, for sure.
I liked this star design. It is cute. Yo may merge the star with 4 tiles. But alone it’s also beautiful.