") One of my favorite skill sets I have from living the “homeschooled-and-my-mom-is-an-art-teacher” life growing up is that my mom taught me to sew simple projects. I would make stockings for Christmas and hem pants. Then in my teen years, I started my own fashion label called FlipSide and sewed my own, uh, unique creations. Thankfully I am no longer sewing velvet panels into the sides of my pants, but I can still make a few fun projects with the sewing knowledge I’ve retained.
One of my favorite skill sets I have from living the “homeschooled-and-my-mom-is-an-art-teacher” life growing up is that my mom taught me to sew simple projects. I would make stockings for Christmas and hem pants. Then in my teen years, I started my own fashion label called FlipSide and sewed my own, uh, unique creations. Thankfully I am no longer sewing velvet panels into the sides of my pants, but I can still make a few fun projects with the sewing knowledge I’ve retained.
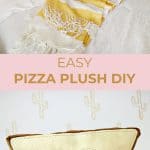
Since we’ve been adding some really cute touches to Elsie’s kid’s room lately (like these cactus plush and succulent garden plush DIYs), I thought it would be fun to create a pizza plush to add to the room as well! As sewing projects go, it’s pretty simple, but it looks totally legit once put together. Especially since we got to work with our friends at EverSewn sewing machines for this project. Not only are their machines cute, but they’re super easy to use! And as a bonus, they’re giving away one of their machines and a Starter Kit to one lucky reader! You can learn more about the giveaway below. Let’s get started!
") Supplies:
Supplies:
–EverSewn Sparrow25 sewing machine
-tan duck cloth (1/2 yard should be plenty)
-white felt (1/4 yard)
-pink felt (small sheet would be enough)
-gold vinyl or leather
-plush stuffing
-tan thread
-fabric glue
-straight pins
-fabric scissors
") I’ve used the Sparrow25 for a few projects now, and I’ve been so happy with its performance. For one thing, I love that it has the easy top loading bobbin thread (so much easier than the old style I grew up with) and a self-threading arm as well. It also has an extra high presser foot option so you can easily get bulky material under the presser foot. I also love when machines let you move the needle position right or left for optimal placement based on your project needs, and this machine also lets you adjust the speed slower or faster, which can be SO helpful in different situations. The EverSewn sewing machines can be found via this link or on their website with their find a local retailer tool. I also got the EverSewn Starter Kit that has lots of helpful little items (like my favorite tool lately, a pair of thread snips) to help with all my sewing needs.
I’ve used the Sparrow25 for a few projects now, and I’ve been so happy with its performance. For one thing, I love that it has the easy top loading bobbin thread (so much easier than the old style I grew up with) and a self-threading arm as well. It also has an extra high presser foot option so you can easily get bulky material under the presser foot. I also love when machines let you move the needle position right or left for optimal placement based on your project needs, and this machine also lets you adjust the speed slower or faster, which can be SO helpful in different situations. The EverSewn sewing machines can be found via this link or on their website with their find a local retailer tool. I also got the EverSewn Starter Kit that has lots of helpful little items (like my favorite tool lately, a pair of thread snips) to help with all my sewing needs.
") First you’ll fold over your tan fabric and cut a large pizza triangle shape (make sure you leave about ½” around the edges for seam allowance). I made mine 16” wide at the top and 17” long down the middle. Round the edges of your triangle as you cut the shape with fabric scissors. Measure the circumference of your triangle and cut a 2” wide strip of tan fabric a few inches longer than the circumference (this will be the sides of your pizza).
First you’ll fold over your tan fabric and cut a large pizza triangle shape (make sure you leave about ½” around the edges for seam allowance). I made mine 16” wide at the top and 17” long down the middle. Round the edges of your triangle as you cut the shape with fabric scissors. Measure the circumference of your triangle and cut a 2” wide strip of tan fabric a few inches longer than the circumference (this will be the sides of your pizza).
")
") Use the gold leather and white and pink felt to cut out shapes for the cheese, a crust, and heart shaped pepperonis for your pizza. Use the fabric glue to attach the cutouts onto the front triangle of your pizza plush, and then sew around each item with a corresponding thread color to secure. Doing projects like this is one reason I love the speed control on the Sparrow25. It can be tough to sew around the edge of small shapes (like the hearts) if your machine only goes full blast, and it’s a lot easier to get a clean, even thread line if you can go slow. You can see that since the leather is a bit thick, I didn’t have it go all the way to the edge of my fabric (like I did with the felt) so I could sew around the seam allowance without all that bulkiness in the way.
Use the gold leather and white and pink felt to cut out shapes for the cheese, a crust, and heart shaped pepperonis for your pizza. Use the fabric glue to attach the cutouts onto the front triangle of your pizza plush, and then sew around each item with a corresponding thread color to secure. Doing projects like this is one reason I love the speed control on the Sparrow25. It can be tough to sew around the edge of small shapes (like the hearts) if your machine only goes full blast, and it’s a lot easier to get a clean, even thread line if you can go slow. You can see that since the leather is a bit thick, I didn’t have it go all the way to the edge of my fabric (like I did with the felt) so I could sew around the seam allowance without all that bulkiness in the way.
") Once all your shapes are secure, pin the long side strip of your pizza all the way around the top panel of your plush. You can either sew your side strip into a closed loop once you have it pinned and know the exact length the loop should be, or you can fabric glue it closed to save a step.
Once all your shapes are secure, pin the long side strip of your pizza all the way around the top panel of your plush. You can either sew your side strip into a closed loop once you have it pinned and know the exact length the loop should be, or you can fabric glue it closed to save a step.
") Sew all the way around the triangle with a ½” seam allowance.
Sew all the way around the triangle with a ½” seam allowance.
") Repeat the process of pinning the sides to the bottom triangle of the pizza but remember to keep a 2-3” opening when you sew the bottom piece so that you can turn your pizza right side out when finished.
Repeat the process of pinning the sides to the bottom triangle of the pizza but remember to keep a 2-3” opening when you sew the bottom piece so that you can turn your pizza right side out when finished.
 .") After you’ve sewn all the way around, pull your pizza right side out through the opening you left, and stuff your pillow to the density you like (you can also iron all the seams flat first to make the edges a bit more crisp). Once your pizza has taken shape, use a blind stitch to close up the opening, and your pizza is complete!
After you’ve sewn all the way around, pull your pizza right side out through the opening you left, and stuff your pillow to the density you like (you can also iron all the seams flat first to make the edges a bit more crisp). Once your pizza has taken shape, use a blind stitch to close up the opening, and your pizza is complete!
")
") AGHHH! Adorable! As a pizza lover, this makes my heart so happy, and I love the little details of the gold crust and heart-shaped pepperonis. You can make this as big or as little as you like based on your room or kid size. How cool would a giant one of these be just for lounging? Sign me up.
AGHHH! Adorable! As a pizza lover, this makes my heart so happy, and I love the little details of the gold crust and heart-shaped pepperonis. You can make this as big or as little as you like based on your room or kid size. How cool would a giant one of these be just for lounging? Sign me up.
To enter for a chance to win your own EverSewn Sparrow25 sewing machine and Starter Kit, all you have to do is fill out the form below! The giveaway is open until 9/29/16, and the winner will be contacted directly. Now if you’ll excuse me, I think I just got hungry for some ‘za… xo. Laura
Sparrow25 Sewing Machine Giveaway
Credits // Author and Photography: Laura Gummerman

16 Comments
Bump up the scale on this slice and it would make a ridiculously awesome floor cushion for lounging. I could see it paired with some plush Pepperoni slice pillows! It’s a wonderful sewing project.
oh.my.gooooooodnesssssss!!!!!!
This is so so so cute!!!!! I have [less than] zero sewing skills; this looks like rocket science to me. I’m always so impressed with what y’all come up with! And, even though I have no skills, you are very good at explaining things, by the way. I hope that one day I can get my paws on a machine and try things out. This (and the cactus project) are extremely tempting!!
<3 <3 <3 <3 <3
p.s. do you like pizza? because i want a pizza that ass! (just felt like i needed to share that with you, it's one of my top 5 fav pick up lines that i keep repeating to my husband)
Super cool!
Super cute idea!
http://www.petiteandhungry.com
Please more easy sewing! So cute. And the possibility of owning this machine – awesome. I see a big pizza pillow in my future! Thank you for sharing!
cute!
That is the cutest thing! Any pizza lover would certainly go crazy!
http://annescribblesanddoodles.blogspot.com
Whoa! Where did this sewing machine come from? Totally in love!
Hi Frances! It’s from EverSewn (http://www.eversewn.com/sparrow25/_ 🙂 -Jacki
Ahh! I was just saying to my boyfriend that I wanted a sewing machine for Christmas for our new house.. maybe I’ll be lucky and win one!? Feeling hopeful
Looove this machine already!! Perused their Site..am soooo impressed! Thank you for chance to WIN one!! 😀
I need this in my life, it’s so cute!
https://www.makeandmess.com/
Totally cute cushion. I’d love to make that for my goddaughter and the Sparrow 25, 197 stitches, just WOW!
I love this idea so cute!
So adorable! What a great machine! You make it look easy 🙂 I would love to hone my (nonexistent skills)
Nice home decor idea. I like it.