")
")
Recipe adapted from Simply Sweet ColorCakes
2 boxes of cake mix with pudding in the mix (15.25 oz)
2 cans of frosting
food coloring
6″ cake pan
silicone cake pop pan
Mix your white cake mixes together with the eggs, water and oil it calls for (to get your cake as white as possible, do the egg white only version). Set aside two cups of the mixture and refrigerate the rest of the mix until needed.
")
")
")
")
")
")
")
While this cake would be adorable for a birthday or wedding shower, I was also thinking it would be so cute as a gender reveal cake with either pink or blue dots for a girl or boy. This is definitely one of those “moment of truth” things where you are just dying to cut it open and see how it turned out, so I think it’s extra special for the person who makes the cake too. Put this one in the “it really works” column! xo. Laura
Credits// Author and Photography: Laura Gummerman. Photos edited with A Beautiful Mess Actions.

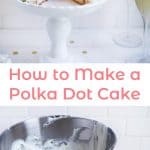
Polka Dot Cake
Ingredients
- 2 boxes of cake mix with pudding in the mix 15.25 oz
- 2 cans of frosting
- food coloring
- 6 " cake pan
- silicone cake pop pan
Instructions
-
Mix your white cake mixes together with the eggs, water and oil it calls for (to get your cake as white as possible, do the egg white only version). Set aside two cups of the mixture and refrigerate the rest of the mix until needed.
-
Tint the two cups of batter that you set aside with your food coloring to your desired color. Place your cake pop molds on a baking sheet and oil your cake pop cavities (top and bottom). Fill your bottom cake pop pan with batter, attach the top, and press all around thoroughly to make sure the parts are sealed together. Bake your tray in the oven at the temperature the cake mix calls for until the cake pops are almost cooked through. Just keep checking with a toothpick after 10 minutes until the toothpick comes out almost clean (mine took about 17 minutes at 350°).
-
Remove the cake balls from the pan and get the rest of your cake mix out of the refrigerator.
-
Place 6-7 cake balls into the bottom of a greased 6" cake pan and spoon in batter just until the cake balls are covered. Bake until a toothpick comes out clean, but try more than one spot when you test in case you happen to hit a cake ball that's already done instead of the new white batter underneath. Mine took about 35 minutes in a 350° oven. Repeat until you have three layers of cake. You can either do this one at a time if you only have one pan, or you can make multiples at once if you have several 6" pans. Allow the cakes to cool completely on a cooling rack before icing.
-
If you have rounded cake tops, use a bread knife to even out the tops of your layers so they will sit evenly on each other. Then stack them together with a layer of icing between each. I made the mistake of trying this before the tiers were totally cool with a lighter whipped icing option, and the layers were sliding around all over the place! The second time I let them completely cool and used the thicker regular icing and it worked much better. Once your layers are stacked, ice around the tops and sides, and you're ready to cut the cake and see the surprise inside!
48 Comments
I love Polka Dot cakes, particularly this pretty pink one. I love the idea of a reveal cake for a little one too!
http://www.theycalleditthediamondblog.com/
Love it!!! My best friend’s birthday is coming up and I’ll try this (is it a recipe that tends to fail if you do it for the first time?)
Thanks for sharing and love from Germany,
http://www.fatcatconnection.com/#!on-almightiness/cmbz/559ae52a0cf28e68712c7f4e
Lisa
wow! amazing! I never saw this before. I like soo much in love with baking that I will try this as soon as I get free…
love those pink cake balls…
thanks a ton!
http://randomscribblific.blogspot.in/
This is absolutely adorable!!
i would have never thought to make little cake balls and THEN put them in – genius!
This is so cute and it turned out so well!! I love the idea of showers or gender reveal! I’ll have to stash that idea away for when the time comes 😉
-Molly
http://www.modcircus.com/
What an awesome idea…I’ve never done a cake like this either, but I sure am gonna bake one soon…have several Birthdays coming up!!! I also want to say this was my first time visiting your awesome blog…found it through my Sister, Mary Freeman’s blog…Blessings,
Bevie
https:/www.artilovetoshare.blogspot.com/
aww so good 😀
xoxo,
Alice’s Pink Diary
This is a really clever idea! I love that its triple layered too! 🙂
http://taleofatallgirl.blogspot.co.uk/
This might be the lazy-o in me, BUT… wouldn’t this be stellar with donut holes in it?!
ohh it looks delicious!!
xx,https://letsjusttalkabouteverything.wordpress.com/
This cake looks amazing! I want it…
Omg what a cute idea! So so creative! And what an adorable outcome. This looks like the happiest, tallest, fluffiest cake ever. Thanks for this idea!
xx Lane
This is a cute alternative to ombre cake. love it.
This is AWESOME! Such a great idea, Laura. Coming from a girl who owns about five polka dotted skirts, I can definitely get behind the cake version.
xo,
Natalie | Natalie Was Here
http://nataliewashere.com/
what a great idea! love the color choice. I think this would be great for a gender reveal cake. thanks for sharing the idea. xx. gigi. http://www.gigikkitchen.com
This is such a smart idea for a cake, so simple, yet makes a whole world of difference.
This is so adorable! And it really doesn’t look that difficult.
♥Heather+Melissa
I love this! What a fun idea! I would love to do this for my daughter’s first birthday cake next month!
Paige
http://thehappyflammily.com
Oh my god I LOVE this recipe!!! Definitely using this for my next friends birthday, it’s so cute!! Never would have thought to use cake pops like that.
Thanks for sharing it!!
LucyAnn x
http://lucyannblog.blogspot.co.uk/
This looks soo delicious, and it’s so pretty too!
Courtney | http://courtzmelv.com
This is so cute ^_^ I will definitely make this when I get a cake pop maker!
Laila from Townhouse Palette
SO adorable! My girls would LOVE this! Thanks for sharing!
This is literally the simplest, yet coolest decorating trick! I may or may not tell everyone this polka dot cake secret.
It should work the first time Lisa! Just make sure the cake is totally cool before icing. That was my mistake, it wasn’t and the layers were sliding around with the icing melting between them…
Laura
This look super delicious must make it for my birthday. Love It
Looks so good! Love it! Thanks for sharing!!!
This is such an amazing idea! I’ll have to keep it in mind for my birthday! 😀
-Lauren
http://www.musingsofaflowerchild.com/
It’s a lot easier than what I thought it would be. Might need to try this for my little one’s birthday! 🙂
This is so pretty. Would love to try make it but I bet it wouldn’t come out as pretty
Now that is a great looking cake. Makes me hungry…. And Ive never seen an actual polka dot cake where theyre inside the actual cake.
This is amazing! With this type of recipe you surely look good between your guests!
Check out everything you need to know from the new video streaming social media, Periscope, and how it is growing vey fast its popularity.
http://www.mgluxurynews.com/posts
https://www.facebook.com/MGLuxuryNews
Bests!
I love this so much!! Colorful tip: divide the “confetti balls” batter into smaller bowls and dye them different colors. Then, you’ll have a pretty, colorful confetti look! 🙂
I love this so much!! Colorful tip: divide the “confetti balls” batter into smaller bowls and dye them different colors. Then, you’ll have a pretty, colorful confetti look! 🙂
Here is my multicolor polka dot version: https://www.pinterest.com/pin/324962929340491740/ I used a yogurt and lemon recipe. Yummy!
Well yeah!
How fun! I love that the cake looks ordinary on the outside but has something unexpected on the inside! Plus this is super simple!
So so cute! I wouldn’t have thought that’s how you would do it! I’d try to do it with multiple colors too.
-M
http://www.violetroots.com
Love this! What a great idea!
How weirdly wonderful. Looks delicious and fun.
This looks so cute!!! And so much easier than you’d think!
http://www.gemmacarey.com/
Really cute idea. Looks good! http://www.hannamarielei.com
This is such a fun idea! I would try a vanilla bean cake with chocolate polka dots.
Happy Wednesday
http://www.lovecompassionatelee.com/thinkoutloud
This is so cute! if only I was a good baker… x
I’m not that much into baking, but this polka dot cake looks amazing!
This is so fun! It really would make the best gender reveal cake!
Omg >.Candy After Dinner
I love all the baking tutorials , I have got to try the Polka dot cake!
inspireparlamode.wordpress.com