 Just thought I’d share a little about two sort of major updates that have happened in my home this past month. We’ve lived in our home for a little less than two years (see my empty house tour here) and Trey and I are both feeling like it’s going to be our home for a long, long time (although I guess you never really know the future, but that’s what we’re planning for now). Obviously no house is perfect, although we definitely love this one a lot. But for most of the time we’ve lived here I’ve really wanted to find ways to make the space feel brighter. The house has plenty of windows (although I wouldn’t mind more 😉 and even three skylights in the main living area.
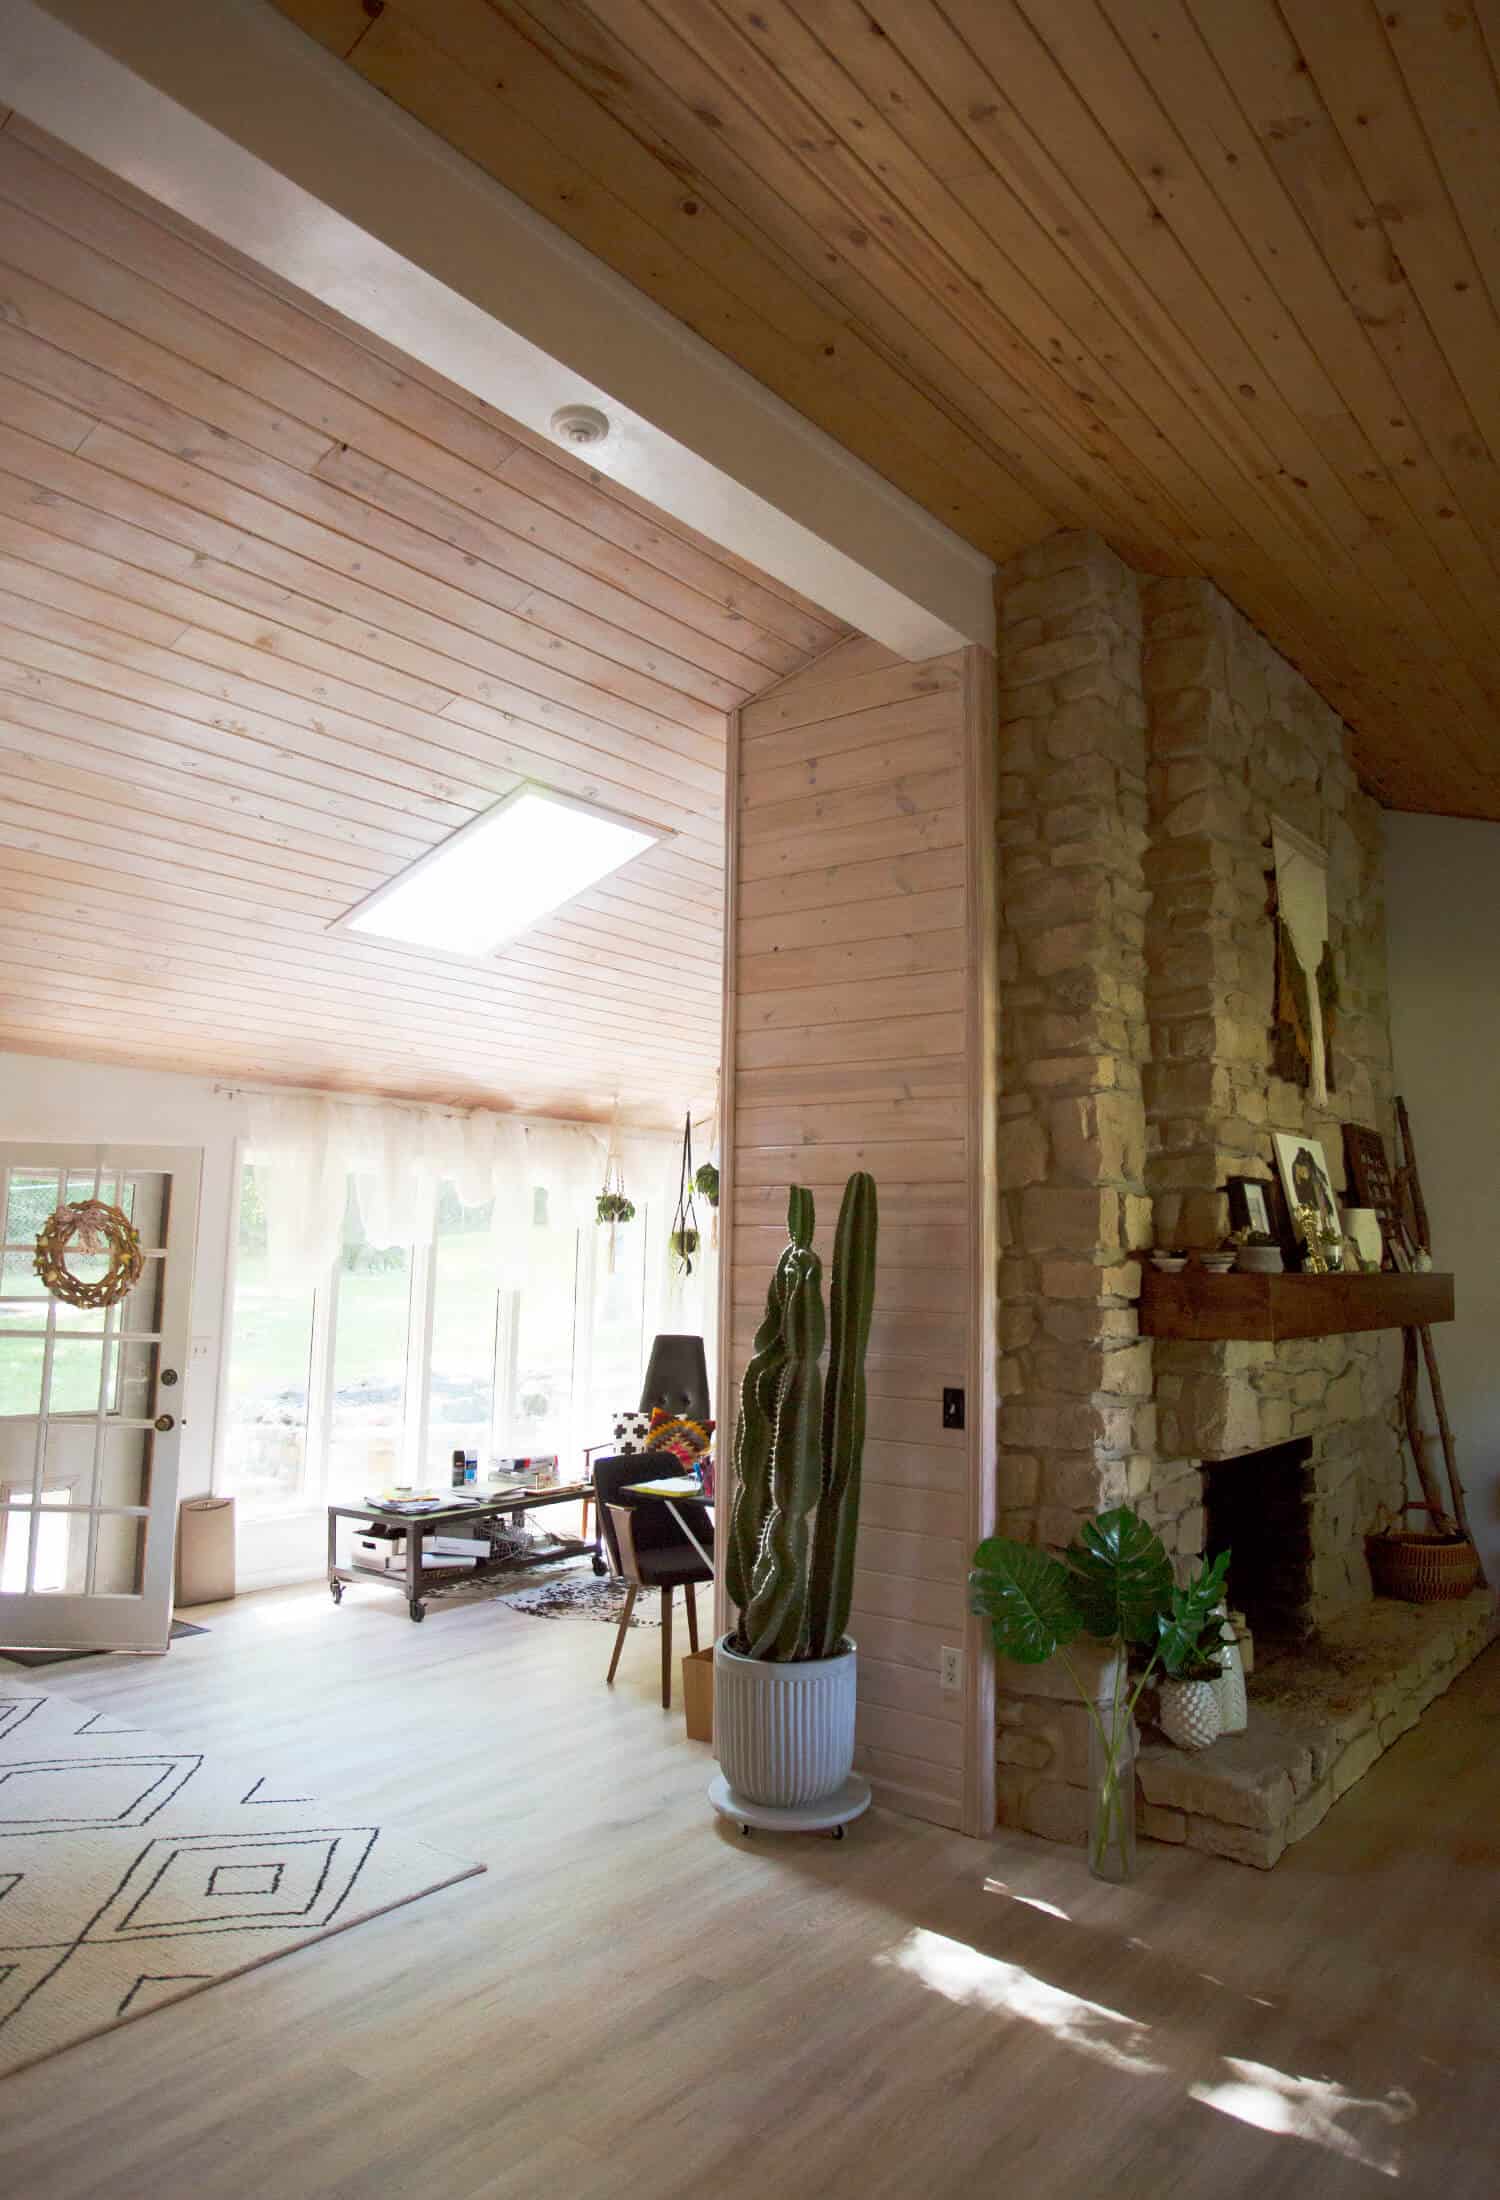
But there are a number of factors that make the space surprisingly dark. First, we have quite a few large, mature trees in our backyard and even a few in the front. We had one removed last year (it was dead and very close to our garage, so one good ice storm could have knocked it into our house), but don’t plan to remove anymore unless they become unhealthy. But the main two factors are we had very dark brown wood laminate floors throughout the house, and second, in the main living areas we have wood ceilings that aren’t really super dark, but make the space much darker than if we had traditional white textured ceilings or something.
 I thought about the floors forever. Basically, I felt a lot of guilt around getting rid of (and buying new) floors since ours were in good shape and likely pretty new. But they were the exact opposite color I’d want if I had chosen them. And then the wood ceilings were a real struggle. The ceilings were really something that caught the eye of both Trey and I when we first saw the house. But after living with the ceilings awhile, I guess I started to feel that the rustic, yellow look just wasn’t something I really liked all the time. I think it’s kind of like when you see a friend wear a really interesting cut dress, but then you try it on and it’s just not right for you. That’s how I felt about the ceilings; they are cool, just maybe not something I really wanted. But changing them would be a much bigger commitment than buying a new dress. 😉
So Trey and I talked about these things for a long time, basically the last few years. And we finally decided that if we felt this was the house we plan to stay in for a long time, then we might as well really make it our own (on a timeline we can afford, so not everything at once).
 First, let’s talk about the ceiling. I got a quote from a contractor we love to work with and after realizing how (mostly) simple the process was going to be, I decided that I would just stain the ceilings myself. I still don’t know if the wood on our ceilings was ever sealed. I’ve had multiple people look at it with me, including a few professionals. It seemed like it wasn’t sealed, just raw wood. However, I guess none of us believe it since that seemed kind of lazy. Still, it did look good, so I can see why the last homeowner left them that way. So I decided to just test a few pieces and get my process down on staining it. I wanted it to look kind of whitewashed, so you’d still see all the wood grain, but the overall tone/look would be softer and whiter. My friend Mara sent me a link to this house and immediately realized that’s pretty much what I was envisioning.
Our ceilings are 12 feet high at the tallest point, so I have to work on a (rented) scaffolding as I stain. I am doing the whole thing by hand, with stain sponges and rags, because I have more control that way and it’s hard enough to get it looking even when you’re sort of working upside down. Plus, I’m pretty afraid of heights. I just try not to look down when I’m doing the higher parts. I’ve been using Minwax water-based wood stain. They have a clear tint base you can add colors to and I added a white shade called Marshmallow (it’s a cooler white). I’m currently halfway done and probably will just need to rent the scaffolding for another week to finish it up soon. I’m overall really happy with it in person, but I think in photos the effect is much less noticeable. Sort of an optical illusion in that way, I guess.
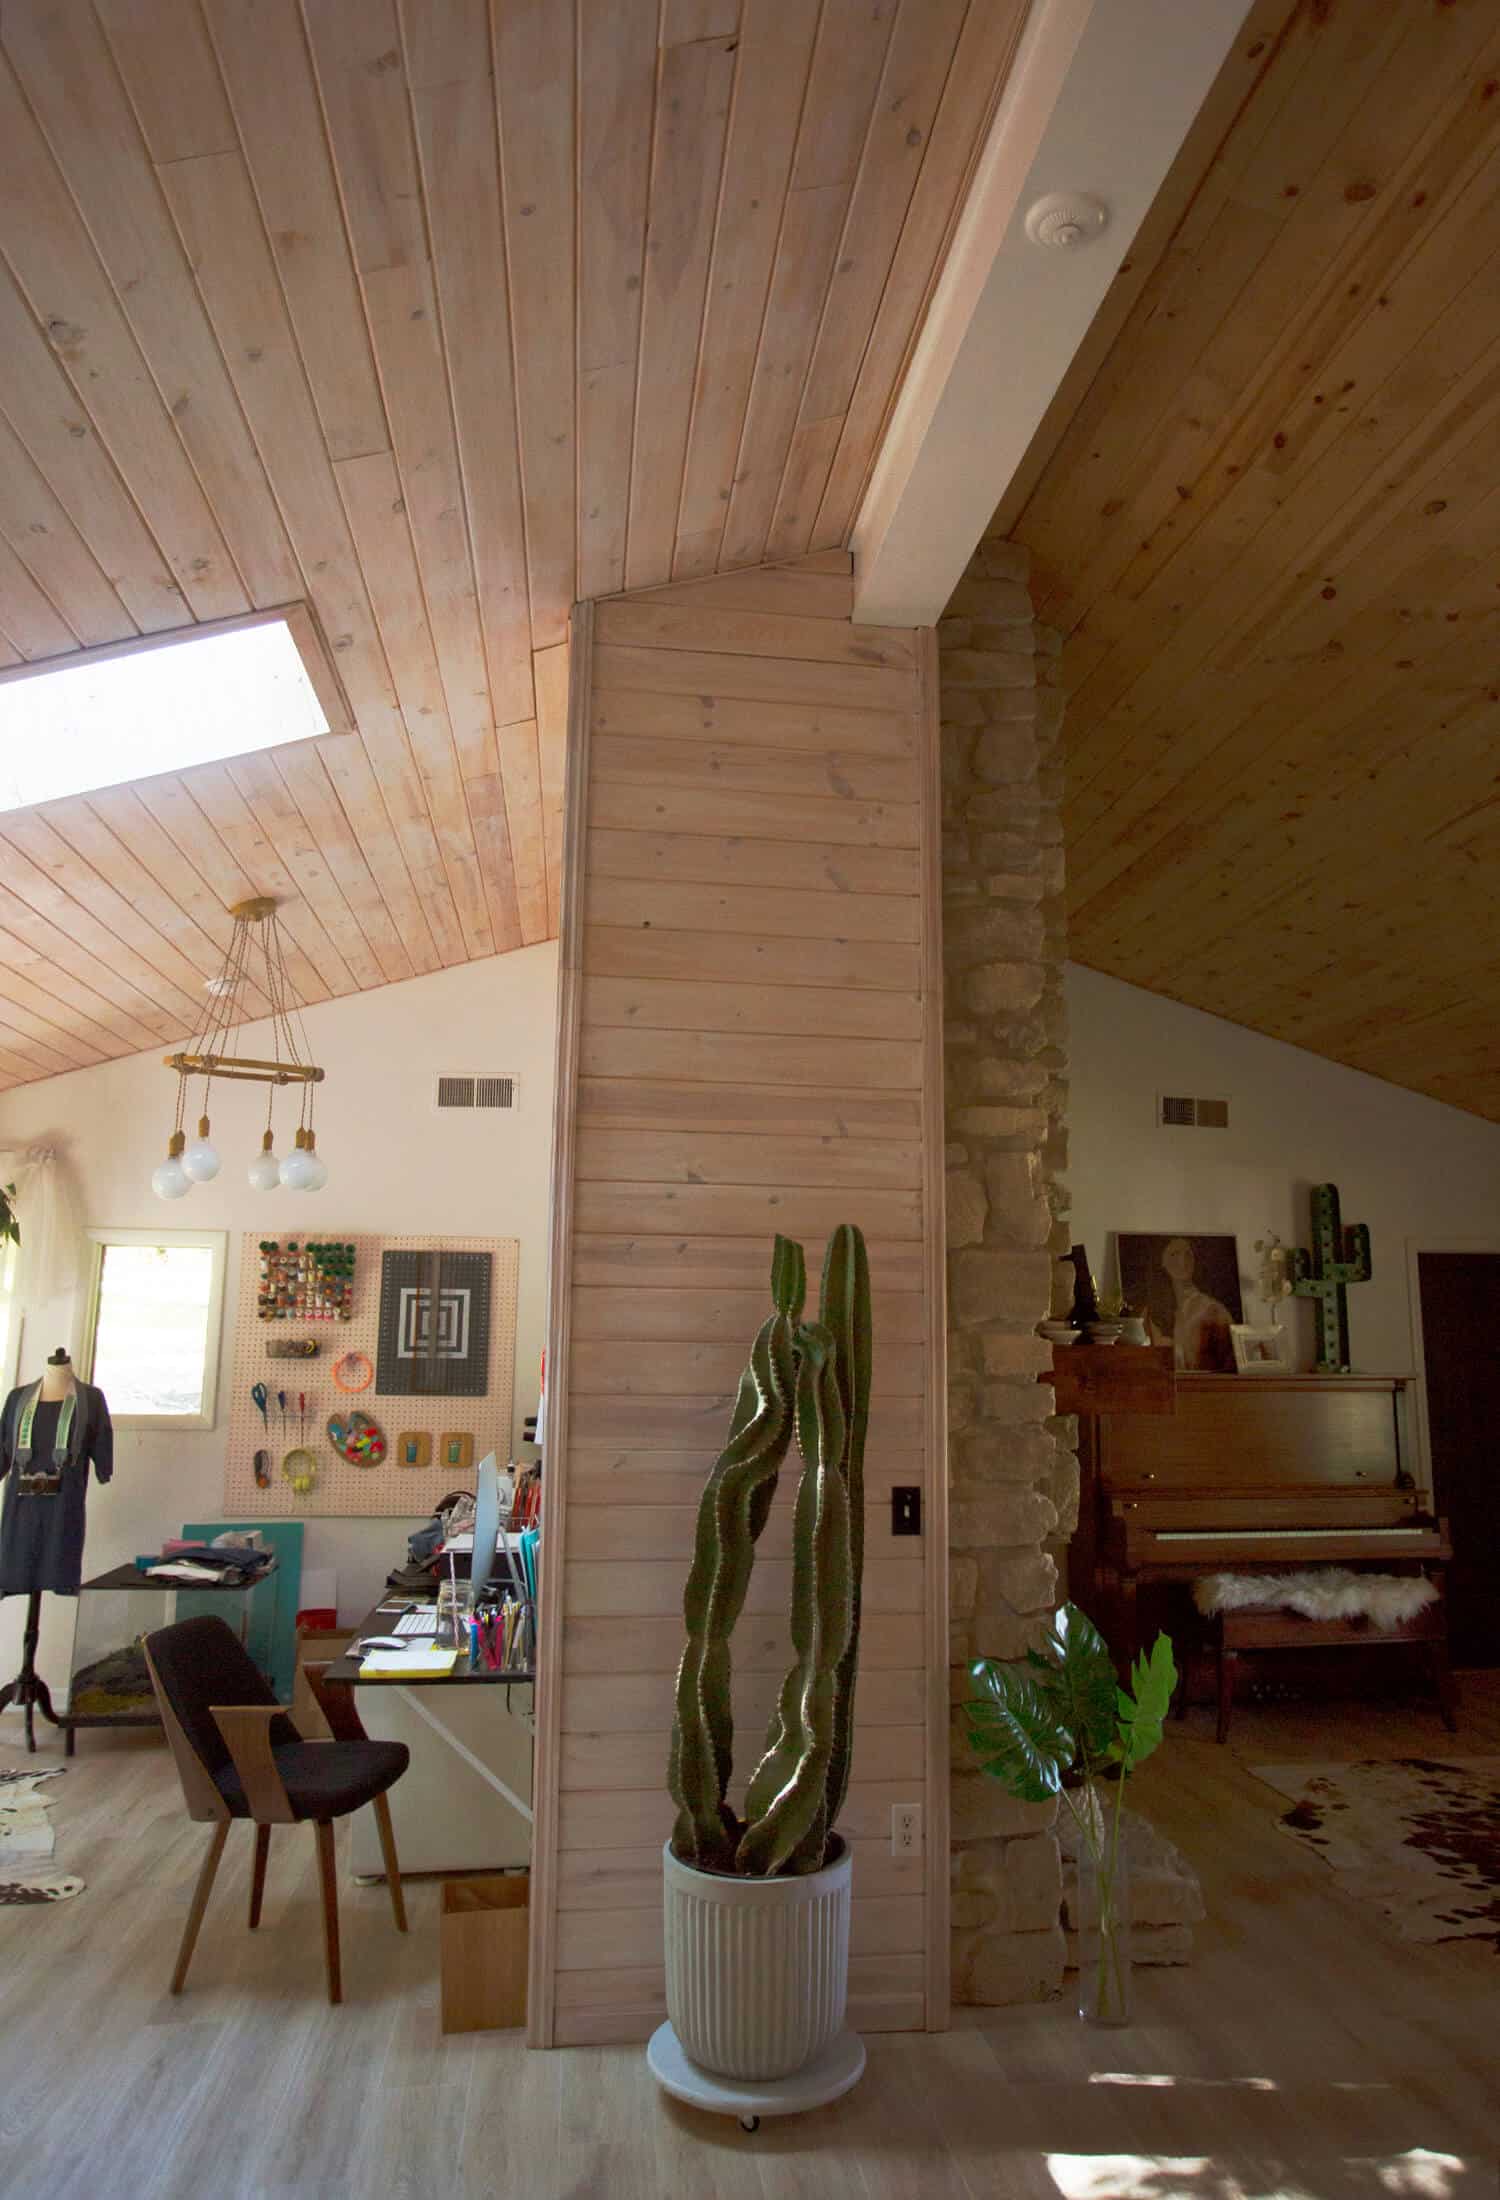
 Here you can see a side-by-side comparison, as I’m only half done so far. I think once I’m totally done it will be hard to even tell a big difference, but as you can see, it’s there! And it makes the space feel a little brighter and less warm/yellow-y.
 We had the floors redone by our contractor and his team. The flooring I choose is this in San Marco Oak and I am REALLY happy with it. I actually can’t believe it took me so long to do it because I am seriously over-the-moon happy with the floors. They make the house feel SO different. And in case you are curious, we donated our old floors to our Habitat for Humanity ReStore, as a really large portion of them were in great shape and uncut. So they could easily be useful for other homes or a few rooms, at least.
So that’s a little update on our house. If you follow me on IG (@emmaredvelvet), you may have seen lots of peeks of the house while it was in progress. And I’m hoping to finish the ceilings this coming week, so maybe I’ll post a few more from my perch on the scaffolding or something. 🙂 Thanks for letting me share! xo. Emma
33 Comments
Gorgeous! I think you definitely made the right choice. The wood is beautiful, but I would get overwhelmed by that yellow as well. Great compromise with that stain.
The changes look so good! The ceiling is subtle but a definite improvement. I did something similar to some wood shelves, they were a bit too orange so I went over them with a very watered-down gray paint, and wiped off while wet. It’s so much better!
Yes, sounds similar. I’m doing the whole, wipe on, wipe off thing too. Just looks a little better that way but boy is it a lot of work. Oh well. I’m overall really happy with the outcome. Your shelves sound awesome too!
This is AMAZING. What a difference and the whitewash and floors make!
I would love to do something similar to my wood ceiling, but mine is 20 feet tall at the peak with rough cut beams every 16 inches. I would be afraid to stain the beams but also worried about splashing them with stain if I tried to just stain the ceiling boards. Sometimes you have to just let your house be what it is, I guess.
However, I am going to try this on some of my walls, which are also wood. (Got way too much wood here.) So I have a question: Did you seal the knots in the wood before you applied the stain? I’ve read that the knots will eventually bleed through and you’ll end up with spotted wood if you don’t seal the knots. And if so, what did you use? Thanks Emma.
I did not seal the knots. I have never heard of that. I may try sealing them on the second side and see how it goes, I’ll probably use poly urethane. Thanks for the tip!
Our WHOLE upstairs attic master bedroom is knotty pine. It’s definitely cozy and it has grown on me but I’ve always thought about doing something….this could work! It’s looks great Emma. I just love the vibe and style of your house (your old one and this one) ?
I am seriously in love with the color choice….it makes a HUGE difference!!!
I have an unfinished wall in my kitchen that is just raw wood and I think I am going to give this a try! Thanks for the inspiration! 🙂
I never would have thought of this as an option. Thanks for sharing. The end affect is just beautiful!
Wow! That makes a huge difference. I think you made a fantastic choice with both the ceilings and the floors. I also really enjoyed reading this post, I love the in-between updates y’all have been sharing on the blog. I think it makes the end result and final reveal post that much more satisfying as a reader. It is like we are going along on the journey with you and hearing your thoughts along the way!
Great job overall…it really has made a difference & I think you can also see a tremendous difference between the two ceilings. Love the lightness & brightness!
Before and afters are great and all, but I wish they were actually a fair comparison. Every single before picture on these types of posts are always decently exposed but look dim next to the over-exposed after pictures :/
You know, I really wish I could go back in time and re photograph my house when I first bought. I’m glad I have the photos I have, but I should have used a tripod when photographing as most of them are just a little blurry and still a little too underexposed. My photography skills have improved some since I moved to this home nearly two years ago, in part because it a bit darker in this house and I’ve learned more about shooting in low light. So, I agree with you, but also I promise I am not trying to make the before photos look bad. 🙂 I just didn’t do a great job photographing the house right when we bought it. Live and learn.
Beautiful! ❤️
Did you need to sand the ceiling planks first? I have knotty pine siding too and it’s just so yellow!
Looks so nice subtle brighter
Sometimes the smallest things make a huge differnece (tho this is not that small:)
It looks great Emma!
I love the new flooring, it really lightens up the whole room. And the addition of the cactus is A+!
Charmaine Ng | Architecture & Lifestyle Blog
http://charmainenyw.com
Wow I would love high ceilings like that!
https://dreamofadventures.com/
I love how light it makes the room, it looks so fresh and clean! Well, plus the high ceilings are amazing in any way! Before and afters are my favorite, hope to see more of these!
Props to you Emma for finding a way to donate/reuse those old floors and keep them out of our landfills!! I think in many ways the new push to remodel interiors for esthetic purposes fairly regularly (at least compared to the late 20th century) can be dangerous, as construction waste is the largest contributor to our landfills, and there are more people/larger homes in the country than ever before
it looks heavenly
Thanks for mentioning the Habitat for Humanity ReStore! I’m not an employee or anything, I just love the dang place. We’ve actually upcycled a solid portion of our furniture from there.
Emma! The difference the new floors + ceiling make is amazing! The before is so yellow compared to the after. You’re doing a great job! 🙂
I definitely like the rustic chic of the wooden floors and ceilings, and I think the way you styled everything it doesn’t seem so dark anymore. Good work!
https://www.makeandmess.com/
Gorgeous floors! I know some people just cant bear to do it, but I would have gone full white paint on that wood wall and ceiling. Props to you for doing it yourself, that’s a big job!
I completely get why you had to change the floors and ceilings! I HATE that kind of light, yellowy wood myself, especially in the wide planks. It’s hard to find anything that matches and doesn’t look like a lodge. You made a great choice with the whitewash stain and bravo to doing it all yourself – it looks like a TON of work!
http://www.shessobright.com
Thank you for this! I have your exact ceilings and have I always assumed they were stained. After reading your post, I went home and really analyzed them and I think they are just raw wood that has aged! I have been contemplating painting them white but the white wash looks amazing!! How did you prep the walls before you started? Just a wash or did you do any sanding?
I love the result you’ve created. Stay strong!! It’s hard work doing it all by hand – but definitely worth it in the end. We chose a similar wood color for our floors downstairs in our kitchen; they had a white oiled finish… http://www.thislifeisbelle.com/home/2017/7/12/our-home-in-san-francisco-part-2
When I saw the in progress posts on IG, I thought it looked like a lot of work for something so subtle…but wow, what a worthwhile difference! It is such a different look and feel and I can imagine it is so refreshing. It really suits your vibe! I’m impressed at you doing it yourself, too. That’s a lot of work! It’s funny to me that the previous owners would have installed floors such a different palette than the wall/ceilings to begin with.
Your house is absolutely gorgeous! I absolutely love the antlers! Do you mind sharing were you found them? <3
Hi Emma- First, love what you’ve done with your home! I recently purchased my first home in Atlanta, GA and so am now re-reading all of ABMs room tours for fresh inspiration. It’s working so well I can’t sleep thinking about paint colors. lol.
Question about your fireplace mantle, was it a difficult job to add that awesome floating wooden shelf? We have THE SAME fireplace situation in our new home, (only brick) and would love to add the same kind of mantle that can hold a little weight.
Thanks!
Fabulous job, well done. My hubby and I are thinking about doing this to our basement, because currently, the ceiling is open, and all the pipes and wiring is exposed. By the way, I could not find how to join your site. Would love to join, help!