
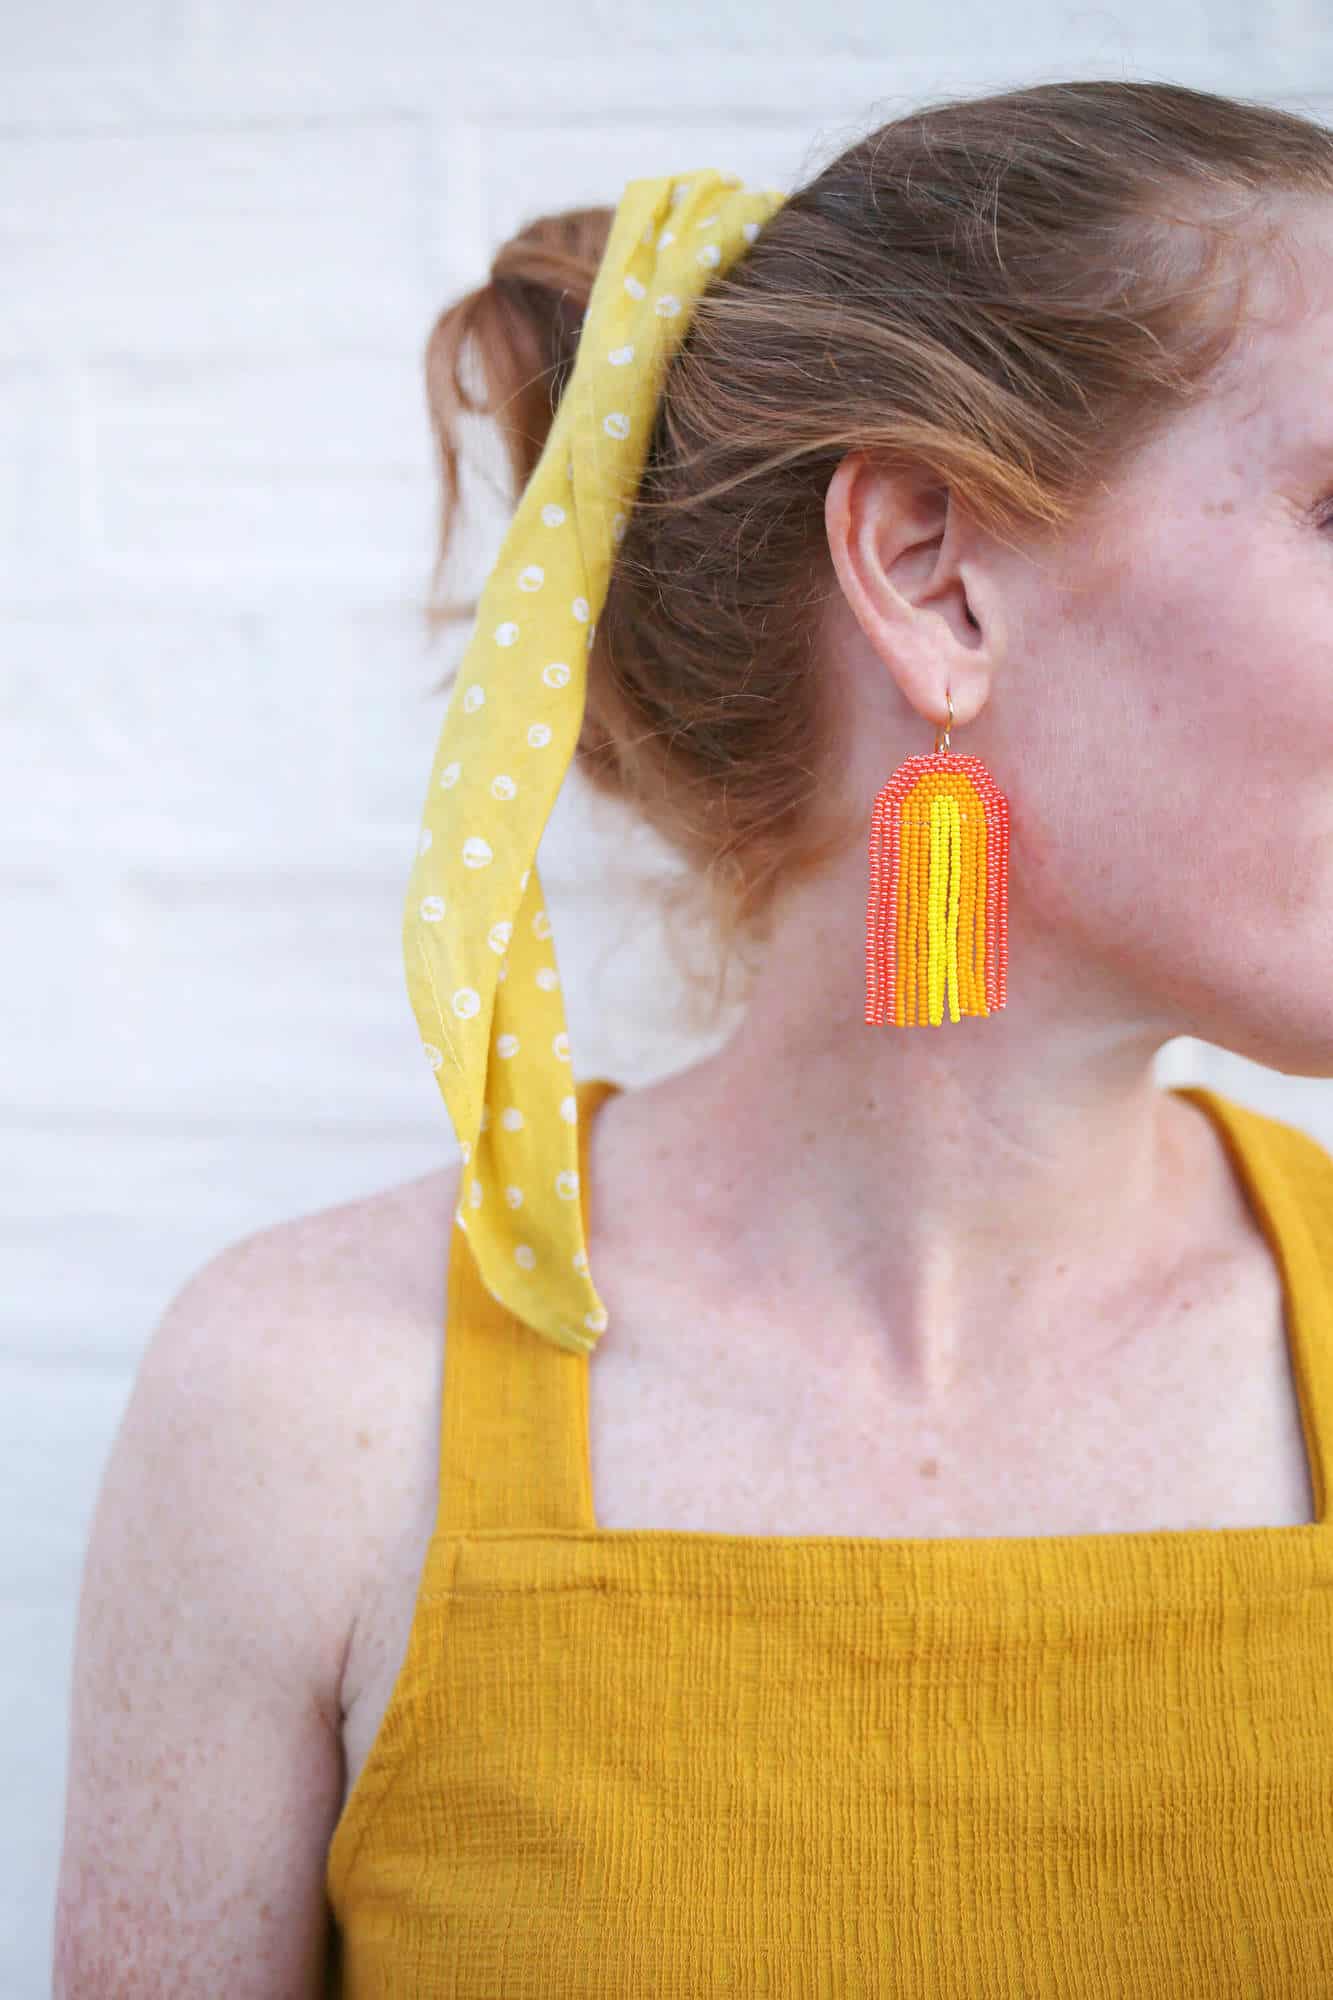
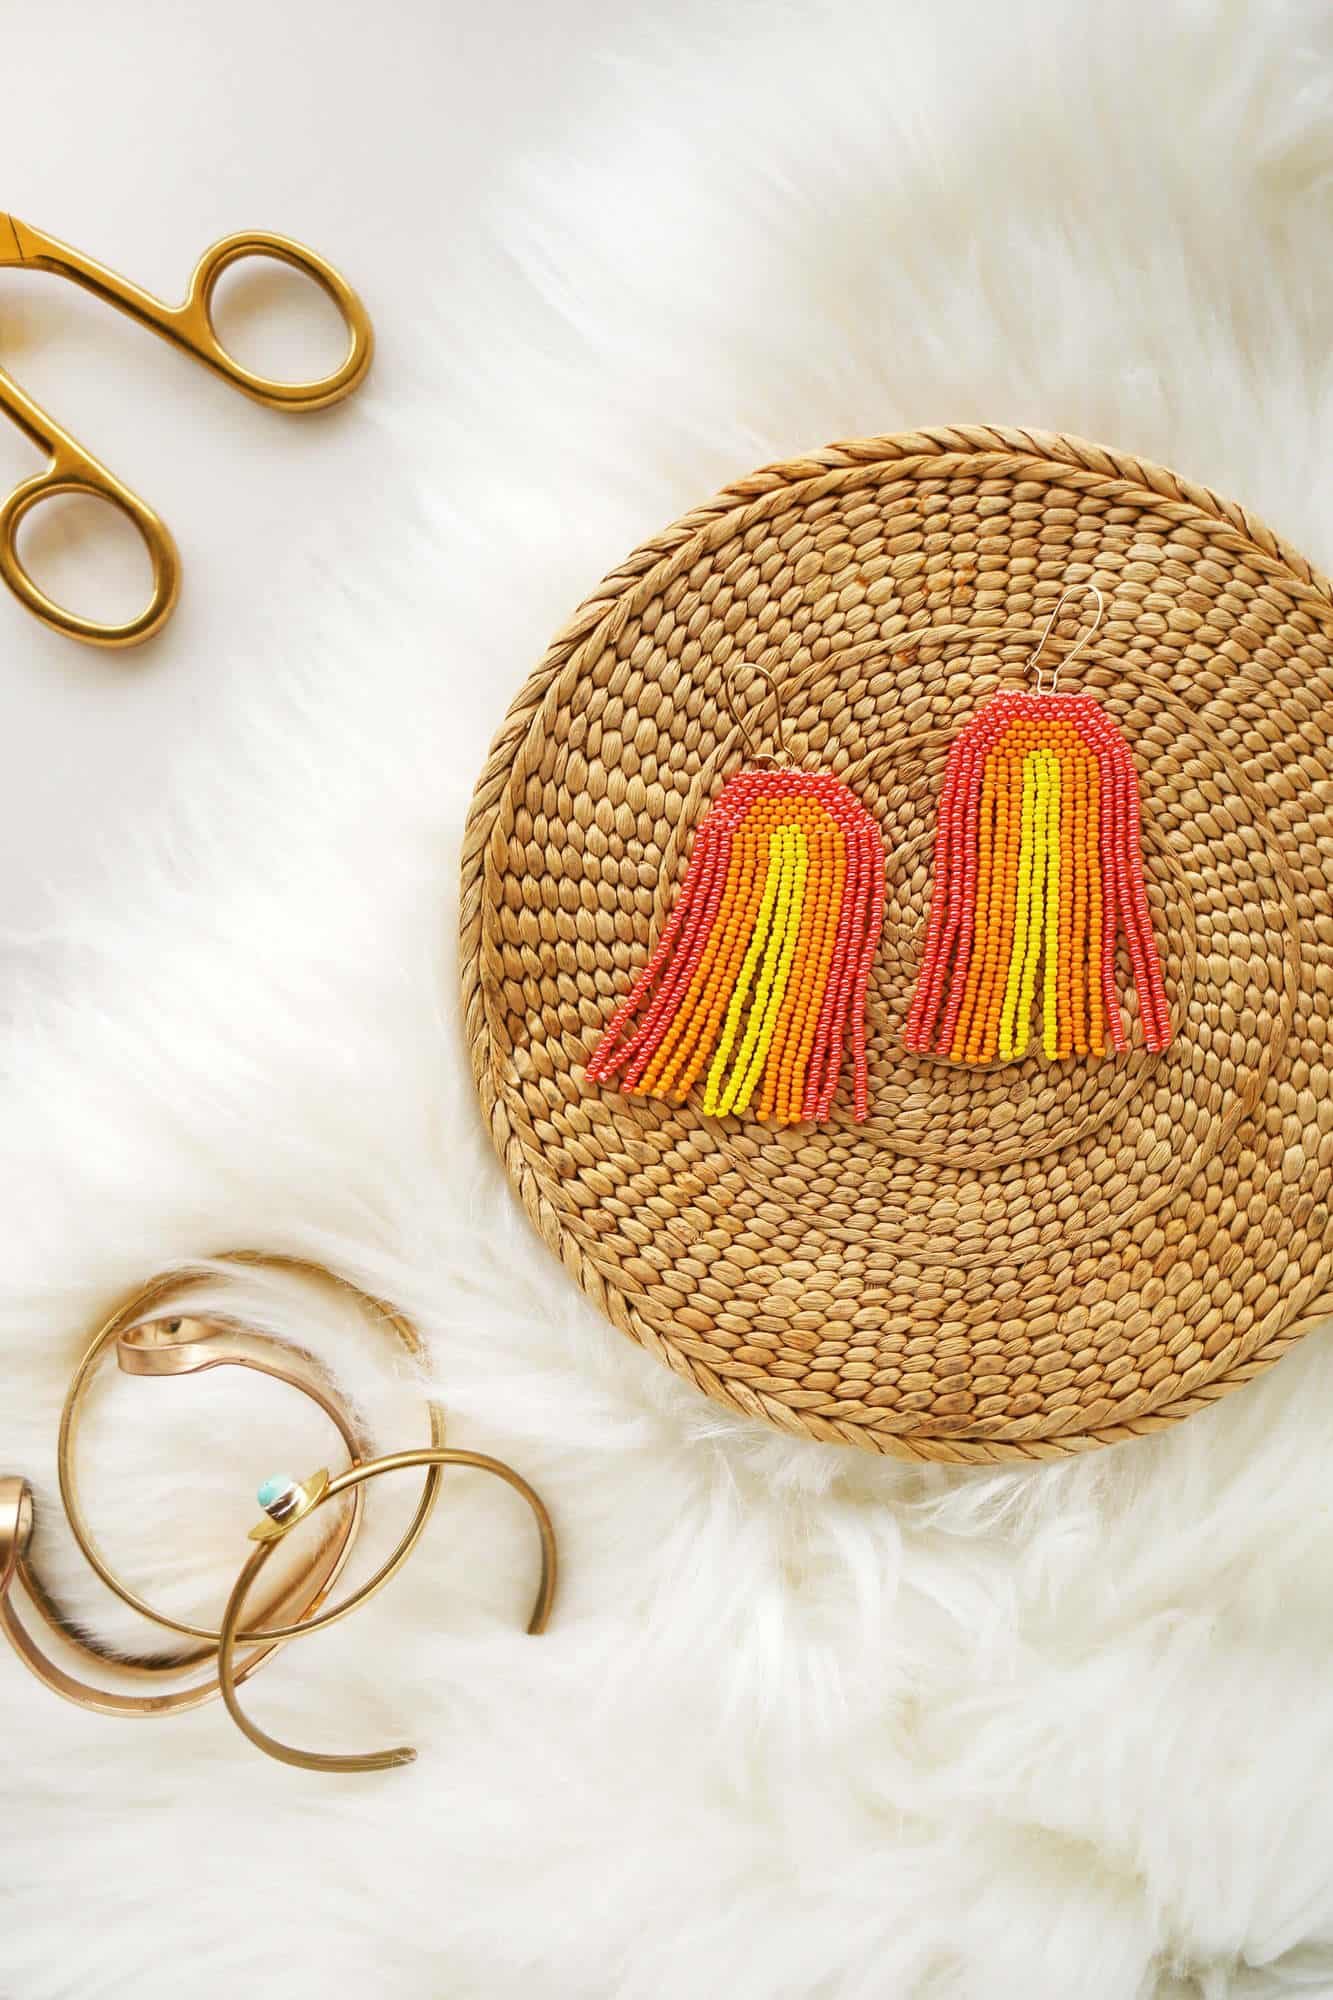
 Who says life can’t be all sunshine and rainbows?! This statement pair of seed bead rainbow earrings will keep that endless summer vibe alive, even if the pumpkin spice release date is just around the corner.
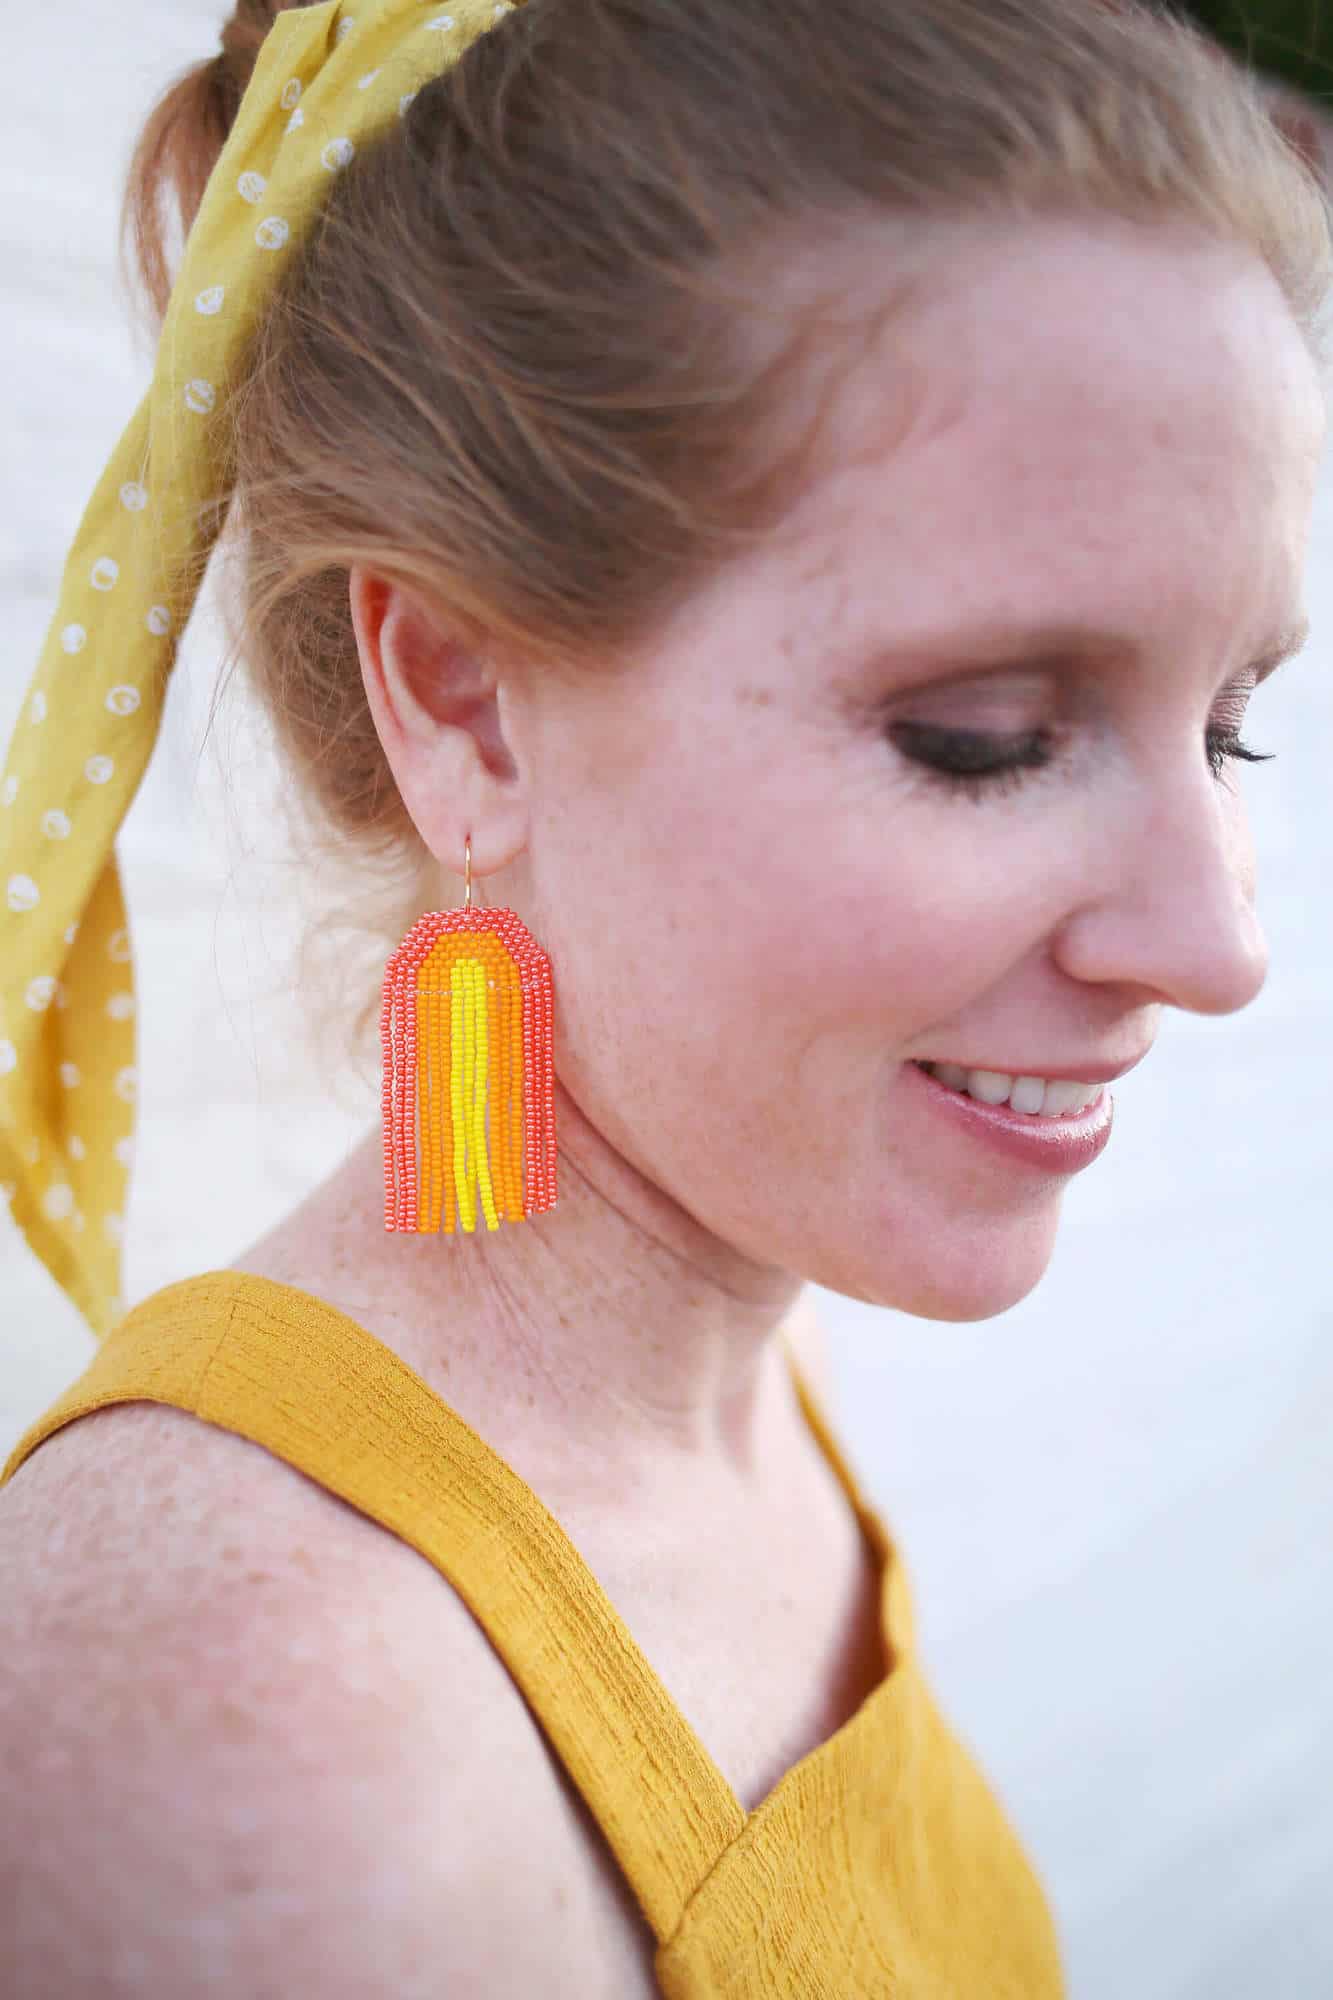
After learning to create triangular seed bead earrings, I realized I could adjust the pattern to create a simple rainbow shape. I am thrilled with how they turned out! I chose to use three colors, but you could easily tweak the pattern to create a more traditional rainbow design. Wear them with your favorite jumper or dress up a simple pair of cut-off jeans and cropped tee and watch those storm clouds disappear. The rainbow trend is still going strong and I couldn’t be happier!
 Supplies:
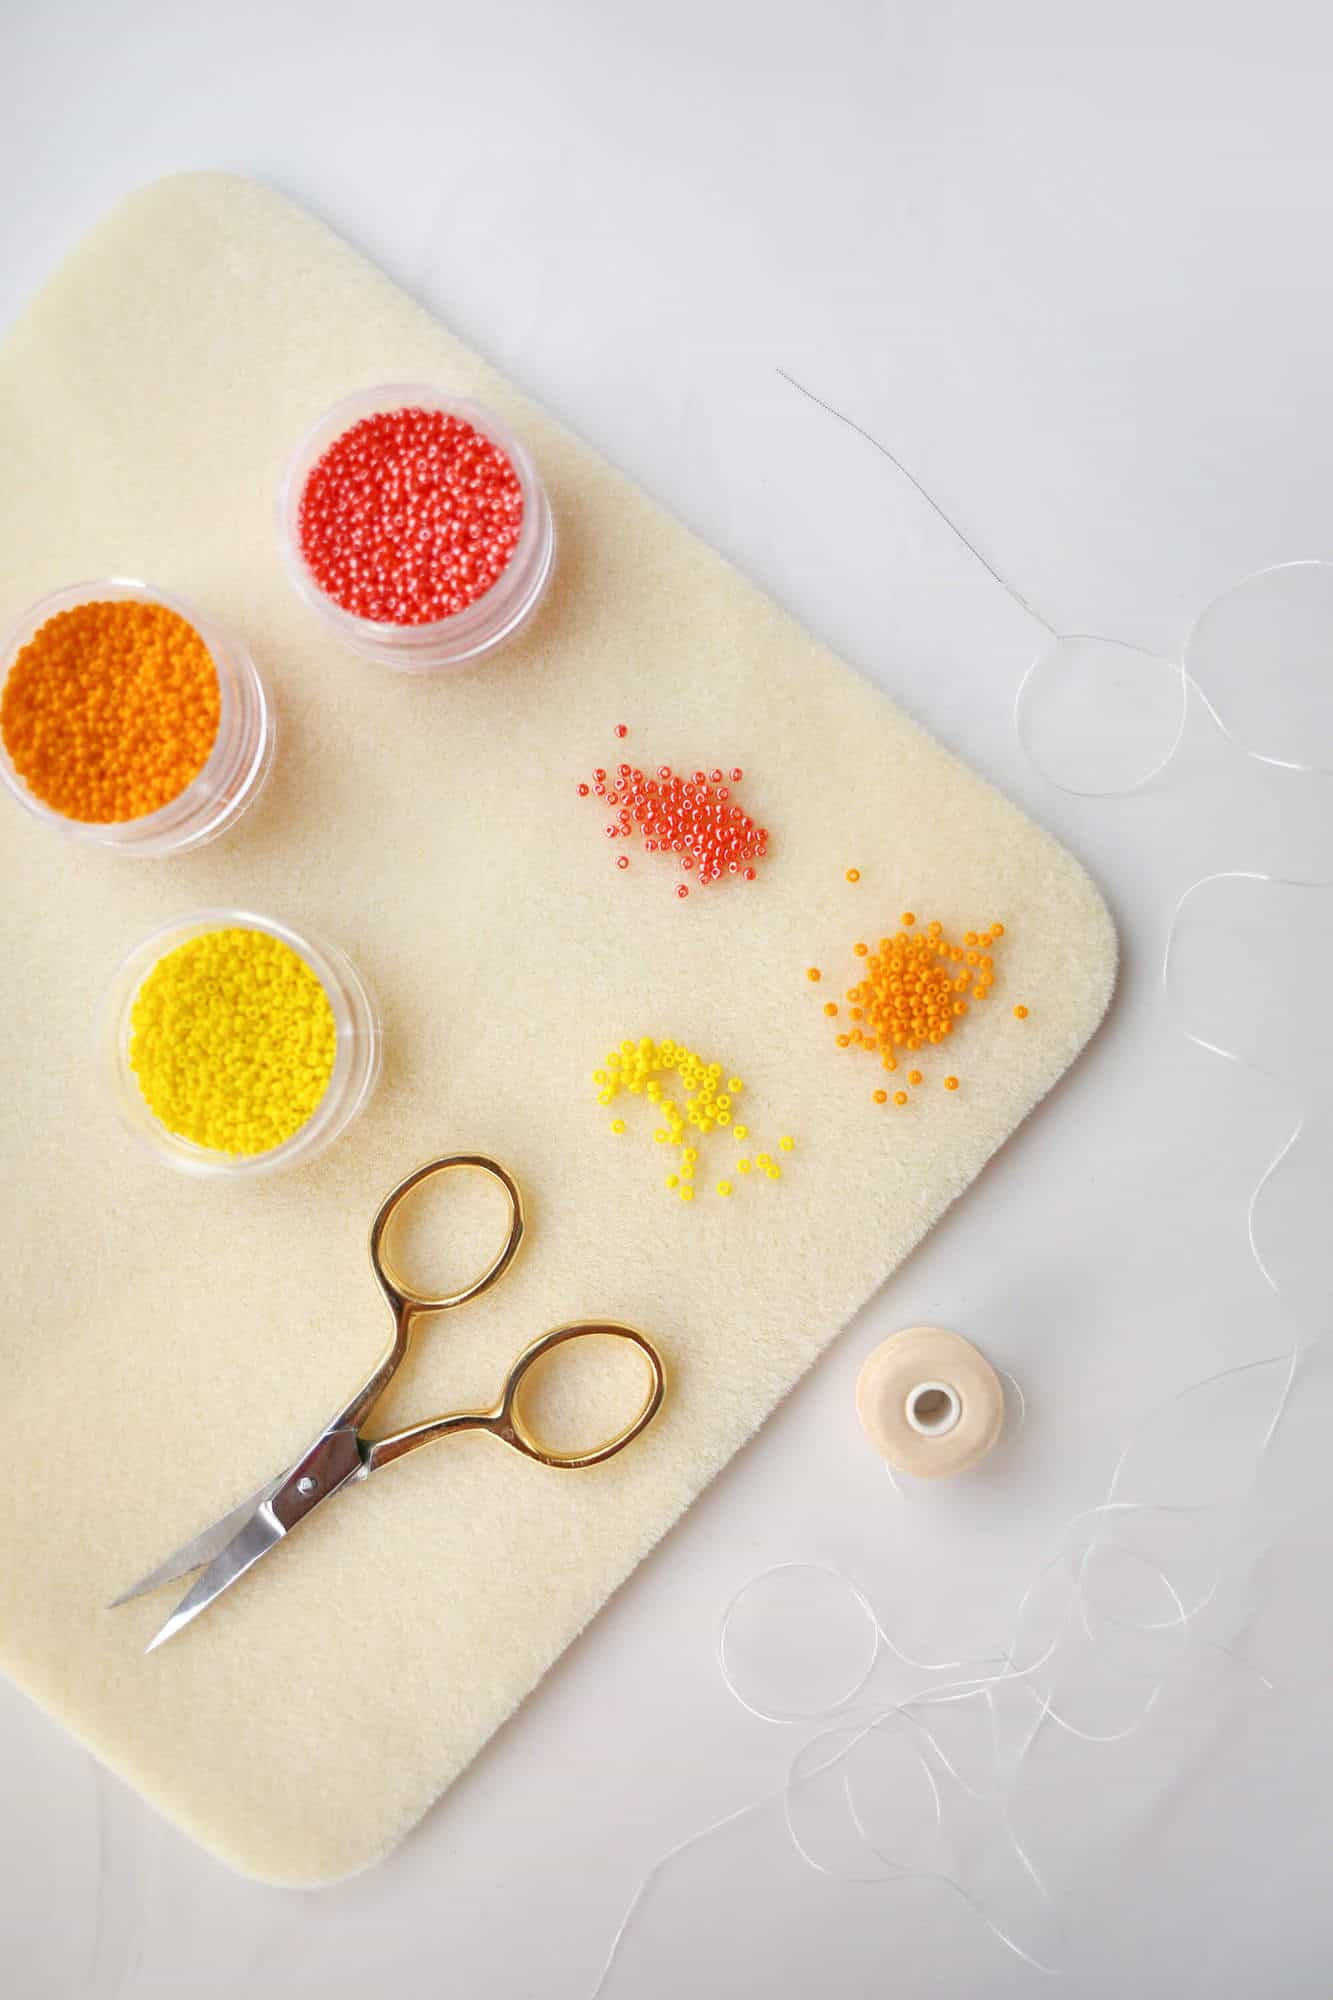
–Miyuki round seed beads, yellow (11/0)
-Miyuki round seed beads, light orange (11/0)
-Miyuki round seed beads, rose pink (11/0)
-collapsible eye needle (6.4 cm, 2.5in)
–Nymo nylon thread, size D in white (64 yards)
–bead mat
-20 mm earring connectors
-scissors
 Step One: Start your first earring with 5′ of thread on your needle. Thread your first three beads in your outer rainbow color and pull them along your thread until you have a 4″ tail.
Step Two: Thread your next three beads in the same color to create the start of your ladder stitch. Keep a space between your first three and your second three.
Step Three: Thread your needle back up through the bottom of the first set of three beads.
Step Four: Then thread your needle back down through the second set of three beads. Pull taut so that the first and second set of beads are snugly side-by-side.
Step Five: Next, pick up three more beads in the same color.
Step Six: Stitch down through the second set of three beads.
Step Seven: Stitch back up through the third set of three beads and pull taut.
Step Eight: Pick up three beads in your next color and then stitch through the bottom of the third set of beads and pull taut.
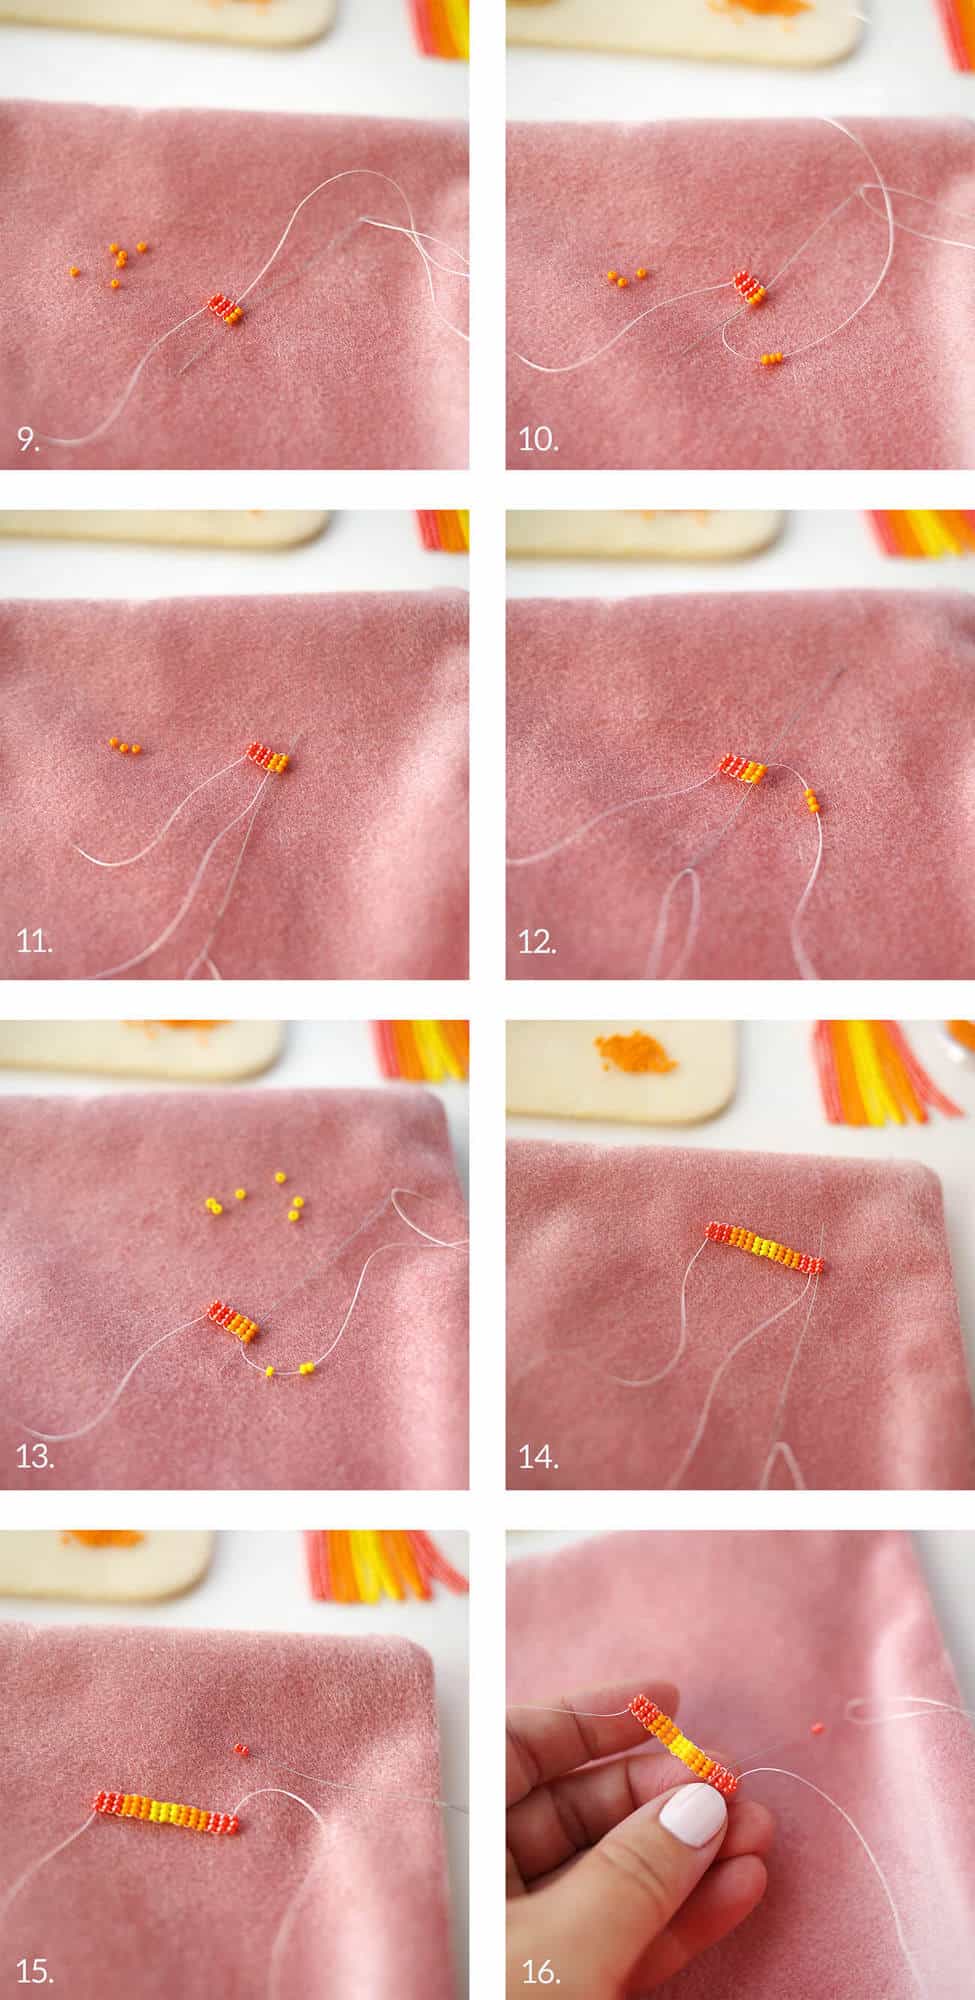 Step Nine: Stitch back down through the new color set of beads.
Step Ten: Pick up three more of the second color beads and stitch down through the previous set—the fourth row of beads.
Step Eleven: Then stitch back up through the fifth row of beads and pull taut.
Step Twelve: Pick up three more beads in the second color and stitch up through the fifth row of beads again. Then stitch back down the sixth row of beads.
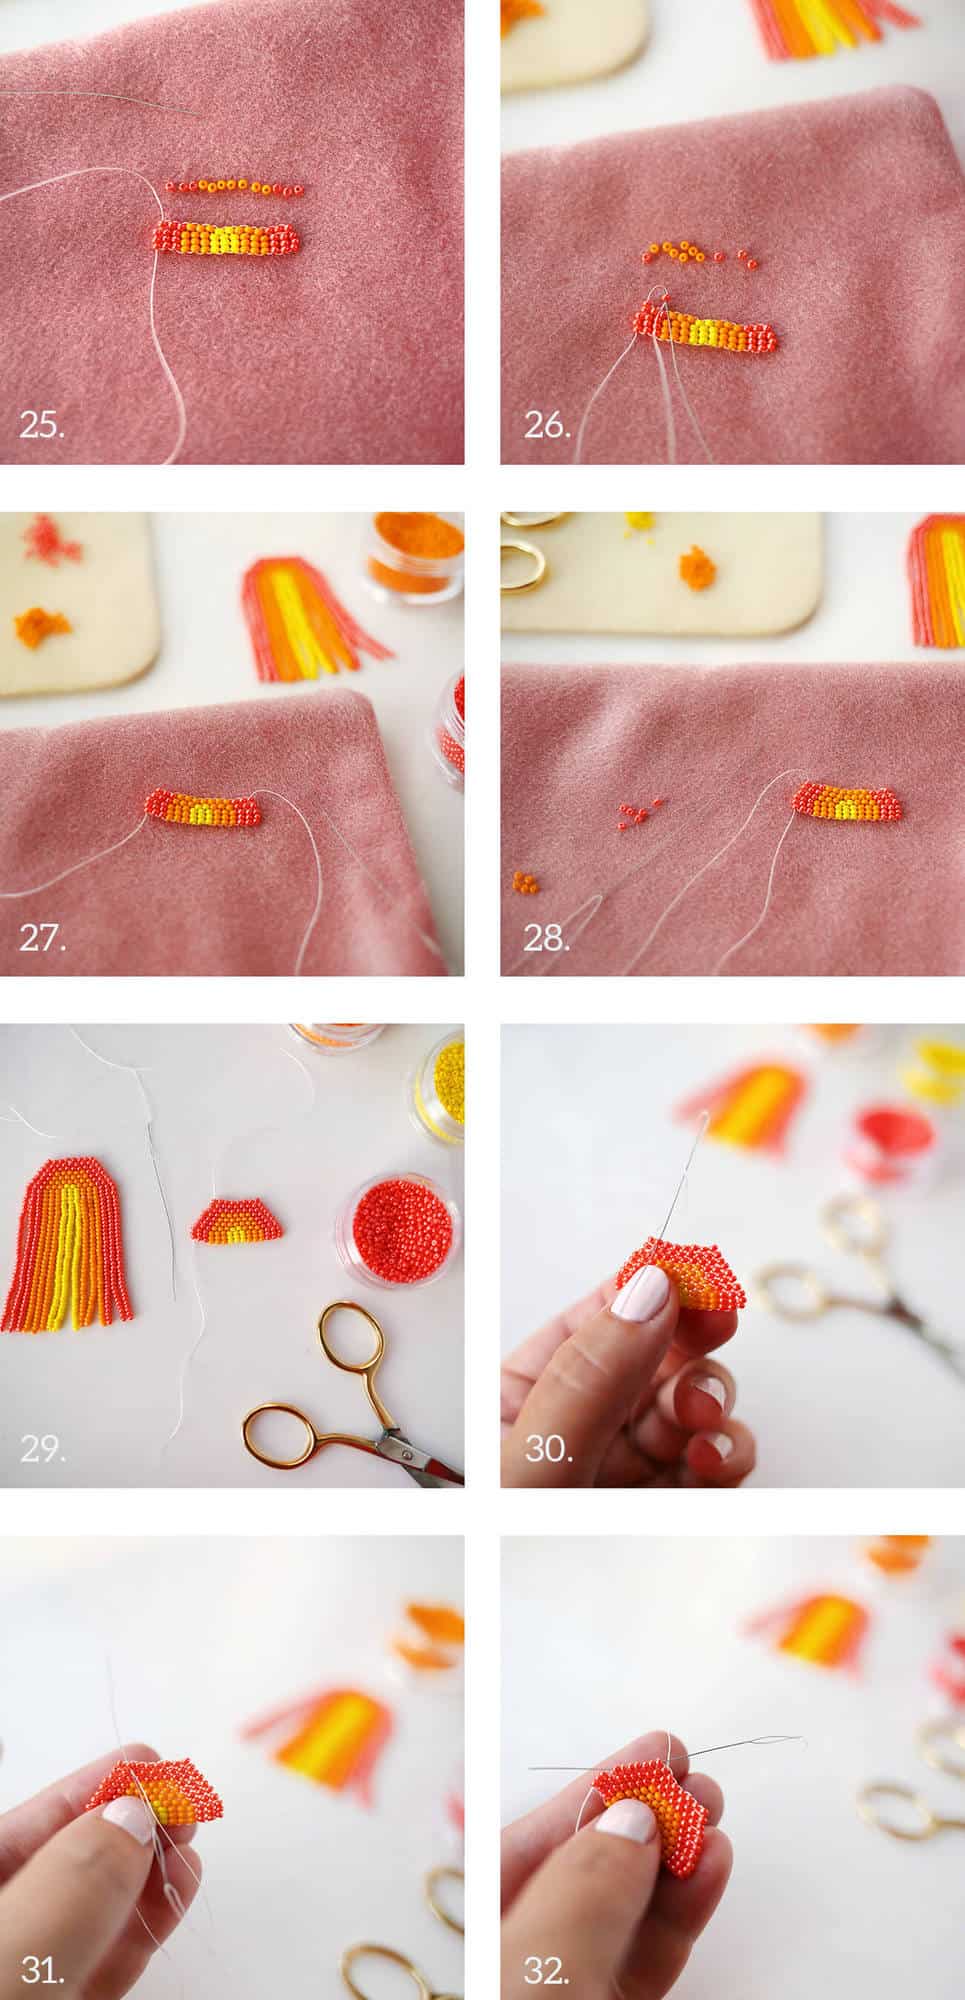
Step Thirteen: Pick up three beads in the third color and stitch down from the top of the sixth row.
Step Fourteen: Continue the ladder stitch pattern so that you add in two more of the third color and then repeat three more of the second color and three more of the first color. You should end by stitching up through the top of the last three beads.
Step Fifteen: Now we’ll start the brick stitch. Pick up two beads in the outer color.
Step Sixteen: Then stitch your needle under the thread showing between the second and third bead from the edge in the previous row. It’s helpful to stitch from the back to the front.
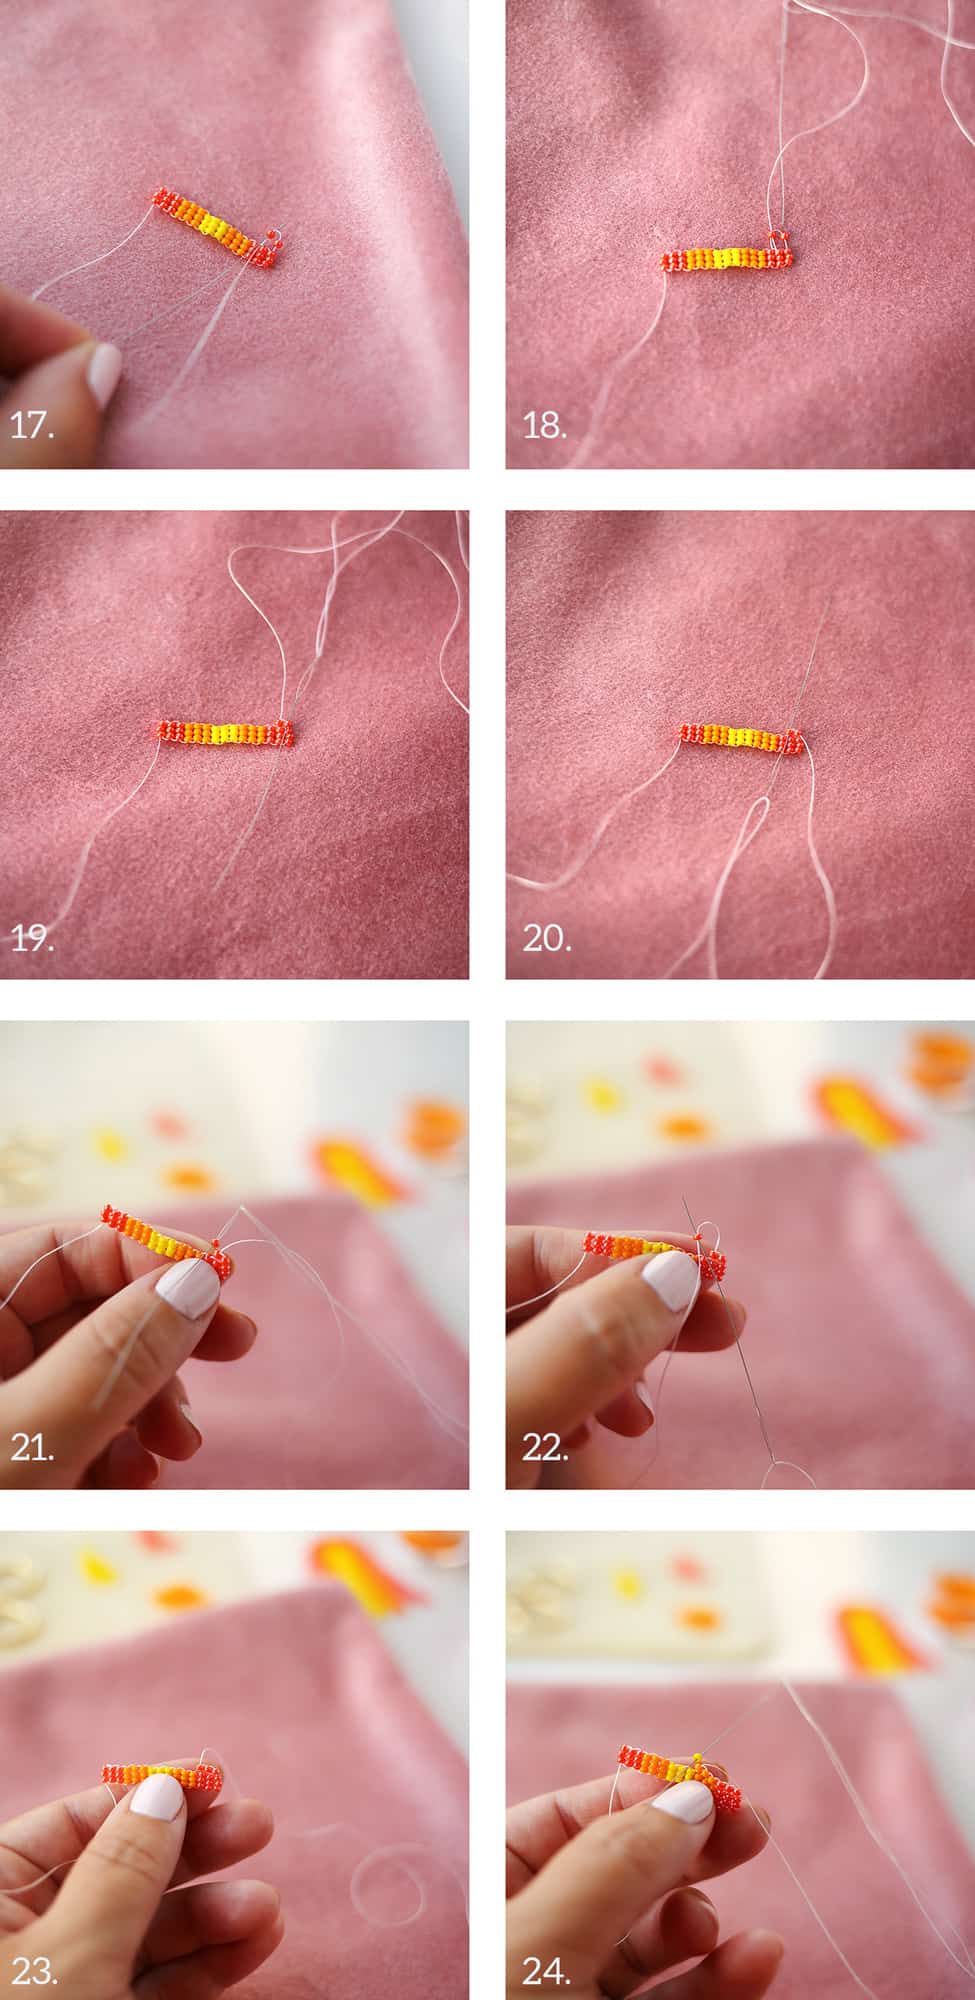 Step Seventeen: Pull until almost taut and then stitch back up through that second bead as shown. This will be the second bead in a new row.
Step Eighteen: Stitch back down the first bead in your new row.
Step Nineteen: Pull your needle through and then pull taut.
Step Twenty: Stitch back up through the second bead in your new row. Doubling back through these two will ensure they are well secured, but you won’t be doing this every two beads—only at the start of a new row.
Step Twenty-One: Pick up a third bead in that same color and stitch under the thread showing between the two beads underneath, the same as in step sixteen.
Step Twenty-Two: Stitch back up through that third bead in your new row.
Step Twenty-Three: Pull taut so that the beads in this row are sitting on top and in between the beads in the row below. Add three more beads in the second color.
Step Twenty-Four: Add in your first of two beads in the third color. This new row has decreased the number of beads in it so the middle color only gets two instead of three. Continue your pattern all the way across.
 Step Twenty-Five: Lay out your second row of beads to brick stitch. You’ll need three in the first color, seven in the second color, and three in the first color. You won’t use any of the third color.
Step Twenty-Six: Pick up two beads in the first color and stitch under the thread between the second and third bead in the previous row. Then stitch back up through that second bead. This is the same thing you did at the start of your first row of brick stitch.
Step Twenty-Seven: Continue adding beads until you finish off this row.
Step Twenty-Eight: Your third row of brick stitch will include three beads in the first color, six beads in the second color, and three more beads in the first color.
Step Twenty-Nine: Add three more rows of beads all in the first color.
Step Thirty: Stitch back down through the second bead in that top row.
Step Thirty-One: Then stitch under the thread in between the second and third bead in the row underneath and then stitch back up through that second bead in the top row.
Step Thirty-Two: Stitch back down all the beads along the edge of the brick stitch rows. Remove your needle from this length of thread.
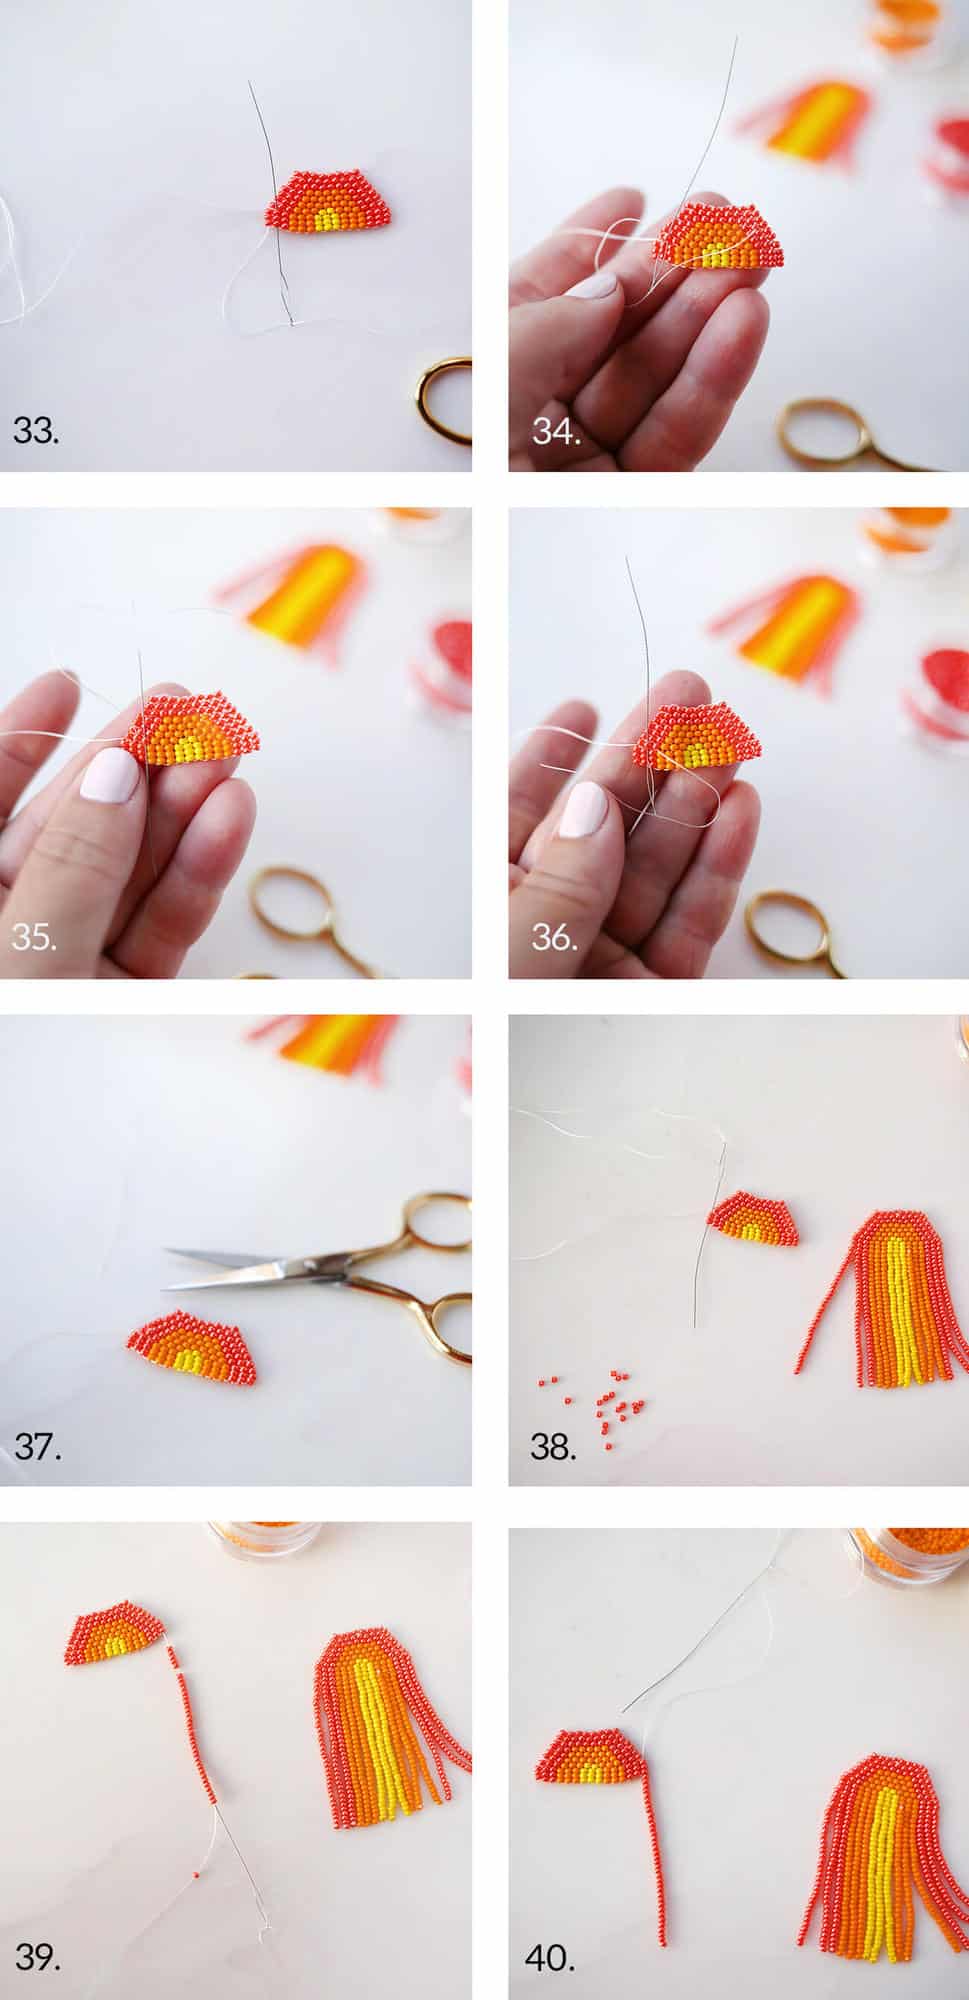 Step Thirty-Three: Thread the short tail of thread through your needle and stitch up the second set of three beads. Pull through.
Step Thirty-Four: Carefully stitch up through the second bead in that first row of brick stitch.
Step Thirty-Five: Then stitch down through the third bead in that first row of brick stitch—the one right next to it.
Step Thirty-Six: Stitch back up through the second bead in that first row of brick stitch.
Step Thirty-Seven: Pull taut and trim. This hides the yarn and ensures that this end won’t unravel.
Step Thirty-Eight: Rethread the long end and stitch down through the first stack of three beads. Pull through.
Step Thirty-Nine: I’ve flipped the earring in this photo. Pick up thirty-five beads in the first color. Leave the bottom bead alone and stitch back up through the next thirty-four beads.
Step Forty: Then stitch back up through the stack of three beads directly above. Pull taut but not so tight that there isn’t any wiggle room. Repeat steps thirty-nine and forty as you move across your earring so that the thirty-five added beads match the stack of three beads above it.
Once you get to the opposite side and finish your last row, circle back with your thread as in steps thirty-four through thirty-seven to make sure it doesn’t unravel. Add your earring hook by slipping it under the thread between the two center beads in the top row.
 Your first earring will take a minute to finish but your second one will go much faster! Once you get the hang of the brick stitch, you’ll be designing your own earrings in your sleep.
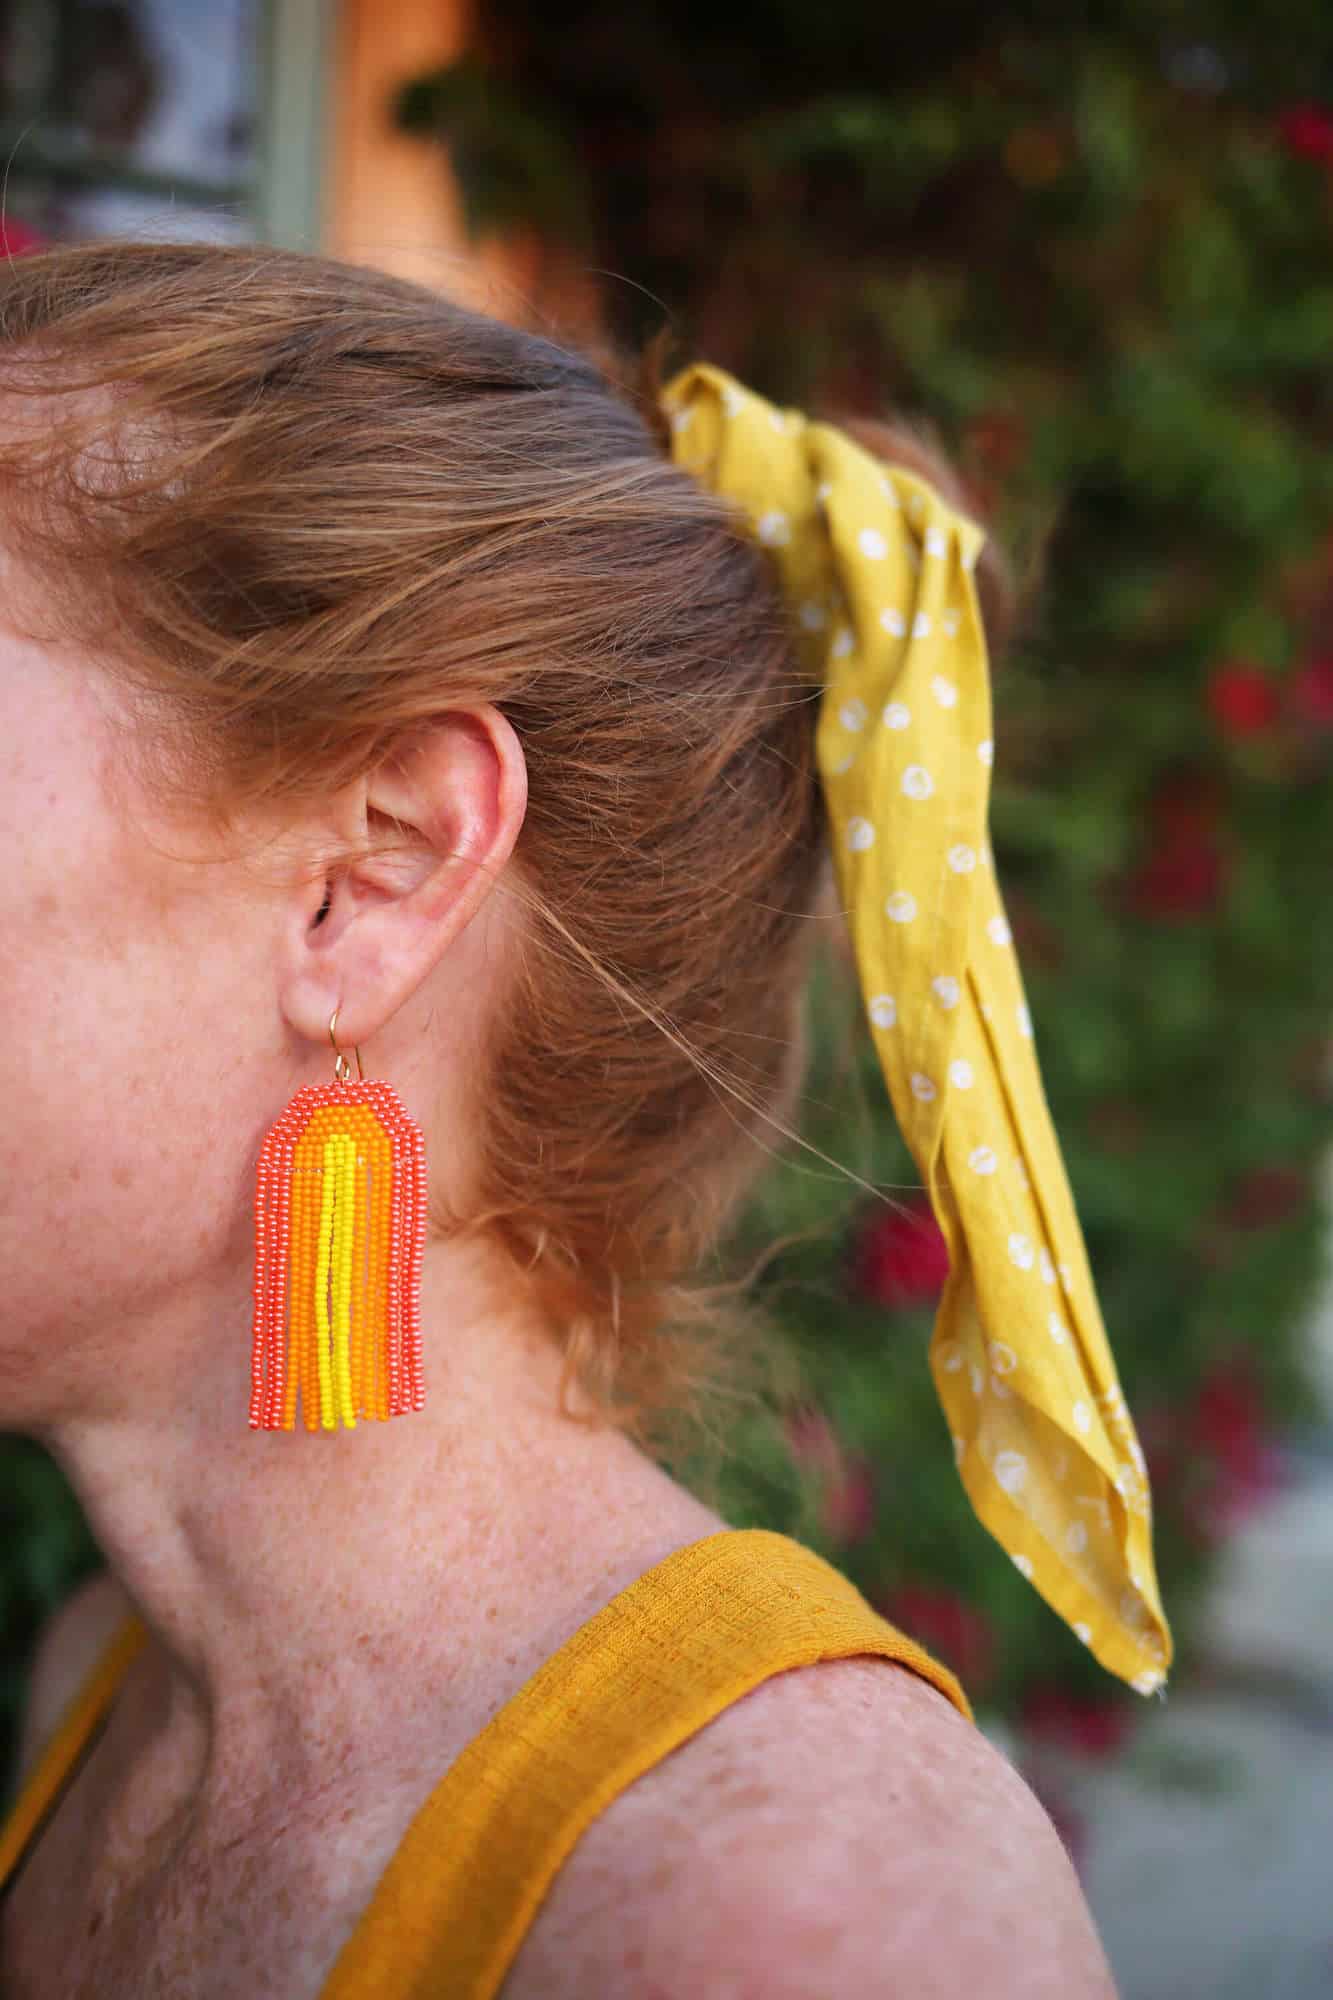 I love the late ’60s vibe these give off! These are the perfect earrings for one more summer adventure—or three, or four …- Rachel
10 Comments
Cute colours! Love how the earrings match the ribbon hairstyle as well. 🙂
Charmaine Ng | Architecture & Lifestyle Blog
http://charmainenyw.com
I love this blog and diy project but it’s really hard to follow with the pictures. Would you consider doing a YouTube video showing the step by step to really see how the stitching is done? Thank you for the consideration and I really love these earrings! ????????????????????
These earrings are amazing! I need to make a pair!
Paige
http://thehappyflammily.com
They’re worth the time it takes to finish both! I have made two other pair in different colors and wear them ALL THE TIME! -Rachel
Love these, Rachel!
Thanks, Janae!!! They were so fun to make!
These are too cute!!! Such a great way to spice up a basic pony or what not!
-Kate
https://daysofkate.com/
As usual, you’ve killed it with this gorgeous project. Great job, Rachel!
Thanks for the love, Vickie! xoxo
Those are so incredibly pretty!
http://www.henatayeb.blogspot.com