

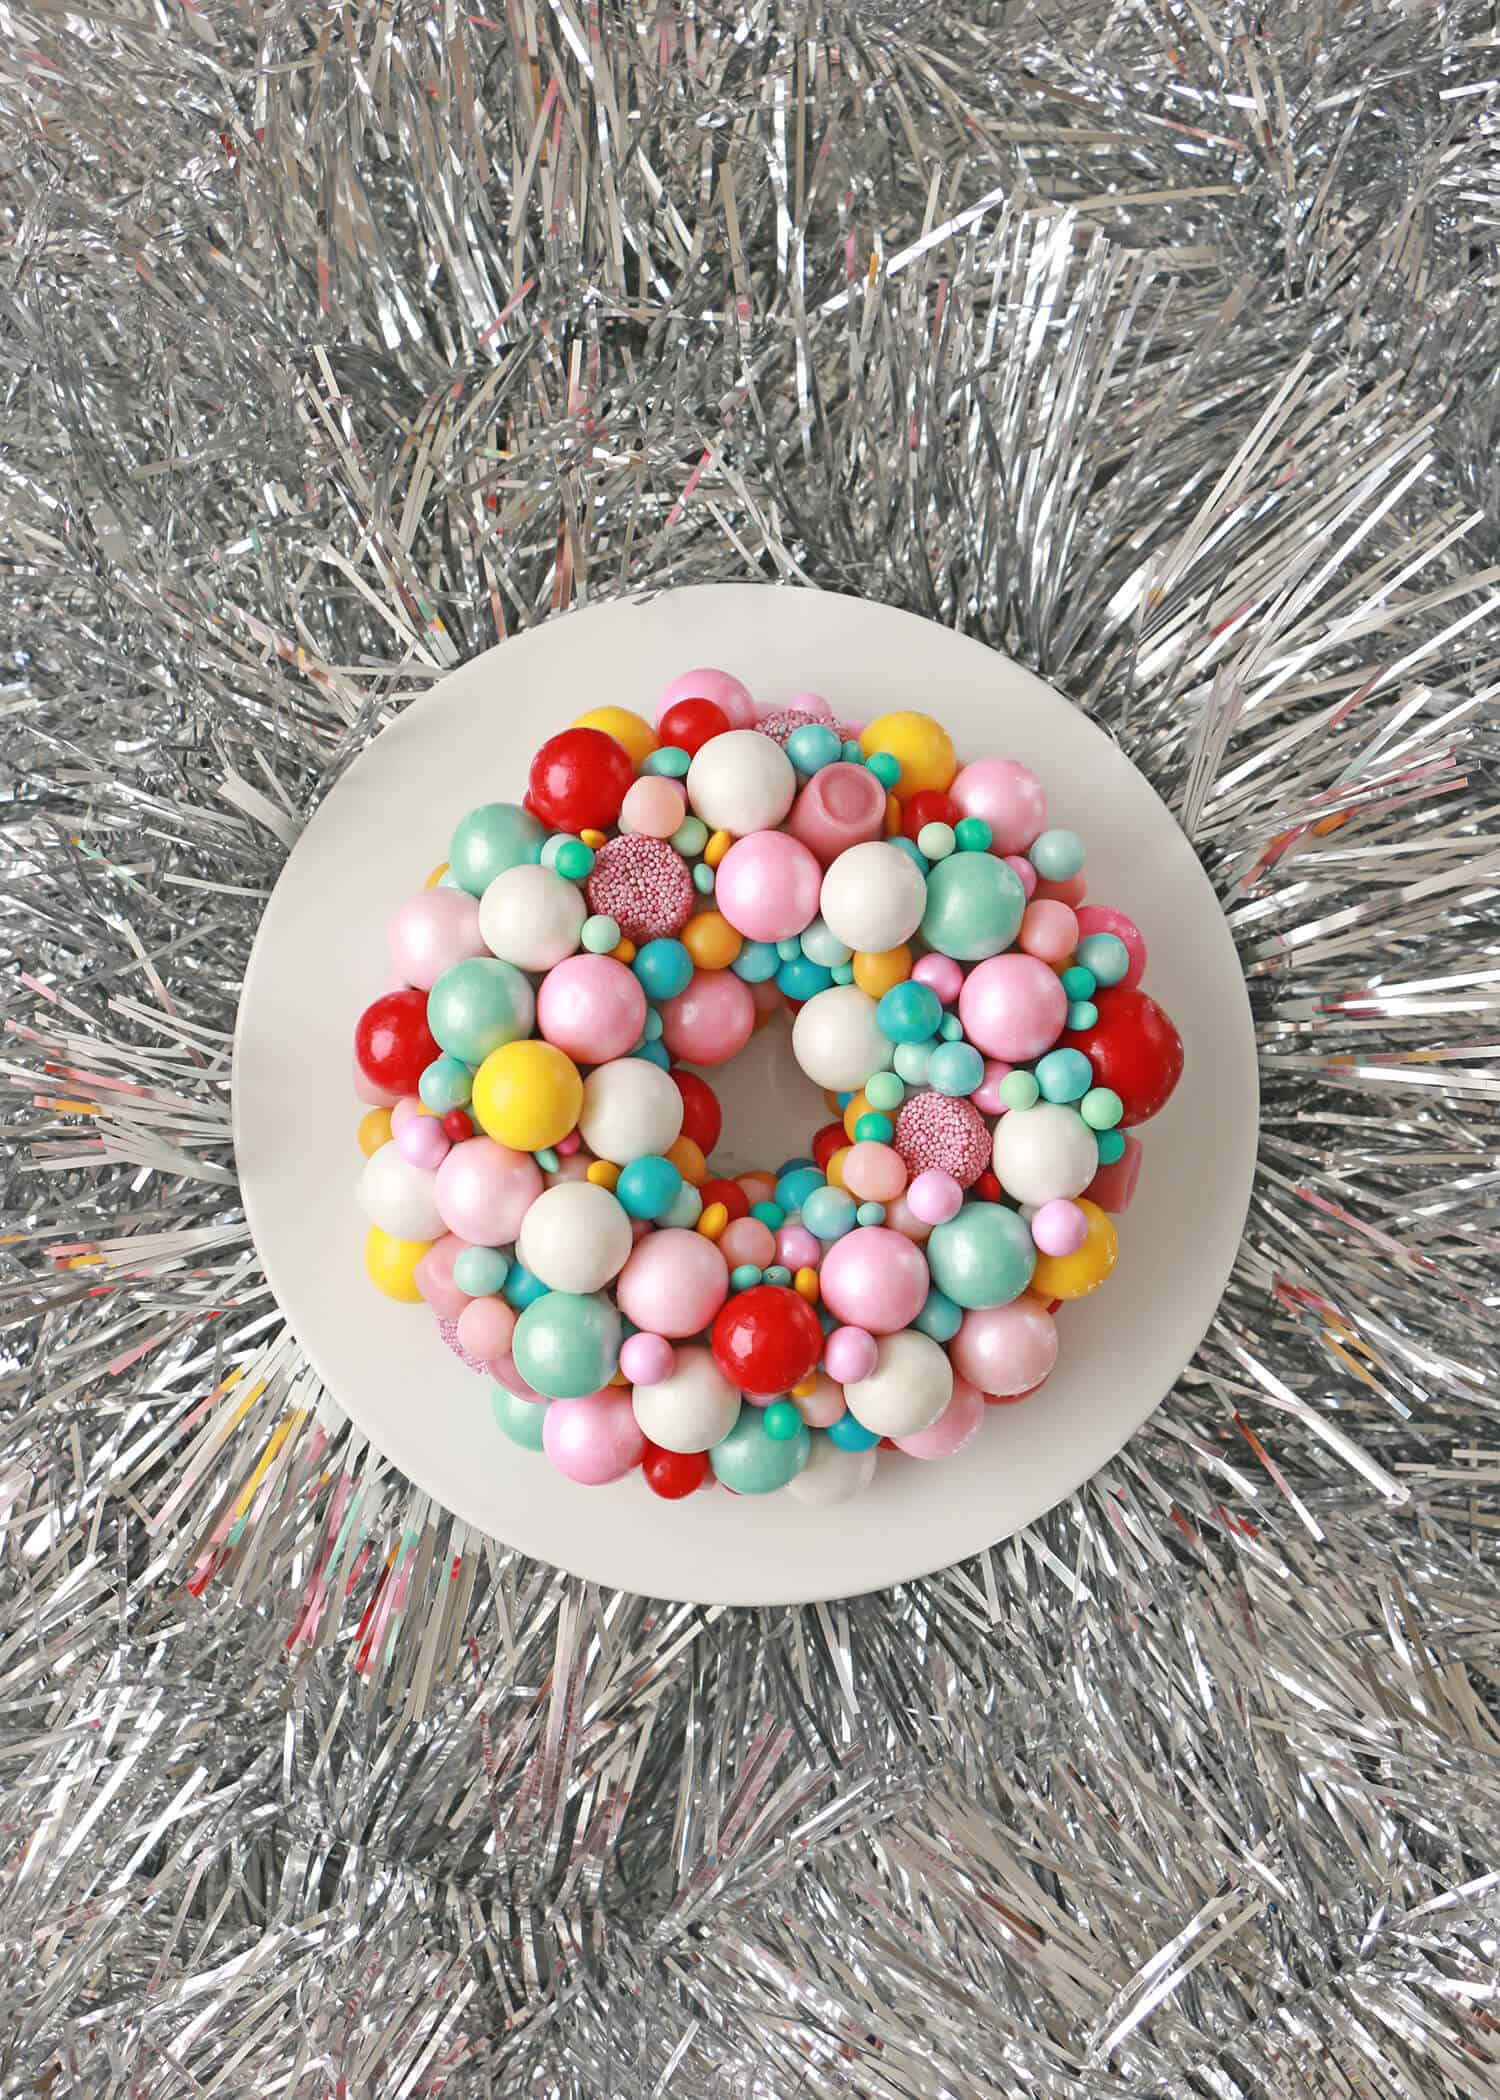
 I love all holiday decorations, but my absolute favorite decorations are those from the past—especially mid-century decorations. Aluminum trees, tinsel, brightly colored glass and metallic ornaments … basically anything full of kitsch and color really makes me swoon. When thinking of holiday dessert ideas, I wanted to pay homage to those beautiful ornament colors of the past, and a wreath cake adorned with retro-colored ornament candies seemed like a pretty perfect way to do that!
 This cake shouldn’t be viewed as a classic party cake you slice into and serve, because let’s be real—there’s a lot of candy on there, and a mouth full of candy with cake wouldn’t be the most enjoyable way to taste your finished masterpiece. Instead, eat this cake in two parts: Pick off and enjoy the candy first, and then get to the cake. The decorating and tasting of this cake is essentially just like a gingerbread house, except with this cake you don’t have to worry about anything collapsing!
 Retro Wreath Cake, makes 2 small cakes
1 box vanilla cake mix
small to large sized round candies (sixlets, gumballs, lollipops, etc.)
colorful candy assortment (gum drops, licorice, marshmallows, etc.)
For the frosting:
2 cups unsalted butter, softened
4 cups powdered sugar
1 tablespoon vanilla extract
black gel food coloring
 For this wreath cake, I’d recommend using a medium-sized (around 6-cup) bundt cake pan, as it’s easier to decorate. But you can also use a large (12-cup) bundt cake pan if you’d like a larger cake surface. To make the base of the wreath, prepare a box cake mix (or any recipe of your choice). Grease your pan, then fill it roughly three-quarters of the way with the batter. Bake your cake as directed, then let the cake slighty cool. Once the pan is cool enough to tough, place a wire rack on top of the bundt pan. While securely holding the pan and rack together, flip over in one fluid motion to unmold the cake. Let the cake cool to room temperature on the wire rack.
 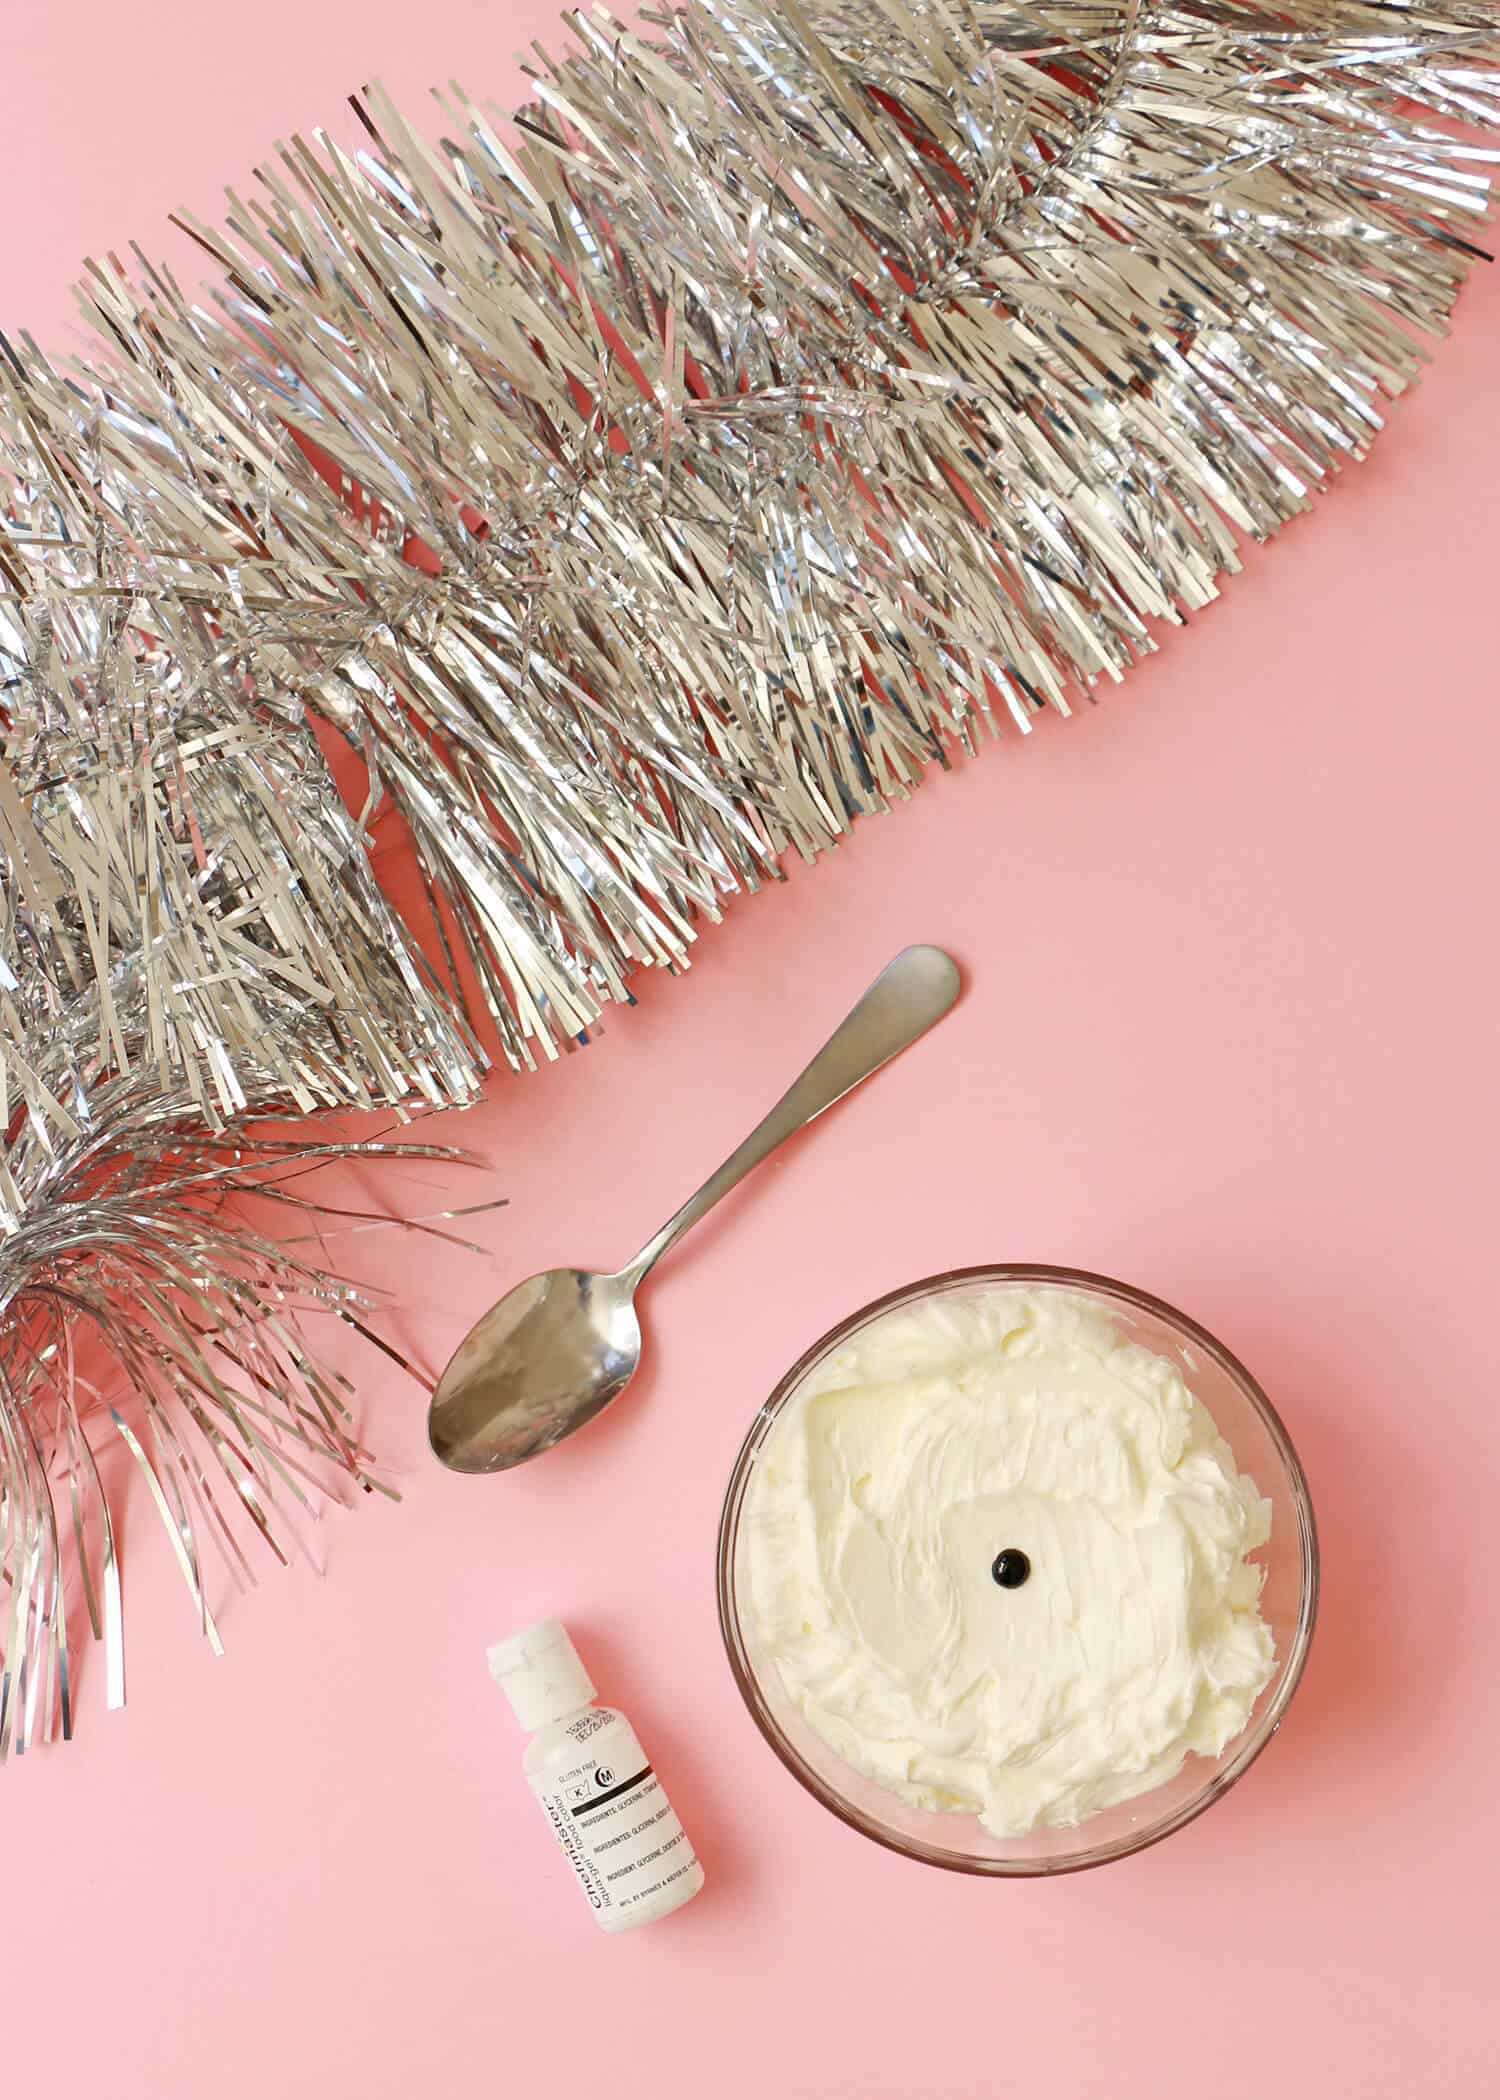 While the cake is cooling, prepare your buttercream frosting. In a large bowl or bowl of your stand mixer, beat the butter on low speed for 1 minute. Gradually add in the powdered sugar and vanilla extract, and beat until smooth. You can keep the frosting white, or if you’re worried about having any of the base show (as I was), you can dye it gray so that it resembles one of the retro silver tinsel wreaths. To color the cake, you will just need to add 1 small drop of black gel food coloring to every 3 cups of frosting. Mix well with a spoon until the color is fully combined.
 Because the height of the baked bundt cake is taller than what we need for our wreath, you’ll actually be able to get two wreaths from one cake. Once the cake has fully cooled, use a serrated knife to cut the cake in half horizontally. Place your top piece aside for now. You can get back to that once you finish your first wreath!
  Frost the base of your wreath cake using a spatula. Don’t worry, it doesn’t have to look perfect (or even decent, for that matter!), as you’ll be covering the base in candy. Just make sure the cake holds to that general wreath shape once frosted. If there’s any uneven spots, use additional buttercream to even them out.
  Now it’s time for the fun part! To decorate, first add your smaller round candies along the inner ring of the wreath, as this area is tricky to get to once you have added your other candies on. Add smaller round candies along the exterior ring edge as well to keep to that rounded wreath shape. From there, add on the medium and large round candies, as well as any other colorful candies, as you work your way to the top of the cake.
 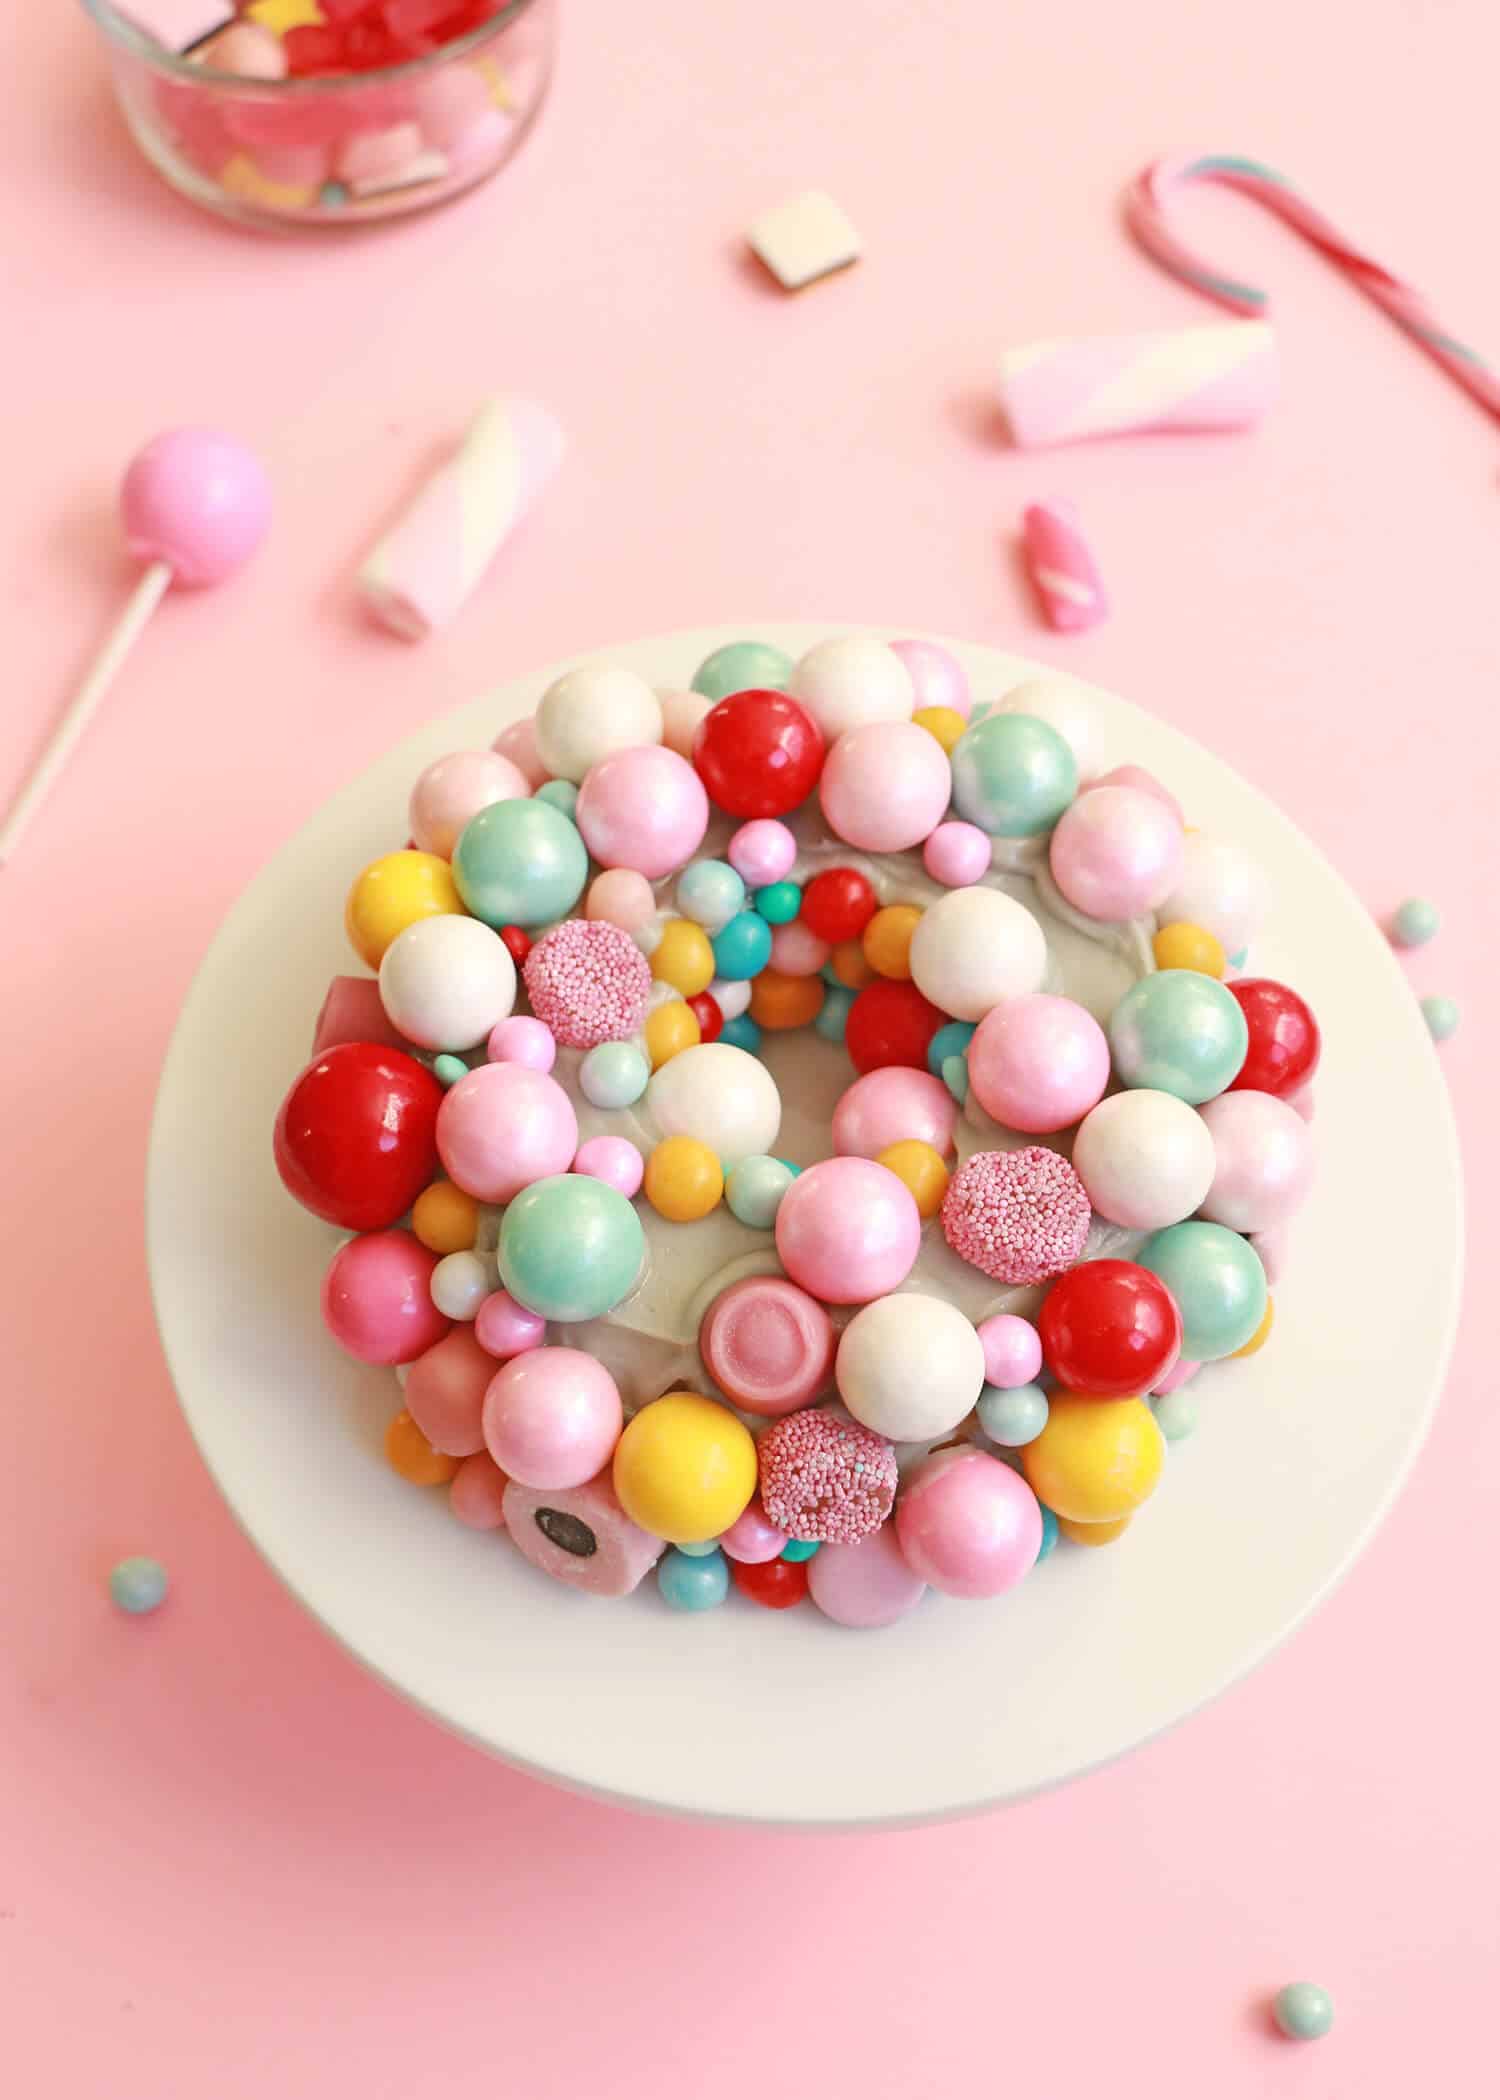 Continue until your cake is filled with the candy ornaments. I chose to decorate my wreath cake with primarily round “ornaments,” but you could also add on marshmallows, candy canes or even a candy bow. To fill any gaps, add a little frosting to the backside of the smaller round candies and then position them onto your wreath.
Once you’ve finished decorating your wreath, place the cake in the refrigerator for at least 20 minutes to allow the cake to set. As it sets, the frosting will become firm and the candy will set securely in place around the cake. 
 I think the most entertaining way to serve this cake would be to put it out on display at your holiday party, and encourage guests (especially any kids) to pick off whatever candy they desire. Once the candy has been properly picked off, slice and serve the cake. Or, you could just slice and serve as is, allowing the guests to pick off their own candy … totally up to you! Either way, this retro wreath cake is sure to be the center of attention at your holiday party! xo. Alana
Retro Wreath Cake, makes 2 small cakes
Ingredients
- 1 box vanilla cake mix
- small to large sized round candies sixlets, gumballs, lollipops, etc.
- colorful candy assortment gum drops, licorice, marshmallows, etc.
- For the frosting:
- 2 cups unsalted butter softened
- 4 cups powdered sugar
- 1 tablespoon vanilla extract
- black gel food coloring
Instructions
-
For this wreath cake, I’d recommend using a medium-sized (around 6-cup) bundt cake pan, as it’s easier to decorate. But you can also use a large (12-cup) bundt cake pan if you’d like a larger cake surface. To make the base of the wreath, prepare a box cake mix (or any recipe of your choice). Grease your pan, then fill it roughly three-quarters of the way with the batter. Bake your cake as directed, then let the cake slighty cool. Once the pan is cool enough to tough, place a wire rack on top of the bundt pan. While securely holding the pan and rack together, flip over in one fluid motion to unmold the cake. Let the cake cool to room temperature on the wire rack.
-
While the cake is cooling, prepare your buttercream frosting. In a large bowl or bowl of your stand mixer, beat the butter on low speed for 1 minute. Gradually add in the powdered sugar and vanilla extract, and beat until smooth. You can keep the frosting white, or if you’re worried about having any of the base show (as I was), you can dye it gray so that it resembles one of the retro silver tinsel wreaths. To color the cake, you will just need to add 1 small drop of black gel food coloring to every 3 cups of frosting. Mix well with a spoon until the color is fully combined.
-
Because the height of the baked bundt cake is taller than what we need for our wreath, you’ll actually be able to get two wreaths from one cake. Once the cake has fully cooled, use a serrated knife to cut the cake in half horizontally. Place your top piece aside for now. You can get back to that once you finish your first wreath!
-
Frost the base of your wreath cake using a spatula. Don’t worry, it doesn’t have to look perfect (or even decent, for that matter!), as you’ll be covering the base in candy. Just make sure the cake holds to that general wreath shape once frosted. If there’s any uneven spots, use additional buttercream to even them out.
-
Now it’s time for the fun part! To decorate, first add your smaller round candies along the inner ring of the wreath, as this area is tricky to get to once you have added your other candies on. Add smaller round candies along the exterior ring edge as well to keep to that rounded wreath shape. From there, add on the medium and large round candies, as well as any other colorful candies, as you work your way to the top of the cake.
-
Continue until your cake is filled with the candy ornaments. I chose to decorate my wreath cake with primarily round “ornaments,” but you could also add on marshmallows, candy canes or even a candy bow. To fill any gaps, add a little frosting to the backside of the smaller round candies and then position them onto your wreath.
Once you’ve finished decorating your wreath, place the cake in the refrigerator for at least 20 minutes to allow the cake to set. As it sets, the frosting will become firm and the candy will set securely in place around the cake.
10 Comments
Possibly the cutest cake ever! Such a great idea to recreate a vintage mercury glass wreath. It would be so fund to pick out all of the candy decorations and snack on them while decorating. Love this idea!
This is the most amazing cake I have ever seen! I love the retro vibe and its so festive. I’m totally bringing this to Christmas Dinner with our friends. Thank you, ABM!
Bundt cakes might be my favorite thing to make, they look so pretty but are simply to create! I think I’m going to try this recipe out to share with my workmates, I’d like to insert a little holiday cheer everywhere! Yum 🙂
Wow, such a cute colourful look! I wouldn’t be able to tell it’s a cake without reading the post, but I love it so much. Perfect for a bubbly party! 🙂
Charmaine Ng | Architecture & Lifestyle Blog
http://charmainenyw.com
That is so cool, I didn’t even know it was a real cake when I saw the picture!
https://www.makeandmess.com/
I love this cake! It is beautiful!
Paige
http://thehappyflammily.com
My jaw literally dropped when I saw this post! This cake is stunning! What an awesome idea!
That’s a pretty and lovely cake!! <3
http://www.bigdreamerblog.com
Wow this cakke looks so cute
http://thepinkpineappleblog.blogspot.com/2017/12/5-ways-to-dress-in-holidays_19.html
ADORBS! I am making this cake for my bestie on her birthday next week. Thank you so much for sharing. Does Alan also ship custom cakes for events?