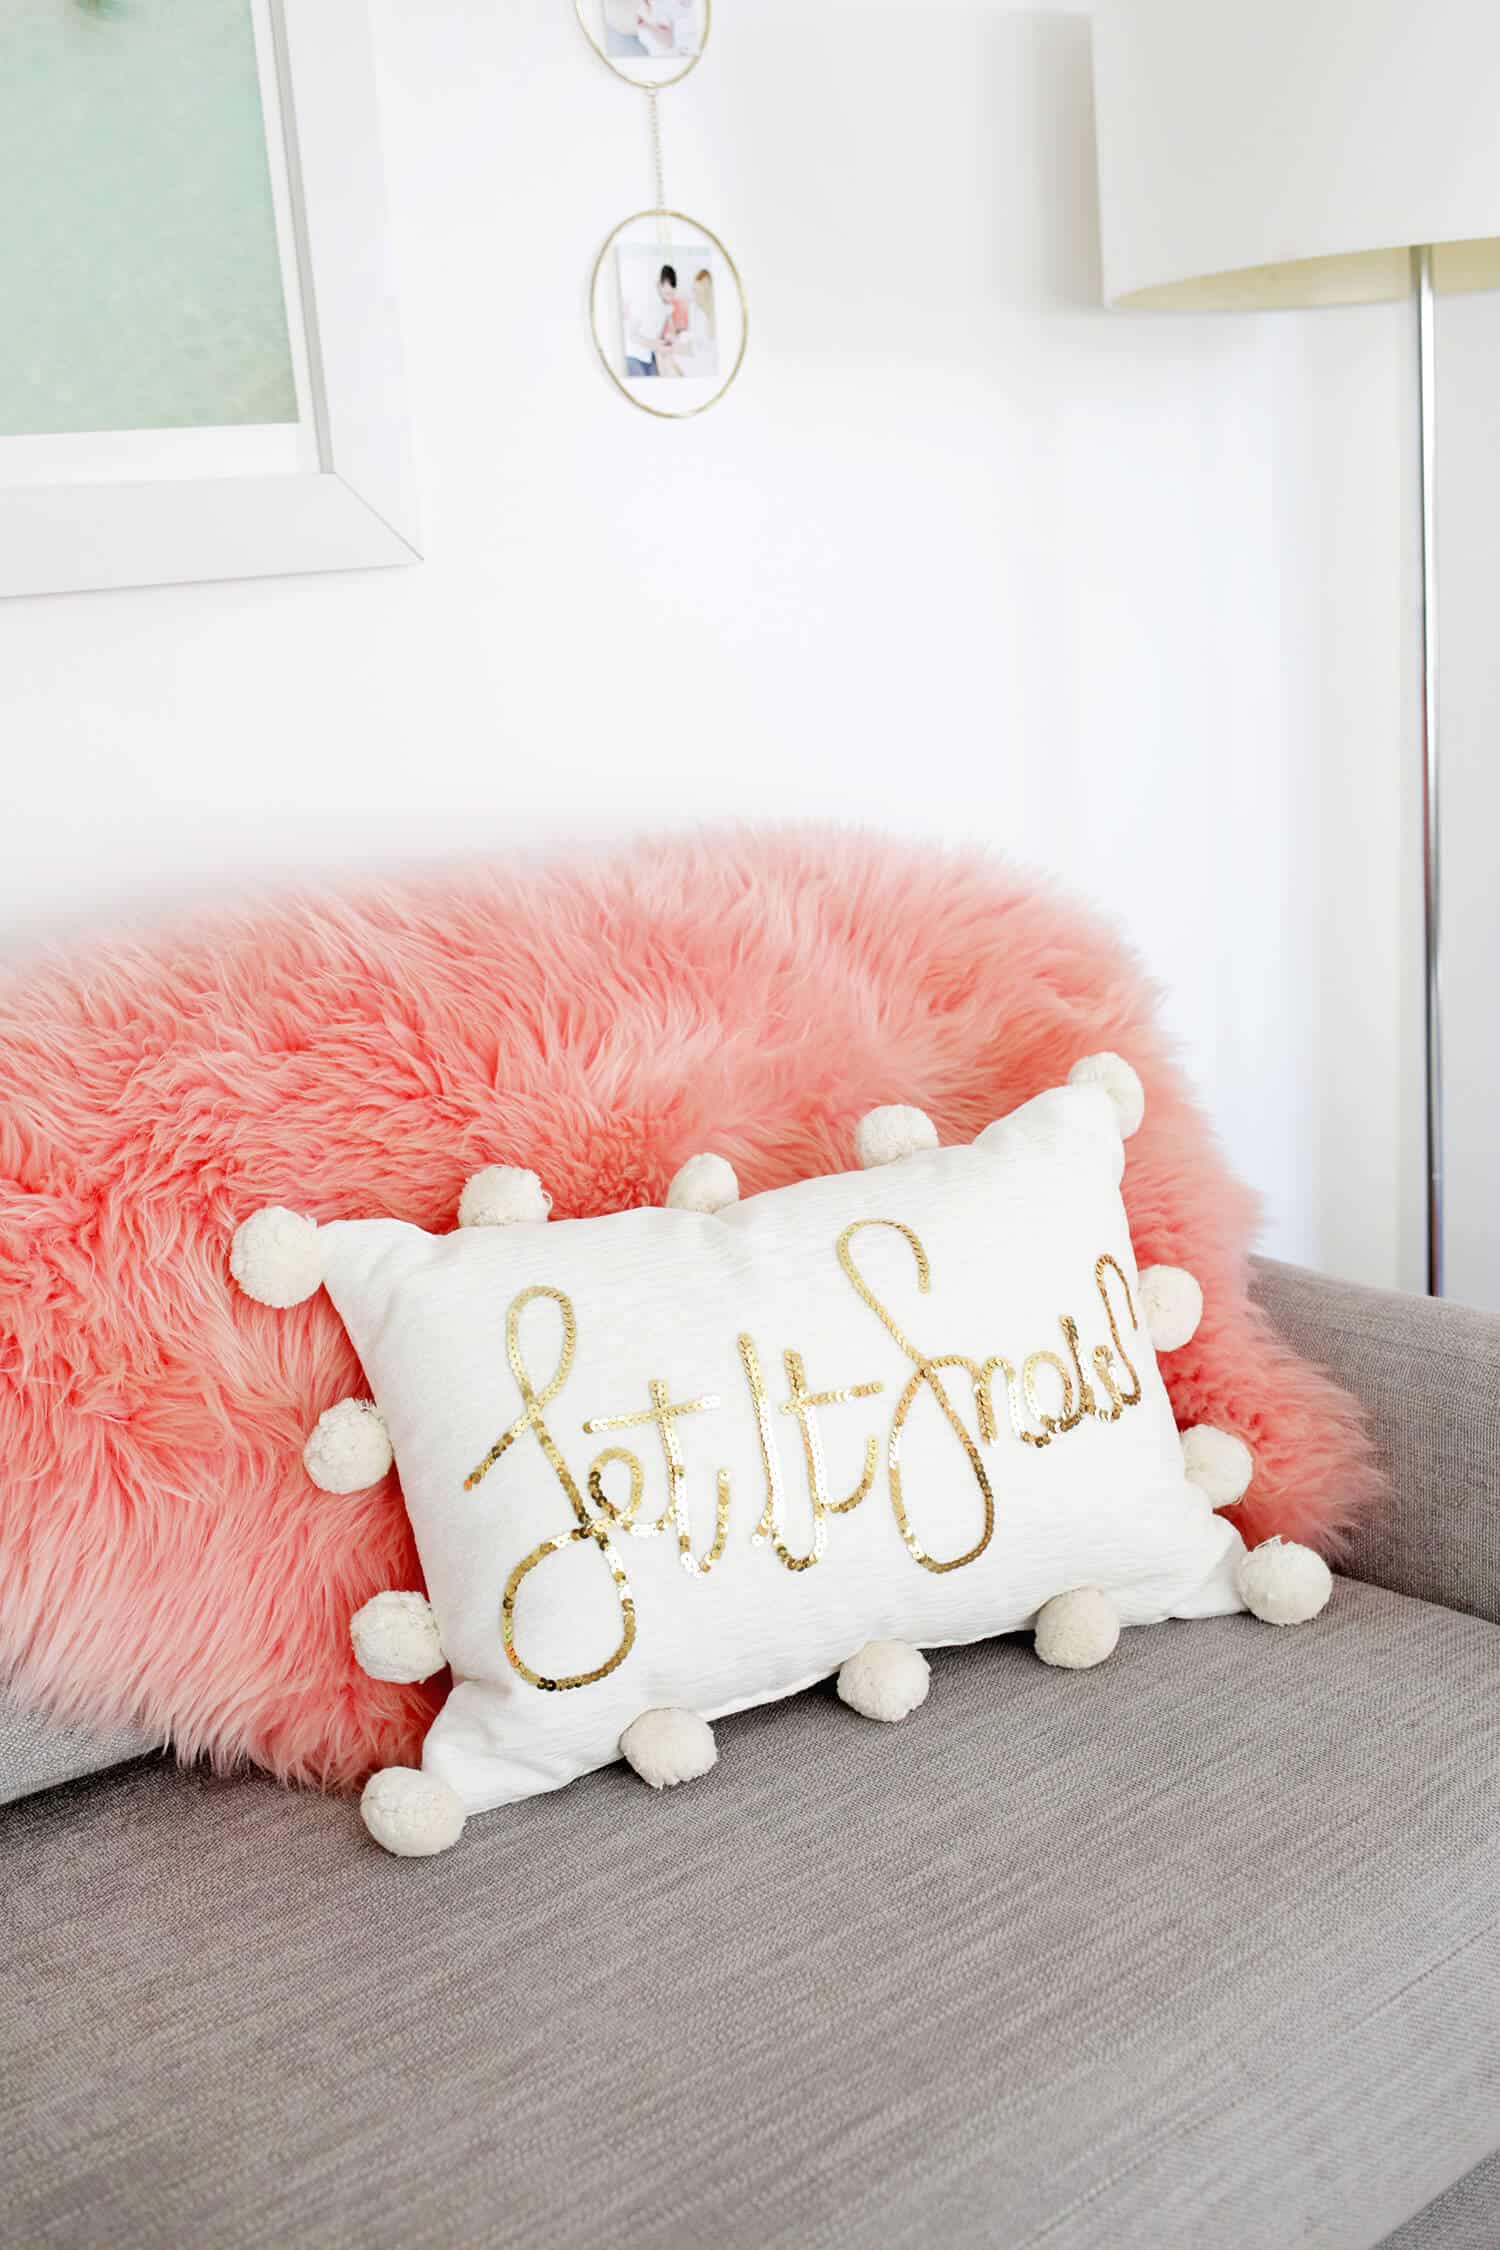
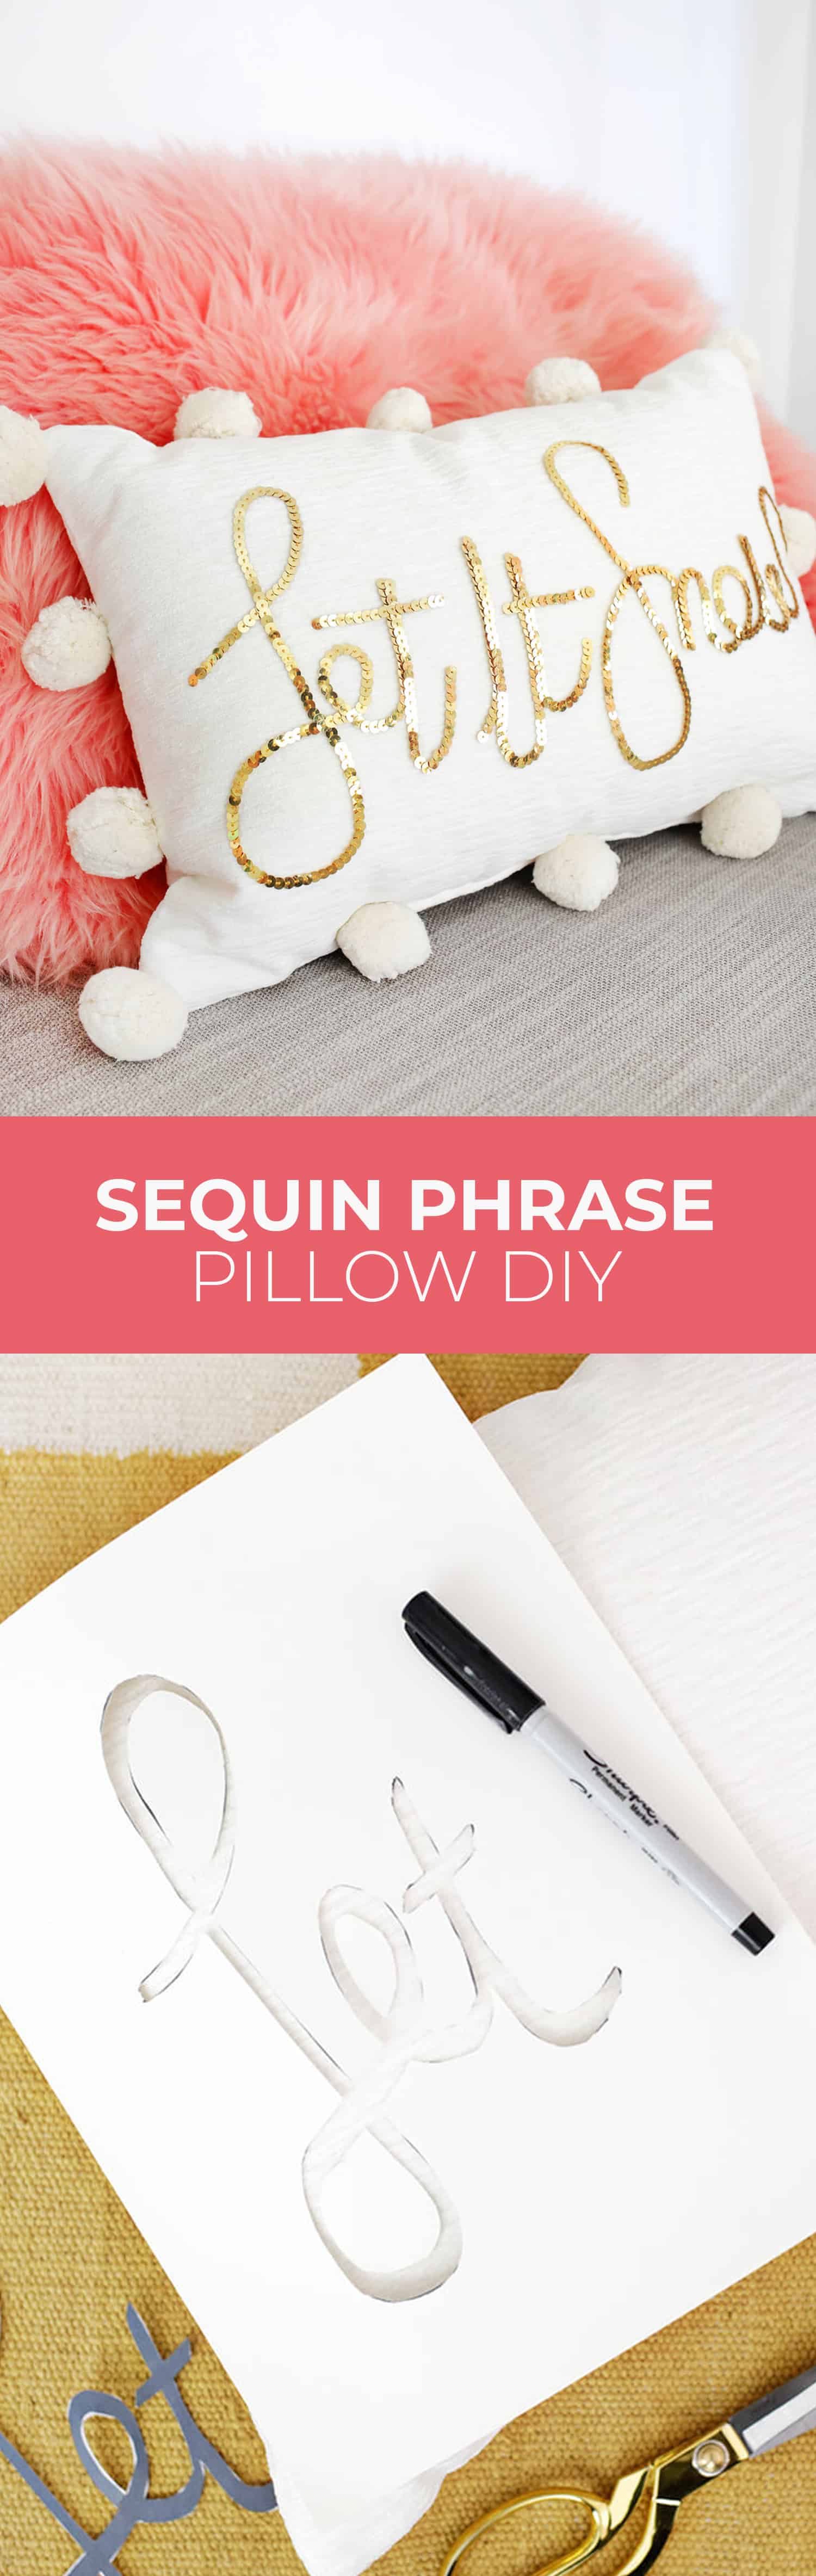
 While I’m over here in Nashville wishing for spring, the weather has other plans as we just had our first big snows of the season. I like to keep warm weather plants and photos of beach and desert scenes in the house to keep my mood up in the dull winter months, but I have to admit that the recent snows were pretty cozy (and beautiful!). So I thought I’d dedicate my next pillow project to the winter season and add a sequin phrase pillow into the mix to add a little sparkle to the couch. Here’s how to make your own sequin phrase pillow:
 Supplies:
-plain pillow (an oblong shape was best for my phrase)
–sequin trim
-fabric glue
-straight pins and fabric scissors
–Let It Snow Phrase Download
 First, either print out the “let it snow” phrase (resize if needed for your pillow) or create your own with a cursive font or handwriting the correct size for your pillow. Next, use scissors or an X-Acto knife to cut out your words so that you have a paper with the negative space where the words should be. Place that paper onto your pillow in the appropriate spot and use a pen to trace the words in your phrase onto your pillow (just a thin line will do so you know where to place your sequin trim). If you have a longer phrase, you’ll probably need to do one word at a time if you are printing it on to regular-sized paper first.
 Use straight pins to pin your sequin trim along the traced phrase line until you have your words pinned on. There may be a few areas (like on my “I” and “t”s) where you have to backtrack on the sequin trim to get back down to the bottom, so just pin the second layer of trim on top of the first and you’ll glue them together so they read as one line later. Cut and save any floating pieces (like the dots of “i”s or crosses of “t”s) until the very last step.
 Once all your letters are pinned in place, start at the beginning of your phrase and slowly remove one pin at a time. Use your fabric glue to glue each section in place. Continue removing pins and glueing sections down until your whole phrase is secure. Add your finishing pieces like the crosses of your “t”s and let your glue fully dry.
 I wanted to add something extra to my pillow, so I took some pom poms that had been removed from an old blanket and sewed those around the edges to give it an extra pop of texture.
  It looks great! As you can see, if you need to backtrack on part of a letter, just glue your second layer of sequins almost directly on top of the original path (like on the “it” section) then it will still read as one line and you won’t have to keep cutting your trim in lots of different spots.
 It’s a little tedious to pin your phrase in place and glue it down little by little, but overall I think the effect of having a custom sequin phrase is totally worth a little extra effort. This pillow looks so cute and I’ll take any little thing that helps to make the winter a bit brighter while waiting for spring. Hope you love this way to add a little sparkle into your home! xo. Laura
19 Comments
That pillow looks so stylish, what a cool idea!
https://www.makeandmess.com/
I definitely love it!
With love from Bavaria/Germany, Rena
http://www.dressedwithsoul.com
Very cute indeed! The great thing about it is you can do any words you want 🙂
Charmaine Ng | Architecture & Lifestyle Blog
http://charmainenyw.com
Ah I have always wanted to go to Nashville! This DIY is so cute!! I love making my own pillows, I use to make them in Textiles class, and should definitely do it again! Definitely going to give this one a go! xx
http://zoe-ware.blogspot.ca
This is adorable! I love it so much!
Paige
http://thehappyflammily.com
cupshe.com has some awesome bathing suits!
Oh my goodness that’s adorable! You guys seriously have the best, cutest DIY ideas. Love it!
http://pullenscozycorner.com
I am definitely ready for spring to get here. This pillow is so cute and doesn’t look like it would be too hard to make.
xoxo
Stacey
http://staceylyynn.wixsite.com/stylingsofstacey
This is so adorable! And such gorgeous lettering.
-Jacqueline
Jackieomy.com
It’s the same here. I went to pack away my “baby it’s cold outside” mug yesterday and was laughed at by my husband. In his defence, it snowed again toady!
Such a cute DIY! It’d so easy to make these into his & hers pillows.
This is such a creative idea! It looks store bought for sure!!
good articles, can inspire readers
I need to make those ! They are so pretty !
https://thefrenchiestblog.wordpress.com
This is such a cute DIY! I love how versatile this idea is. I definitely want to make some myself.
Thank you for the post guys! You have given me some great ideas for my little ones blanket 🙂 Can’t wait to get started! Thank you very much!
Love the photos by the way! 🙂
All best!
Fantastic instructions & Ideas
This is so cute!! Though I wonder if fabric glue would be good enough if I want to throw the cushion in the wash every now and then. I’d probably have to sew the words on to make the pillow washable, right?
Yes, probably!
Laura