
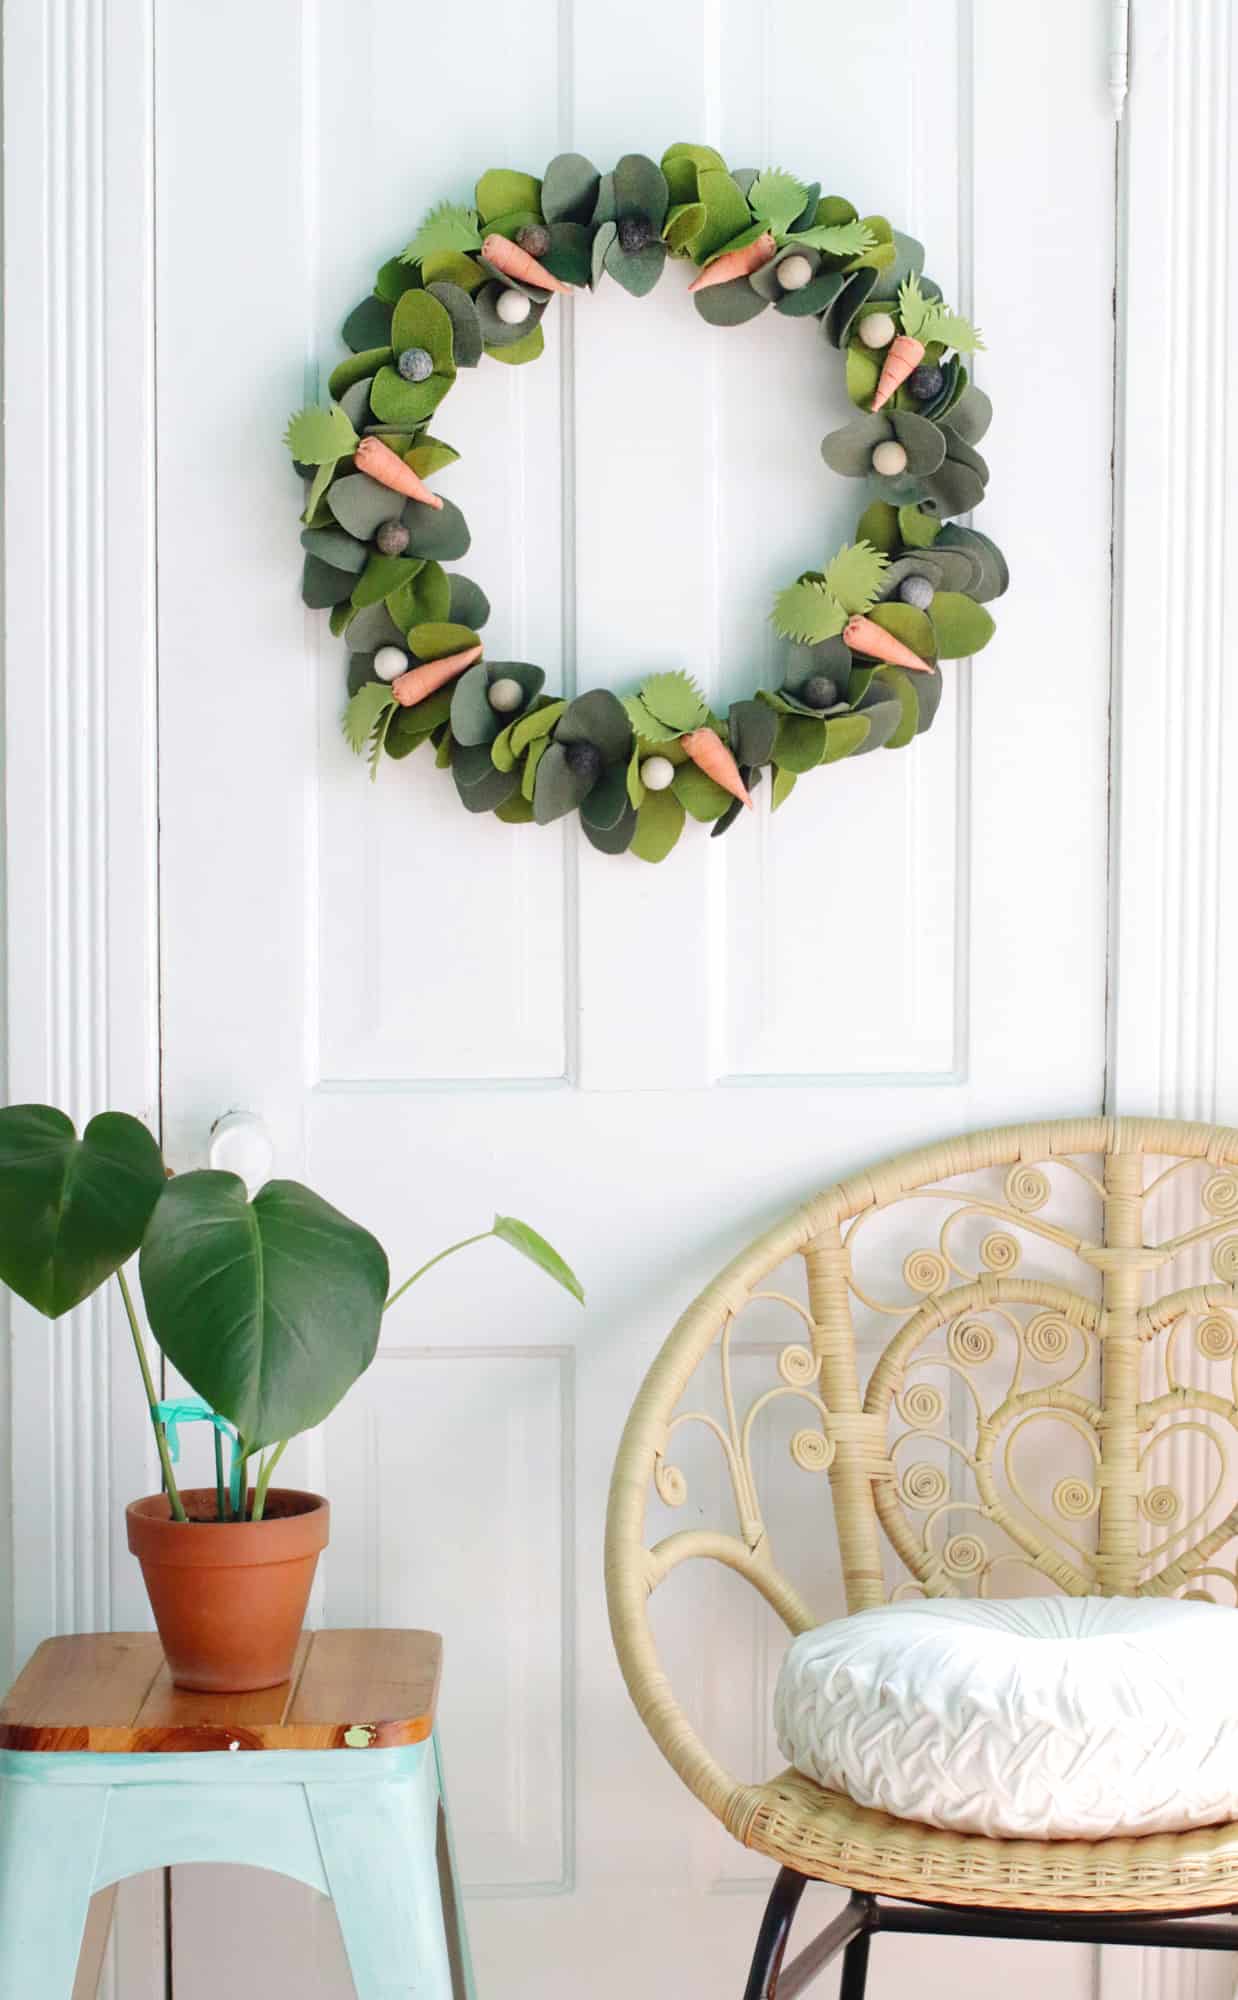
 Since we’ve been staying home 24/7, I have found myself with a lot more crafting time on my hands. I’ve also been cooking so much more, my house is cleaner than ever, and I have rediscovered my love for creating things with a few supplies and a lot of imagination! I made this wreath last week and I love how cheery and springy it is.
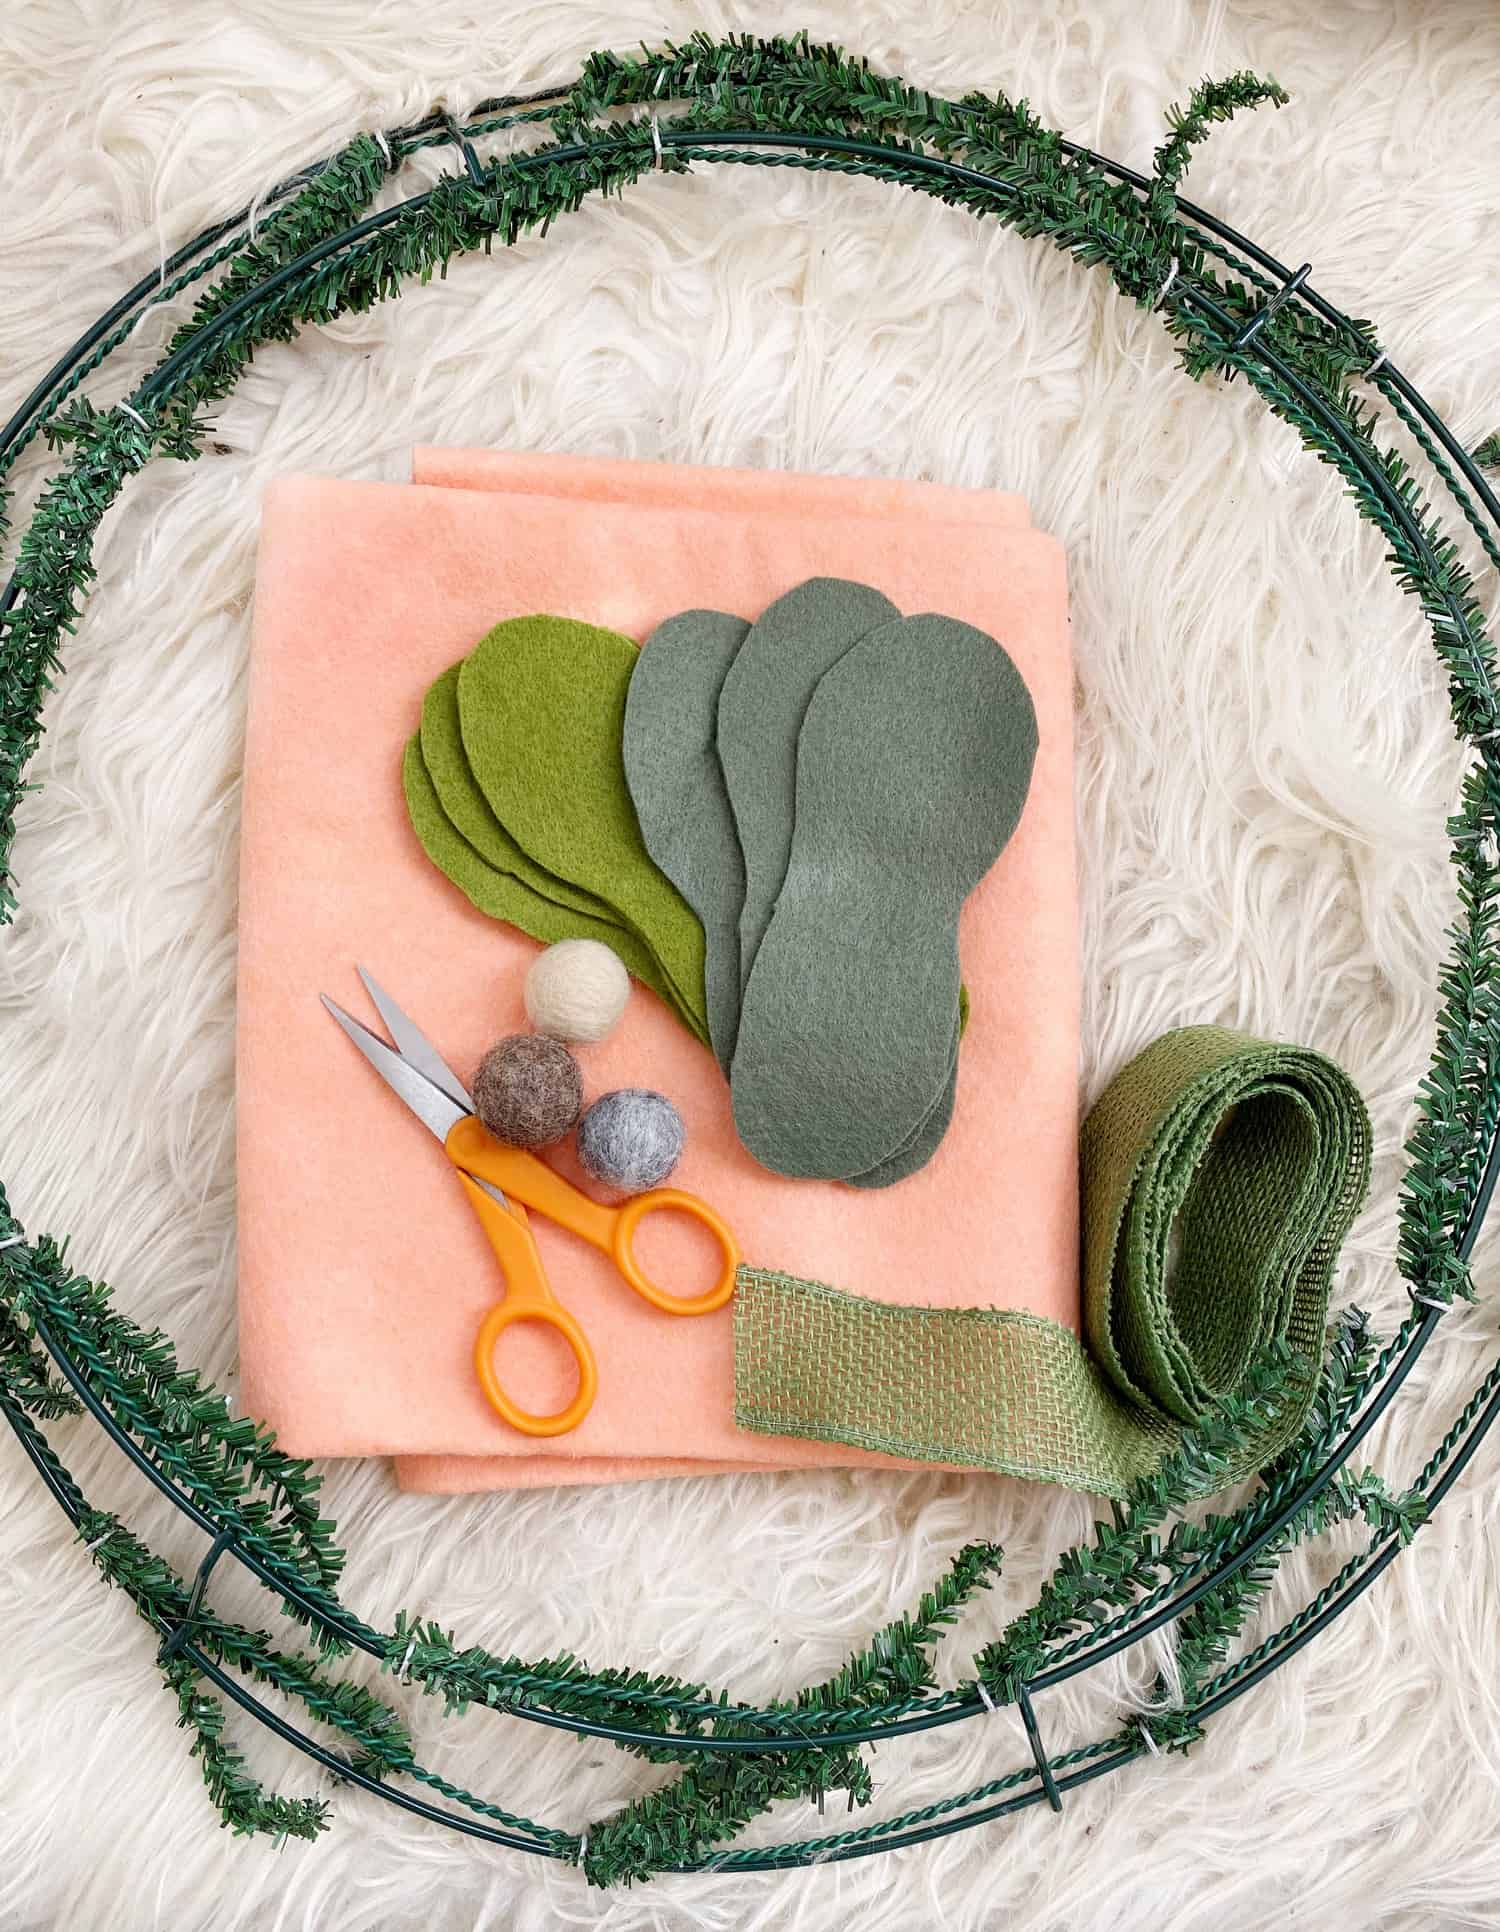 Supplies:
–wreath base
–wool felt
–fiberfill
–burlap ribbon
–felt balls
-needle and thread
–hot glue gun
-chopstick
–scissors
–wire cutters
–spring wreath pattern
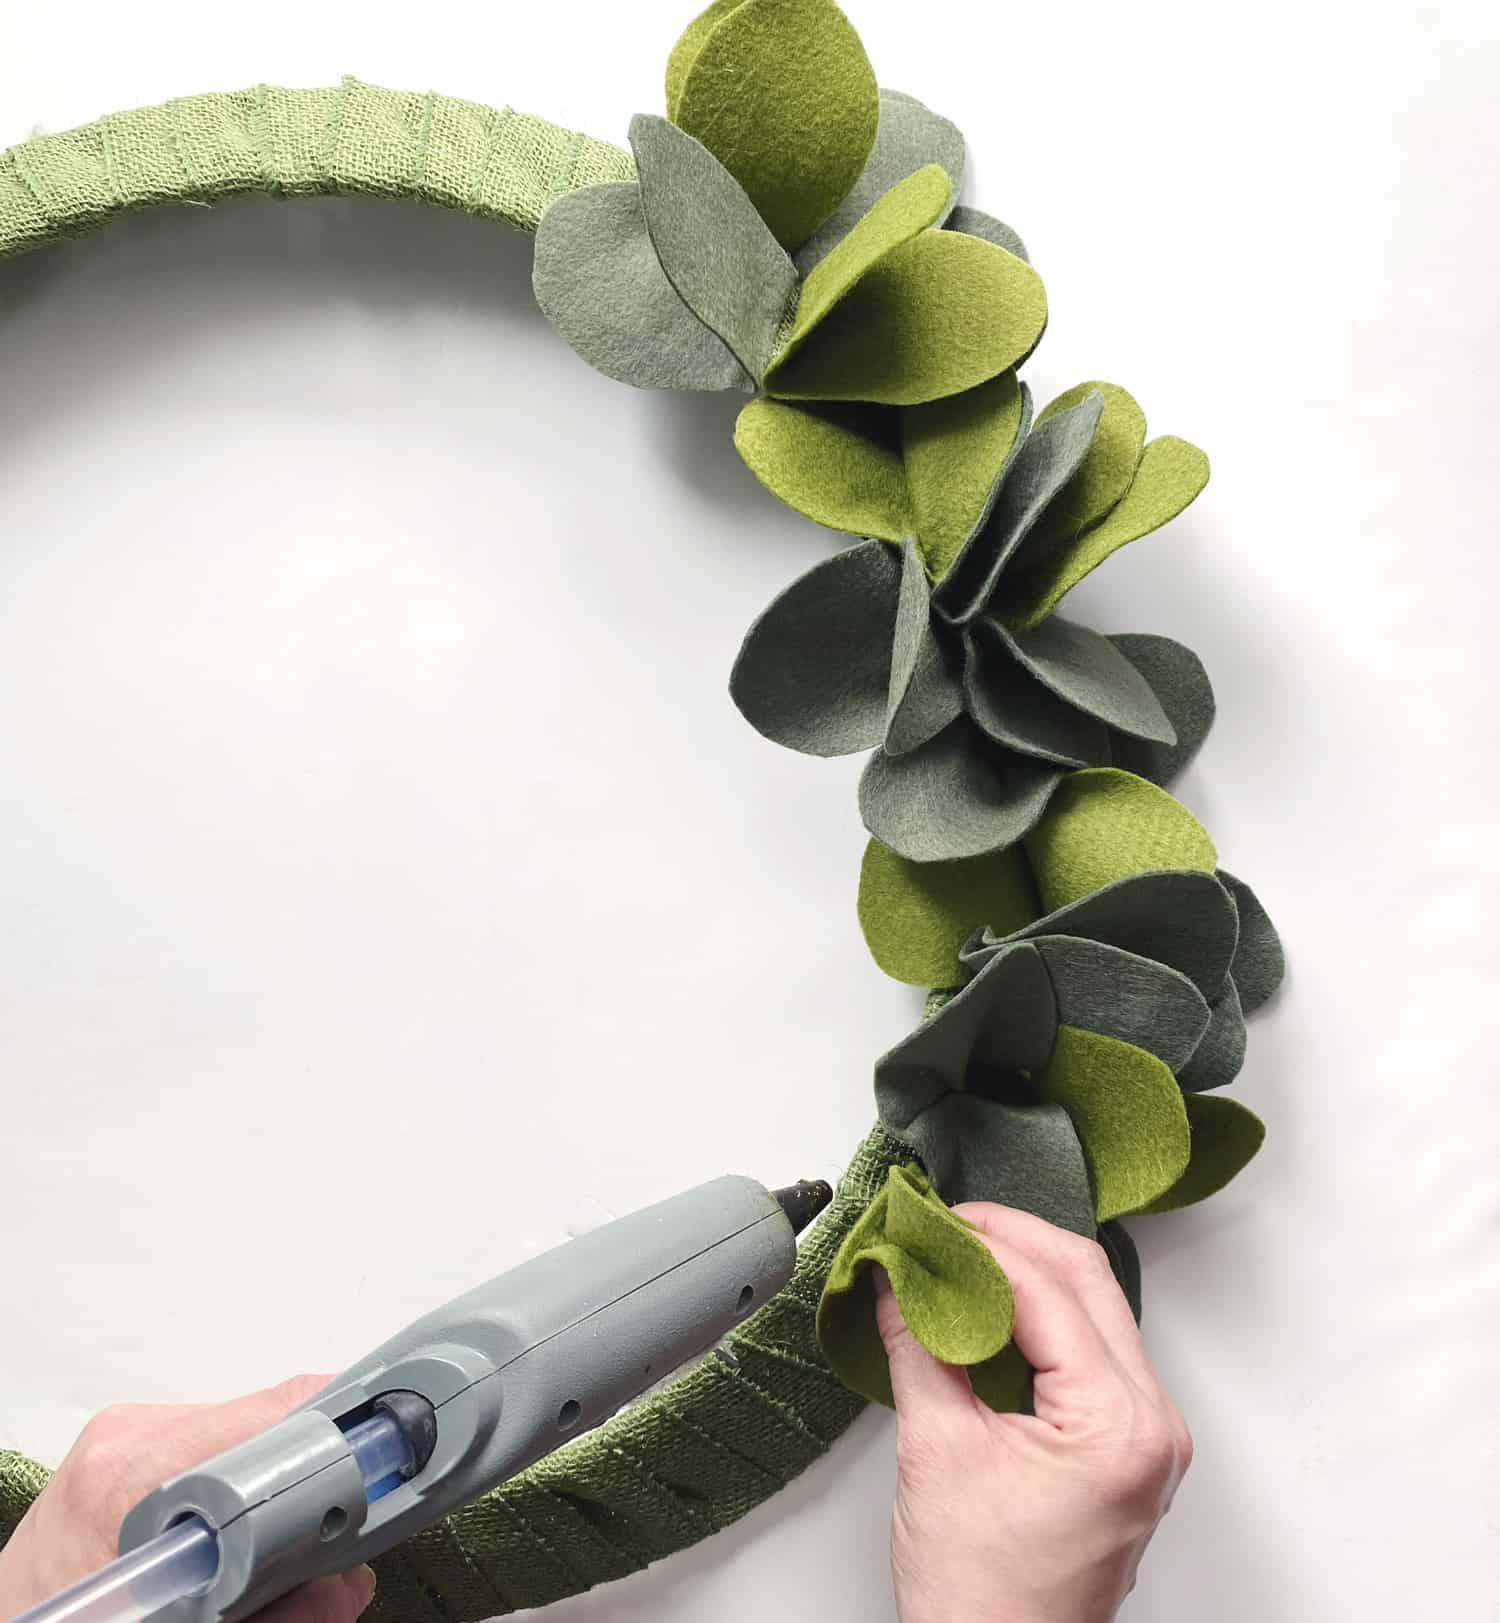 To begin, print out the spring wreath pattern. Use the pattern to cut out your felt pieces. Remove the branches from the wreath with wire cutters and wrap the outside edges of the wreath with burlap ribbon. Start gluing the leaves to the wreath by folding them in half and alternating colors and directions.
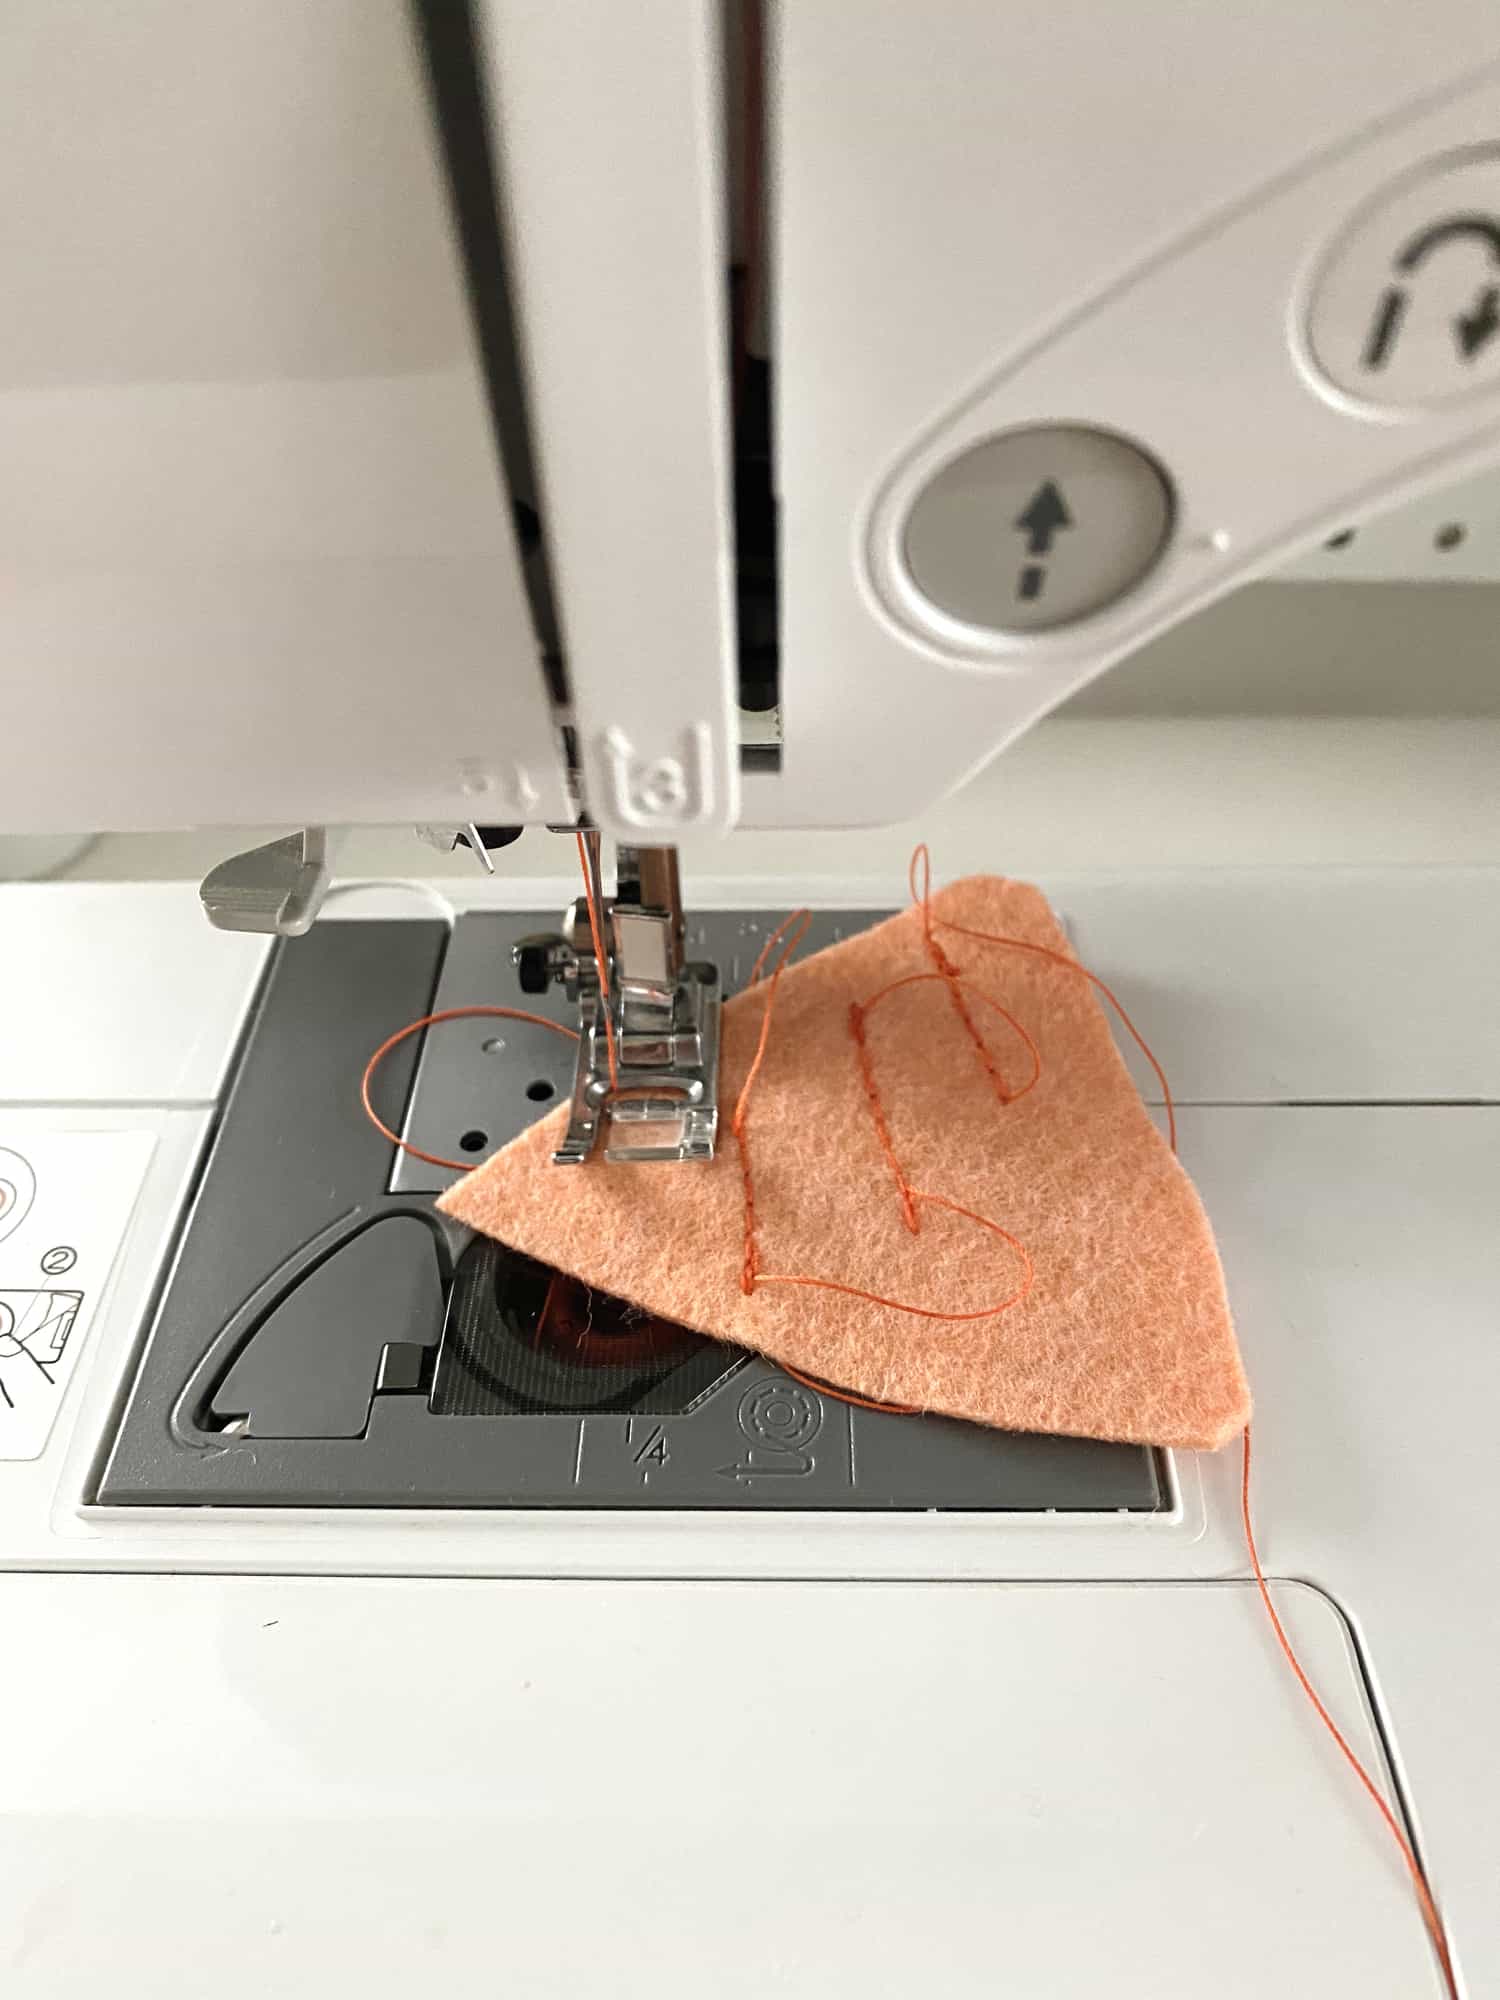

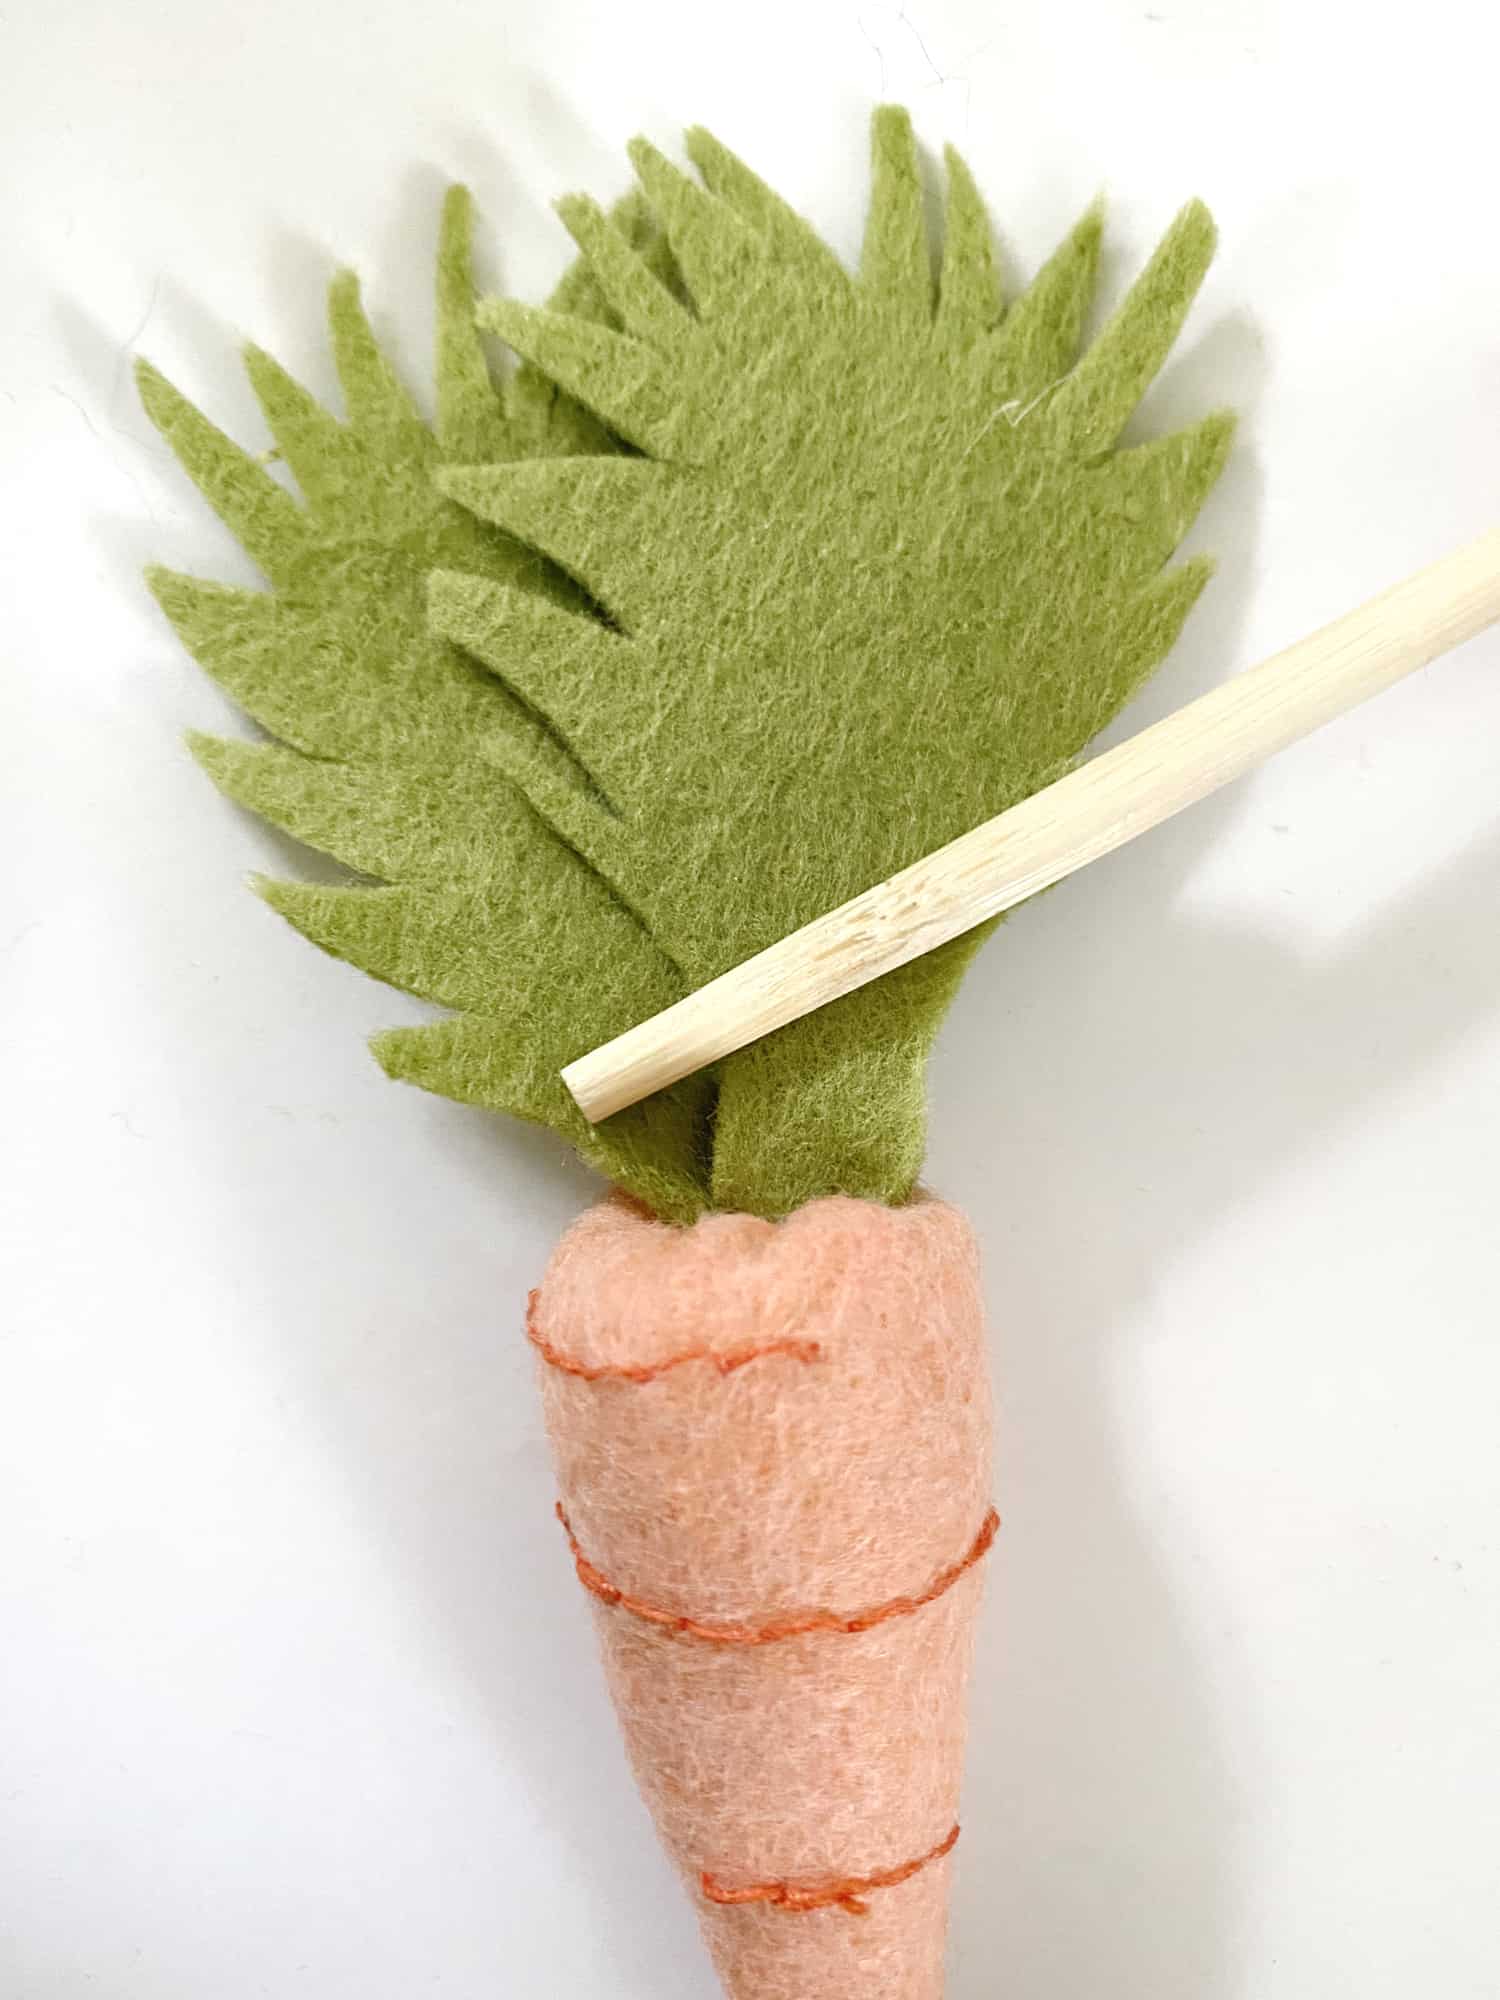 Add contrasting lines to your cut carrot piece, either by hand stitching or machine stitching. Fold in half lengthwise and sew up the back using a whipstitch. Stuff with fiberfill and close the top by using a running stitch and pulling your thread tight. Stuff your carrot top pieces into the small remaining opening with a chopstick.
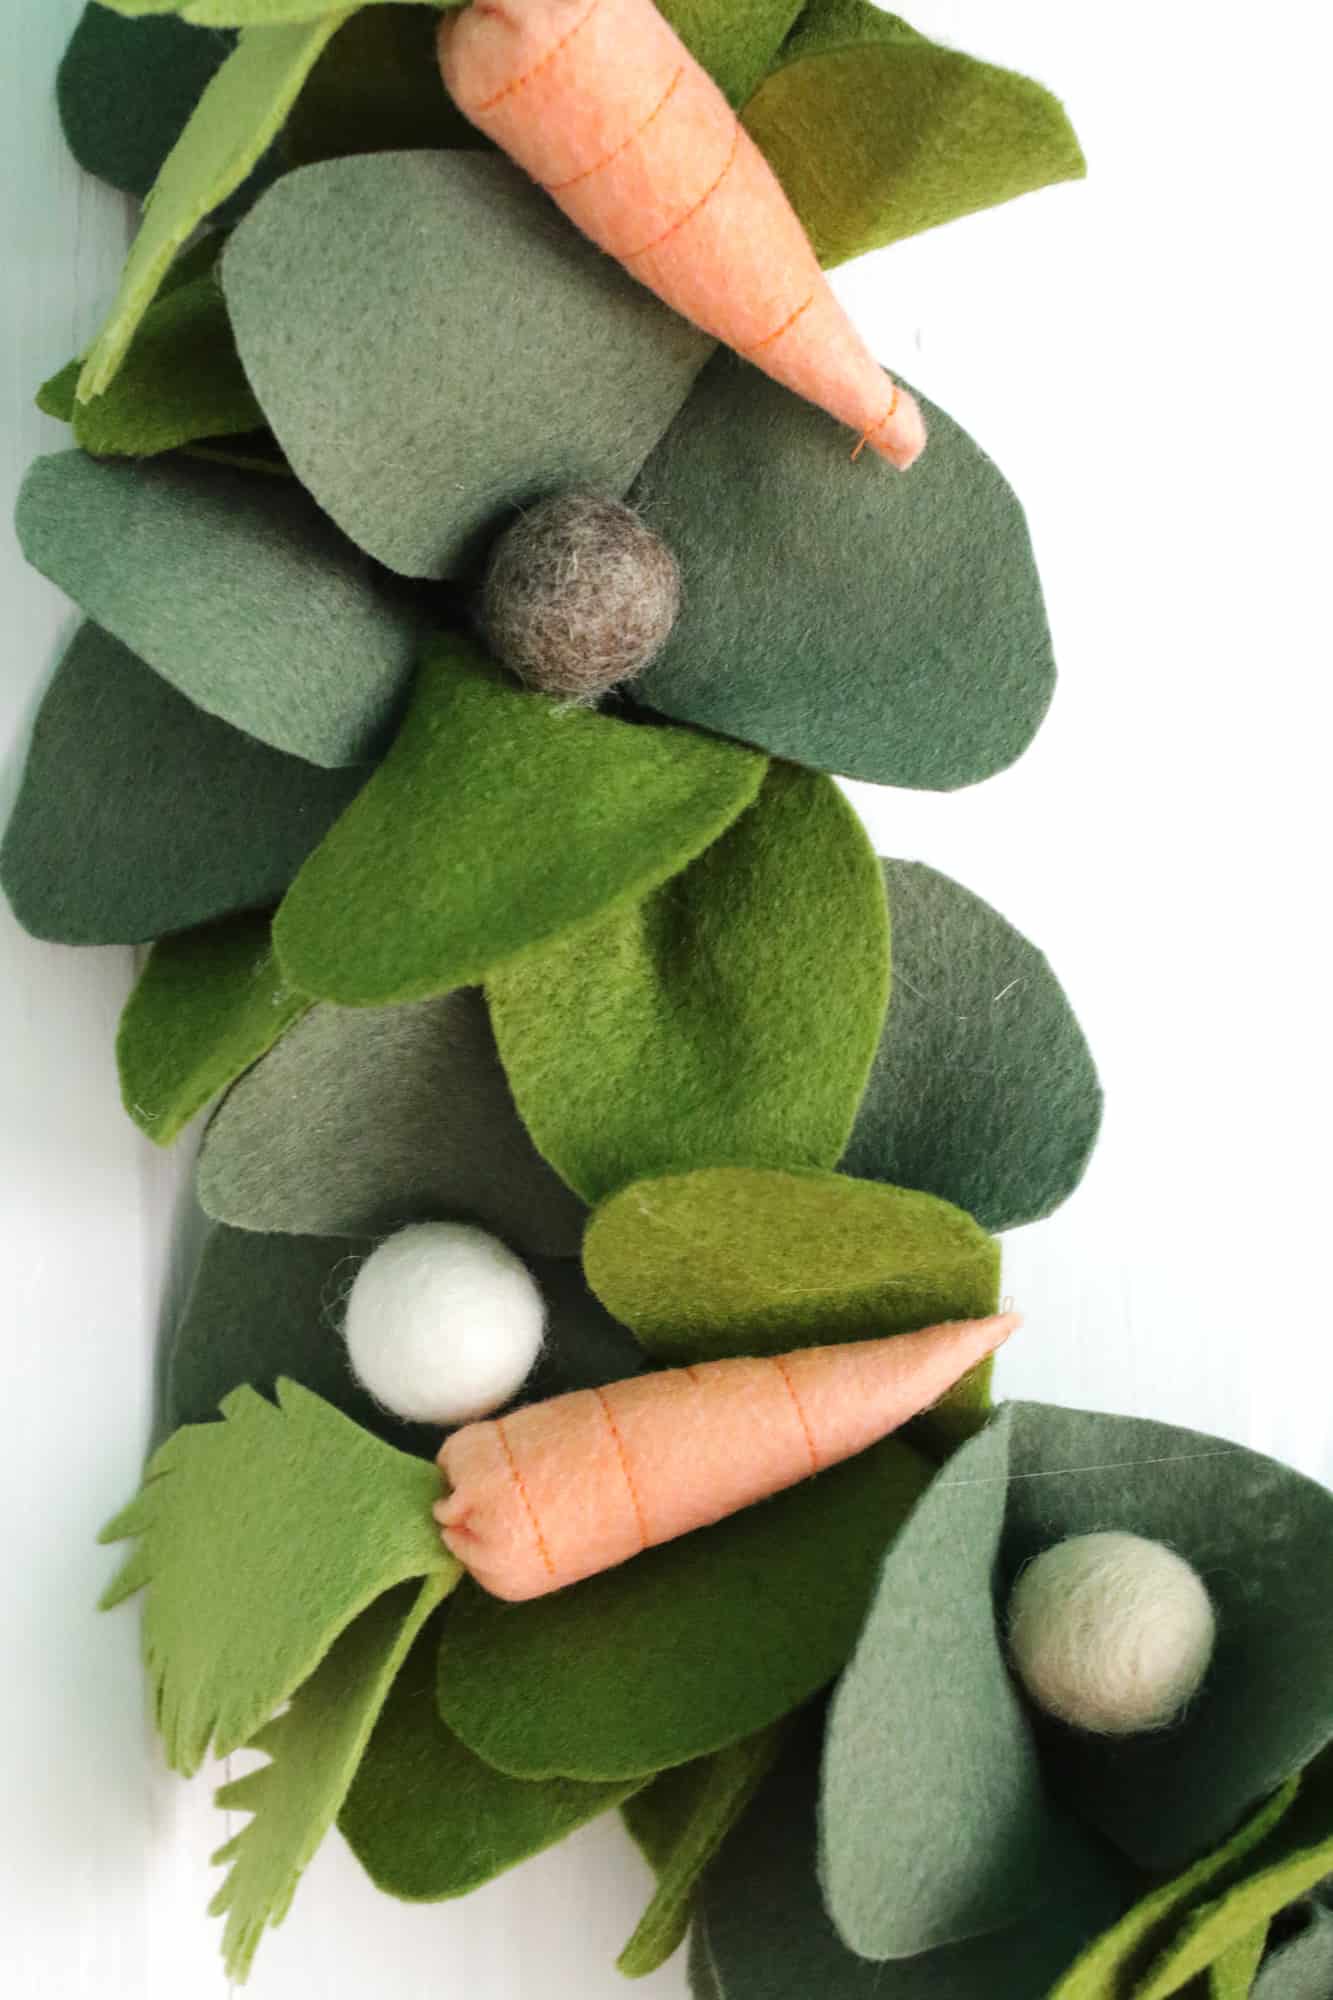
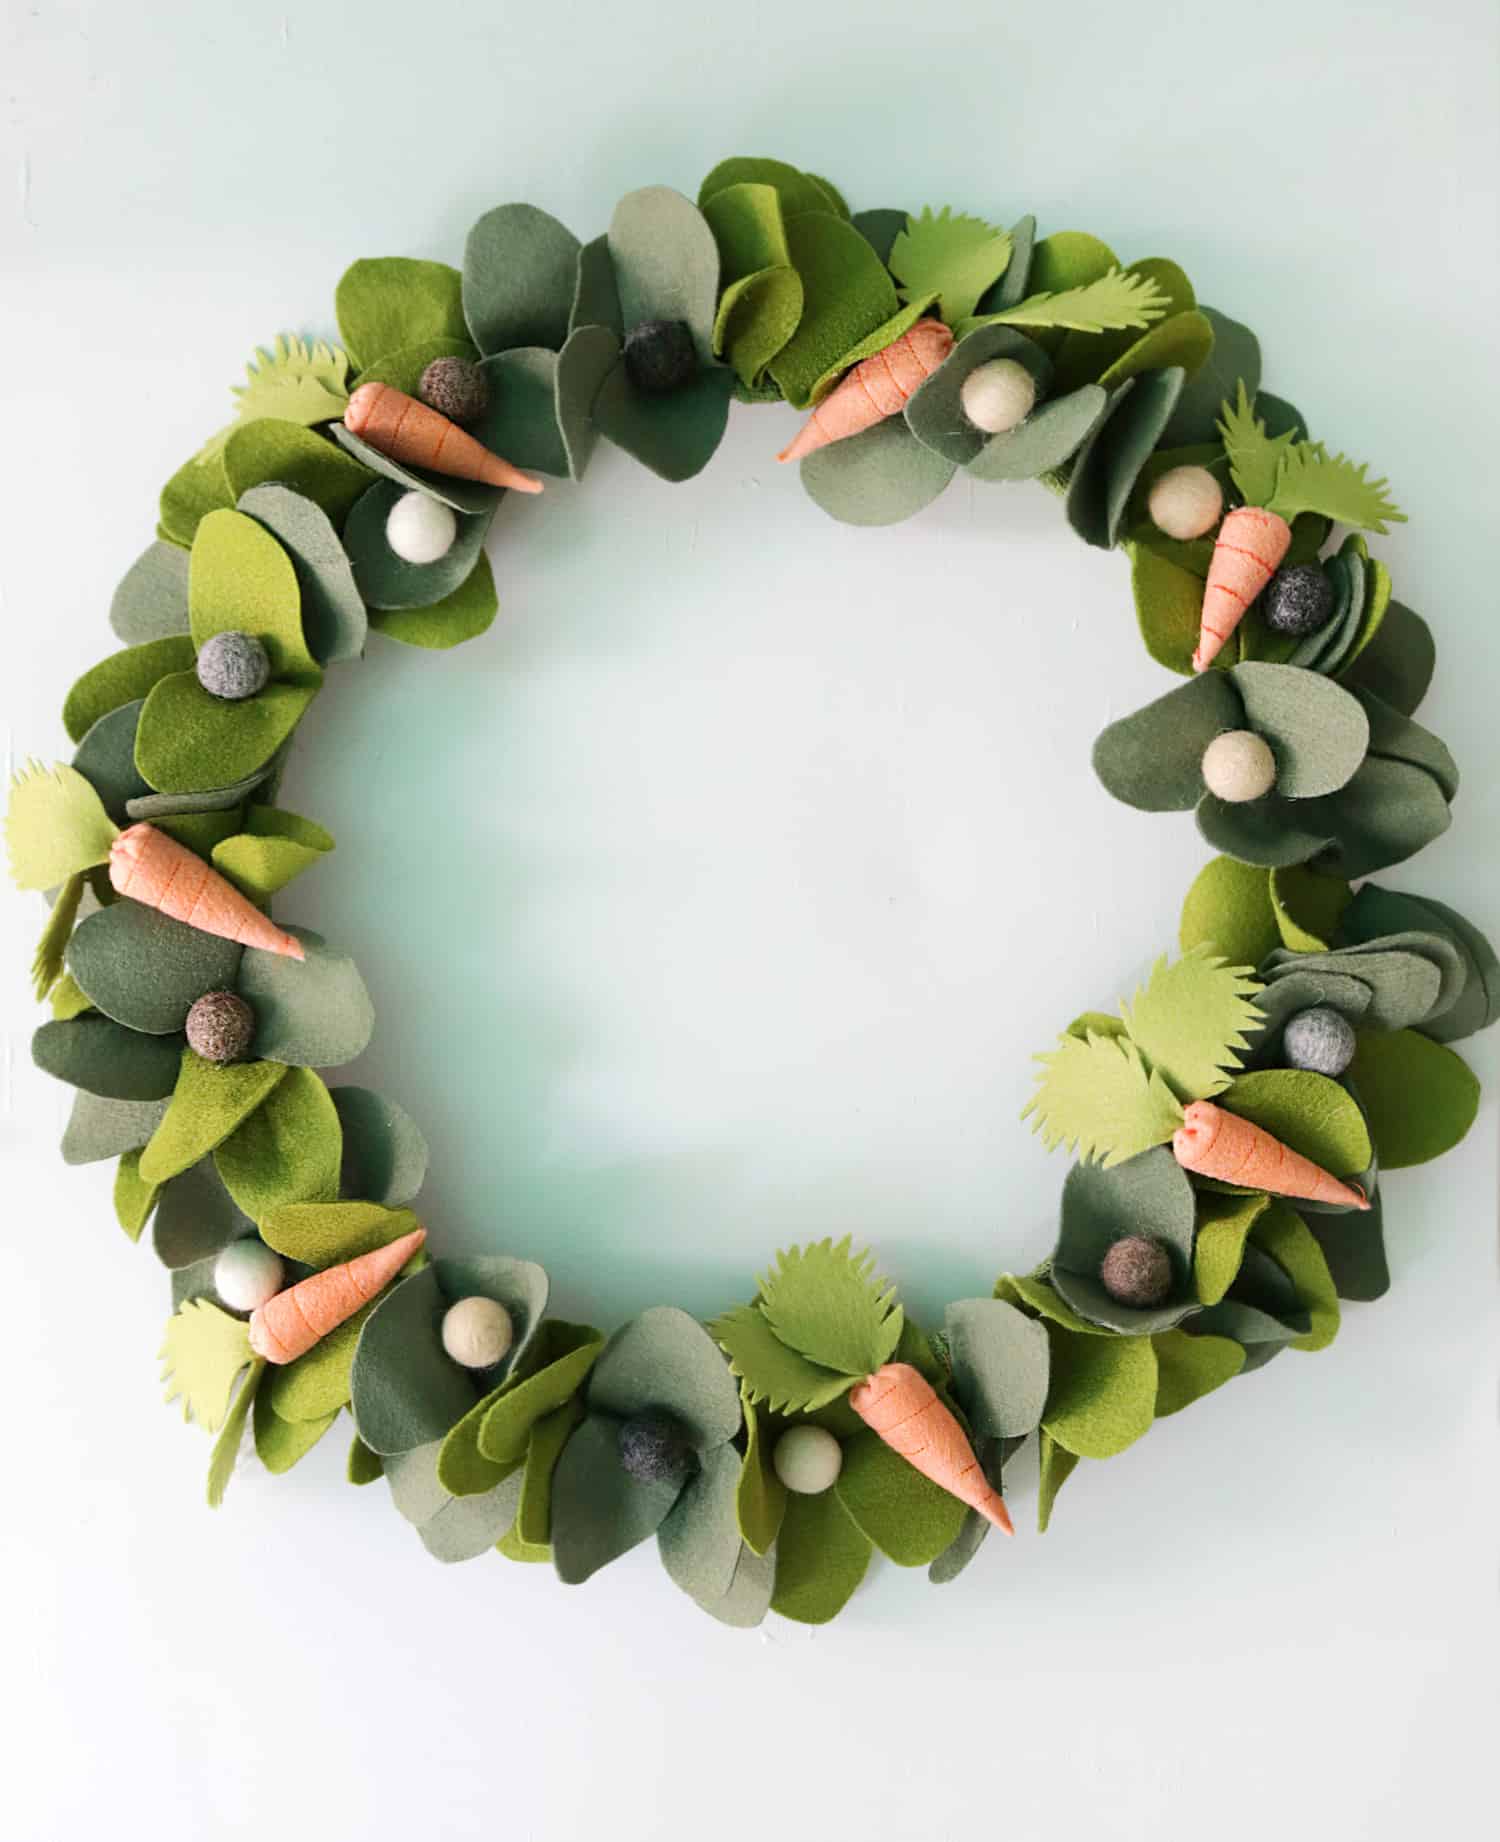 Hot glue the carrots and felt balls to your wreath and then you’re all done! Hang anywhere in your house or on your front door for a healthy dose of cheery spring delight!
I just love how this wreath turned out! It’s a project that wasn’t too time consuming and brightens up any corner. I would definitely buy this if I found it in a store. Happy crafting, friends! xo. Katie
7 Comments
Looks so cute!!
http://www.thelisasworld.com
Adorable!
This is lovely! A great DIY since we have tons of time now! ❤️✨
Charmaine Ng | Architecture & Lifestyle Blog
http://charmainenyw.com
Adorable!!! 🙂
This is such a pretty wreath! Thank you for sharing, Katie.
When I first saw the thumbnail image, I thought the carrots were real! The orange top stitching is a great idea for that extra life-like detail! 🙂
Mike
http://www.thecraftygentleman.net
Wow!! You always have the cutest diys!! I’ve just pin it!! 🙂
xx
Eli
https://curly-style.com/2020/04/look-negro-con-crop-top.html