
 So, I think this is such a fun DIY to make on a night in, or gather up a few gal pals for an afternoon of crafting and a cocktail. While I do love doing over-the-top complicated DIYs, I also love a good quick and easy project to get that creative energy out without making a huge mess for days. So things like ring dishes or jewelry holders are always a good option for a fast DIY. I wanted a little ring holder next to my kitchen sink, so I thought some clay ring towers that looked like they were lightly dusted in some sprinkles would be perfect for the job! We are partnering with JOANN for this post and I love that I can get all my supplies for my projects there in one place and get coupons and deals on their app so you can save some money at the register, too. Sometimes I just browse the store with no purpose at all so I can find all the new things they’ve gotten since the last time I was there!
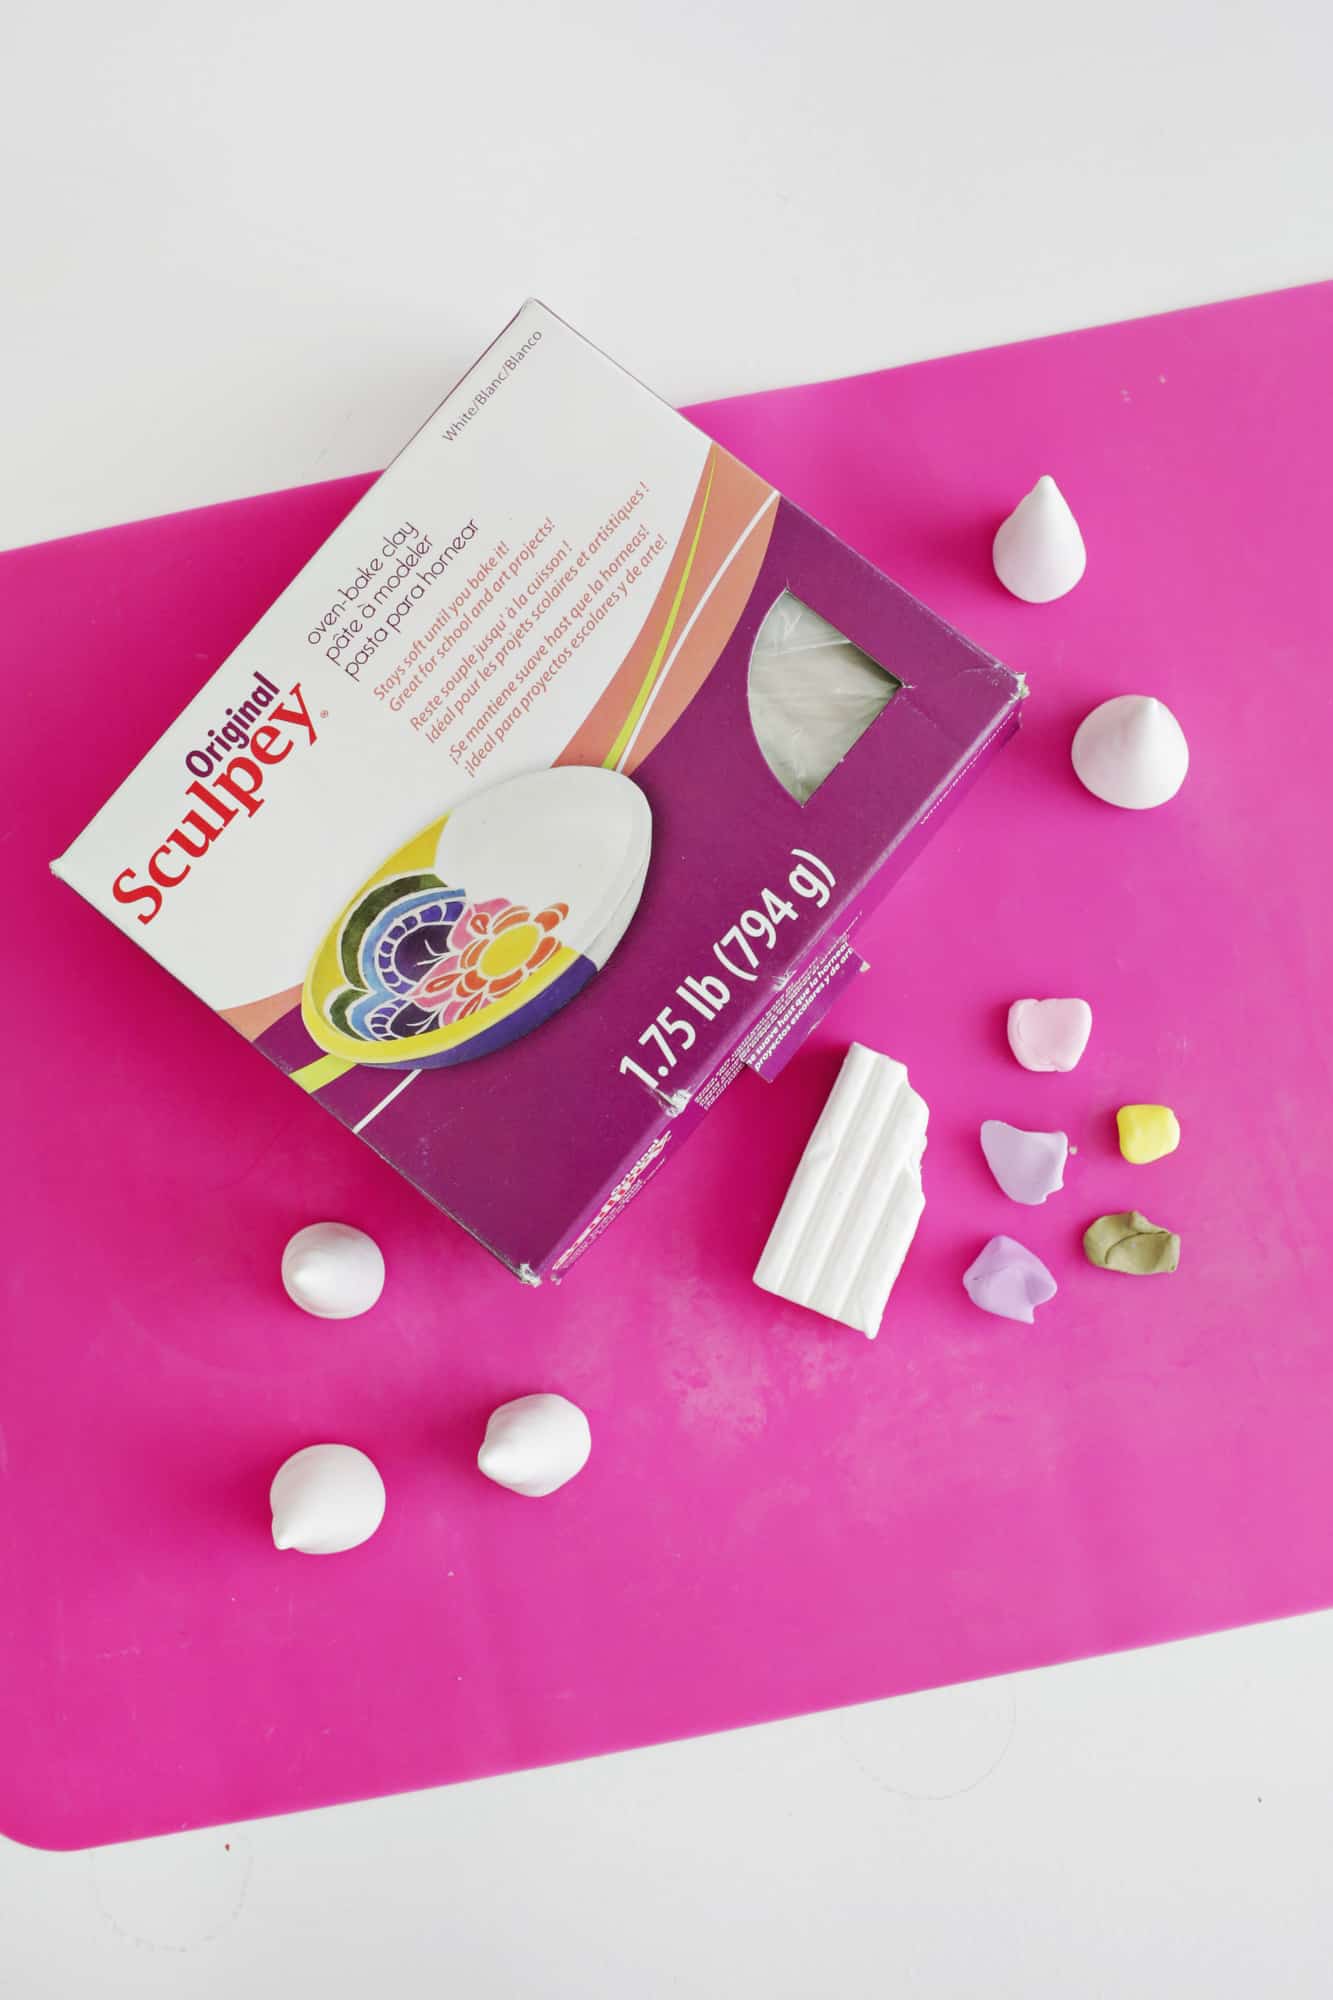 Supplies:
–white oven-bake clay
–oven-bake clay in colors of your choice
–silicon mat
-parchment paper and baking dish to bake the clay
–clay glaze (optional)
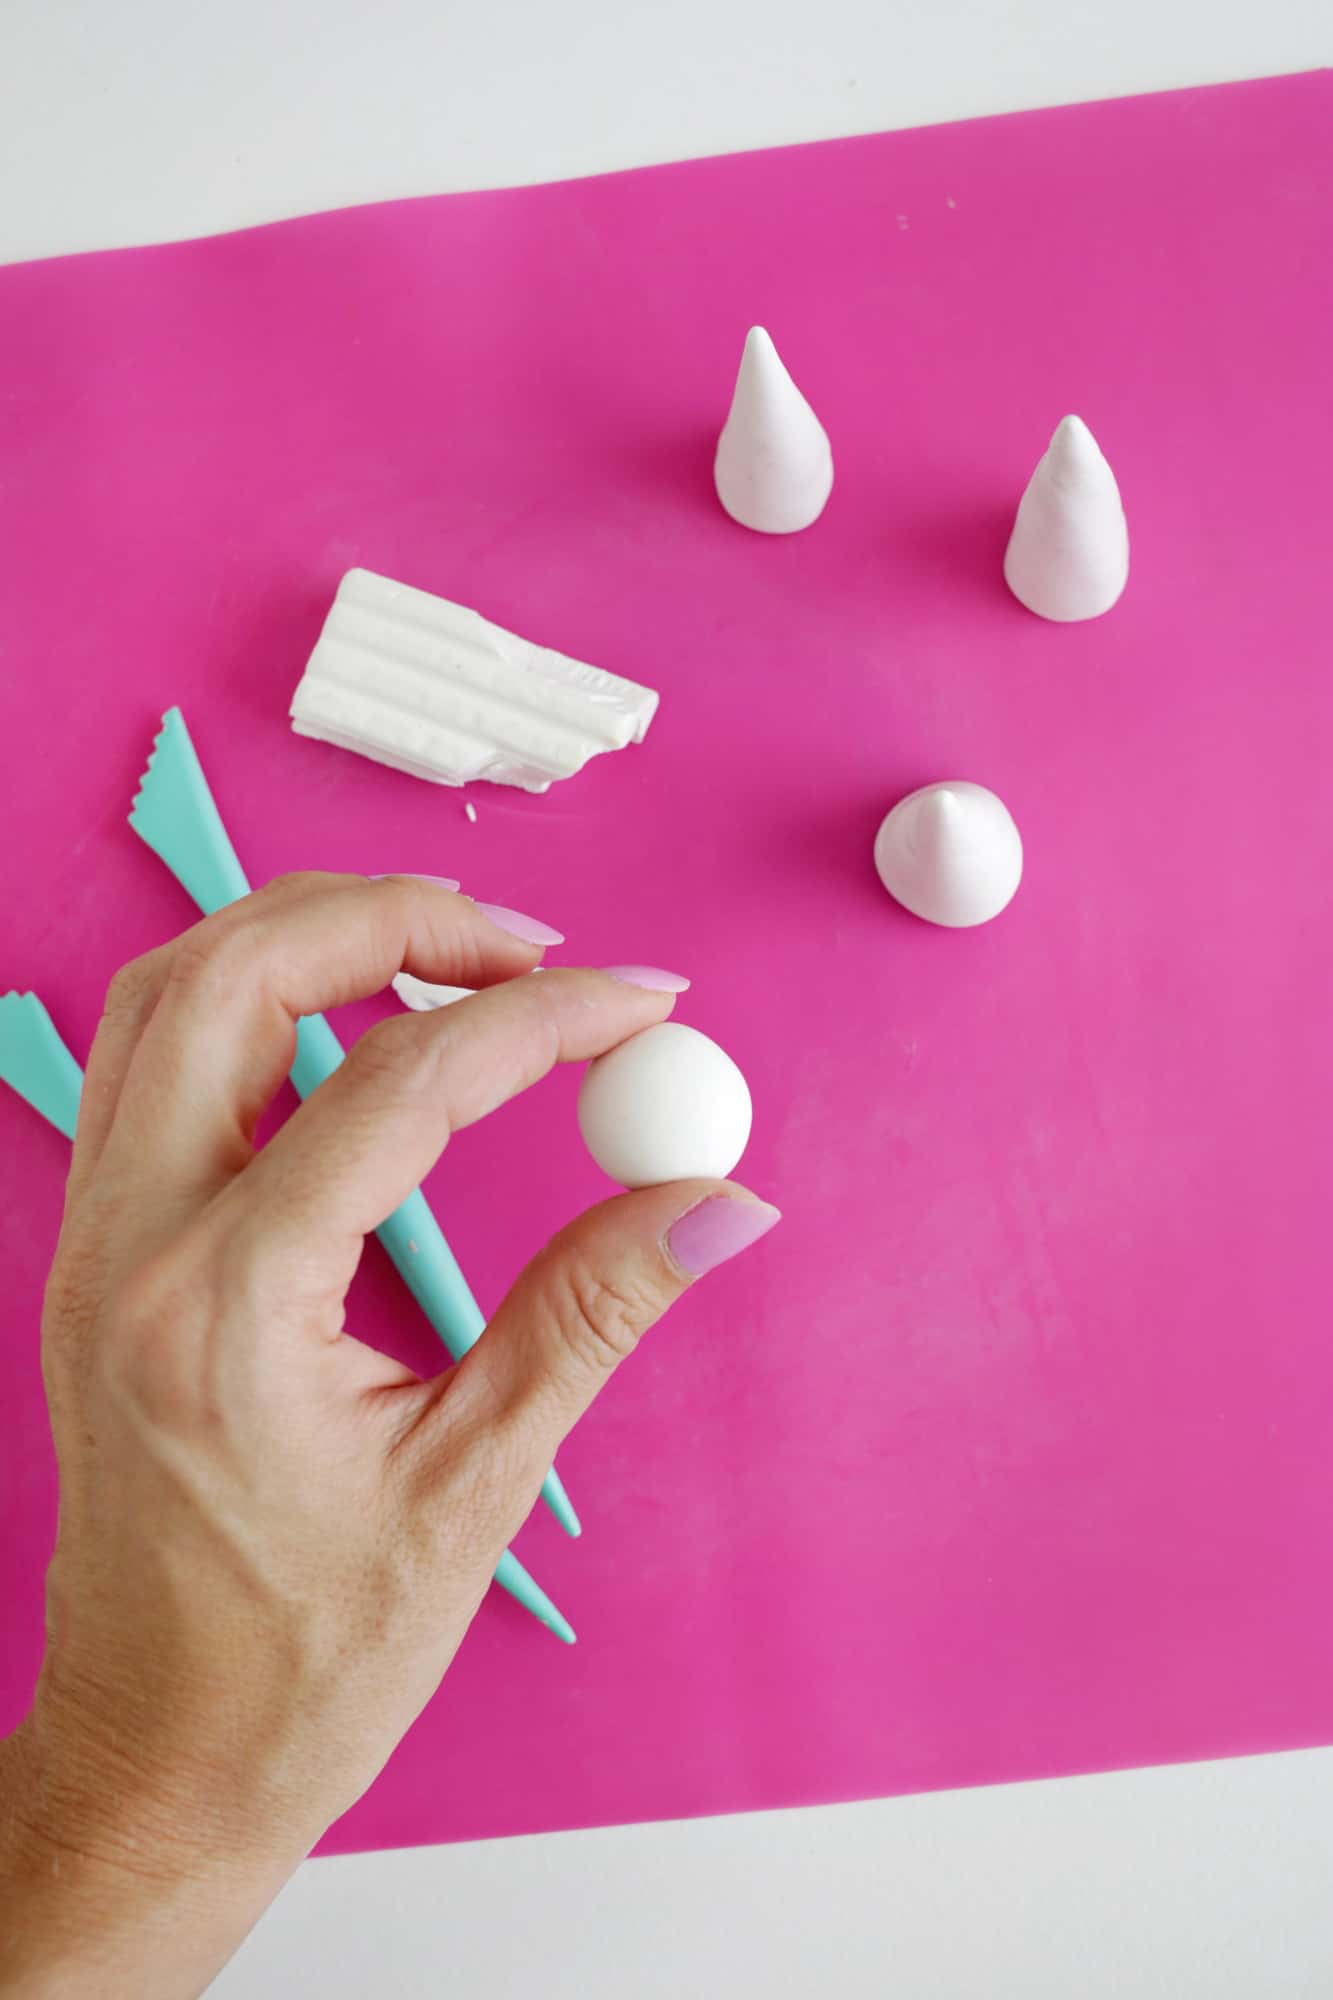 First, take a hunk of white clay and knead it in your hands until it softens and becomes pliable. Roll it into a ball a little larger than 1″ in diameter.
  Place the ball on your silicon mat and start to roll it with 2-3 fingers, but roll it a little left of center so that it starts to make a cone shape (thinner at one end and fatter at the other), rather than a clay “snake” that’s all the same thickness.
 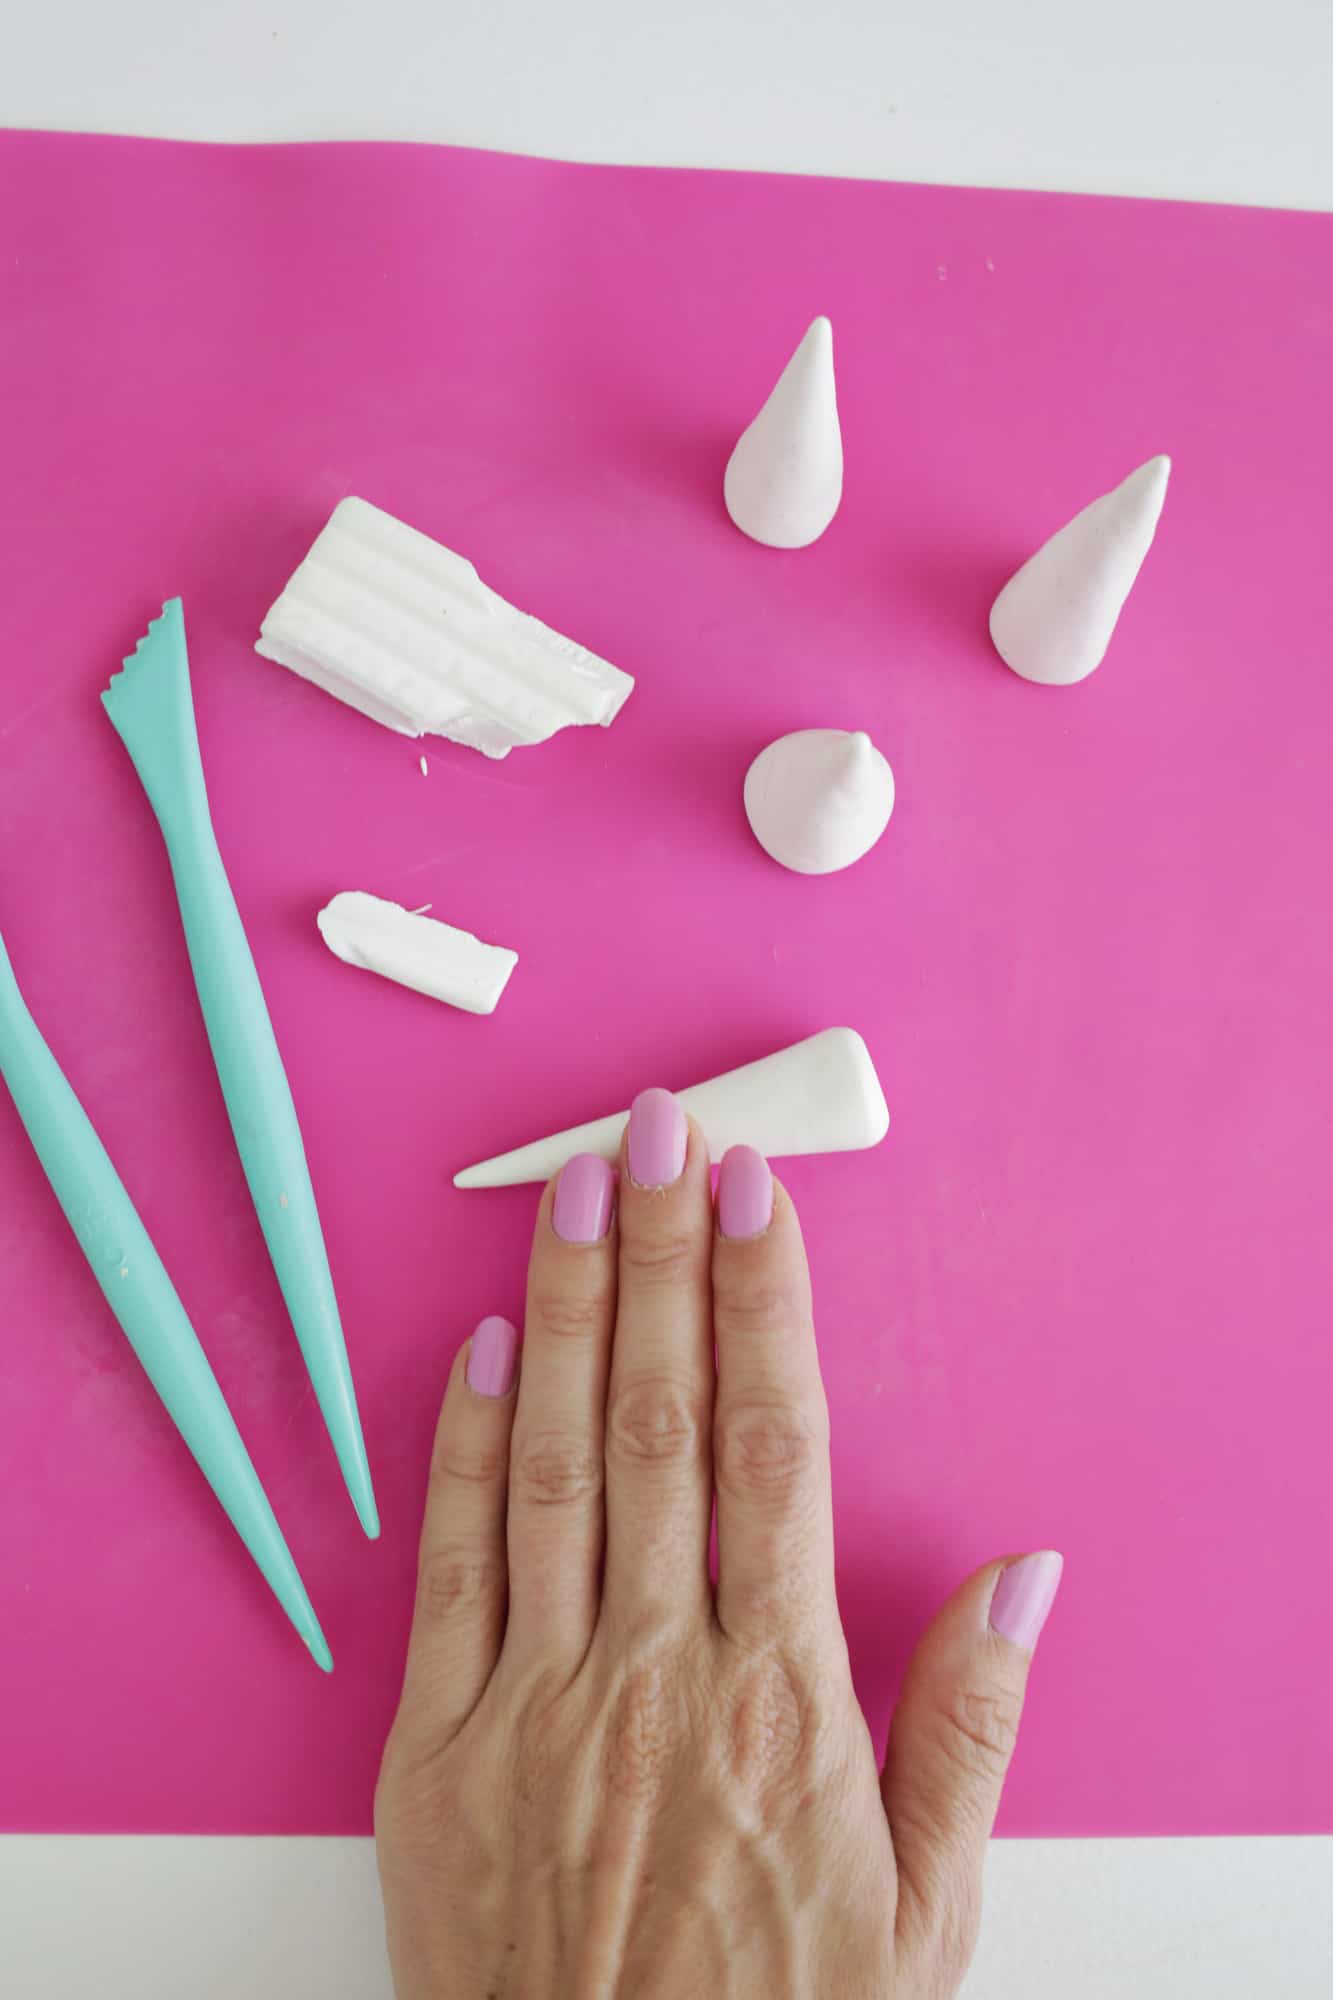 Keep rolling the cone while moving your hand in a rainbow arch path (rather than just straight forward and back) until you have a shape and height that you like. Use your fingers to flatten the bottom a bit so it will stand up and set aside.
 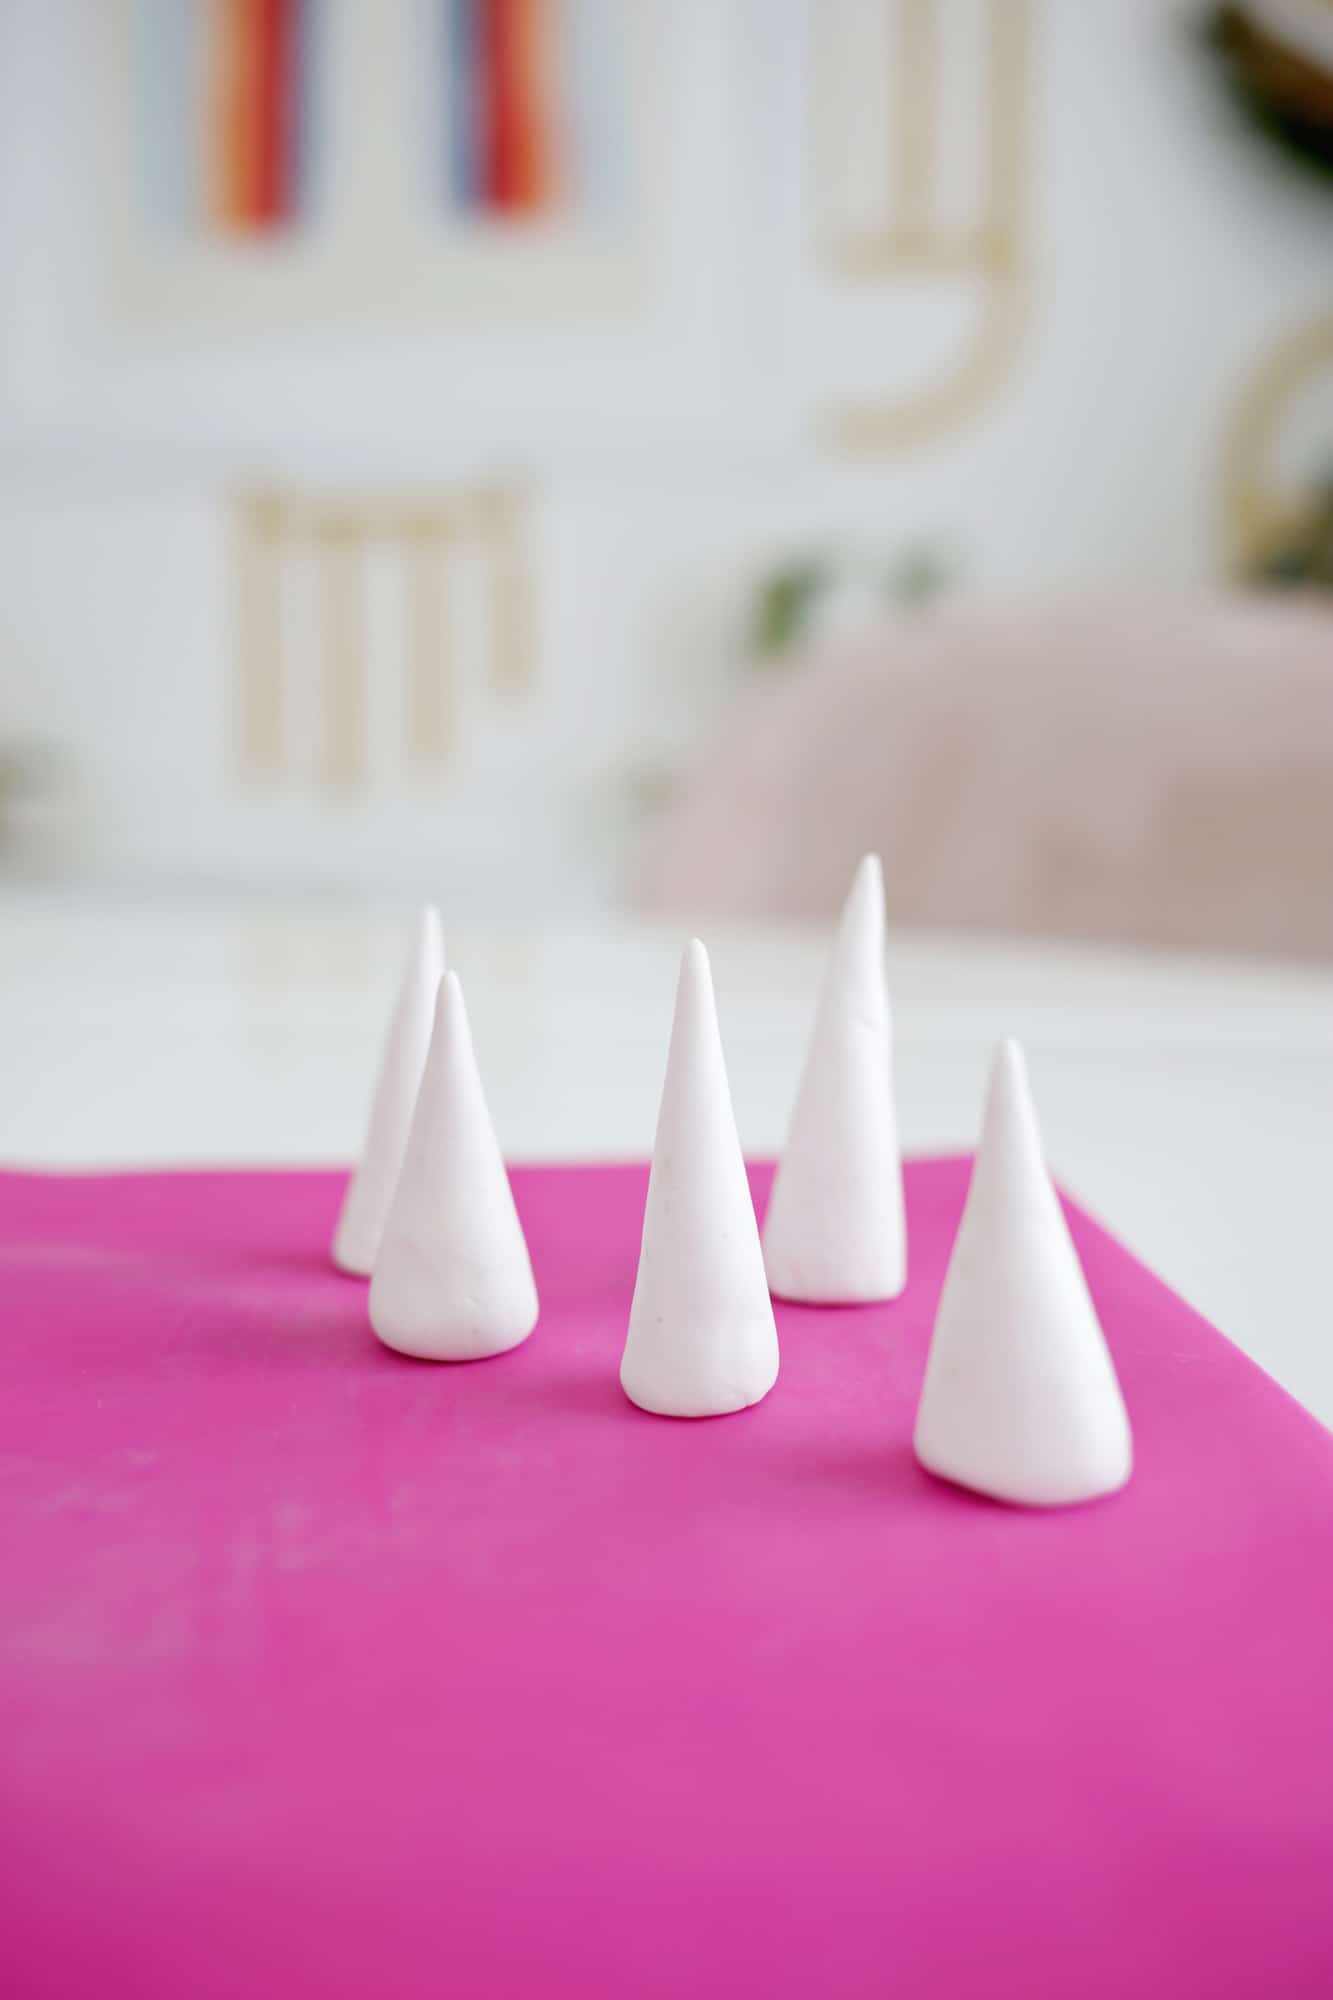 Make as many cones as you want in different heights and widths.
 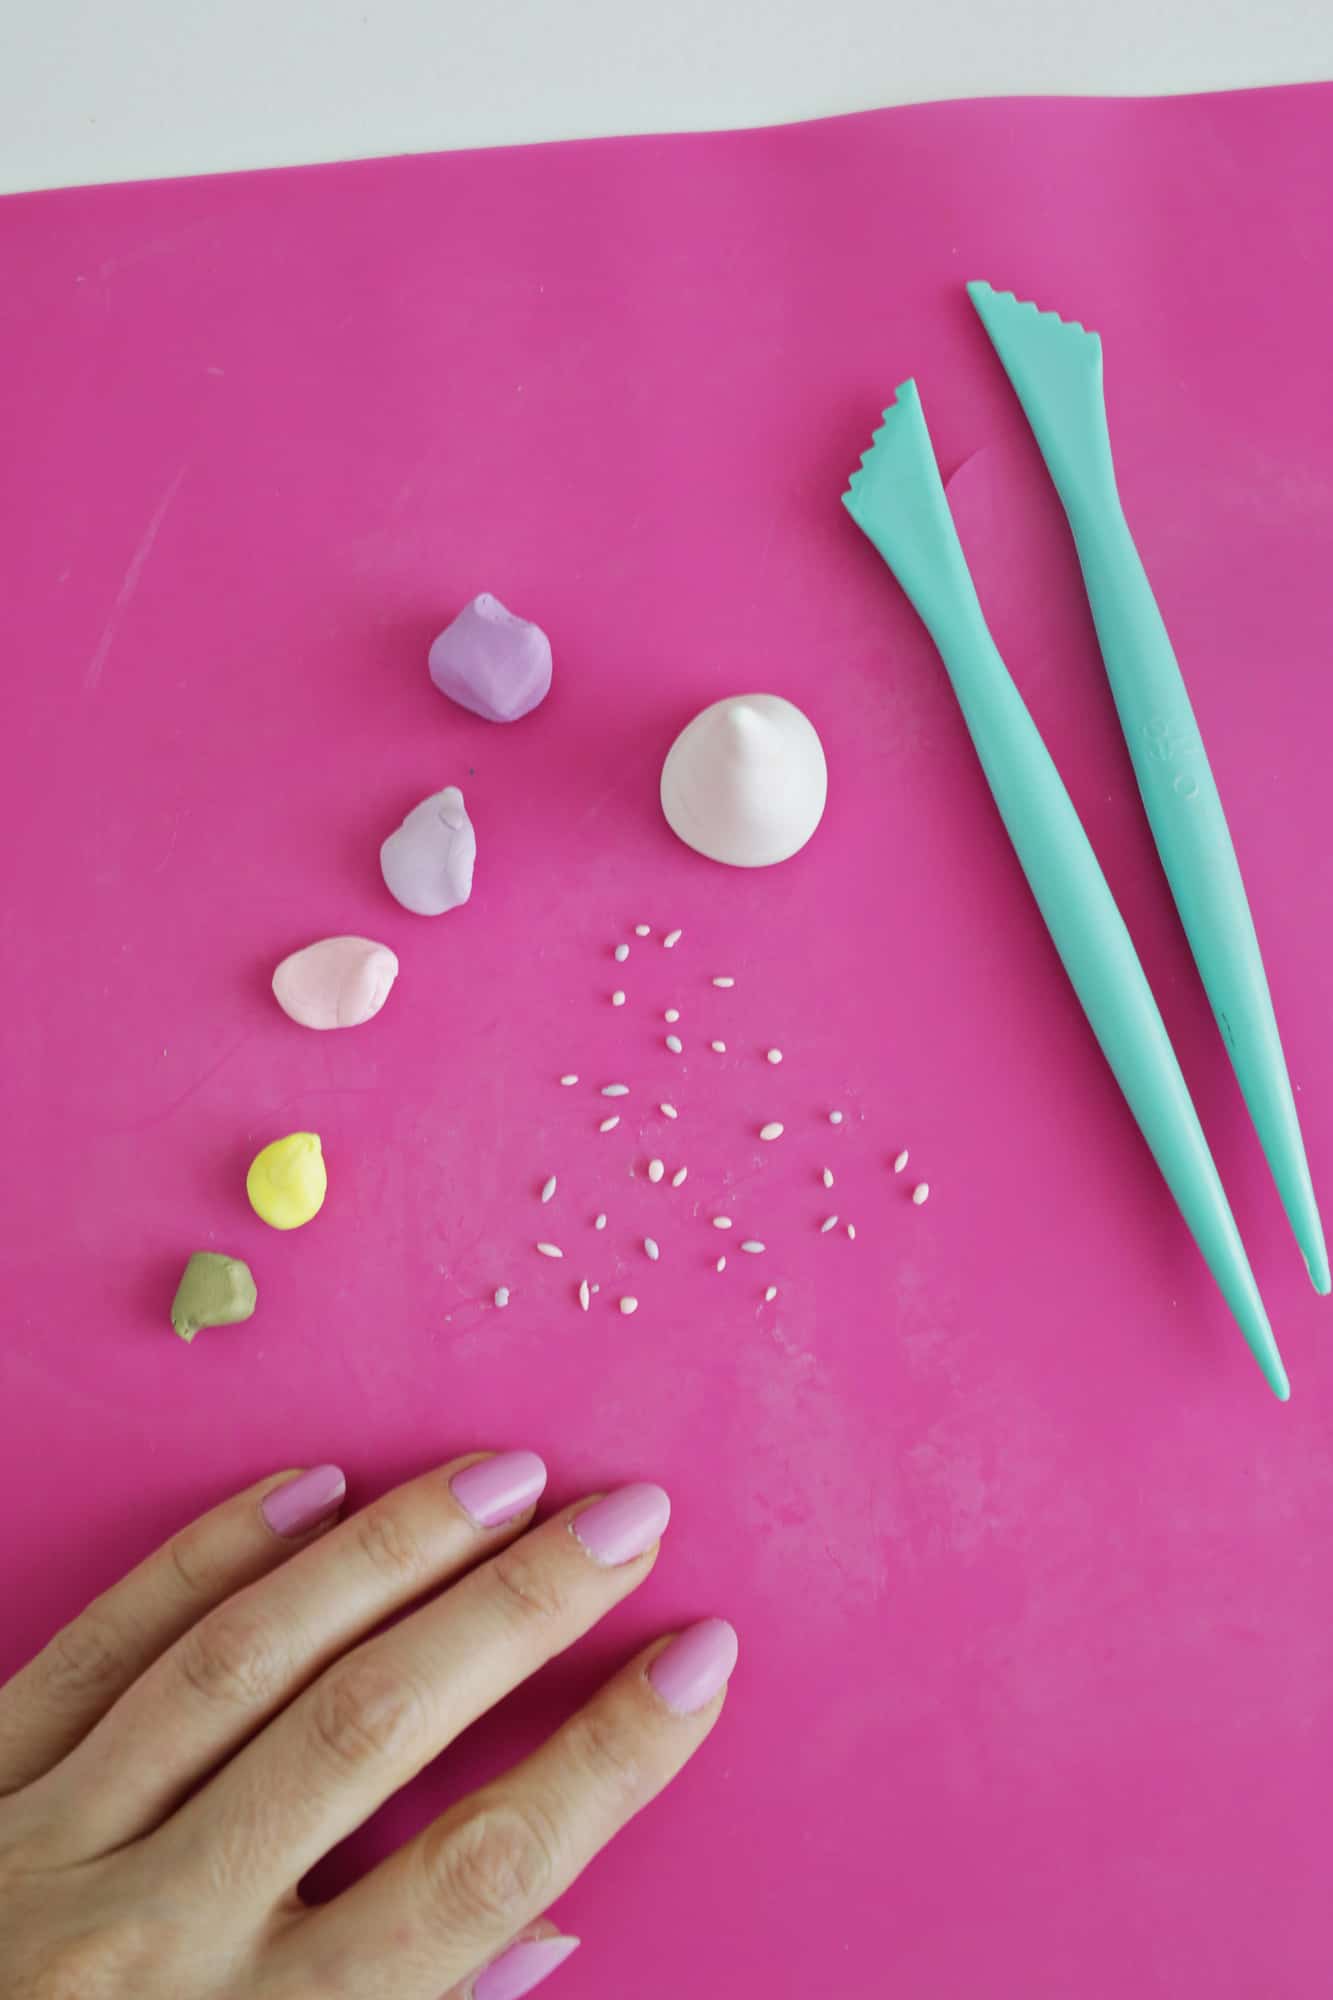 Soften some clay in the colors of your choosing, or mix a few colors together for new shades, and pull the tiniest (like, super tiny) bits of clay off and roll them slightly in your fingers to make a tiny sprinkle shape and drop it onto your mat.
  Keep dropping little bits of clay in whatever colors you want and then gently roll your white cone into the bits. You want to roll it hard enough that the bits stick to the clay tower, but not so hard that it flattens the sprinkles into the cone. So go more gently at first and re-roll it into the bits if you need to.
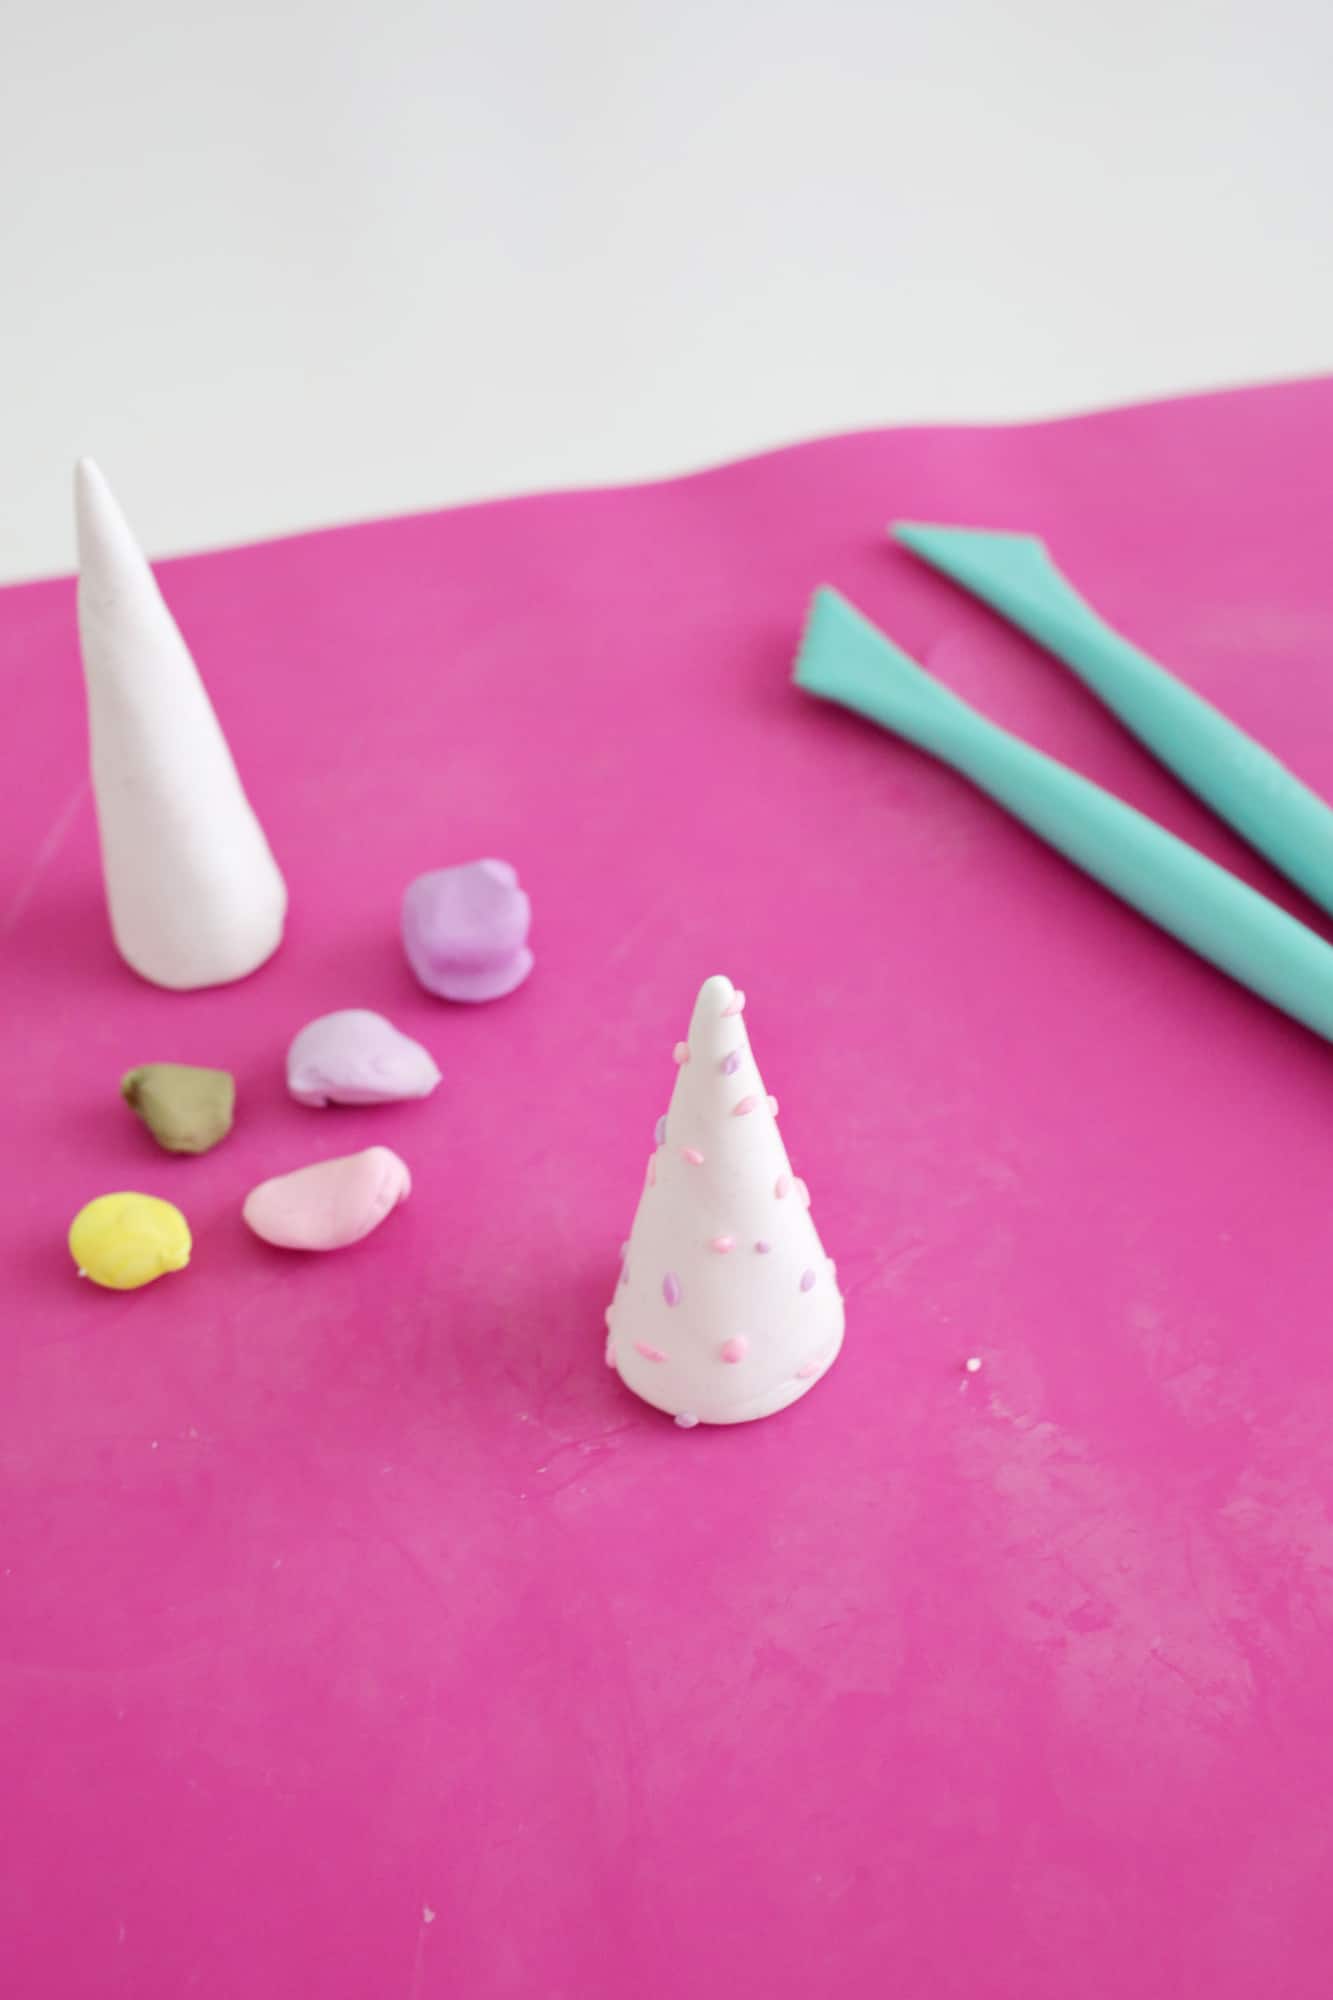
 Once you have the sprinkles where you want them, repeat with each tower and place the towers onto some parchment paper in a baking dish and bake for the time indicated on your clay (it may be different for different brands). Once your towers are baked and cooled, you can either glaze them with a sealer or leave them be for a more matte look. Add your rings and your towers are done!
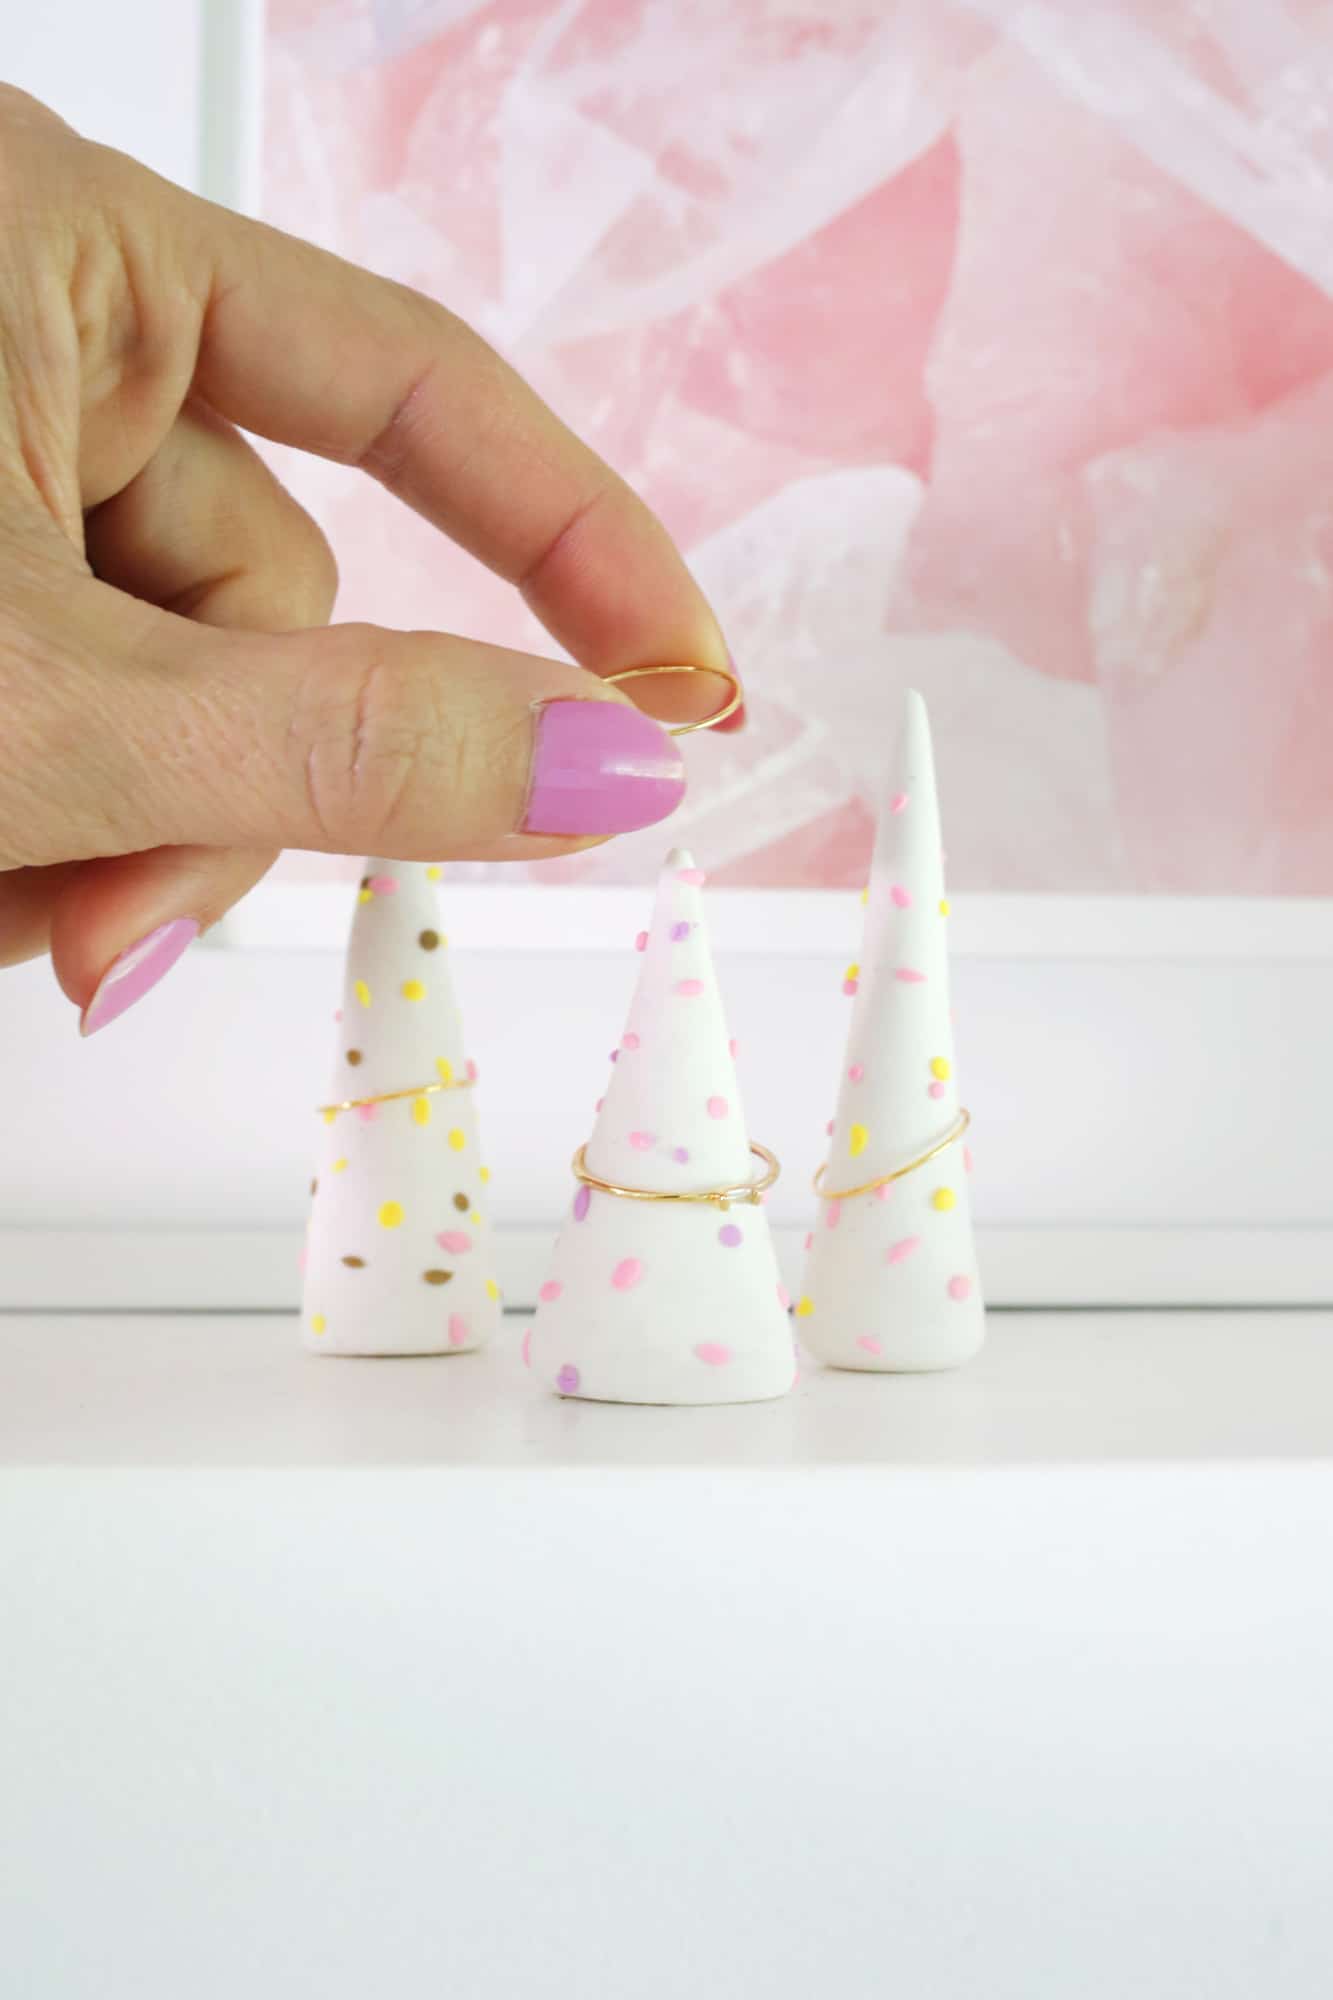
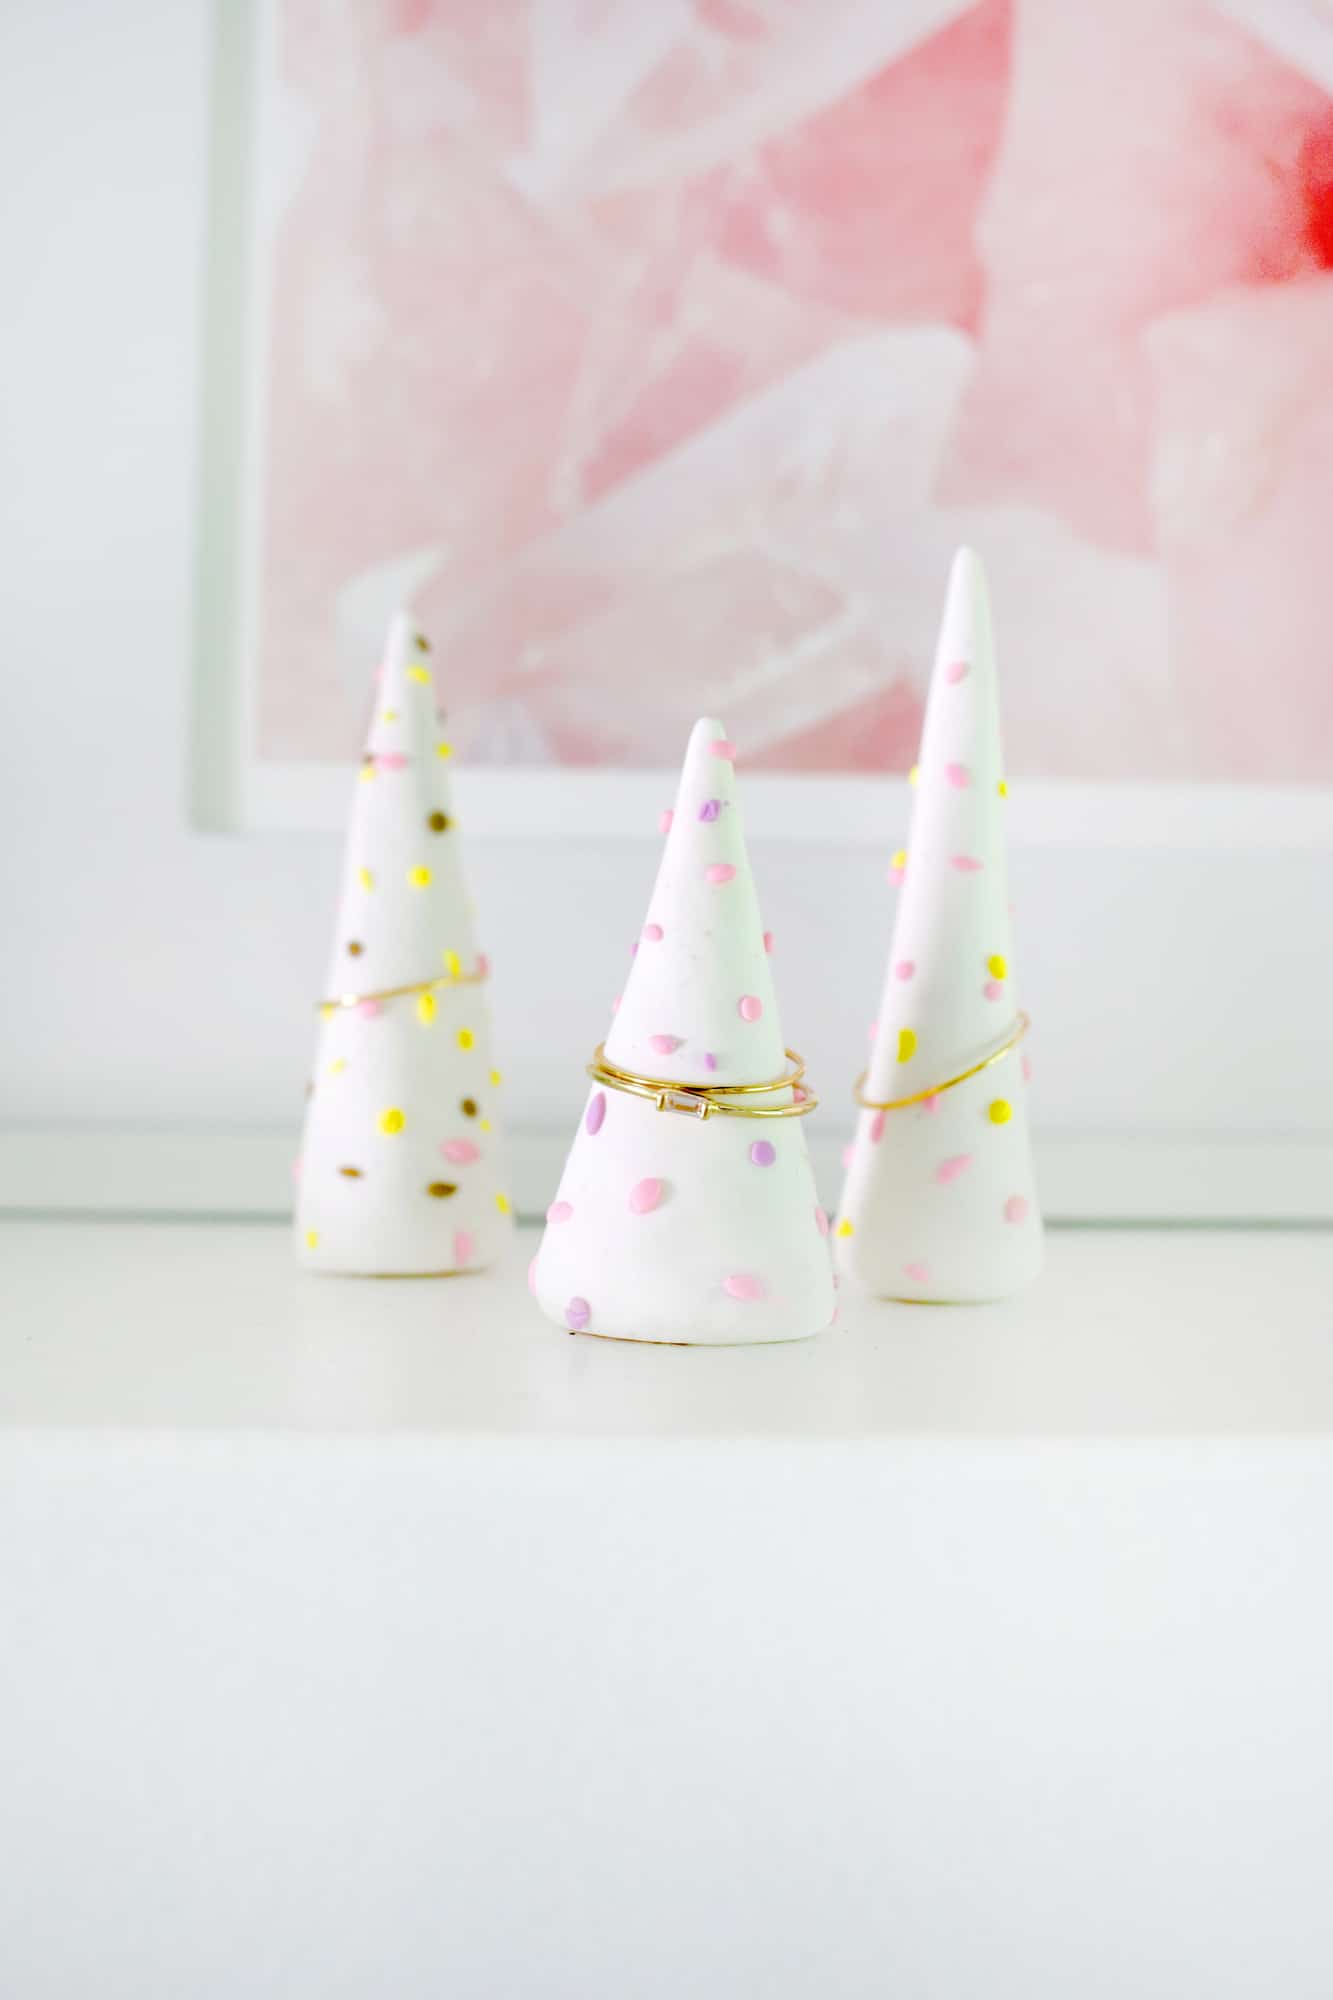
 I love the slightly 3D look that the sprinkles give the towers, but you can always roll your towers a little harder into the clay bits and it will create more of a flat polka dot effect if you’d prefer that. As you can see, it’s pretty easy to make several of these at one time. So it’s a snap to make a few of these for gifts, etc., and you could even give it with a few stacking rings already attached (I love this dainty ring too!) in customized colors. Hope this finds its way into your craft night soon! xo. Laura
5 Comments
Super cute as always! They remind me of unicorn horns! ❤️✨
Charmaine Ng | Architecture & Lifestyle Blog
http://charmainenyw.com
This is so cute! Totally making one to go on top of my dresser!
Paige
http://thehappyflammily.com
This is such an adorable idea — it looks so fun and quite simple to do. I am definitely going to have to give this a try ♥
Christmas trees!!
This is such a cute idea! I’ve been wanting to work with clay lately. This looks like a perfect beginner project.