") People like me were the reason that “novelty” shops and items were created. Would you like to have a toothbrush shaped like a dinosaur or a pincushion that looks like a donut? Right this way! In the spirit of Bjork’s swan dress (which Katie has also shown you how to make for a Halloween costume), I thought it would be fun to make an apron that had a pink swan as the neck to keep you company while you cook. I mean, who doesn’t like to have a pal in the kitchen, right?
People like me were the reason that “novelty” shops and items were created. Would you like to have a toothbrush shaped like a dinosaur or a pincushion that looks like a donut? Right this way! In the spirit of Bjork’s swan dress (which Katie has also shown you how to make for a Halloween costume), I thought it would be fun to make an apron that had a pink swan as the neck to keep you company while you cook. I mean, who doesn’t like to have a pal in the kitchen, right?
") Supplies:
Supplies:
-1 yard of solid colored fabric for your swan body (I chose pink)
-1/8 yard of grey or black fabric for swan beak
-medium weight interfacing that fuses to one side
-black button for eye
-black embroidery thread
-sewing machine
-plain white apron
-peel and stick velcro
-fabric glue
–swan apron template
(right click to download and assemble by printing all pages, and then matching the numbers together)
") First you’ll want to print, assemble, and cut out your swan template. Fold your swan body fabric in half so you are cutting two layers at once, and place your template on top. Trace your template onto your fabric and cut out your swan shape.
First you’ll want to print, assemble, and cut out your swan template. Fold your swan body fabric in half so you are cutting two layers at once, and place your template on top. Trace your template onto your fabric and cut out your swan shape.
") Use the beak template shape to cut out your beaks as well. Line up your beak shapes on the face of your two swans and sew the two together so that you have grey beaks. Cut off any excess fabric and iron your seams flat.
Use the beak template shape to cut out your beaks as well. Line up your beak shapes on the face of your two swans and sew the two together so that you have grey beaks. Cut off any excess fabric and iron your seams flat.
P.S. Make sure that your beaks are attached so that when you put your two layers of swans together right side in, you have two finished beak seams facing each other. I forgot to think about that and only had one of the right side layers facing in, so when I flipped them, just one side of my swan had the finished seam for the beak showing and the other had the inside seam—Oh well! I just made the pretty side the outside of the apron 🙂
") Cut another swan shape out of your interfacing and make sure to think about which is the shiny side that will fuse to the wrong side of one of your swans so you don’t cut it the opposite way that’s needed. After cutting, go back around the edge and cut off another 1/2″ around the shape so that the interfacing won’t go to the edge of your swan fabric once fused (it will be easier to turn inside out if the interfacing is just inside the seams). Iron the interfacing in place on the wrong side of one of your swans.
Cut another swan shape out of your interfacing and make sure to think about which is the shiny side that will fuse to the wrong side of one of your swans so you don’t cut it the opposite way that’s needed. After cutting, go back around the edge and cut off another 1/2″ around the shape so that the interfacing won’t go to the edge of your swan fabric once fused (it will be easier to turn inside out if the interfacing is just inside the seams). Iron the interfacing in place on the wrong side of one of your swans.
") Layer your two swans together so that the right sides of each swan are facing each other (that way when you turn it right side out again, your interfacing will end up in the middle).
Layer your two swans together so that the right sides of each swan are facing each other (that way when you turn it right side out again, your interfacing will end up in the middle).
") Sew all the way around the edge with a 1/4″ seam allowance but remember to leave a 3-4″ opening.
Sew all the way around the edge with a 1/4″ seam allowance but remember to leave a 3-4″ opening.
") Turn your swan right side out through your opening. This part will take a bit of patience to get that rather long swan neck turned the right way, but go slow and use long handled spoons or sticks to help push it through the right way. Once it’s turned right side out, iron your swan flat. You’ll also want to fold in the fabric of your 3-4″ wide opening 1/4″ so that it matches the other seams. You can iron those seams flat, and then sew up by hand or use fabric glue to close the opening.
Turn your swan right side out through your opening. This part will take a bit of patience to get that rather long swan neck turned the right way, but go slow and use long handled spoons or sticks to help push it through the right way. Once it’s turned right side out, iron your swan flat. You’ll also want to fold in the fabric of your 3-4″ wide opening 1/4″ so that it matches the other seams. You can iron those seams flat, and then sew up by hand or use fabric glue to close the opening.
") Use a needle and thread to attach your eye button and sew a wing path with embroidery thread to make a wing detail. If you have a iron-erasable marking pen, those are great to use on projects like the wing line. You can draw the line you want, follow it with your thread, and then a quick pass of the iron will make the original line you drew disappear!
Use a needle and thread to attach your eye button and sew a wing path with embroidery thread to make a wing detail. If you have a iron-erasable marking pen, those are great to use on projects like the wing line. You can draw the line you want, follow it with your thread, and then a quick pass of the iron will make the original line you drew disappear!
") Pin your swan to the top of your apron and situate it just right for your comfort. Cut the top straps of the apron off (the swan neck becomes your strap), and use fabric glue to attach the swan in place. Cut and apply patches of velcro where the swan neck meets the apron, and you and your new swan friend are ready to get cooking!
Pin your swan to the top of your apron and situate it just right for your comfort. Cut the top straps of the apron off (the swan neck becomes your strap), and use fabric glue to attach the swan in place. Cut and apply patches of velcro where the swan neck meets the apron, and you and your new swan friend are ready to get cooking!
")
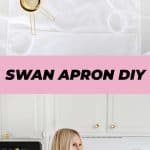
") Soooo cute! I know that most swans don’t come in pink, but I wanted him to stand out from the white apron, and you can do whatever color you like! It’s great that this is machine washable too since aprons can get messy when cooking. This would also be fun to make with a kid and have a matching “Mommy and Me” apron set—how sweet would that be!? Whether you love swans, cooking, sewing, or just novelty items in general, I think you’ll have a lot of fun recreating this project for yourself. Happy sewing! xo. Laura
Soooo cute! I know that most swans don’t come in pink, but I wanted him to stand out from the white apron, and you can do whatever color you like! It’s great that this is machine washable too since aprons can get messy when cooking. This would also be fun to make with a kid and have a matching “Mommy and Me” apron set—how sweet would that be!? Whether you love swans, cooking, sewing, or just novelty items in general, I think you’ll have a lot of fun recreating this project for yourself. Happy sewing! xo. Laura
Credits // Author and Photography: Laura Gummerman. Photos edited with the NEW A Beautiful Mess actions.
21 Comments
You could also scale it down slightly eliminate the apron and it would make a really cute baby bib. Long ago, as I recall I couldn’t have too many of those!
This is adorable! Would make a GREAT present for my mother!
Charmaine Ng | Architecture & Lifestyle Blog
http://charmainenyw.com
You could also just tell people it’s a flamingo!
Cute! Reminds me of Bjork’s swan dress at the Academy Awards.
Laura! I’m shocked and disappointed that you didn’t make it a cat!!!
So cute!
http://objectsicantafford.com
Ummmmmm……
I was thinking the same thing! Who ever heard of a pink swan? Why not just call it a flamingo?! It’s cute in a quirky, Bijork kinda way.
YESS!! I am totally making a flamingo version of this… Right now 🙂
I never would have thought of something like this. So cute! http://www.likehanna.com
Yep! I used to have one of those from when I was little that was a mother goose!
Laura 🙂
Haha, got to show some other animals some love too 🙂
Laura
This is such a cool idea, and a wonderful way to look glamorous in the kitchen haha
https://www.makeandmess.com/
love the swan apron! : )
I’m a big swan fan girl myself! check out my etsy shop 😛
https://www.etsy.com/shop/vintagezuhause?ref=hdr_shop_menu
This is so cute! x
Izzy |https://pinchofdelight.wordpress.com
You’re sure it’s not a flamingo?
Is it just me, or could that also be a flamingo? <3
- Katie
https://thebippityboppitybeautifulblog.wordpress.com
Definitely a flamingo 🙂
This is so Laura haha. Love the personality you bring to the ABM team, priceless 🙂
Too cute! I’d probably do my swan in white and a flamingo in pink 🙂
I have a friend that has had me make aprons for her daughter for Christmas. Now I wanted to make her a special apron and this is it.