 My absolute favorite way to decorate a cake is with edible flowers. I can’t think of a prettier (or easier) way to give cakes a totally unique look and a whole other dimension of flavor. And you don’t need a bunch of special tools or skills! Decorating a cake with edible flowers is as easy as deciding where to put them and pressing them in place. So much easier than making flowers from frosting! And did I mention these are flowers you can actually eat if you choose to?!
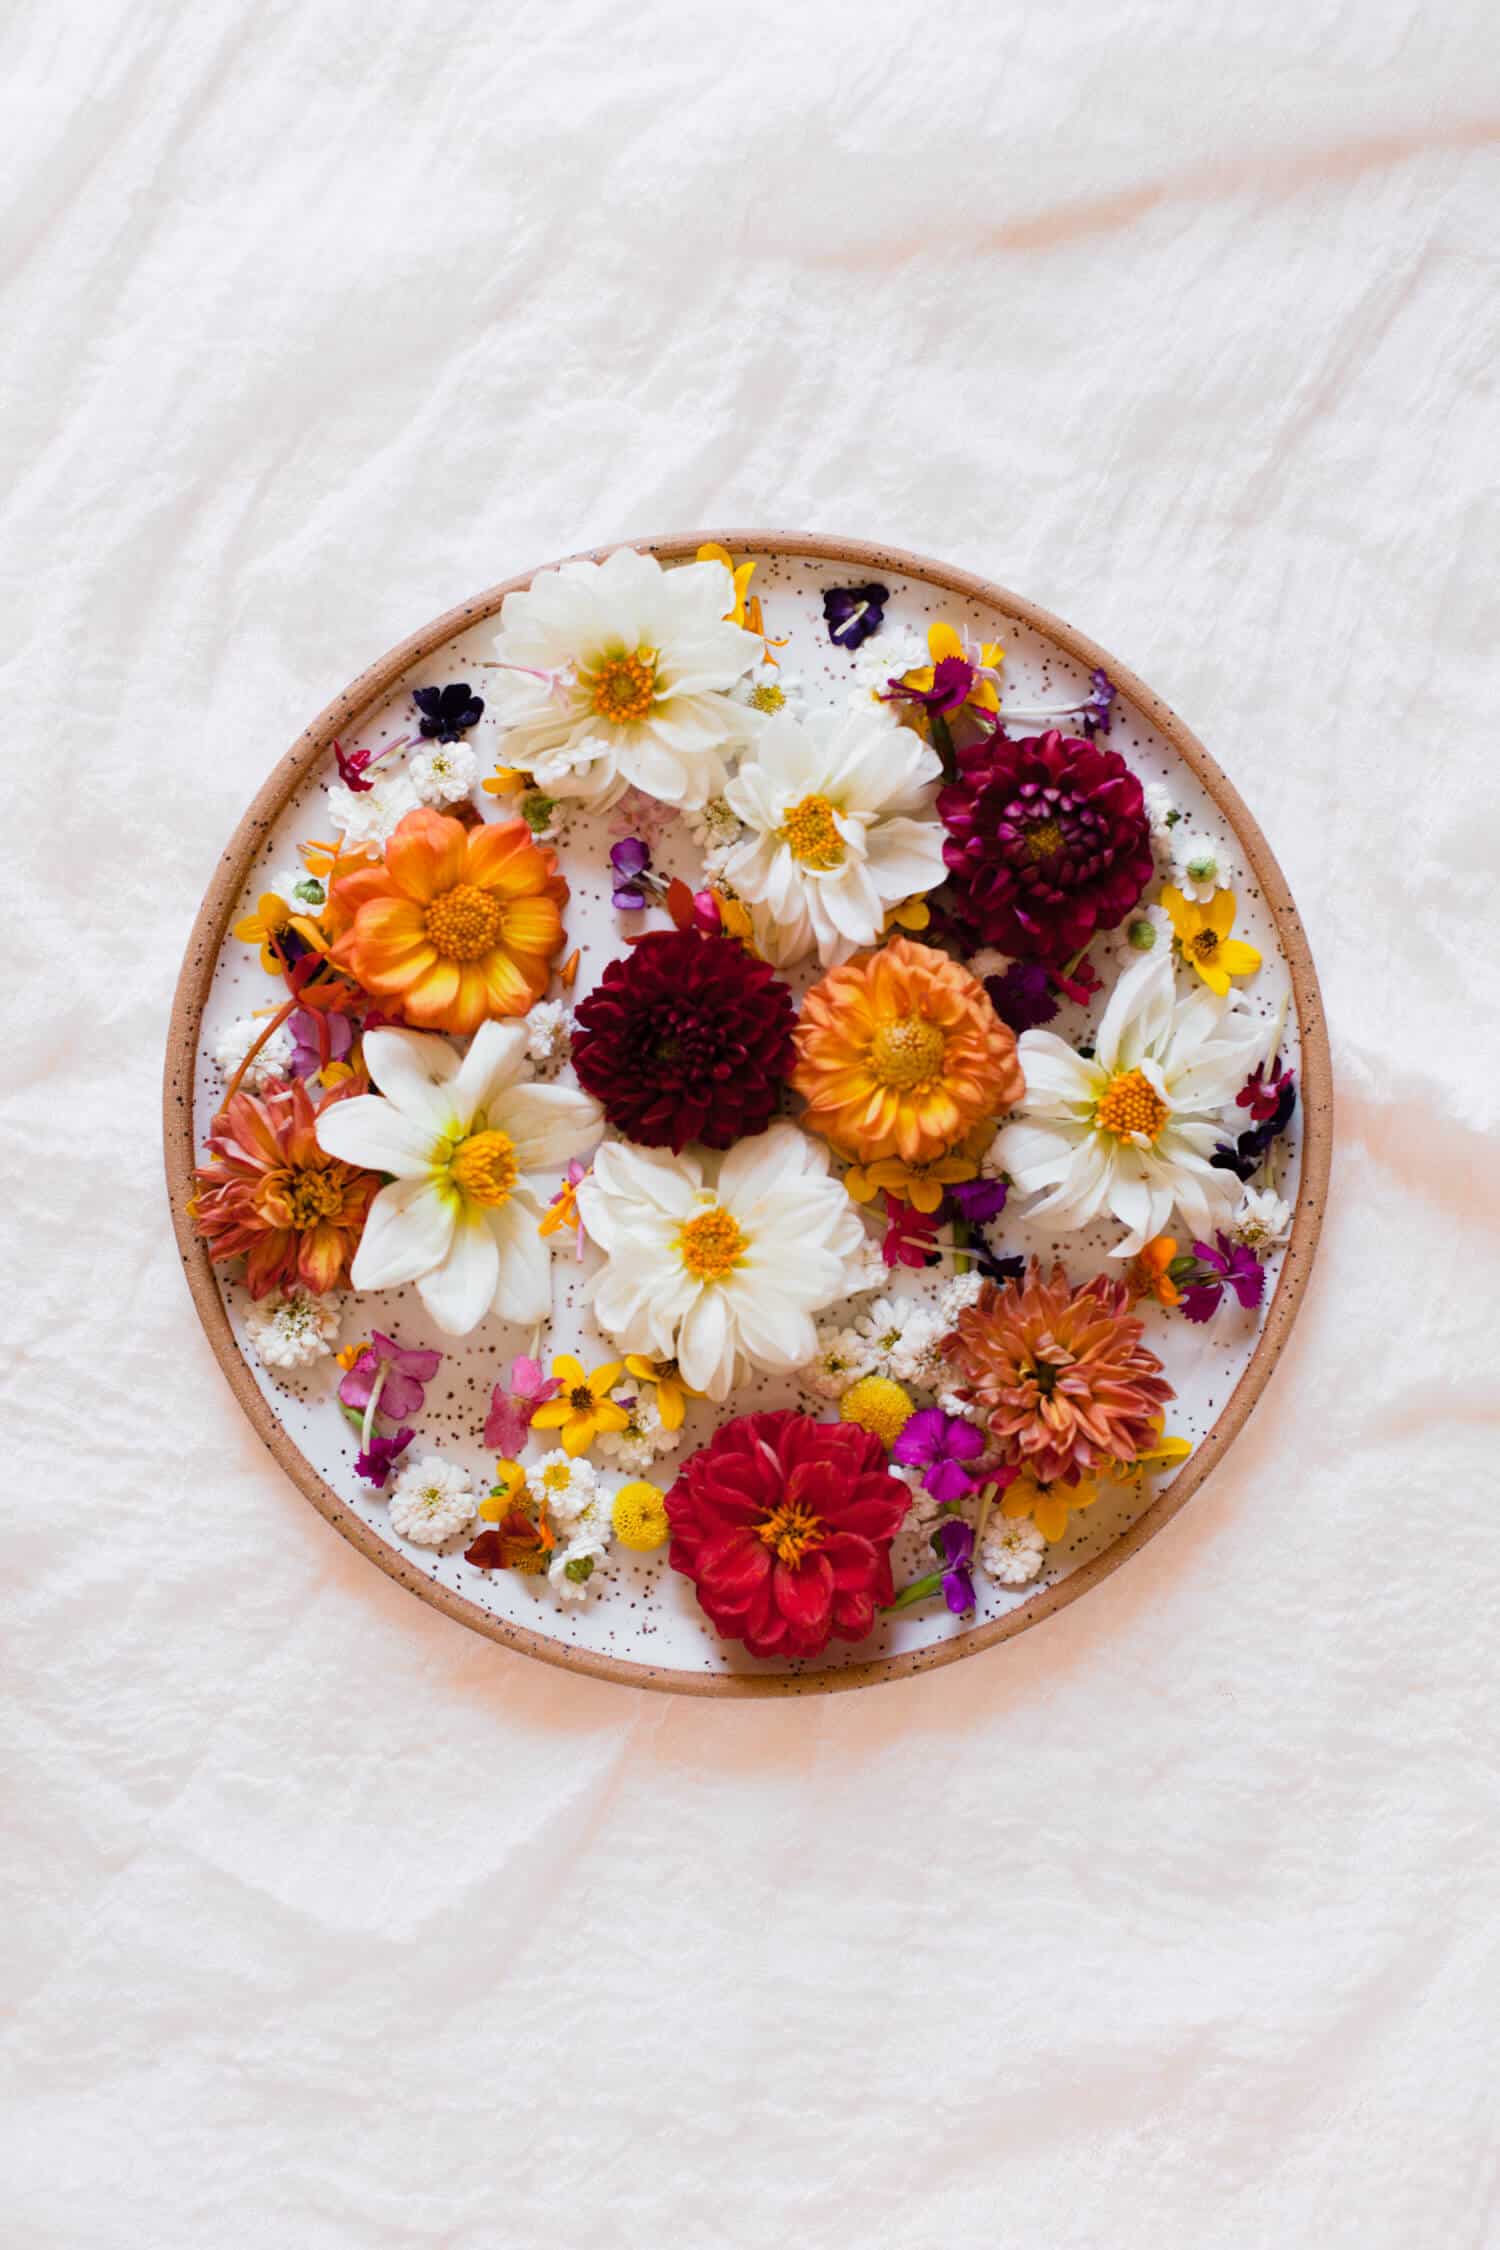 So which flowers are edible? Surprisingly, a lot! Keep in mind that some flowers, like some herbs and teas, aren’t recommended for people with certain health conditions. My favorites for decorating cakes are:
Pansies have a mild flavor that works well with any cake.
Roses have sturdy petals that candy beautifully and a classic floral flavor.
Dahlias come in a variety of colors, shapes and flavors and last a long time.
Mums have a stronger green flavor than others, but hold up for hours.
Lilacs have tiny, delicate flowers that are great plain or candied.
Bachelor buttons look like mini pom poms and have a subtle flavor.
Hibiscus has beautiful petals and a tart, berry flavor.
Orchids can be surprisingly sweet and come in tiny and large sizes.
Impatiens have a very mild flavor.
Begonias have gorgeous pink petals and stems, and a citrusy flavor.
 Here are some tips to keep in mind:
-Only use flowers that are grown specifically for consumption. Edible varieties from markets and garden centers are often sprayed with pesticides. Look for labels that say food grade, edible, or organic.
-Your local wedding cake bakers and flower farmers can point you toward the best sources for edible flowers in your area, or you can find them online. I ordered flowers here.
-Pay attention to flavors when you’re choosing flowers. Chive flowers are beautiful but you don’t want your cake to taste (or smell) like onions!
-Buy flowers the day you’re going to use them so they’re at their freshest whenever possible. You can also store them in a dry bag or container in the refrigerator for a day or two if needed. But the longer you wait the higher the possibility of discoloration or wilting.
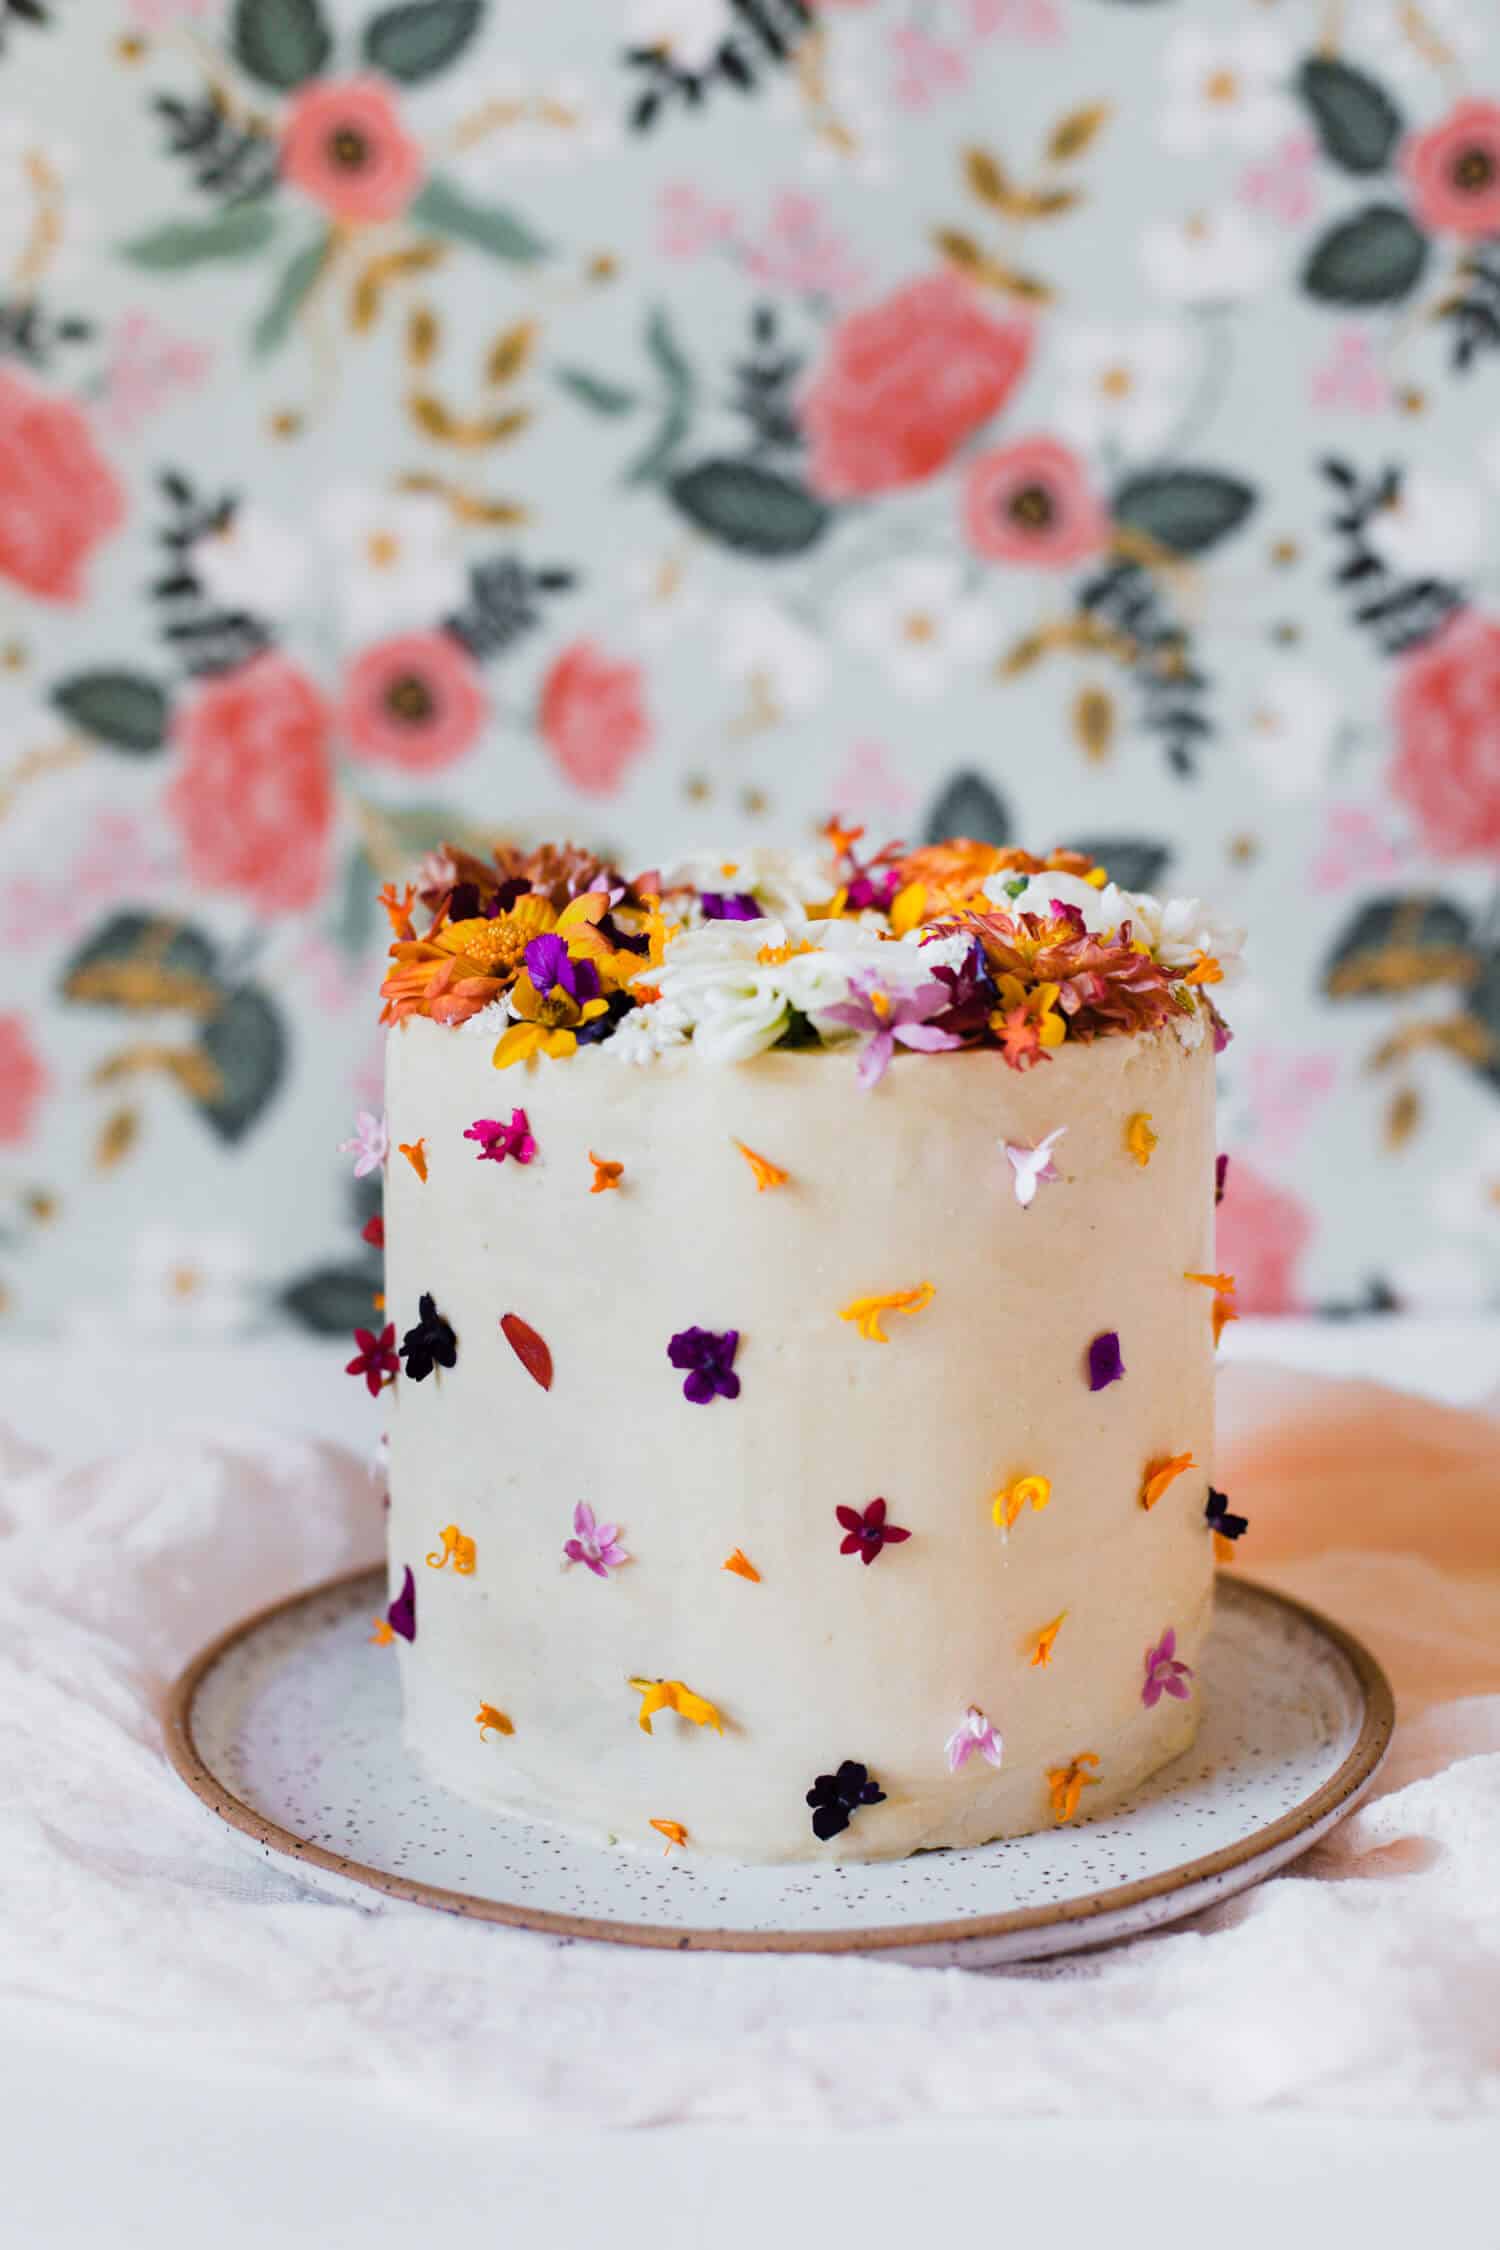
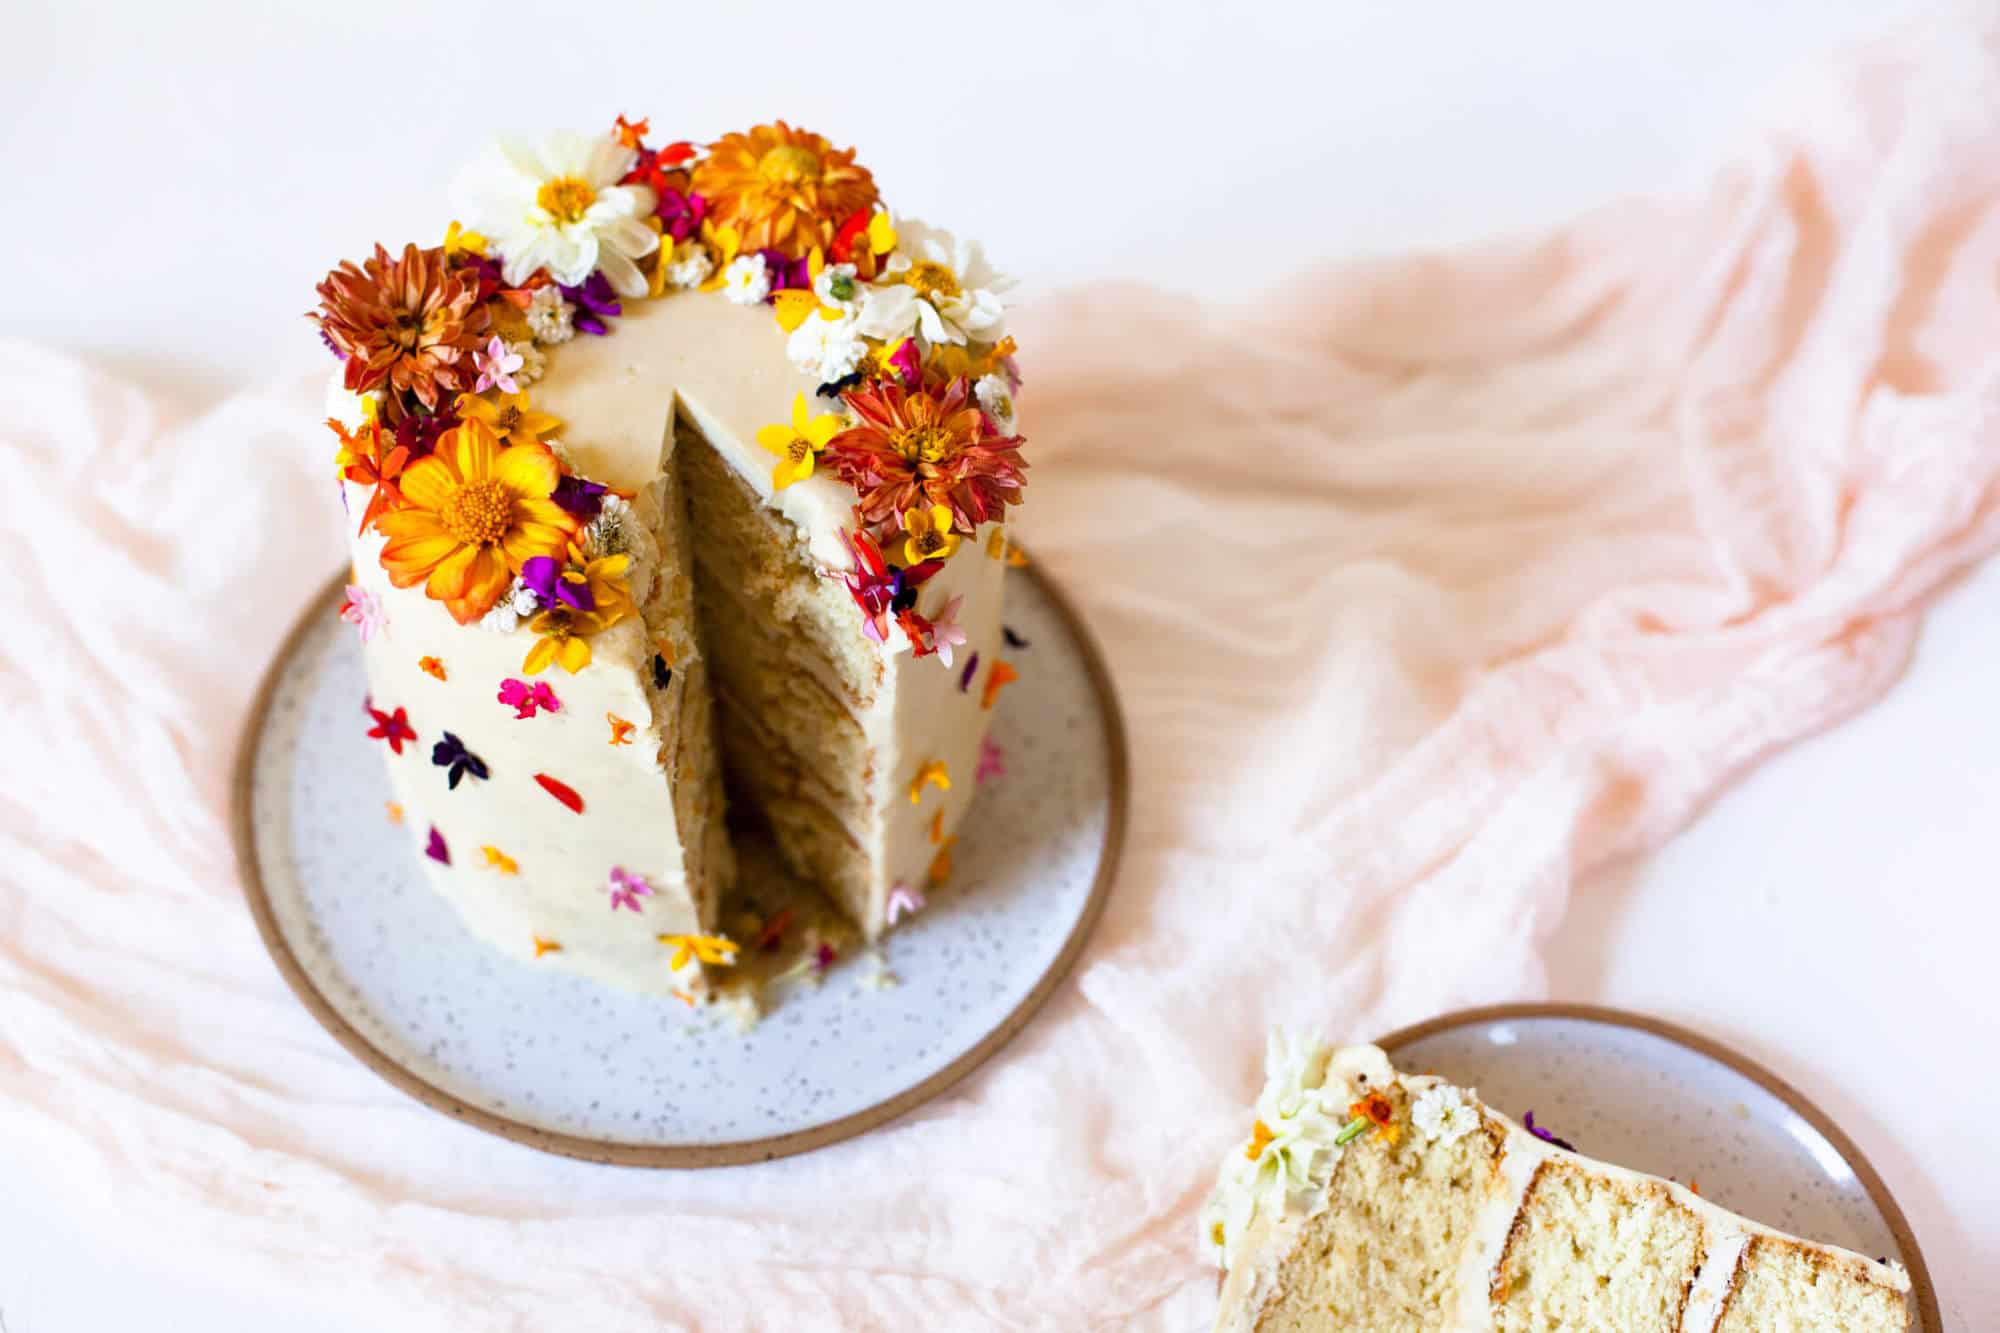
 There are two ways to use edible flowers: plain and candied. The simplest way to decorate with flowers is to gently press them into the cake, just as they are. Some of my favorite looks are:
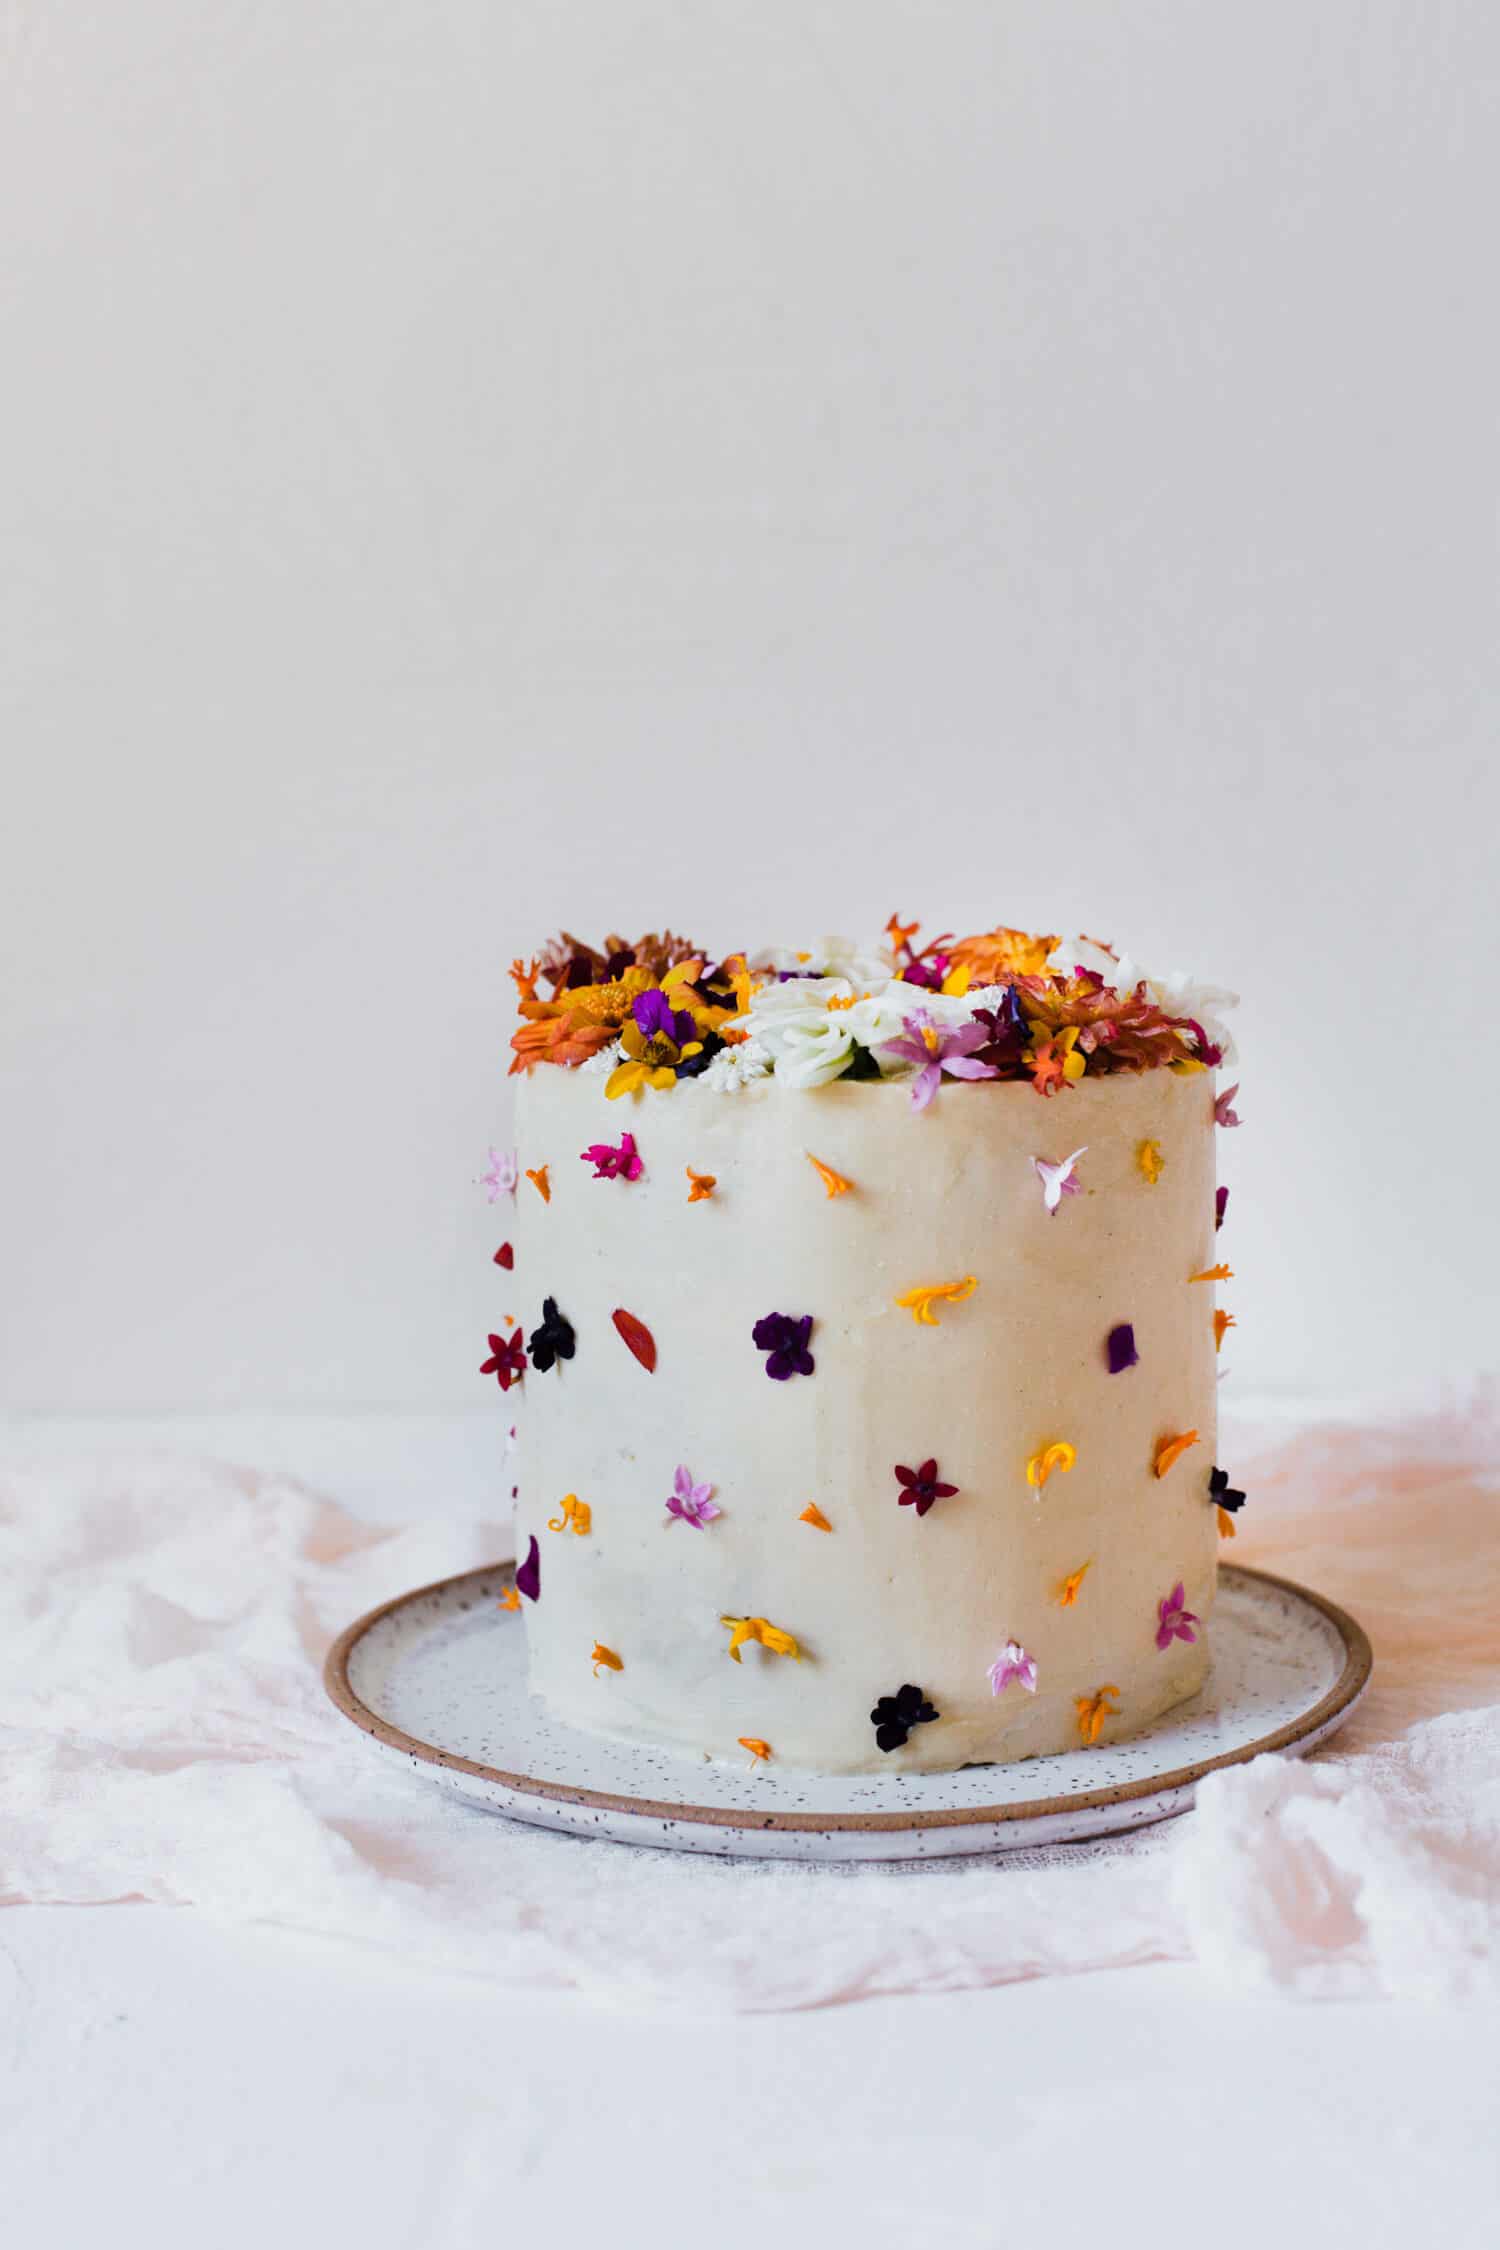
All over confetti using small flowers
A crescent moon along the top edge
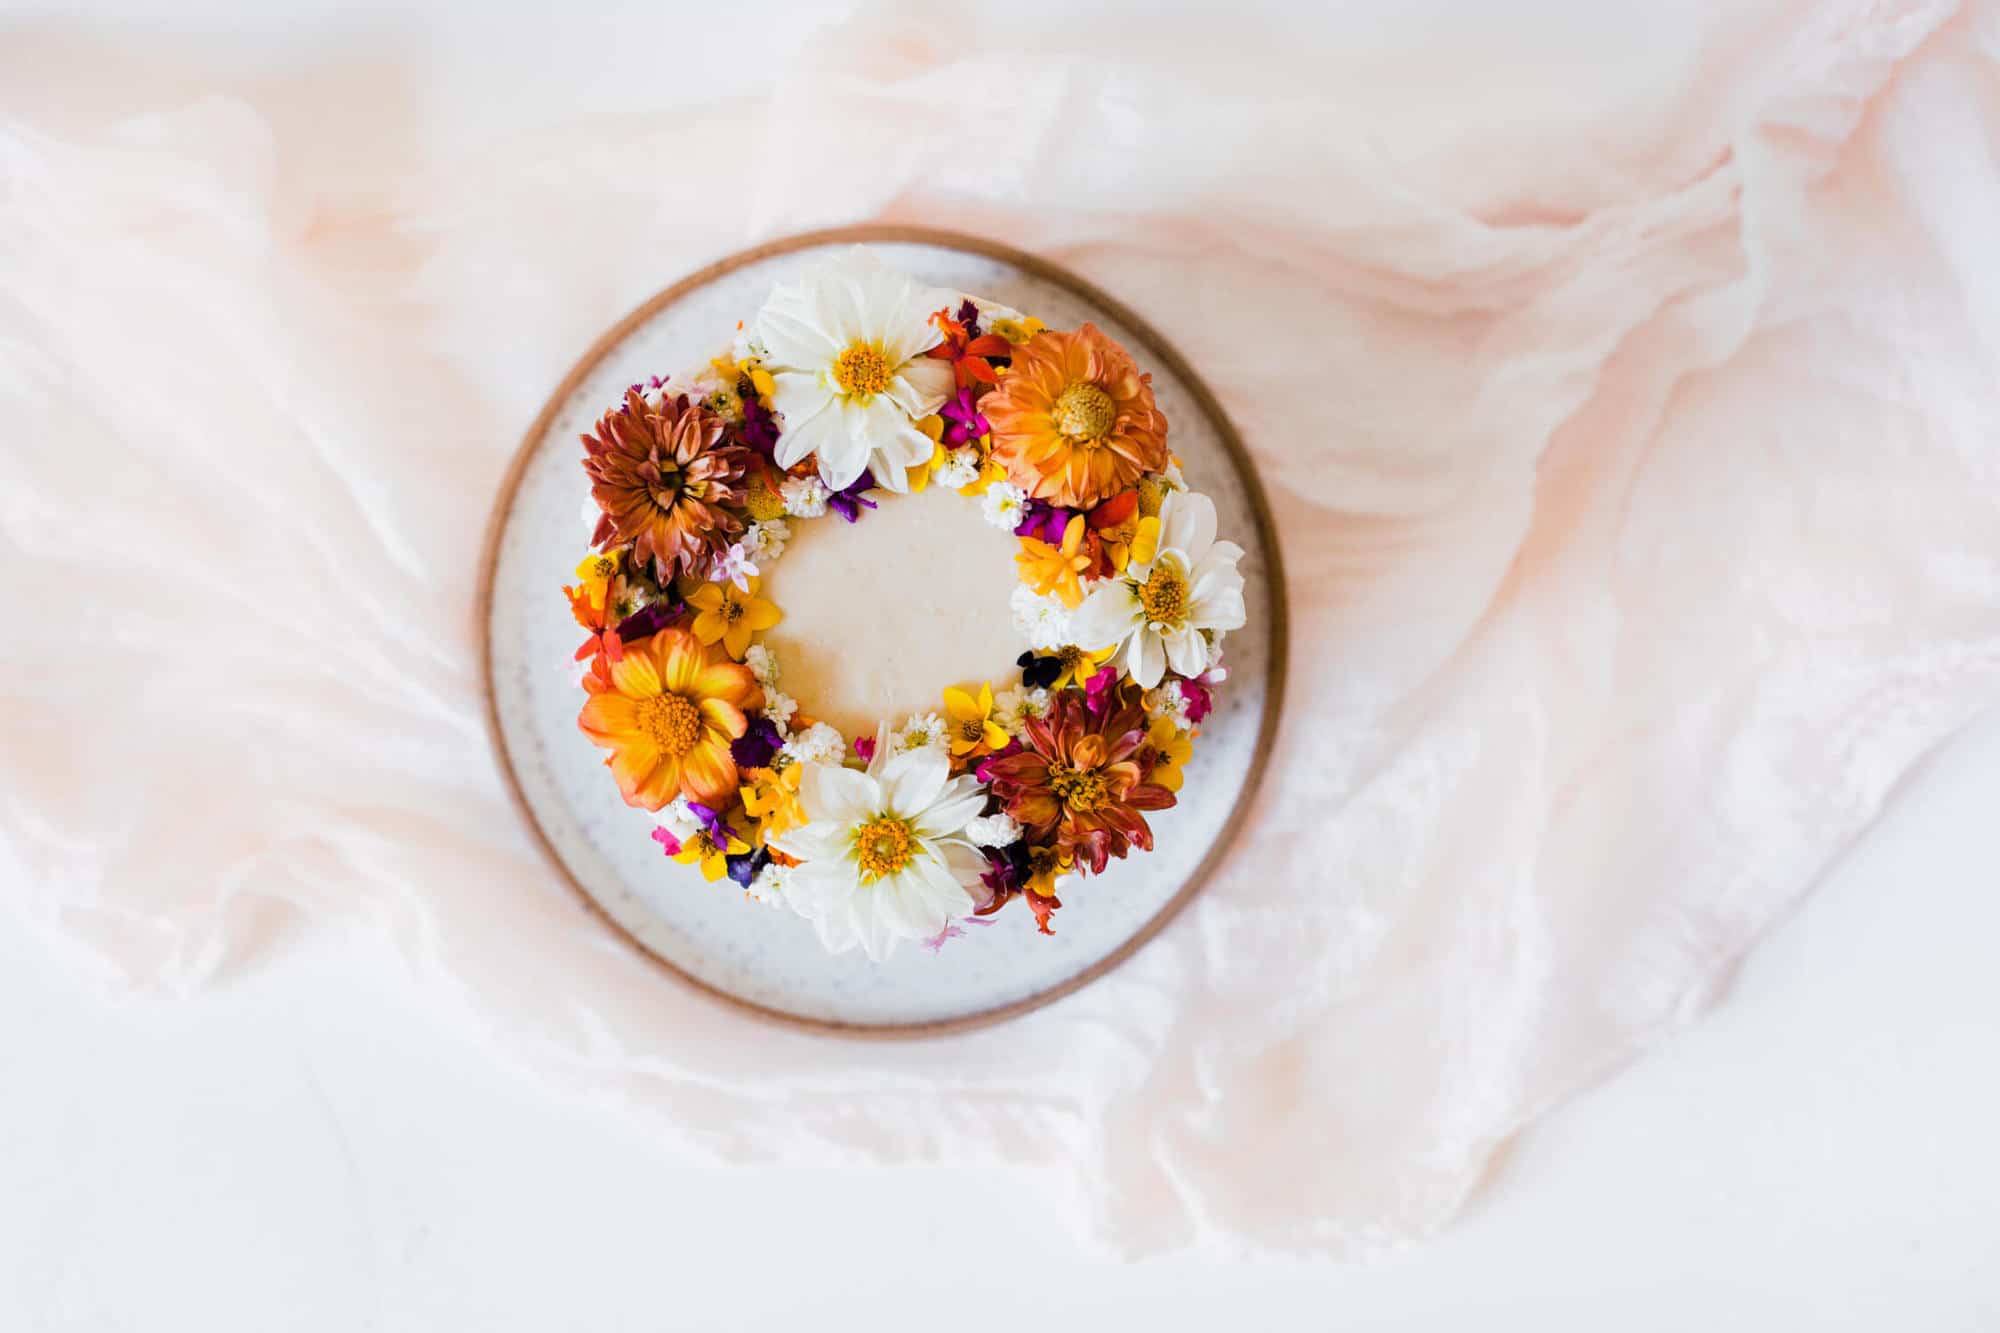
A flower wreath
A big statement flower on top
A rainbow made of different colored flowers
If you’re not into the flowers’ full on flavor, try candying petals or whole flowers, which takes the bite out of bolder flavors and gives them a sugary crunch! Use a small paintbrush to coat the flowers in beaten egg white, then sprinkle evenly with superfine sugar. Let the egg white dry a few hours before adding to your cake. Use pasteurized egg whites to avoid salmonella risk.
 Decorating tips:
-Pick a frosting that stays soft, like Swiss meringue buttercream. American buttercream forms a crust, making flowers more likely to fall off.
-Frost the cake ahead of time, but save the flowers for as close to when you’re serving the cake as possible. Some flowers wilt quickly at room temperature.
-Keep your flowers refrigerated until you need them.
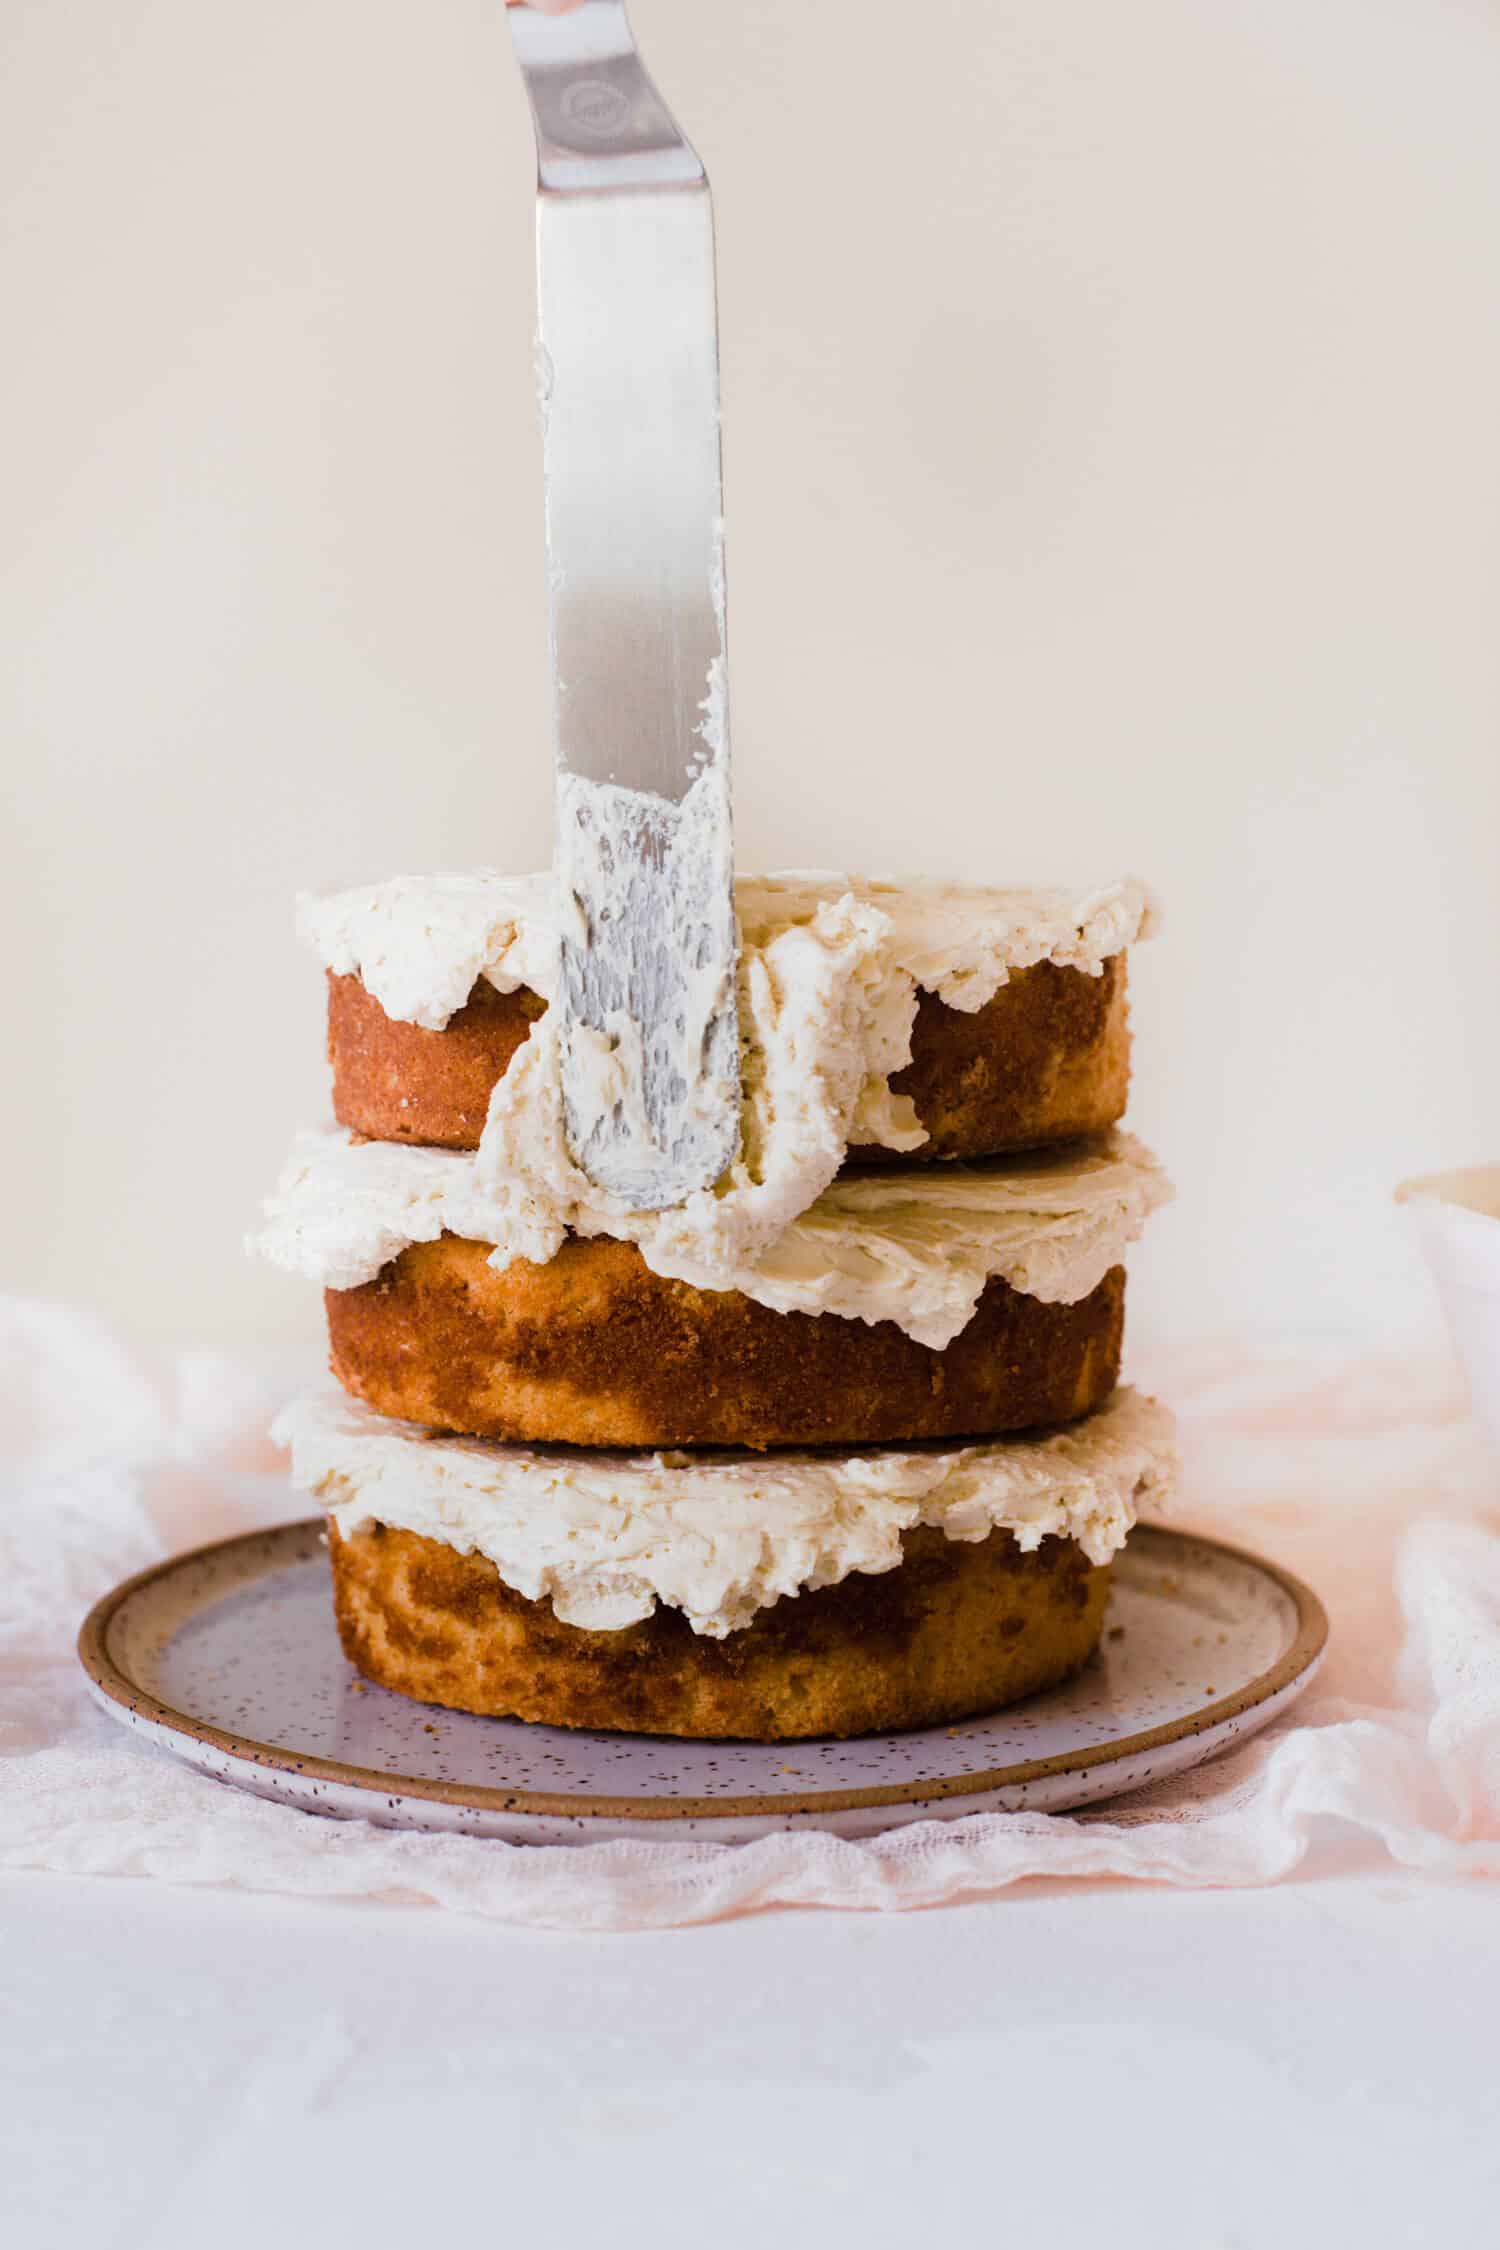 To assemble the cake, level the (completely cooled) layers by removing the domed tops with a serrated knife. Snack on the scraps as you frost! Spoon a heaping cup or so of frosting onto the first layer and spread using an offset spatula or a butter knife held parallel to the cake. Spread the frosting outward, using a back and forth motion so the spatula never lifts the frosting or touches the cake directly (to avoid crumbs), until it’s even and as thick as you want it. Let the frosting hang over the edge of the layer. Stack the next layer and repeat.
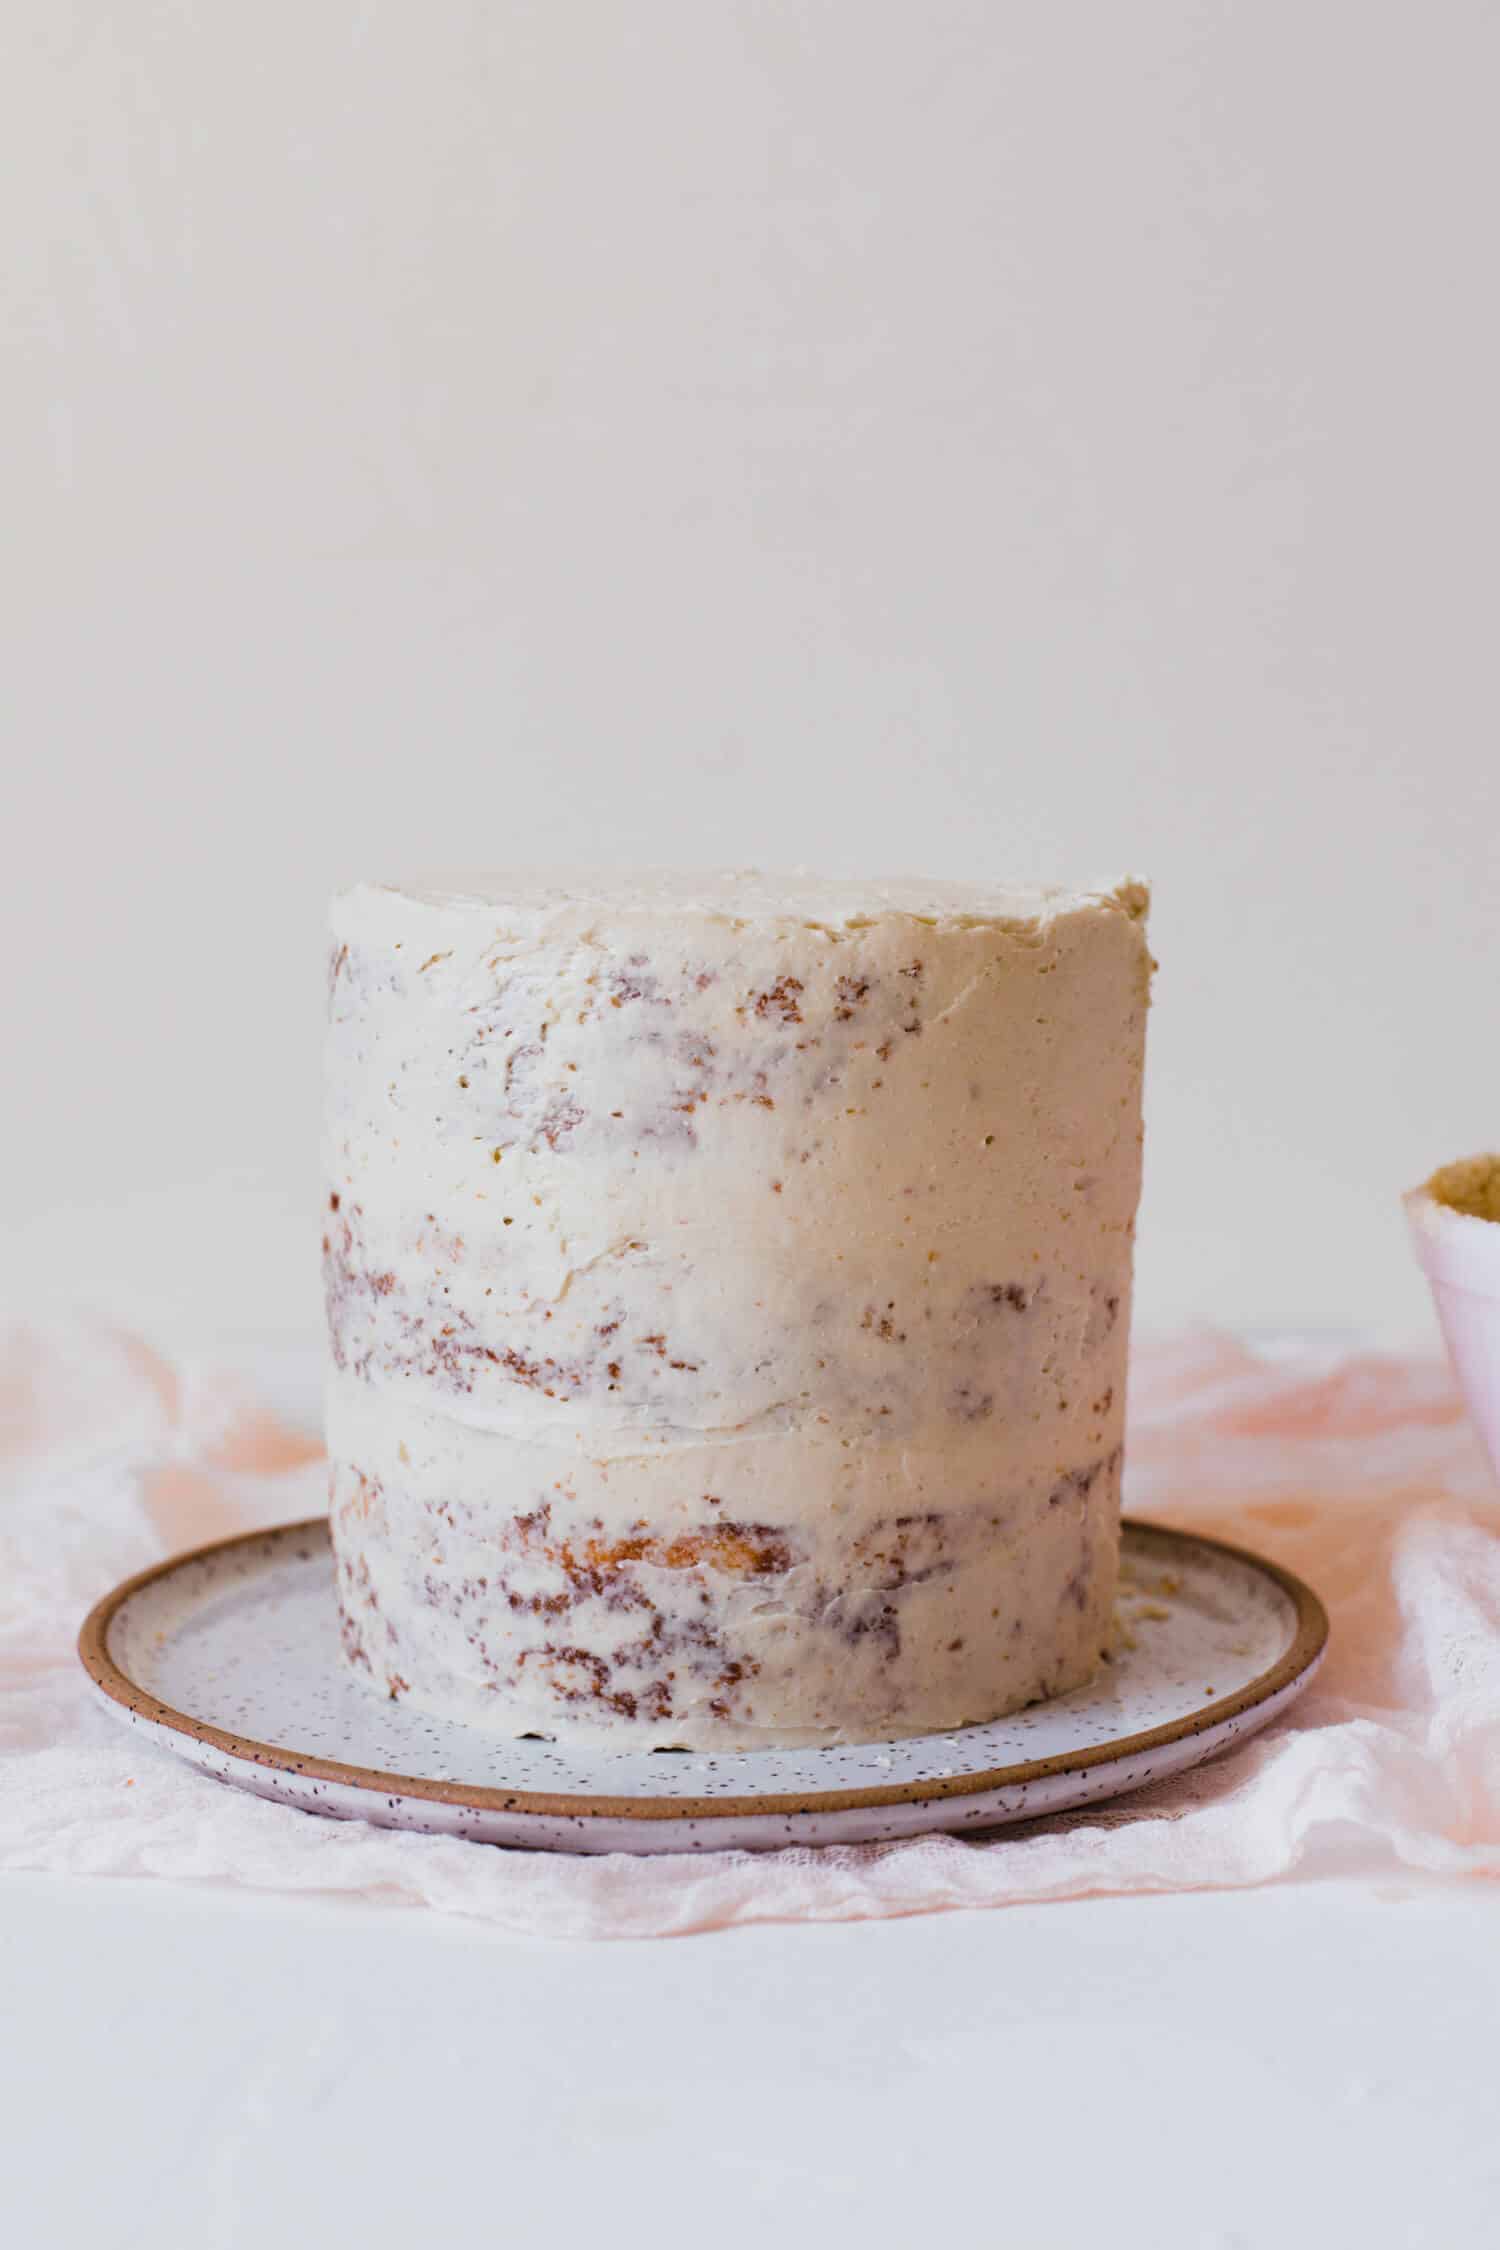
Give the cake a crumb coat—that’s a thin layer of frosting that locks in crumbs and acts as a foundation for the outer frosting. Use plenty of frosting, so you can spread it without lifting it up or touching the cake layers with the spatula. Once the crumbs are sealed in, smooth off the excess.
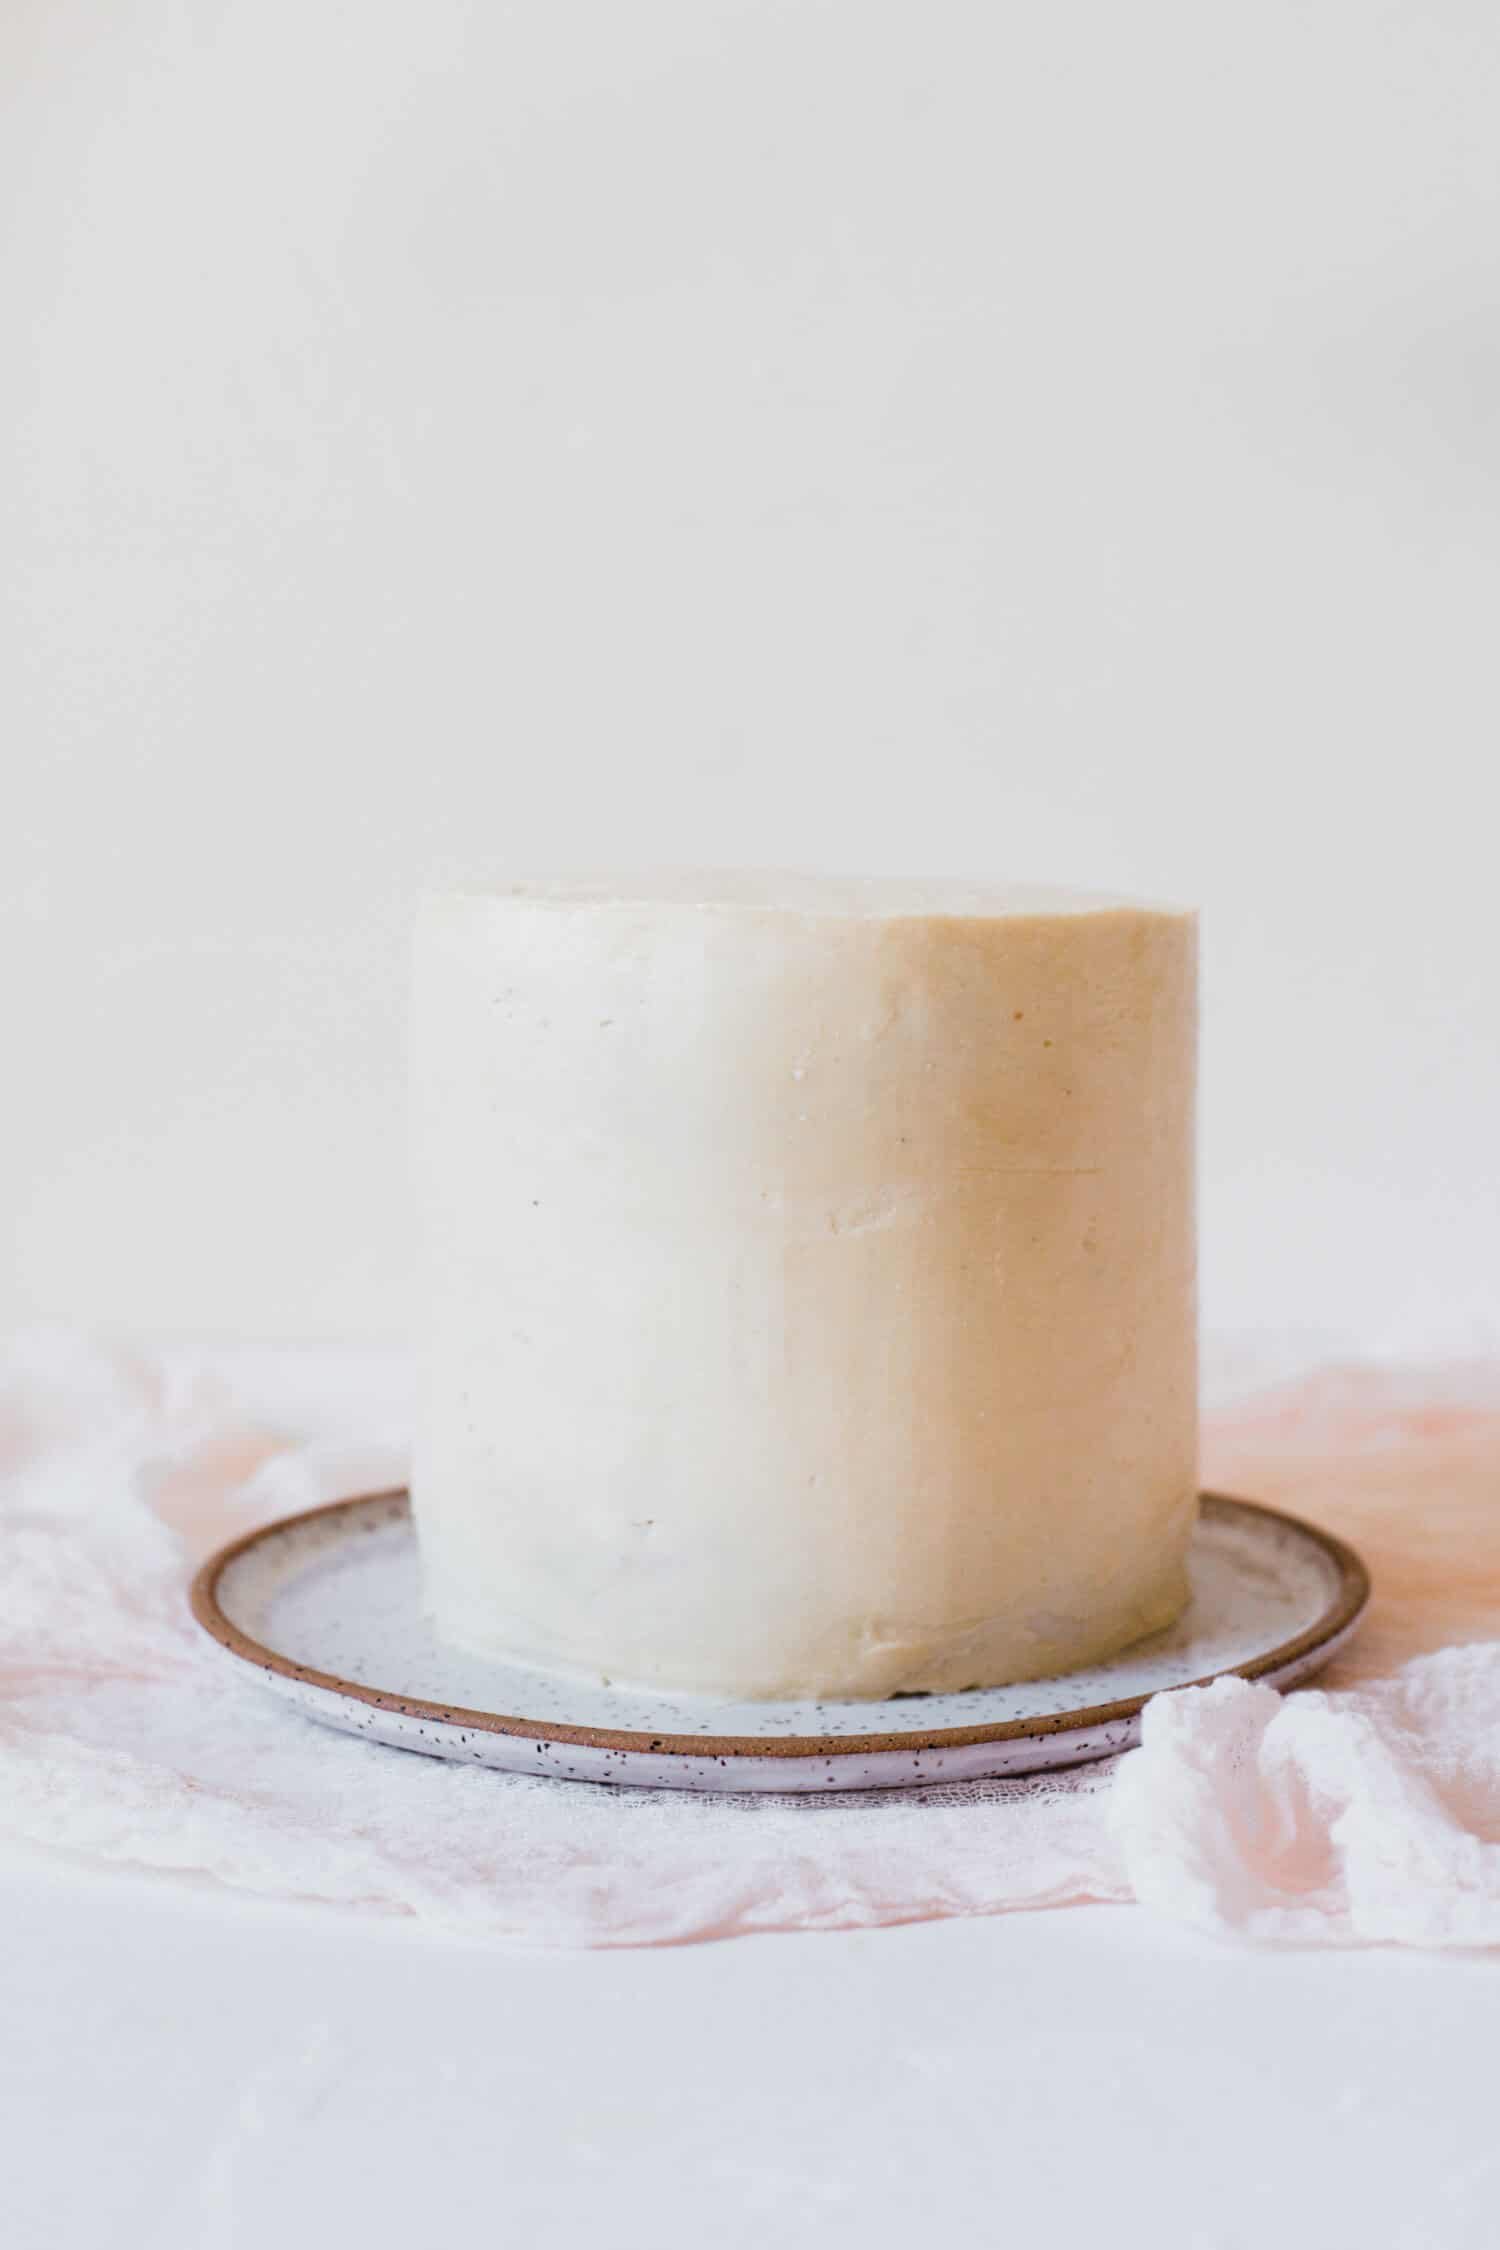
Add dollops of frosting to the tops and sides, then spread them out until the cake looks smooth. Don’t worry if it’s not perfect—mine has some little flaws that you don’t notice at all once the flowers are on.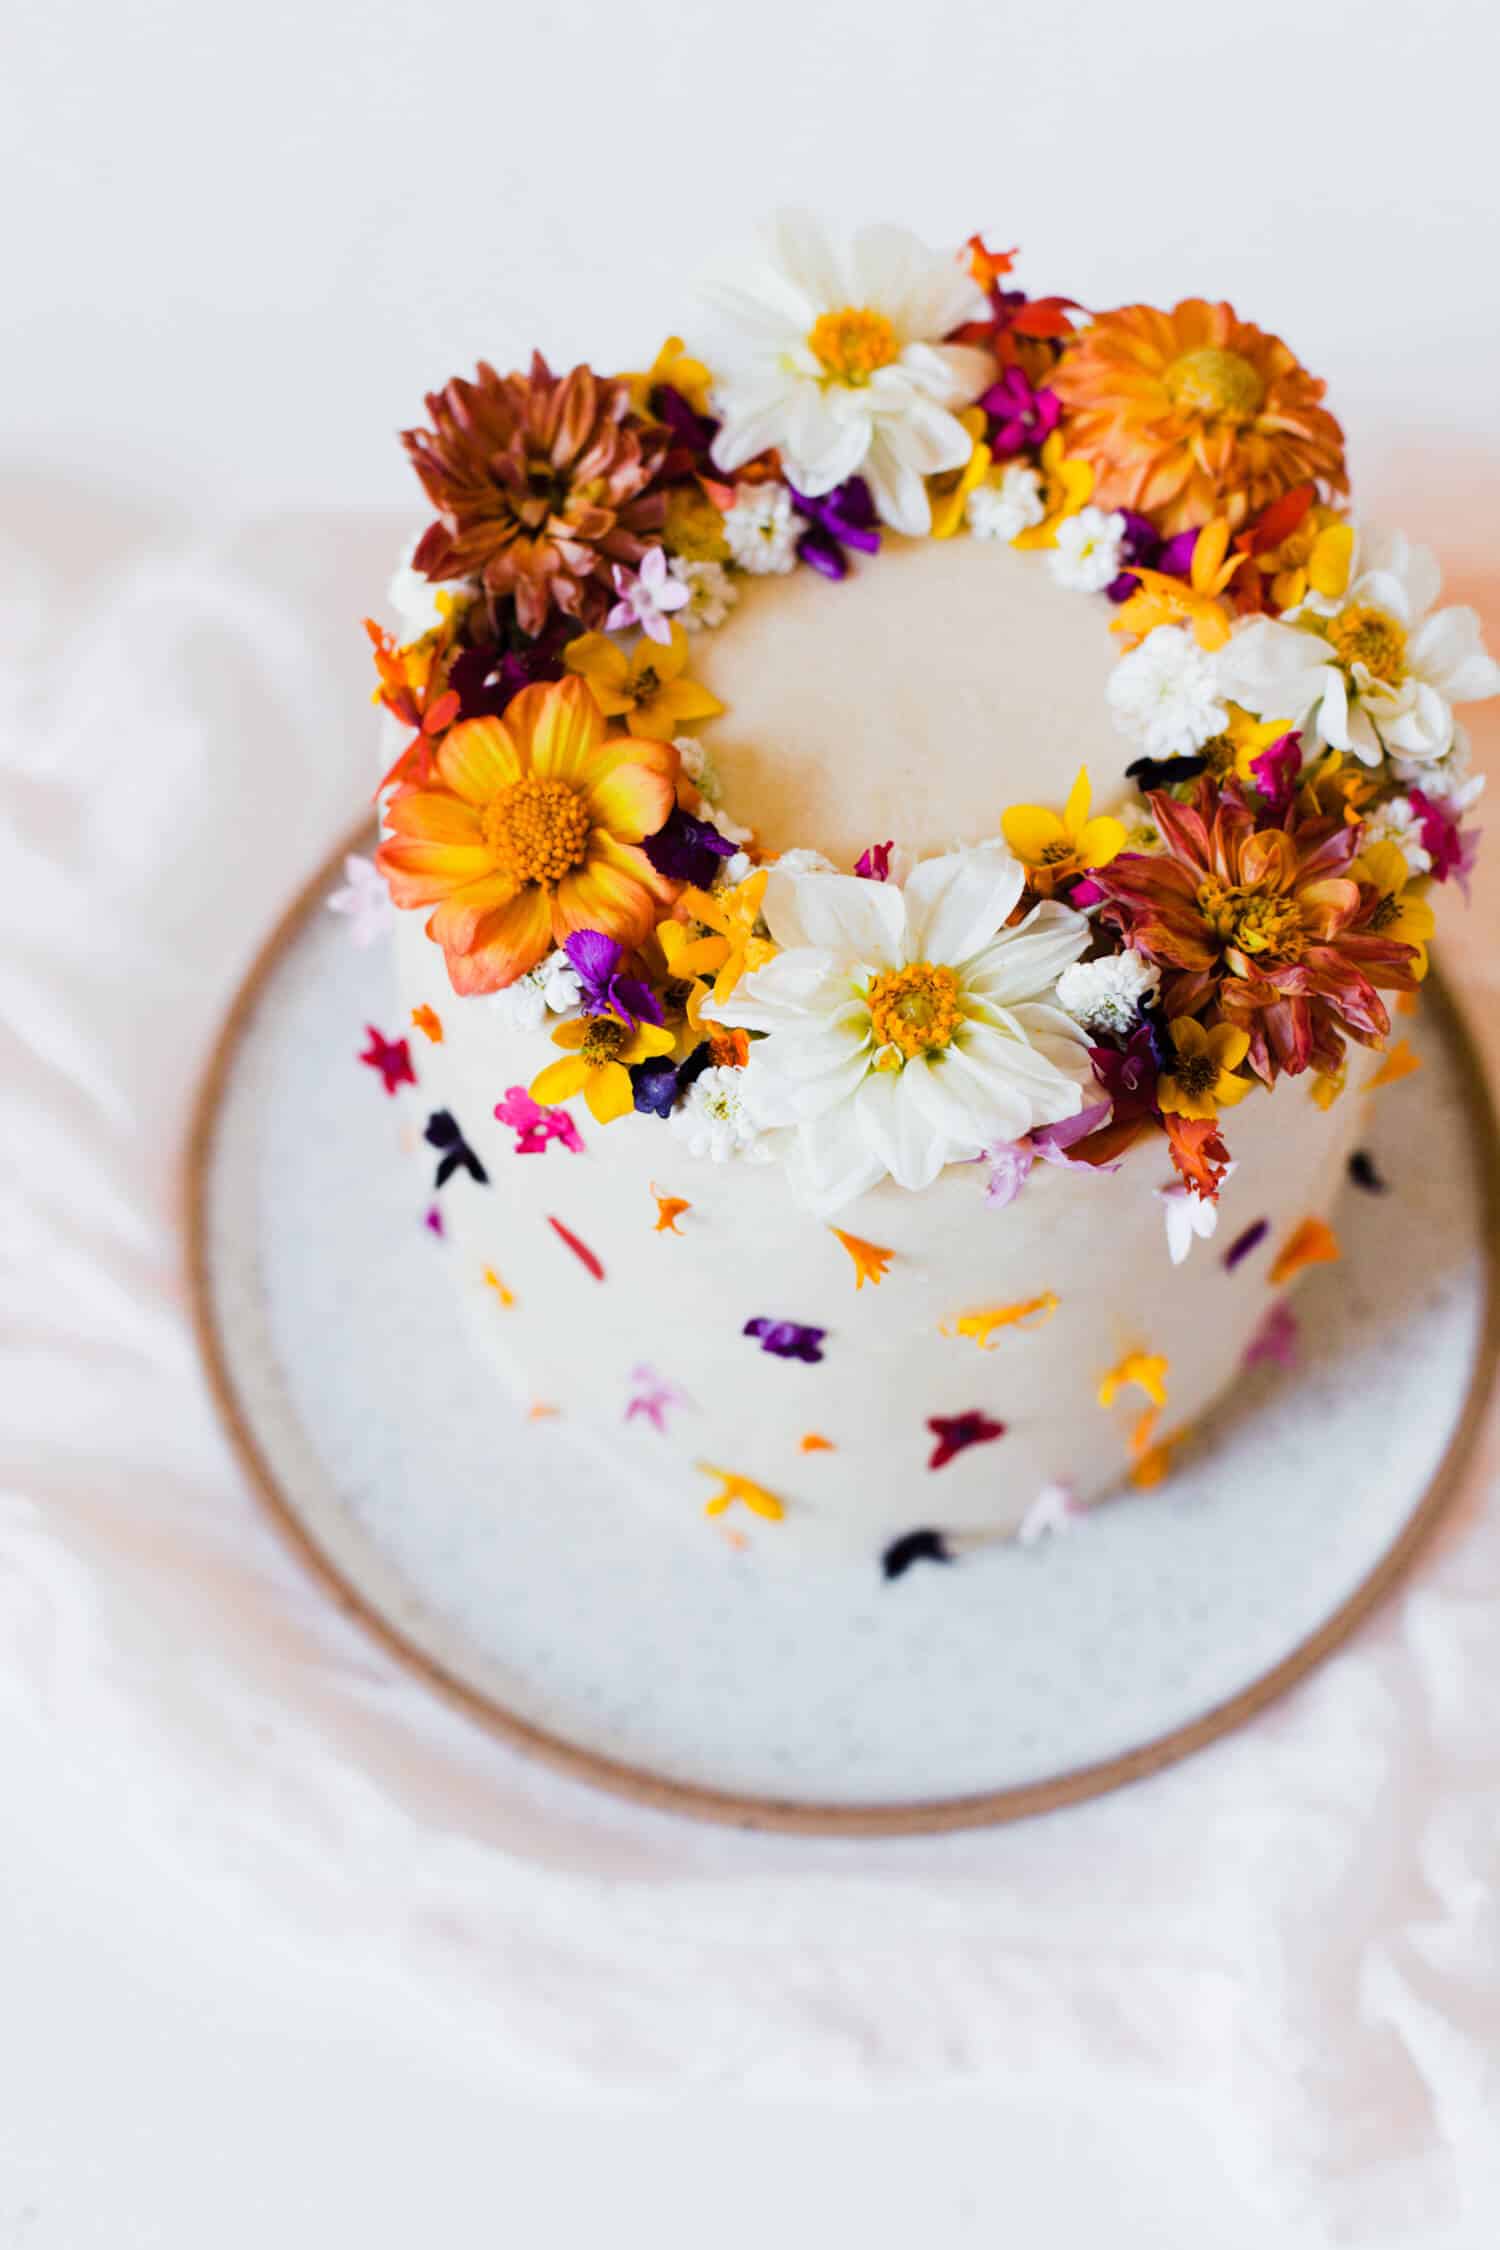
Add your flowers! I started with seven dahlias on top of the cake then filled the gaps with miniature mums, sun daisies, dianthus, tiny orchids and star flowers. Then I added miniature marigolds, star flowers and dianthus petals to the sides. Slice and serve while the flowers are fresh.
Edible Flower Cake
A one-bowl almond cake covered in Swiss meringue buttercream and edible flowers.
Ingredients
For the cake
- 2 1/2 cups all purpose flour scooped and leveled
- 1 2/3 cups granulated sugar
- 2 1/2 teaspoons baking powder
- 3/4 teaspoon salt
- 1/2 cup unsalted butter room temperature
- 2 tablespoons expeller pressed canola oil
- 1 cup whole milk
- 1 tablespoon vanilla extract
- 1 teaspoon almond extract
- 3 large eggs room temperature
For the Swiss meringue buttercream
- 8 egg whites or 8 oz. pasteurized egg whites
- 2 cups granulated sugar
- 1 1/2 cups unsalted butter room temperature
- 1 tablespoon vanilla extract
- 1/4 teaspoon salt
- a mix of edible flowers
Instructions
For the cake
-
Preheat over to 350º F.
-
Add the sugar, flour, baking powder and salt to the bowl of a stand mixer and whisk together. Beat in the butter and oil with the paddle attachment until the mixture looks like wet sand.
-
Mix the milk, vanilla and almond extract in on medium low speed. Add the eggs one at a time, mixing after each one until incorporated.
-
Divide between three 6" cake pans greased and lined with parchment. Bake until a toothpick comes out clean. Start checking for doneness around 30 minutes. Let cool in the pans for five minutes then turn onto a rack to cool completely before frosting.
For the Swiss meringue buttercream
-
Add the egg whites and sugar to the bowl of a stand mixer, making sure the bowl is very clean first. Place over a pot of simmering water (but don't let the bottom of the bowl touch the water). Whisk constantly until the sugar is dissolved and the mixture is very hot. If you used regular egg whites, use a thermometer to make sure the mixture reaches 160º. For pasteurized egg whites, you don't need a thermometer.
-
Place the bowl back on the stand mixer fitted with the whisk attachment. Whisk on medium high speed until the mixture turns into voluminous, glossy meringue and the bottom of the bowl has cooled to room temperature. The meringue should be stiff enough that it won't slide out of the bowl if you turn it upside down.
-
Switch to the paddle attachment and begin incorporating the butter, one tablespoon at a time, on medium low speed. Wait until each tablespoon is mixed in before adding another. Don't worry if it looks curdled or separated.
-
Once all the butter is added, scrape down the sides of the bowl and mix on medium high speed until the buttercream is smooth and fluffy. If it hasn't come together after 5 minutes, it may be too warm. Refrigerate for 5 minutes then try mixing again. Mix in the vanilla and salt.
To decorate
-
Frost and decorate the cake as desired. Serve at room temperature.
Recipe Notes
You can bake the cake layers and make the buttercream in advance. Wrap the cooled cake layers in plastic and freeze to keep them fresh (this can make frosting easier too). Let refrigerated buttercream come to room temperature (it can take a few hours) and remix until it's fluffy before using.
I love how the fresh flowers look on this cake and it only took 10 minutes to decorate! Plus, everyone I’ve served flowers to has been really excited to try them. I highly recommend putting flower confetti on the sides of your cake like I did because it’s the handiest way to hide imperfections. Your cake will look perfect and no one will ever know! Have you ever baked with edible flowers? What’s your favorite kind? xo Kayleigh
12 Comments
This is a beautiful cake! I’m not that great of a baker, but I’d love to make my own edible flower cake one day. Too bad edible flowers are so expensive where I live! 🙁
Charmaine Ng | Architecture & Lifestyle Blog
http://charmainenyw.com
I never ever used flowers so far for cakes but now I want to try it out!
xx from Bavaria/Germany, Rena
http://www.dressedwithsoul.com
SO pretty 🙂 I always get excited when I get to eat flowers haha
Your cake looks beautiful! I actually put edible flowers on a cake that I made for a dinner party this weekend! I put pansies and dianthus flowers from my garden. im excited to grow other edible flowers in our garden!. We have tons of mums of various colors in our front yard that I’ll have to put on a fall cake!
Felicia
http://www.casalibrablog.com
What a beautiful addition to any cake!
https://www.makeandmess.com/
gorg photos and a great cake girl!
These look so cute! It makes me want to get in the kitchen and start baking!
Paige
http://thehappyflammily.com
what a great post, thank you! Love the list of edible flowers since, as you write, edible real flowers are just better than a bunch of sugar pressed into a flower pattern,!
cake looks amazing ,
i am not sweet lover but i like to taste different food items
This is beautiful. My goodness, almost too pretty to eat. Keep up the good work.
Emilia
IMomIWorkILove.com
So gorgeous! This looks delicious.
-Jackie | Jackieomy.com
What a creative way to make a cake so beautiful! I love this idea and will have to use it this weekend!! Thank you!
Kendra
Wanderinginsunshine.com