
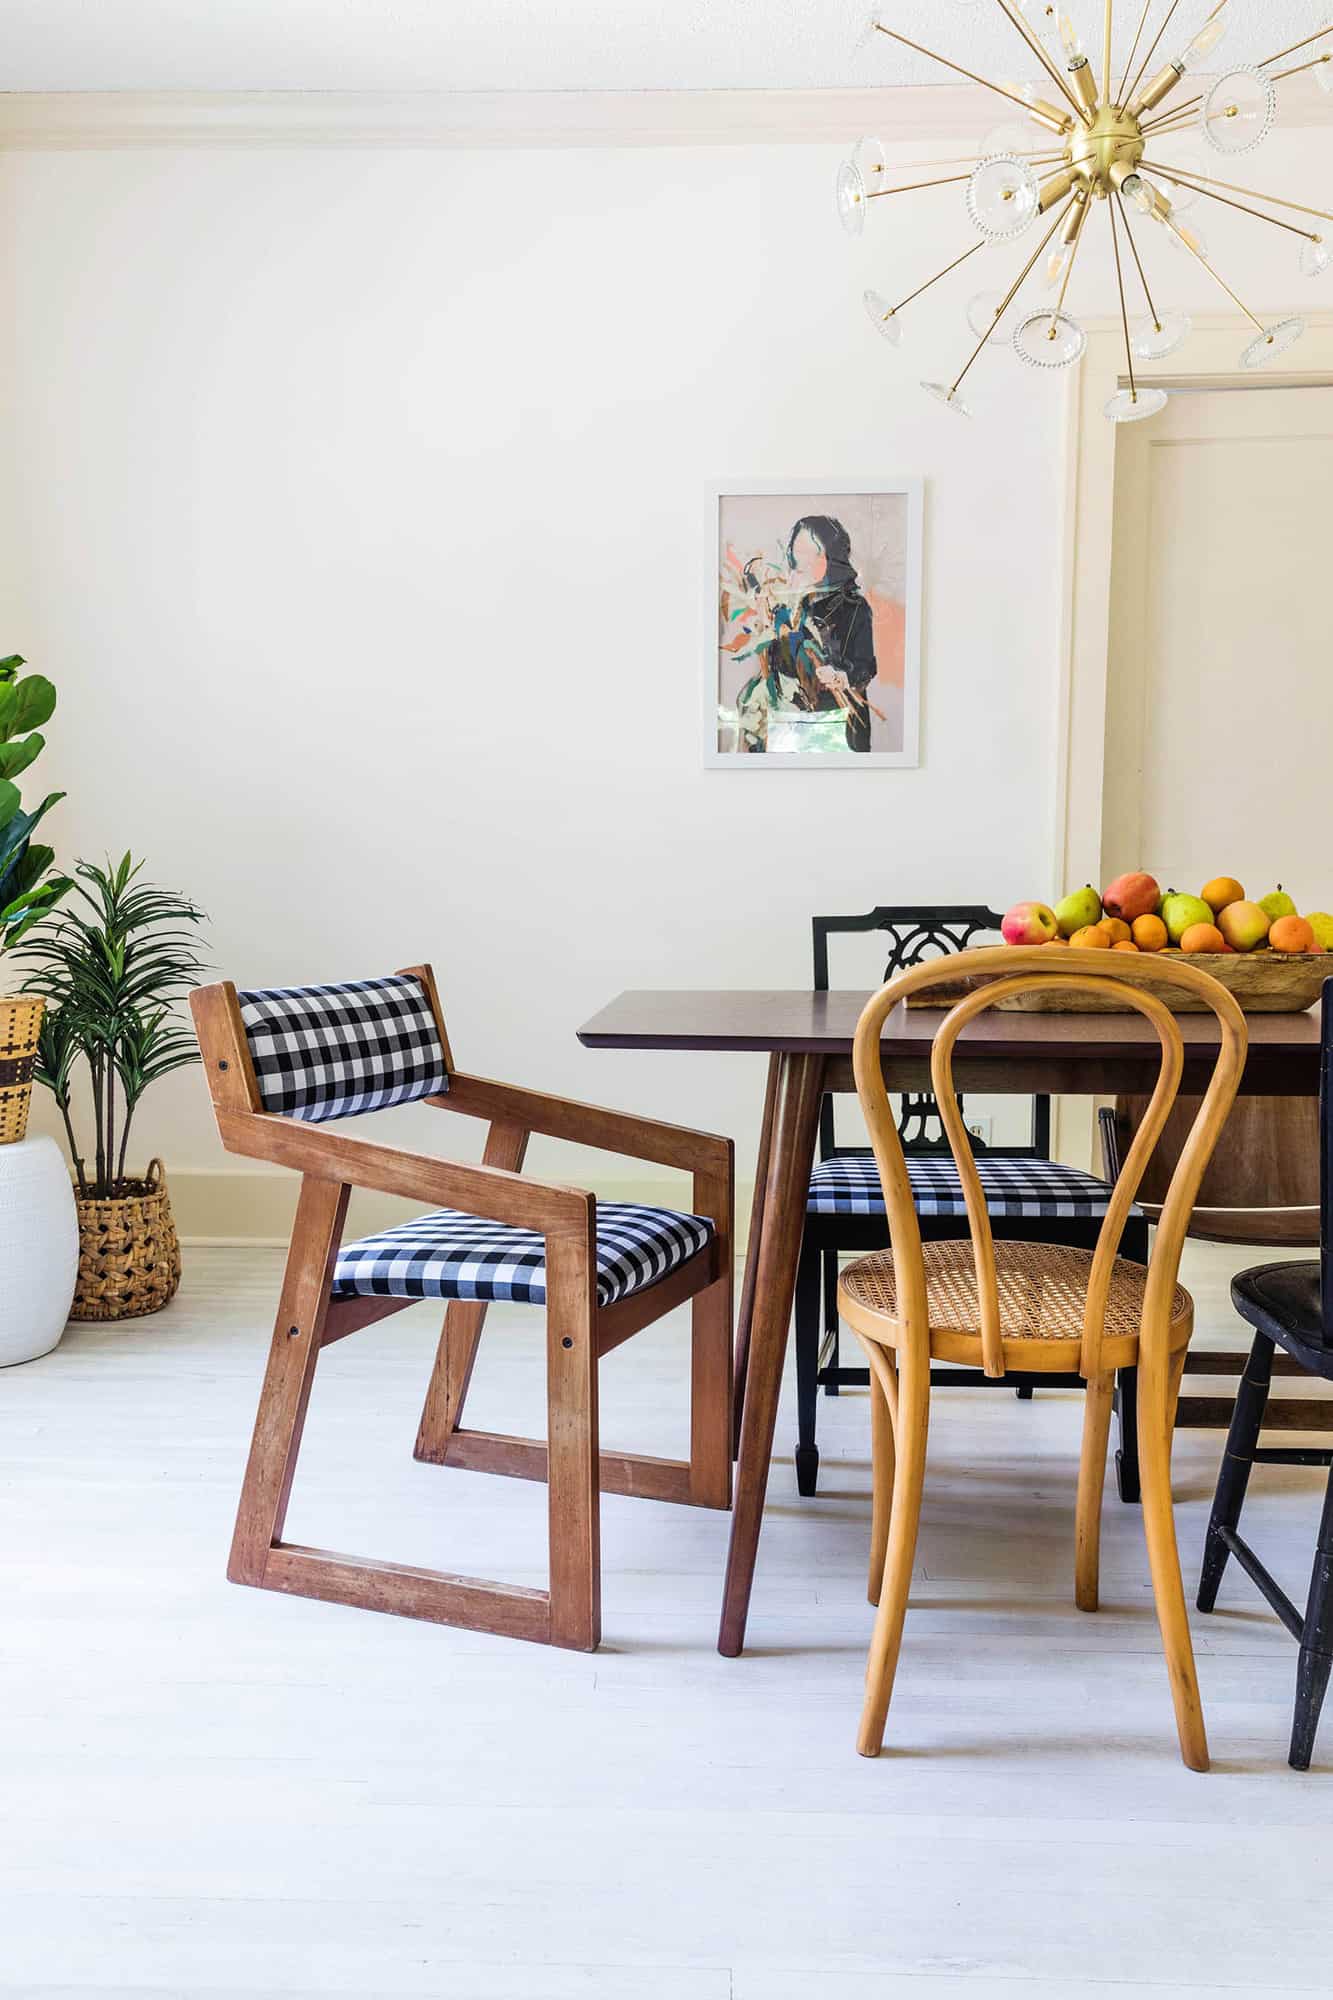
 If you follow us on Instagram, you’ve probably seen many behind the scenes at the Springfield Bnb house (Elsie’s second home for the holidays). We are still finishing up many things, but some rooms are beginning to come together and I am starting to add some furniture. I am normally a very slow decorator, and it’s taken me about four years to “finish” my personal home. So I am getting started on Elsie’s Springfield home (along with her, we email and FaceTime about the house a LOT), knowing that I’ll likely add more and tweak things as we still finish many projects. Today, you’re getting a peek into the dining room because I wanted to share these super simple reupholstered (thrifted) chairs.
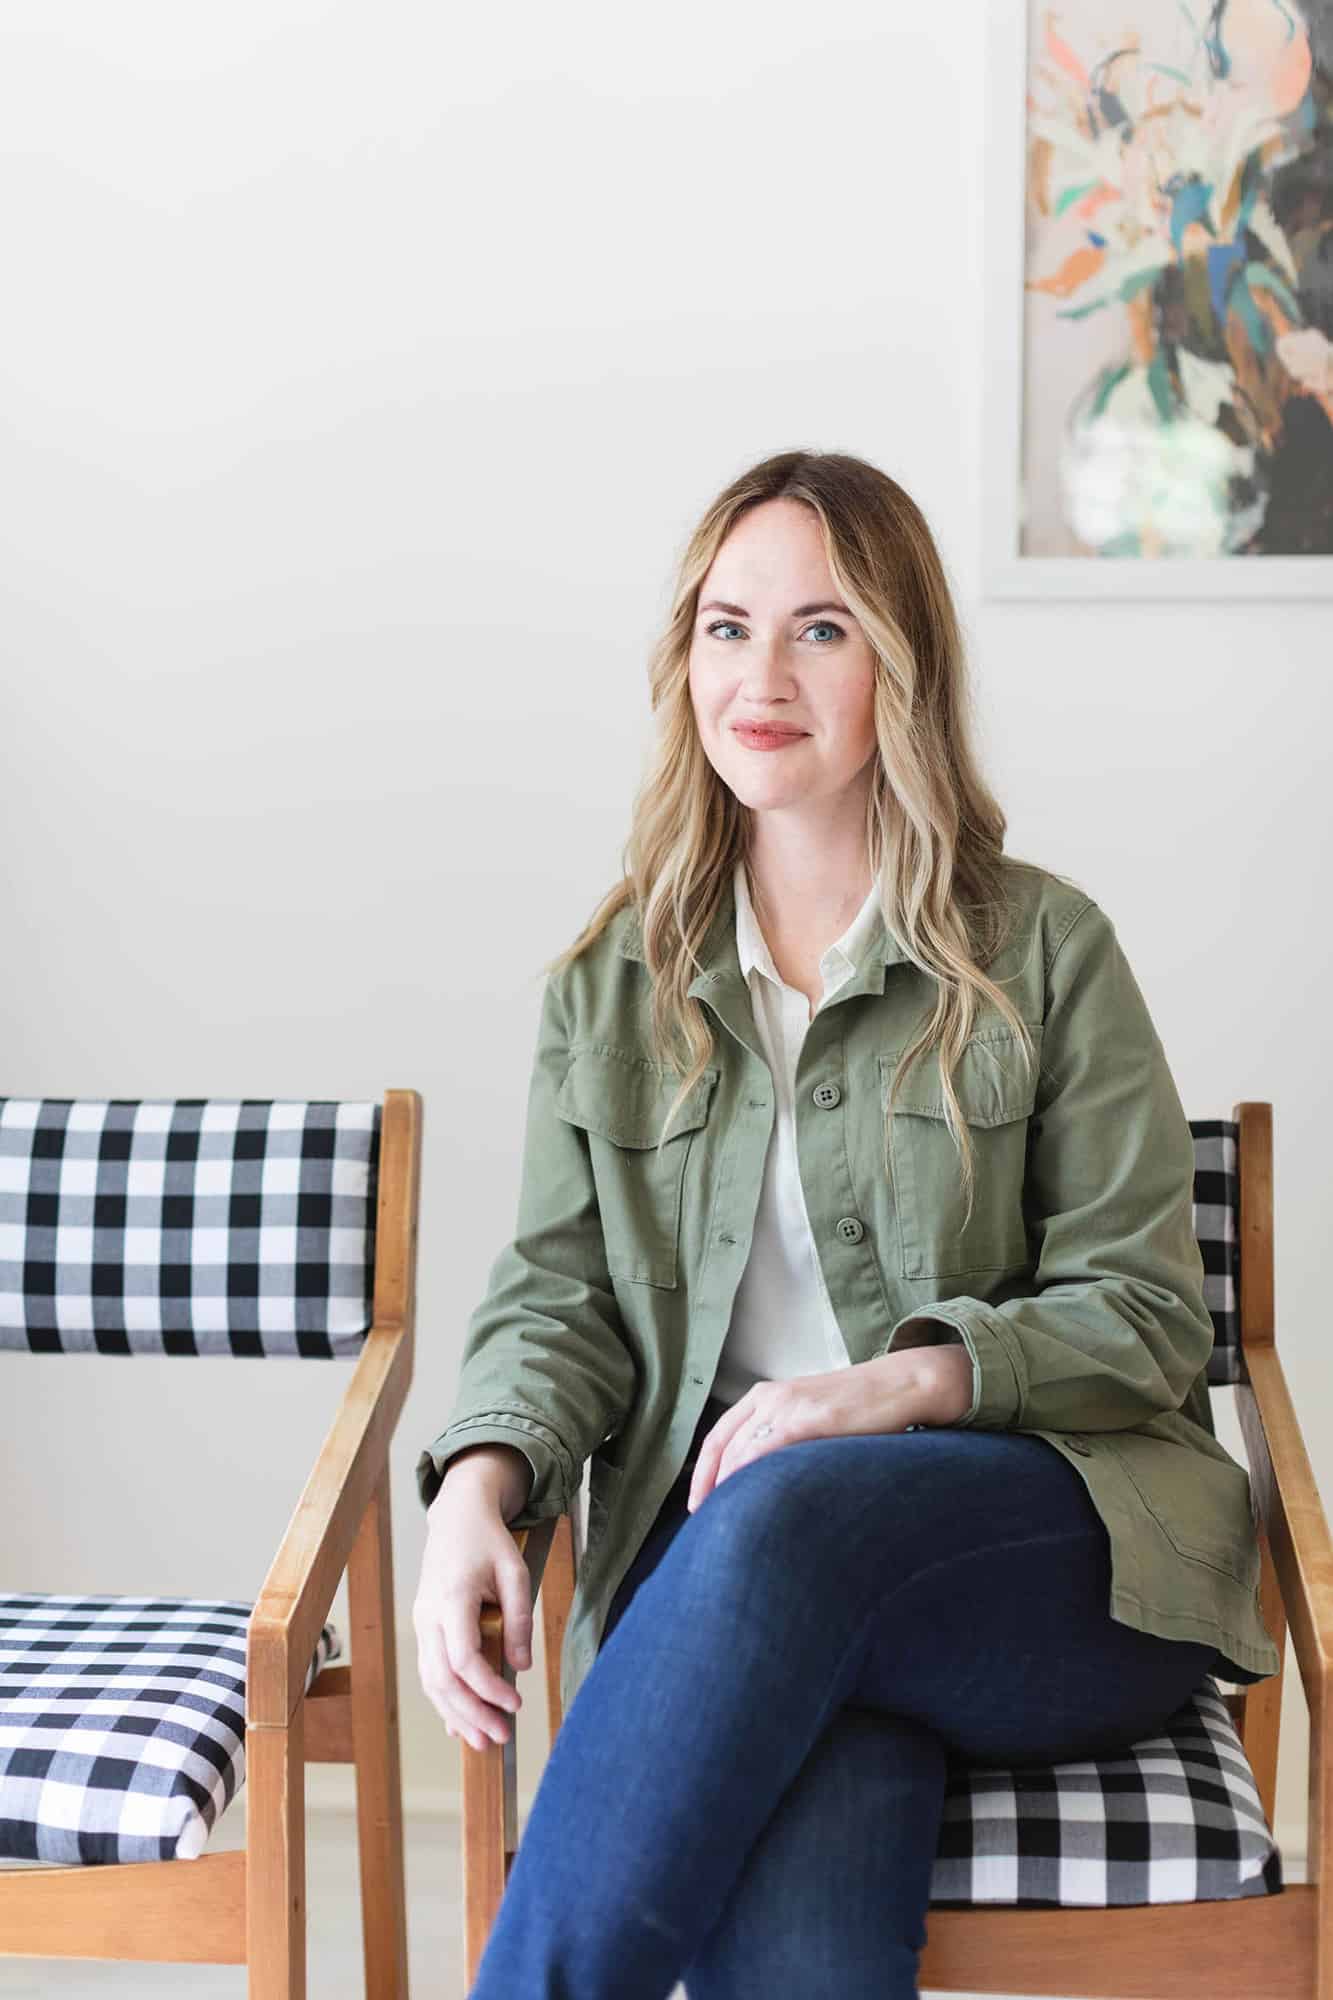
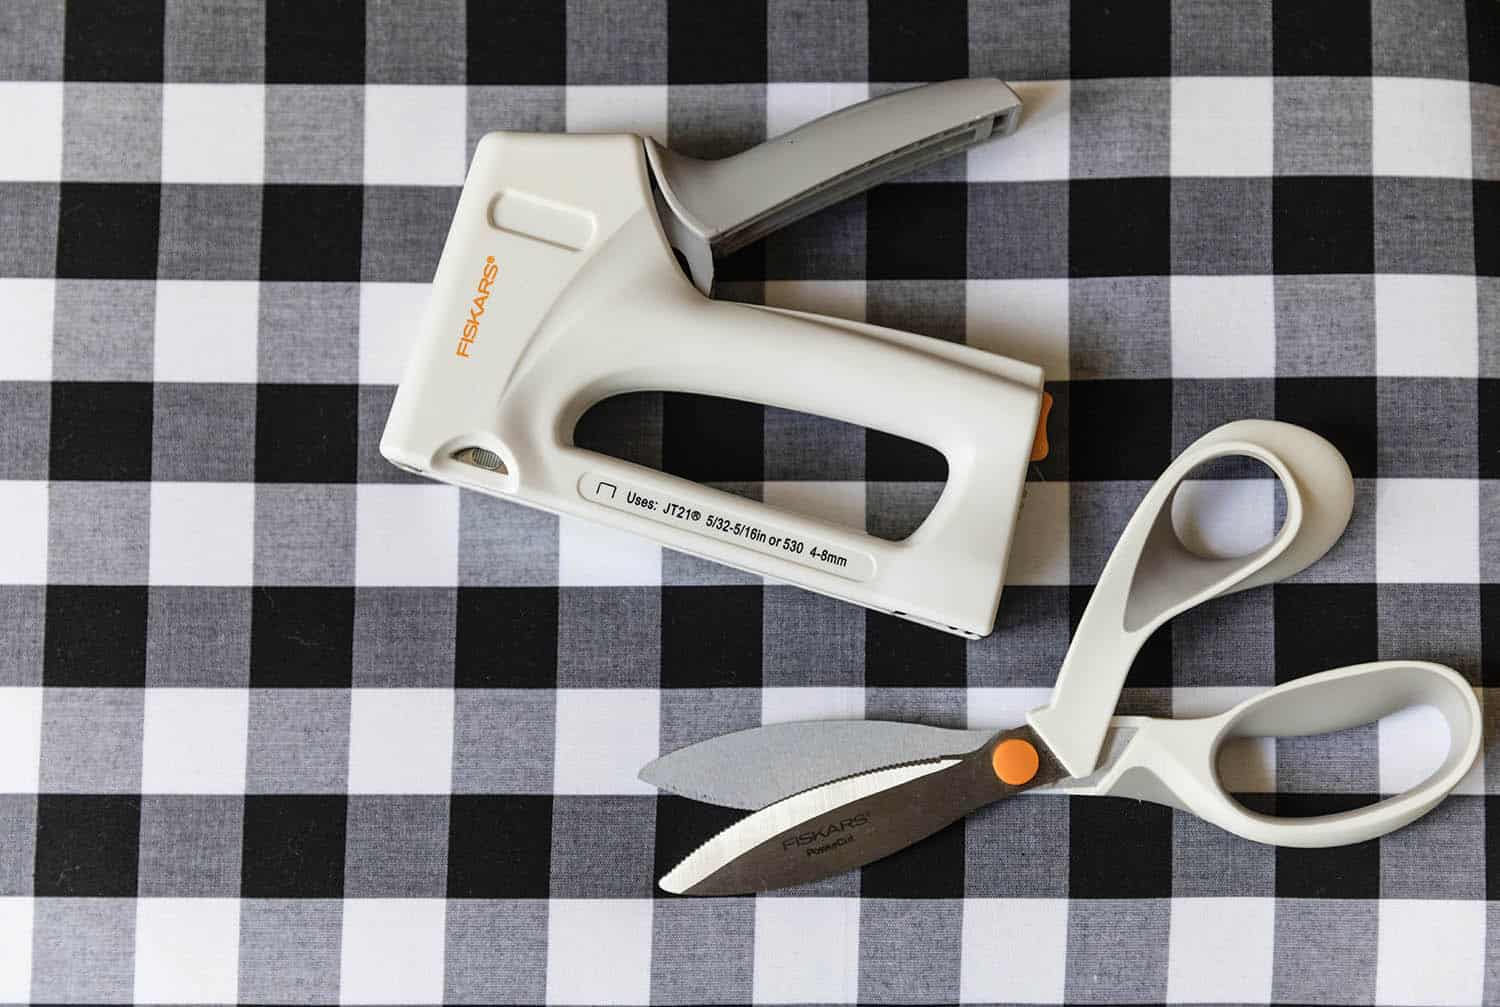
For this project, I worked with Fiskars. I have been obsessed with their products for many years. If anyone in my house growing up (or now) asks for “the good scissors,” they are most certainly referring to a pair of Fiskars. 🙂 What you might not know is they also produce really great DIY-friendly tools. I am completely obsessed with their staple gun (see below). I have smaller hands and using staple guns for DIY projects over the years has always been a struggle. Not so with my Fiskars staple gun, it’s super lightweight and I can easily hold fabric or steady my project with one hand while using the other to staple.
This is a sponsored post, but this opinion is 100% my own and I’m telling you—this is the best staple gun I’ve every used! You’ll see I also used my Fiskars Power Cut Shears and screwdriver for this project, but I also own their level, hammer, and I literally keep my Fiskars tape measure in the car because I find I need it so often when I’m at the Springfield Bnb house or out shopping for random supplies or items during this project. Love all their tools!
 If you’ve never reupholstered a dining chair before, let me start by saying this is the perfect project to start with if you are new to reupholstering. Anyone can do it and I don’t know about you, but I find it a little bit thrilling to find something at a thrift store and give it a new life. It’s like the object is getting a second chance at life. Maybe that’s cheesy? I don’t know. But it sparks some joy for me!
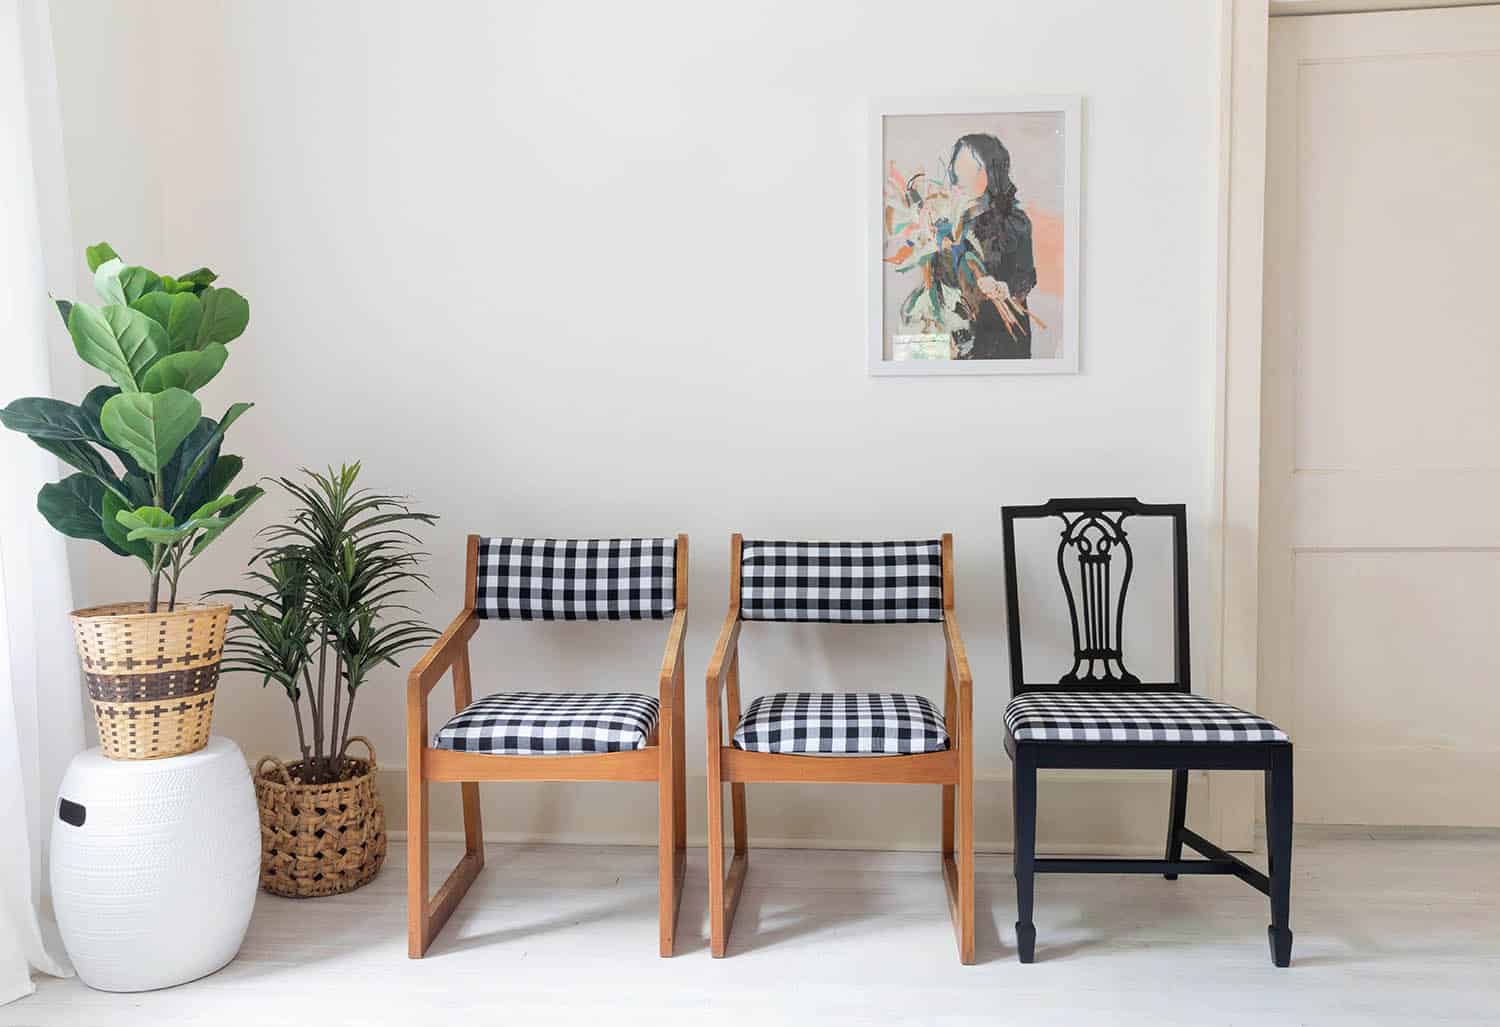
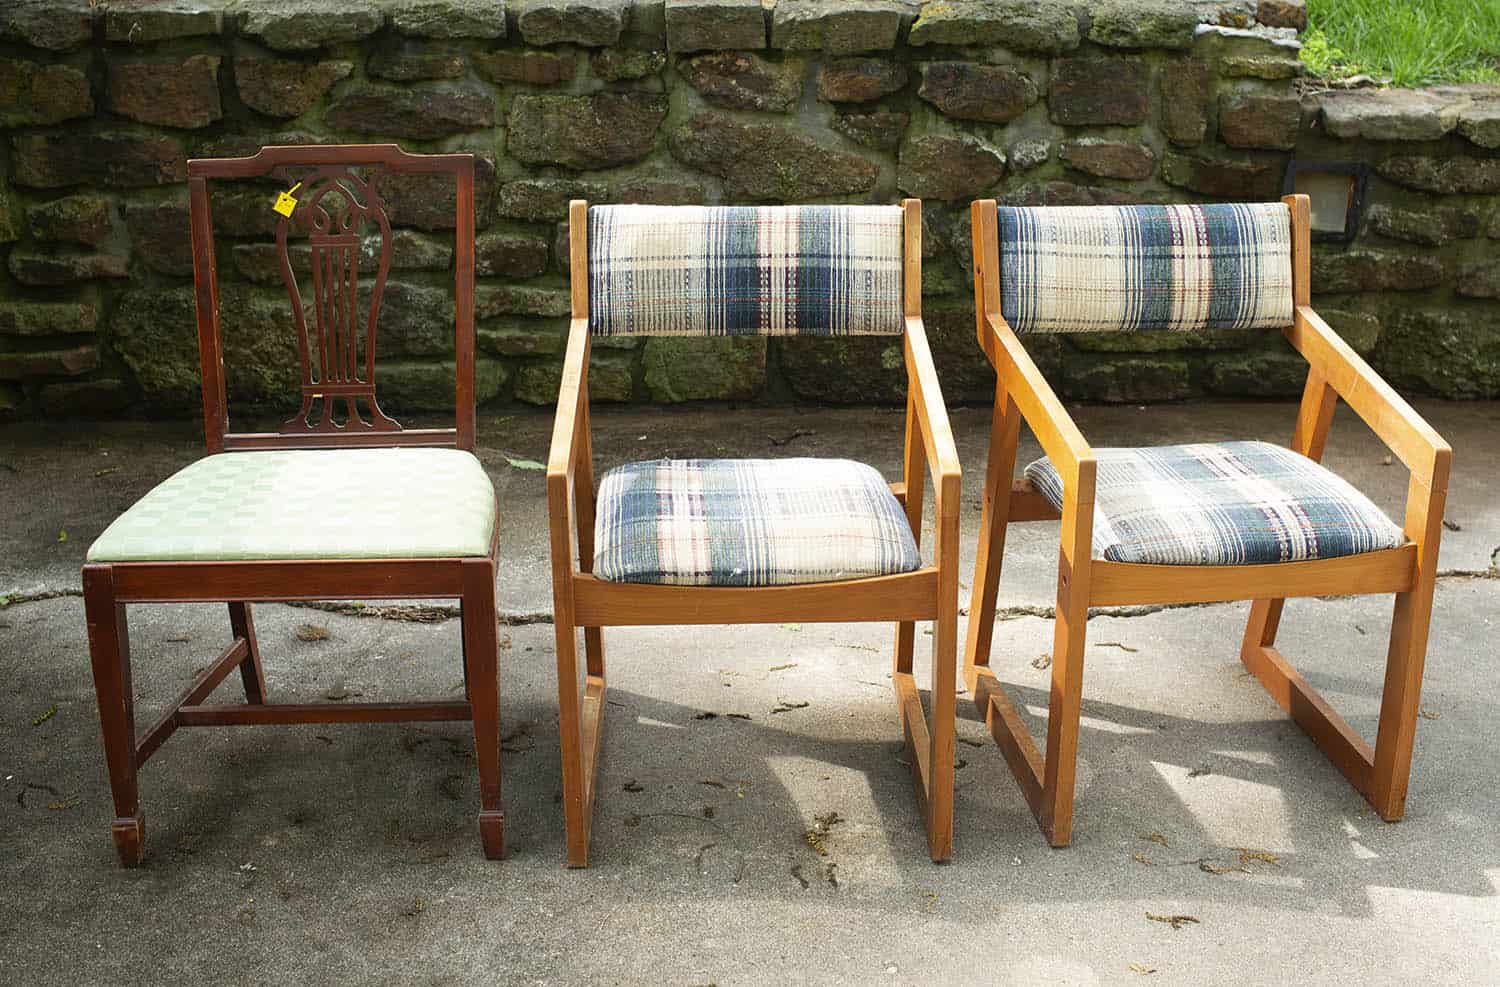 Here are the three chairs I thrifted that needed to be reupholstered and painted (the other chairs were also thrifted or from flea markets, but they were cute as is). The one on the left is the easiest type of chair to reupholster. You simply unscrew the cushion from the bottom, swap out fabric, and screw back on. I did one like this when I was in high school. So if you’re at all nervous to give this a try, look for chairs that are this type of shape/style for an easy option.
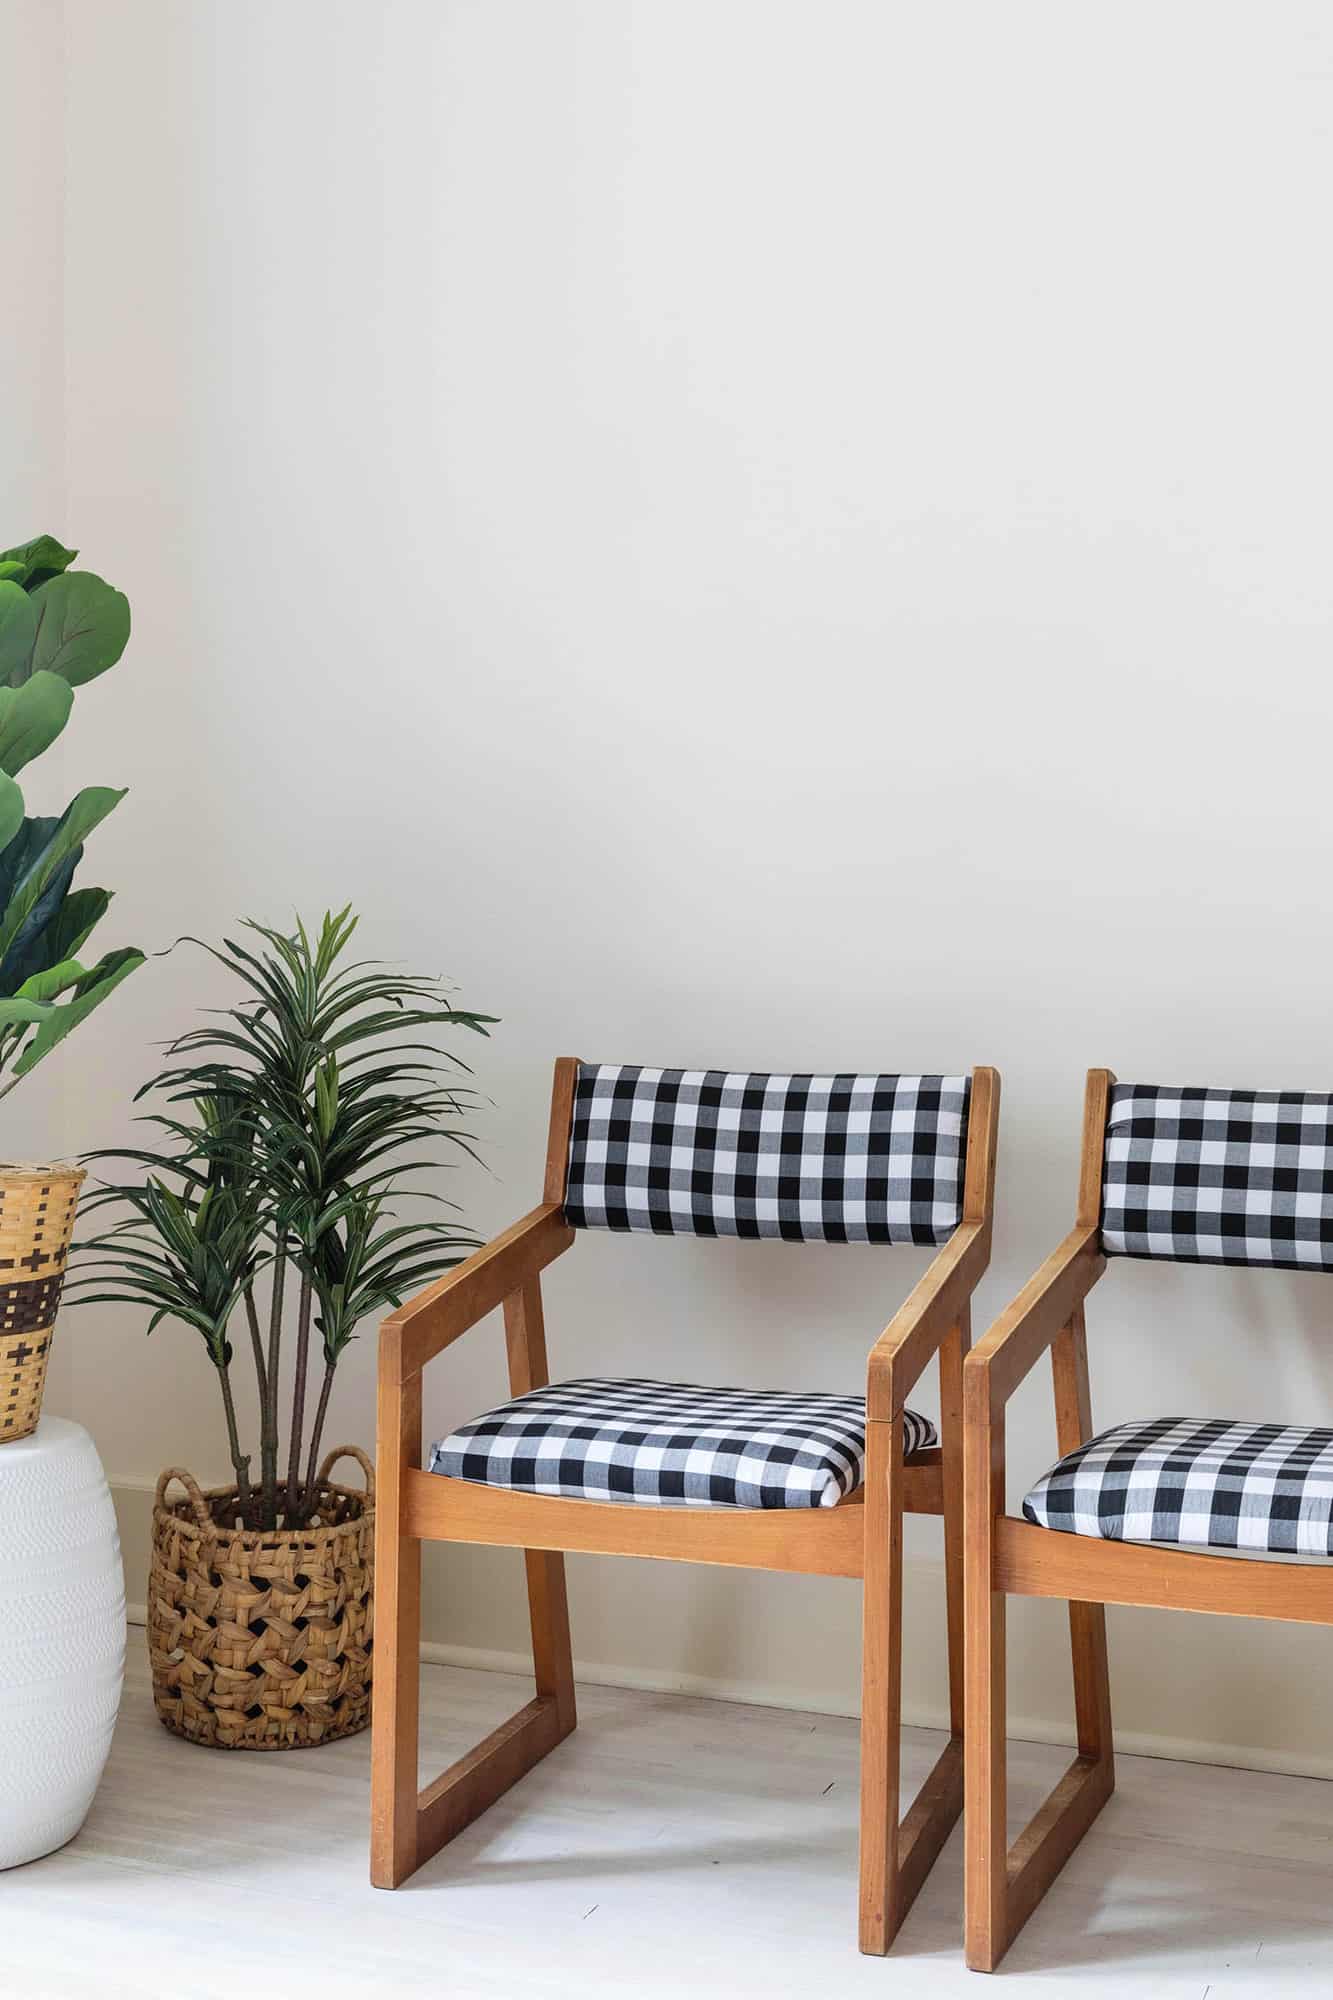
The other two chairs I thought would probably be a bit more challenging (for me), but I fell in love with the shape and since there were two available, I thought they would look good at either end of the table.
 A couple of tips when shopping. First, this is a bit obvious but easy to overlook. Make sure to actually sit on the chairs when you are at the store. No matter how rough they look, you want chairs that are structurally sound, unless you feel confident you can repair them. Don’t buy a chair that’s completely falling apart unless you know you can fix it. It won’t matter how cute it turns out with your reupholster job if it’s not useful.
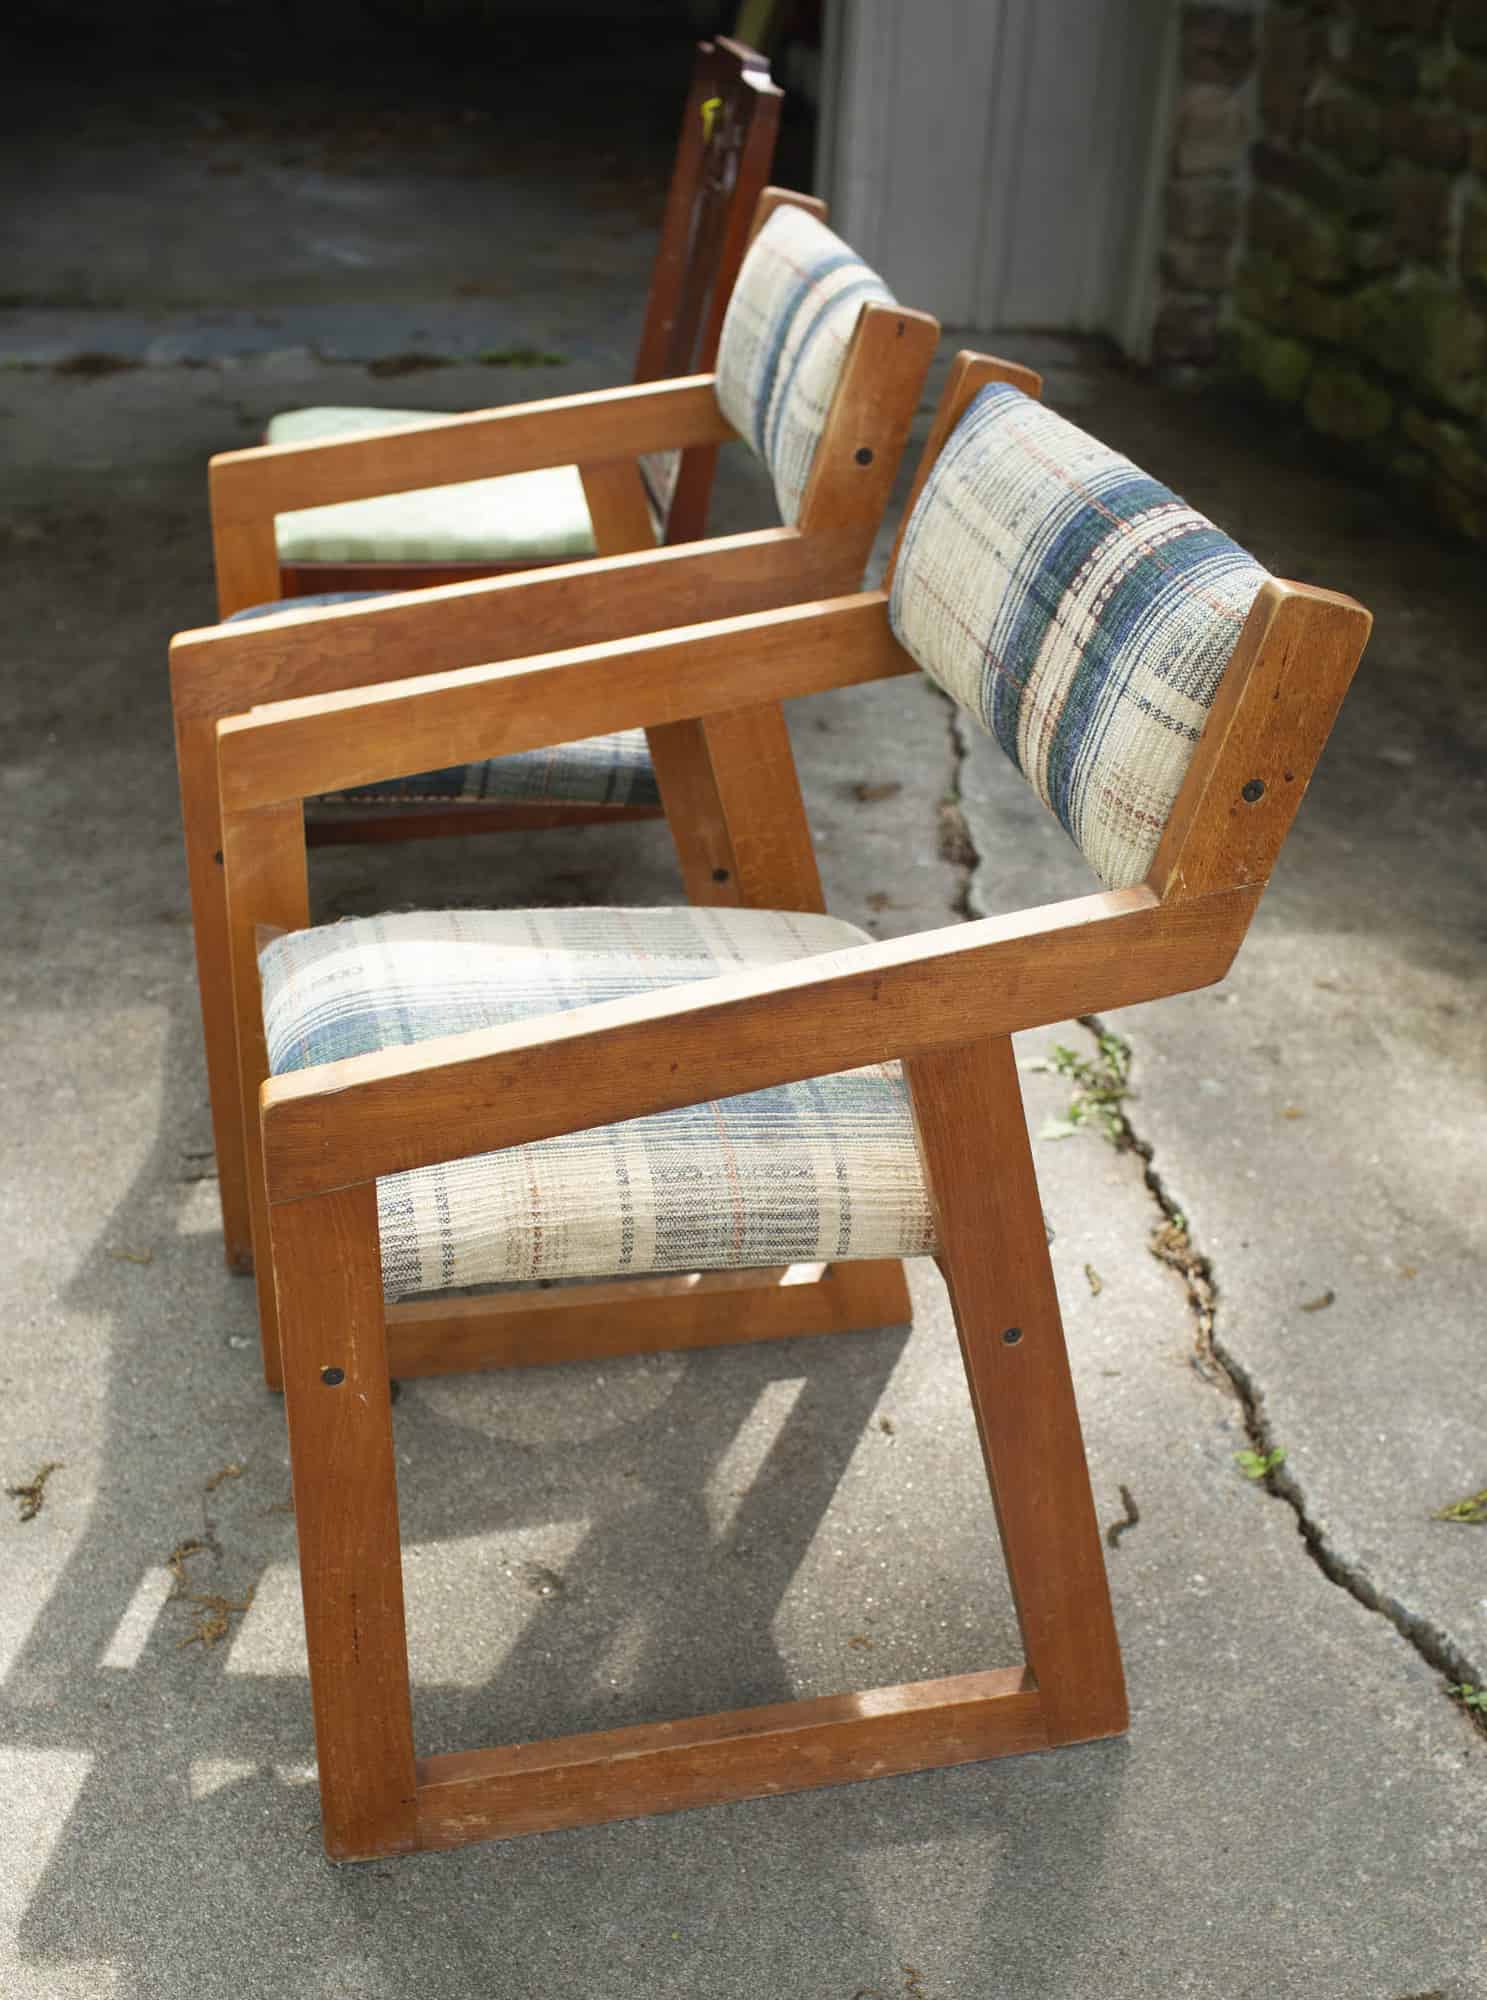
Second, really examine how the chair is put together. When I was buying the two chairs above, I was at the thrift store literally flipping it over and looking at how it was put together. If you don’t understand how to take it apart it’s probably not a good option for you, as you’ll need to be able to completely remove the cushions AND put them back on in order to reupholster.
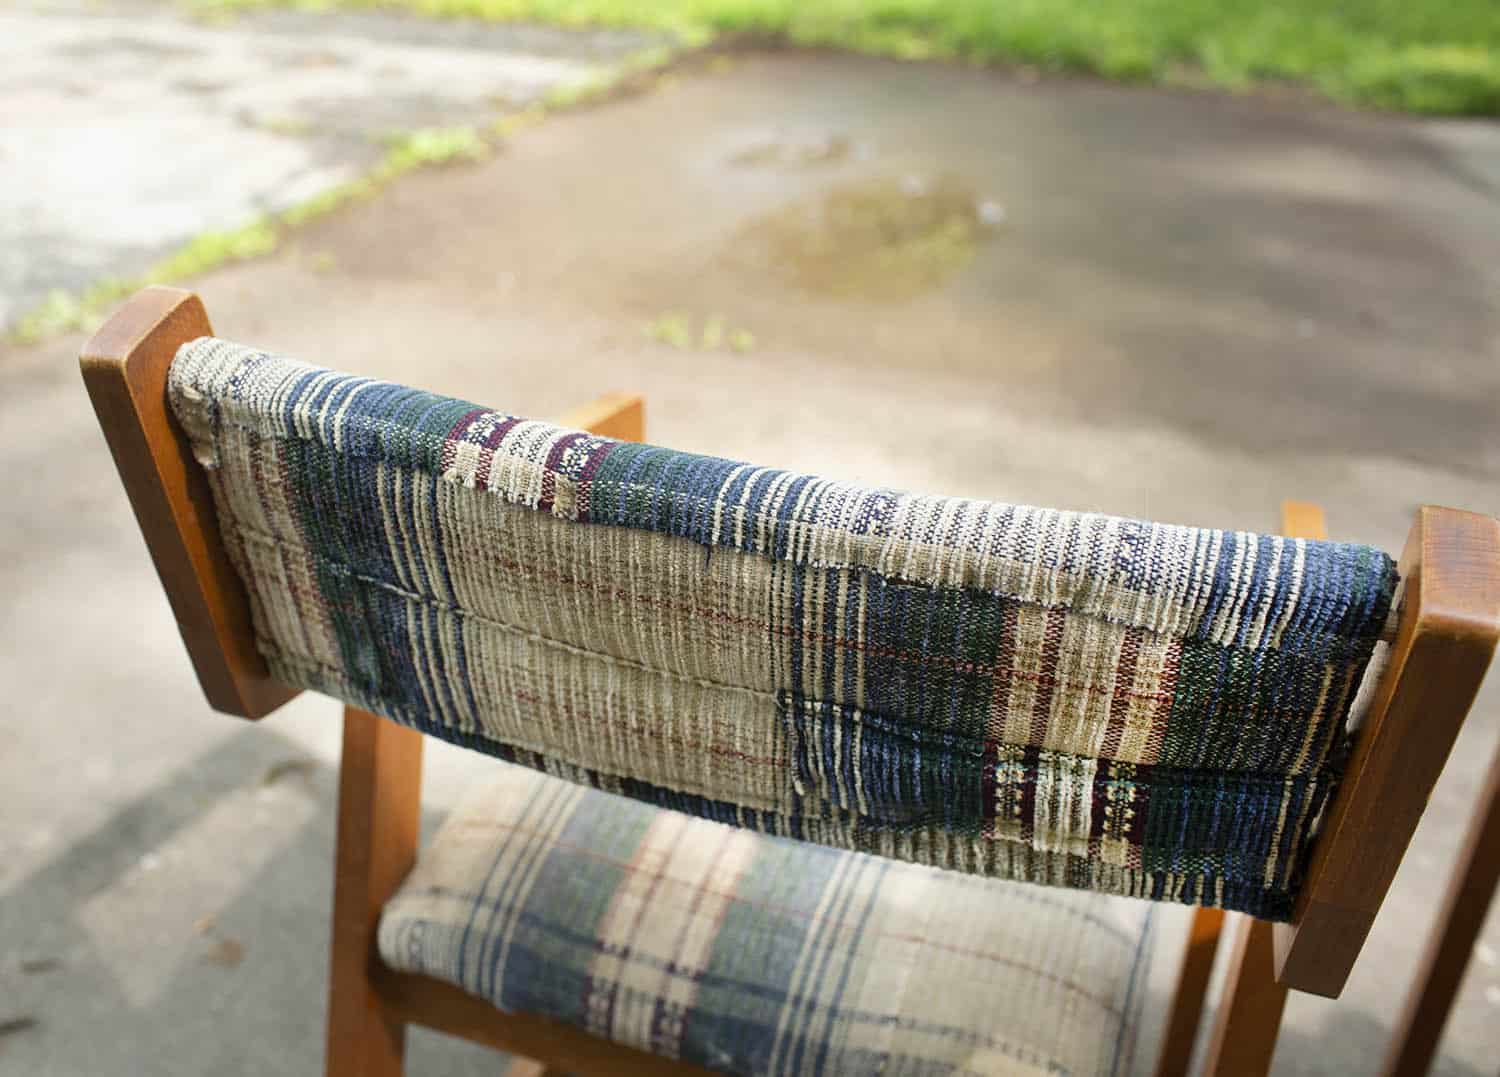 Here you can see the previous upholstery job—I’m guessing it was also a DIY for someone? I wasn’t 100% sure how I would do these back cushions, but I felt I could at least do better than this, so that gave me some confidence.
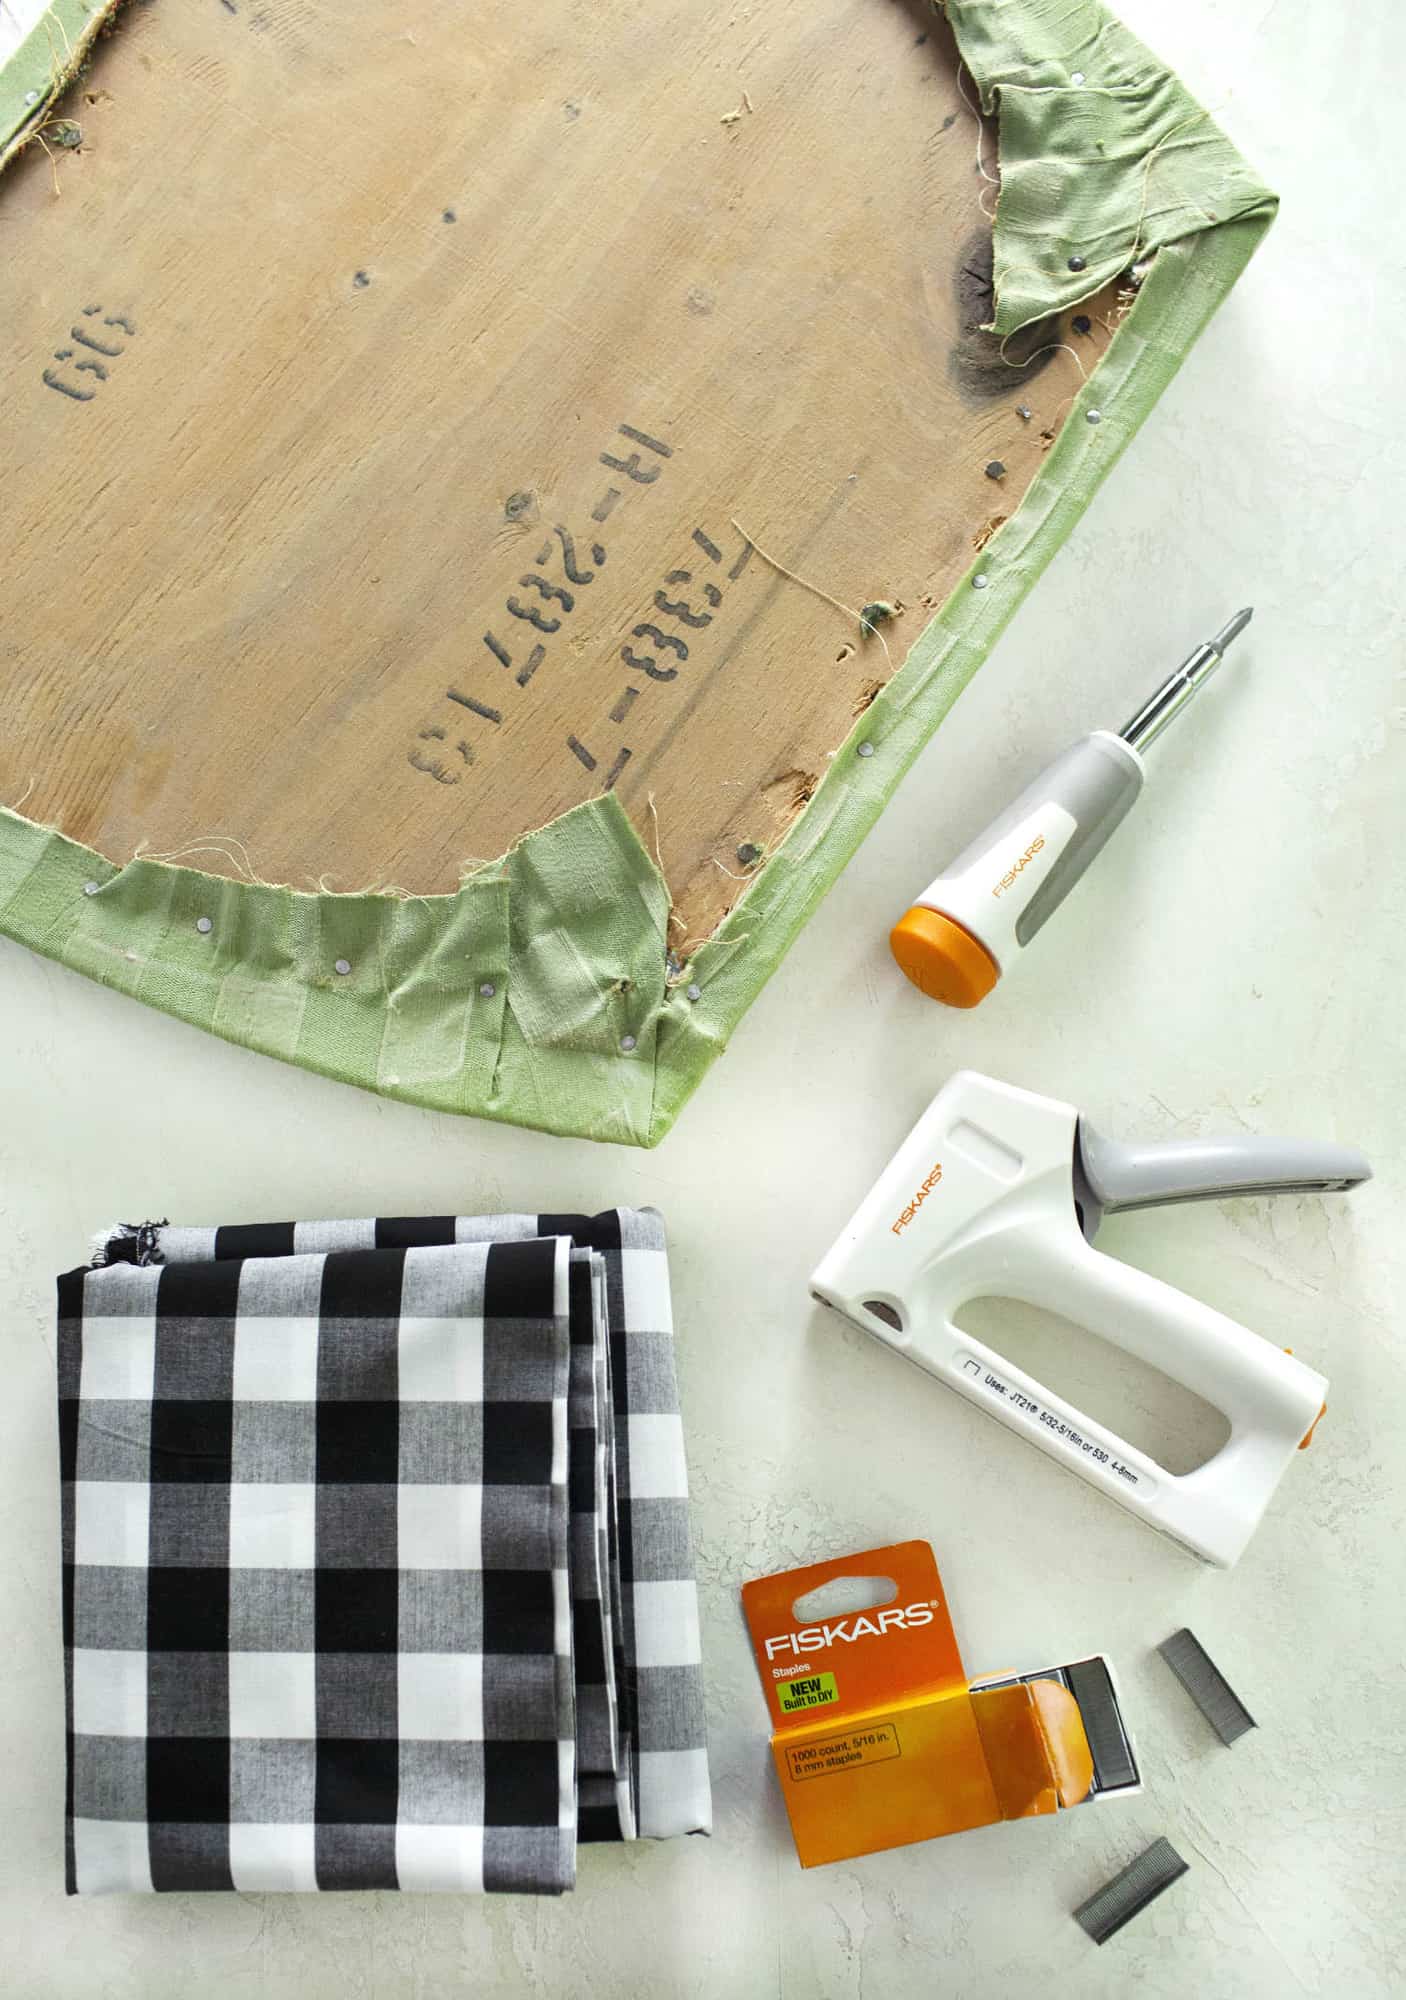 Supplies:
thrifted or secondhand chairs
screwdriver or drill
scissors or shears (depending on fabric choice)
staple gun and staples
fabric*
new filling may be needed in some cases
*What fabric to choose? If you are new to reupholstering, I would pick something that is very easy to work with (very foldable/bendable) and inexpensive. This will give you more freedom to, well, make mistakes and try again if you need. A quilters cotton is an OK choice, just Scotchguard after you’re done to help project it. But other fabrics can work even better if you’re up to it, like thicker upholstery fabrics, faux fur, oil cloth (if you want something super wipeable), or even leather or faux leather. These can be more challenging to work with, but they can be higher quality and may last longer.
Step One: After buying your chair(s), take the cushions off and throughly clean both the wood or metal frame and the cushions. What you use to clean may vary based on the types of material you use, but this is just a good time to give your new (to you) chair a very good wipe down.
If you plan to paint the chair frame, you can do so now too. I painted one of the chairs but I ended up liking the wood color on the other two, so I just distressed a little more with sandpaper before cleaning.
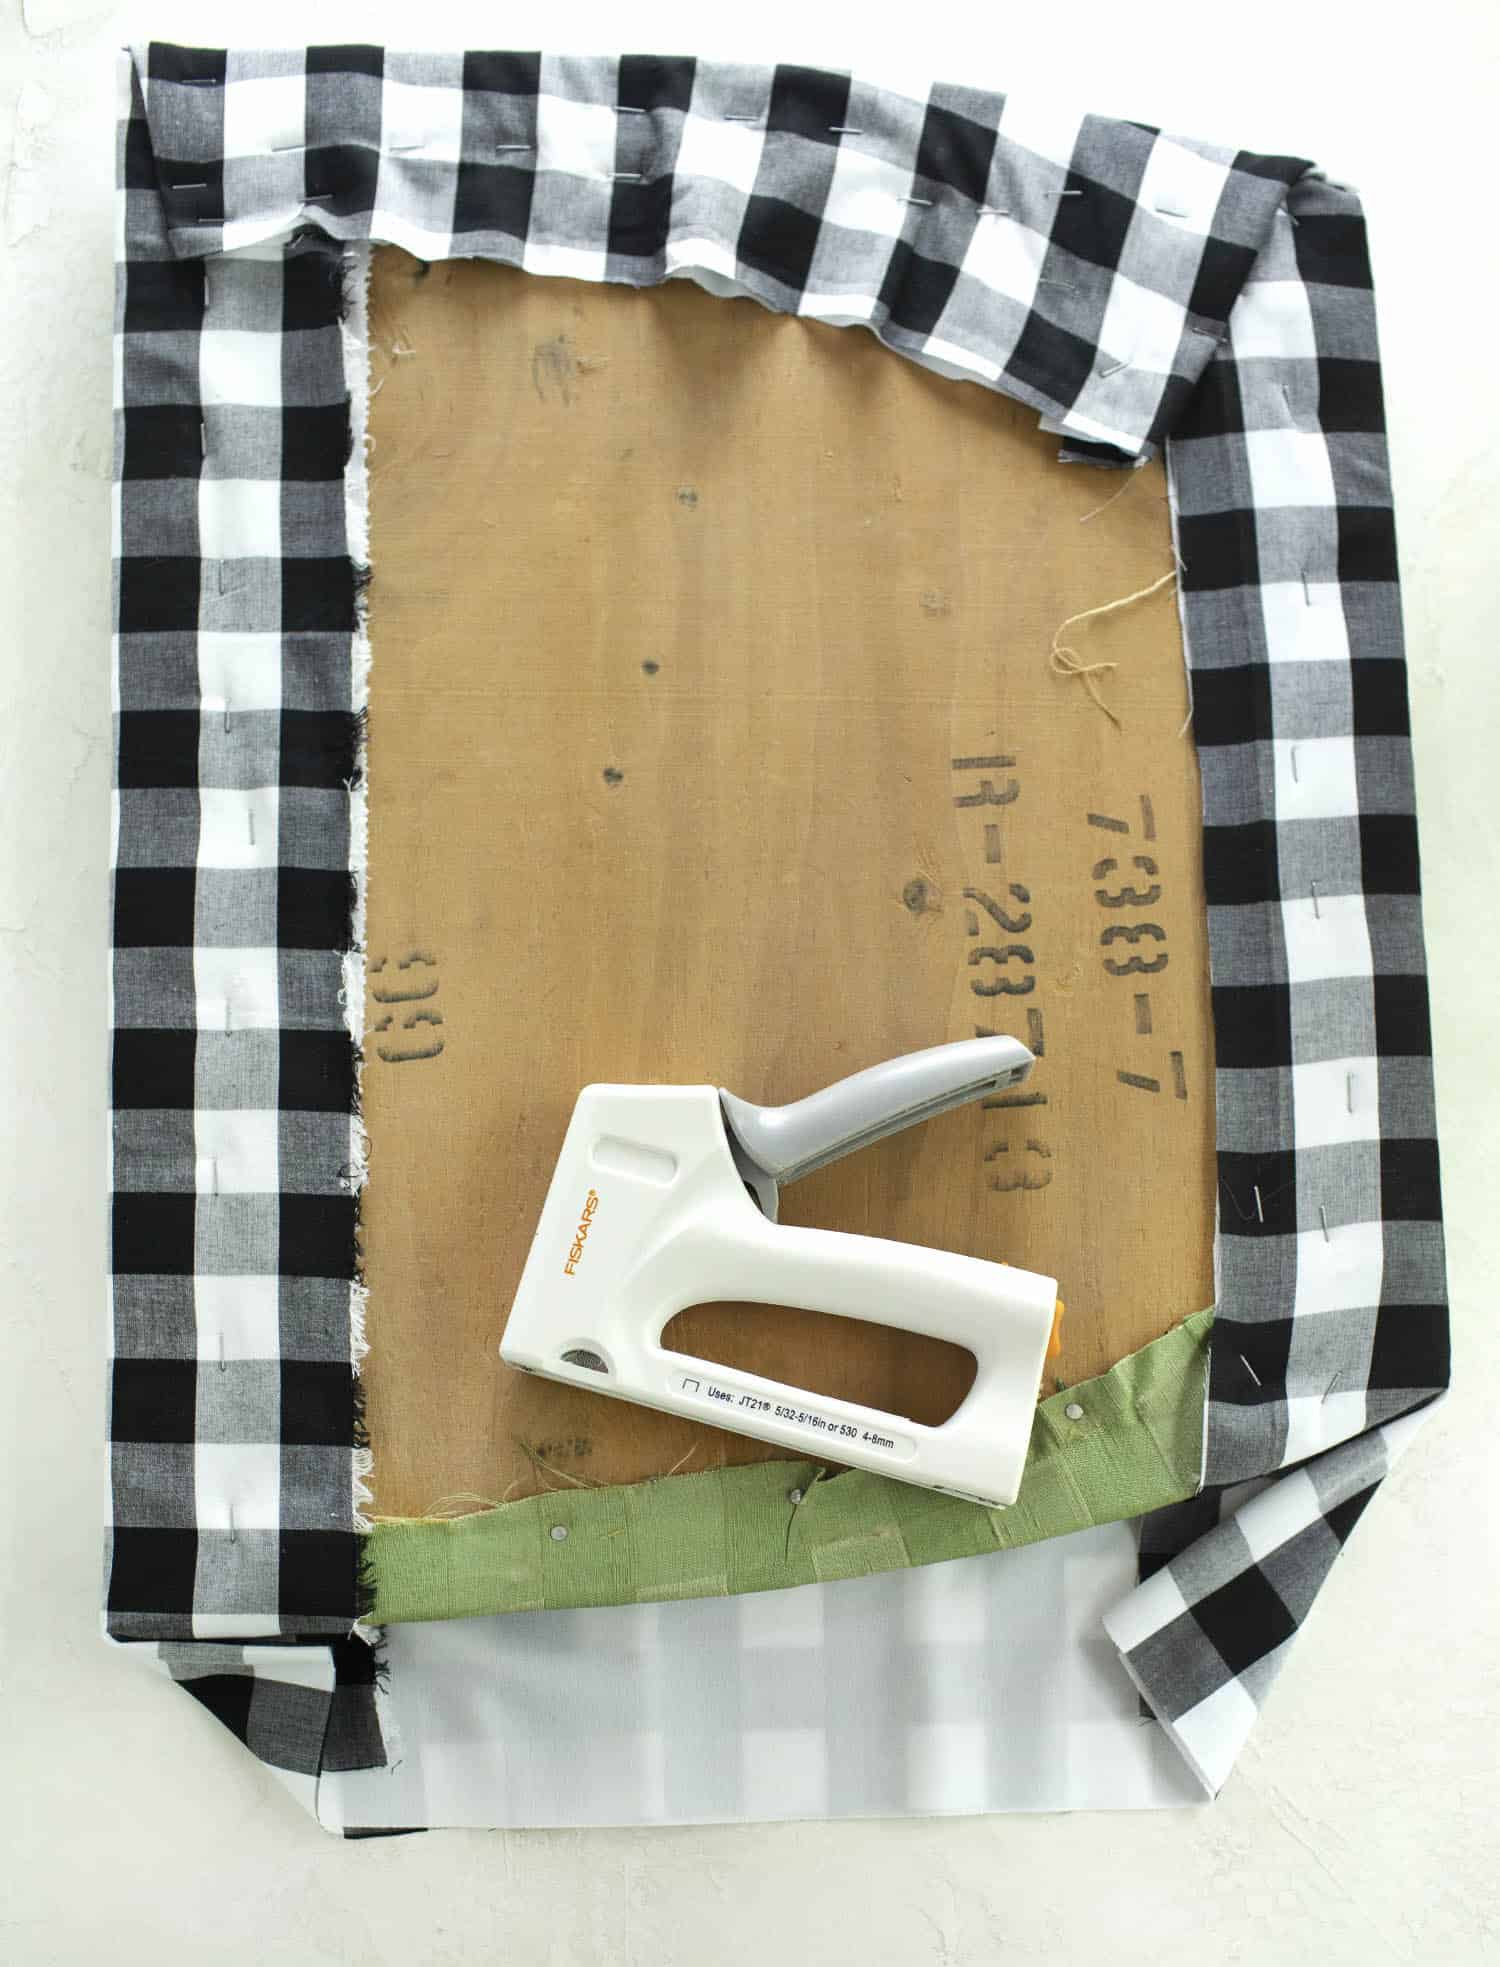 Step Two: Time to wrap the cushions in the new fabric. Think of this like wrapping a present. It’s super easy when the present is in a perfectly square or rectangle box, but it’s more challenging if it’s not. Right? I like to do two opposite sides first (stapling down the fabric as I go, like using a LOT of tape on a present), then folding and figuring out my corners as I wrap the other two sides. See photo above.
For the two chairs that had back cushions, I also wrapped the fabric and folded so the seam was inside and stapled on the black portion of my fabric. Then, once I reassembled the chairs, I painted the tops of the staples with a very fine brush and black acrylic paint so they don’t show.
Step Three: Reassemble the chairs. If the screws are rusty, you can replace them with similar-sized ones, or use the old ones that came with the chair. If you want to protect your fabric more, spray on some Scotchguard or a similar product; this may not be necessary for certain fabric types. Test a piece of scrap fabric if you are unsure before spraying the whole chair.
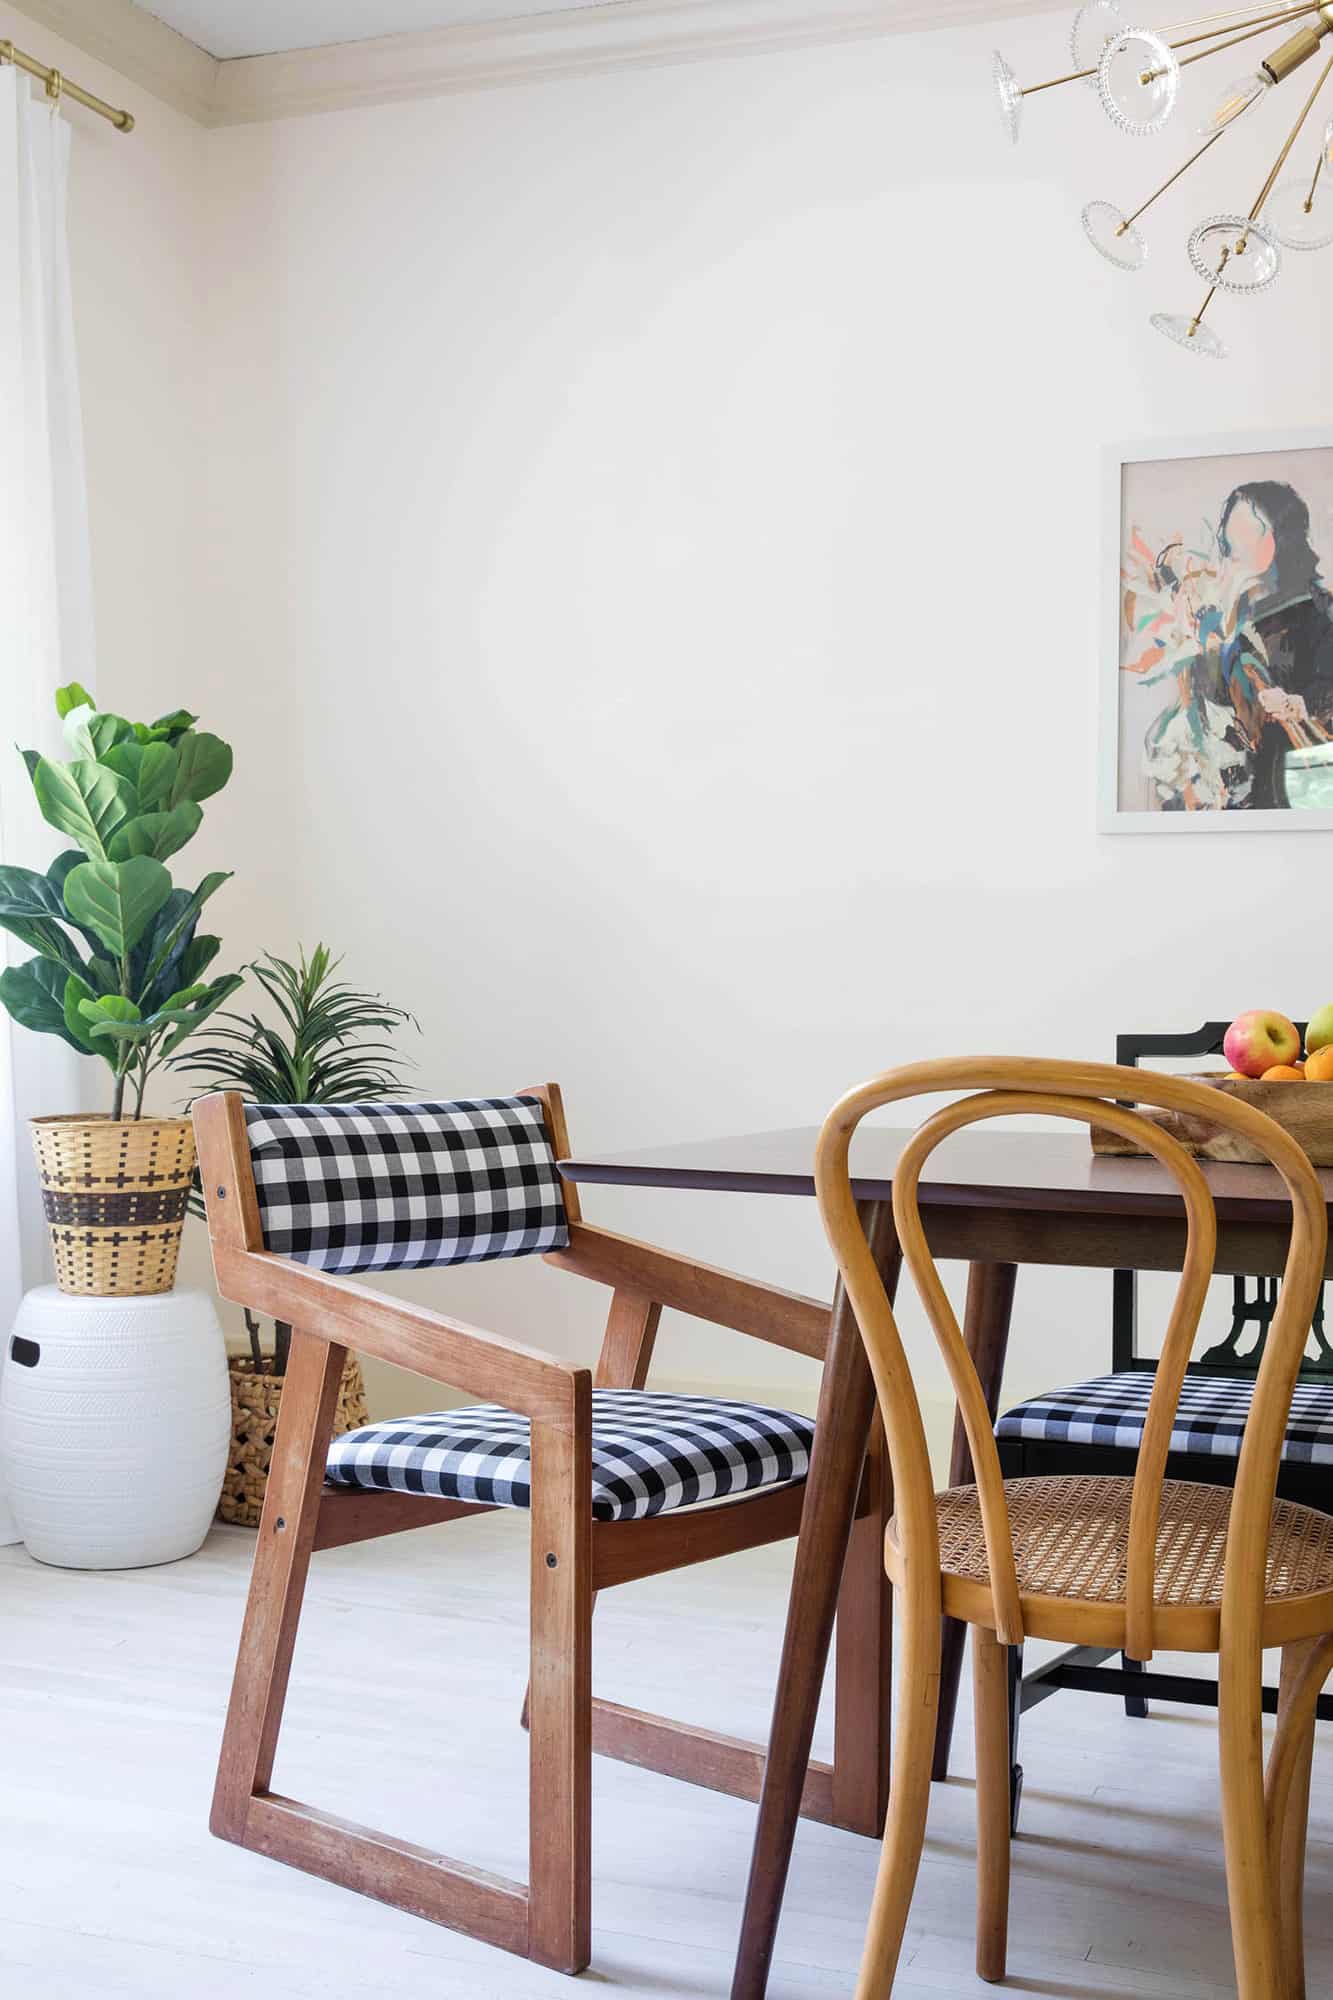
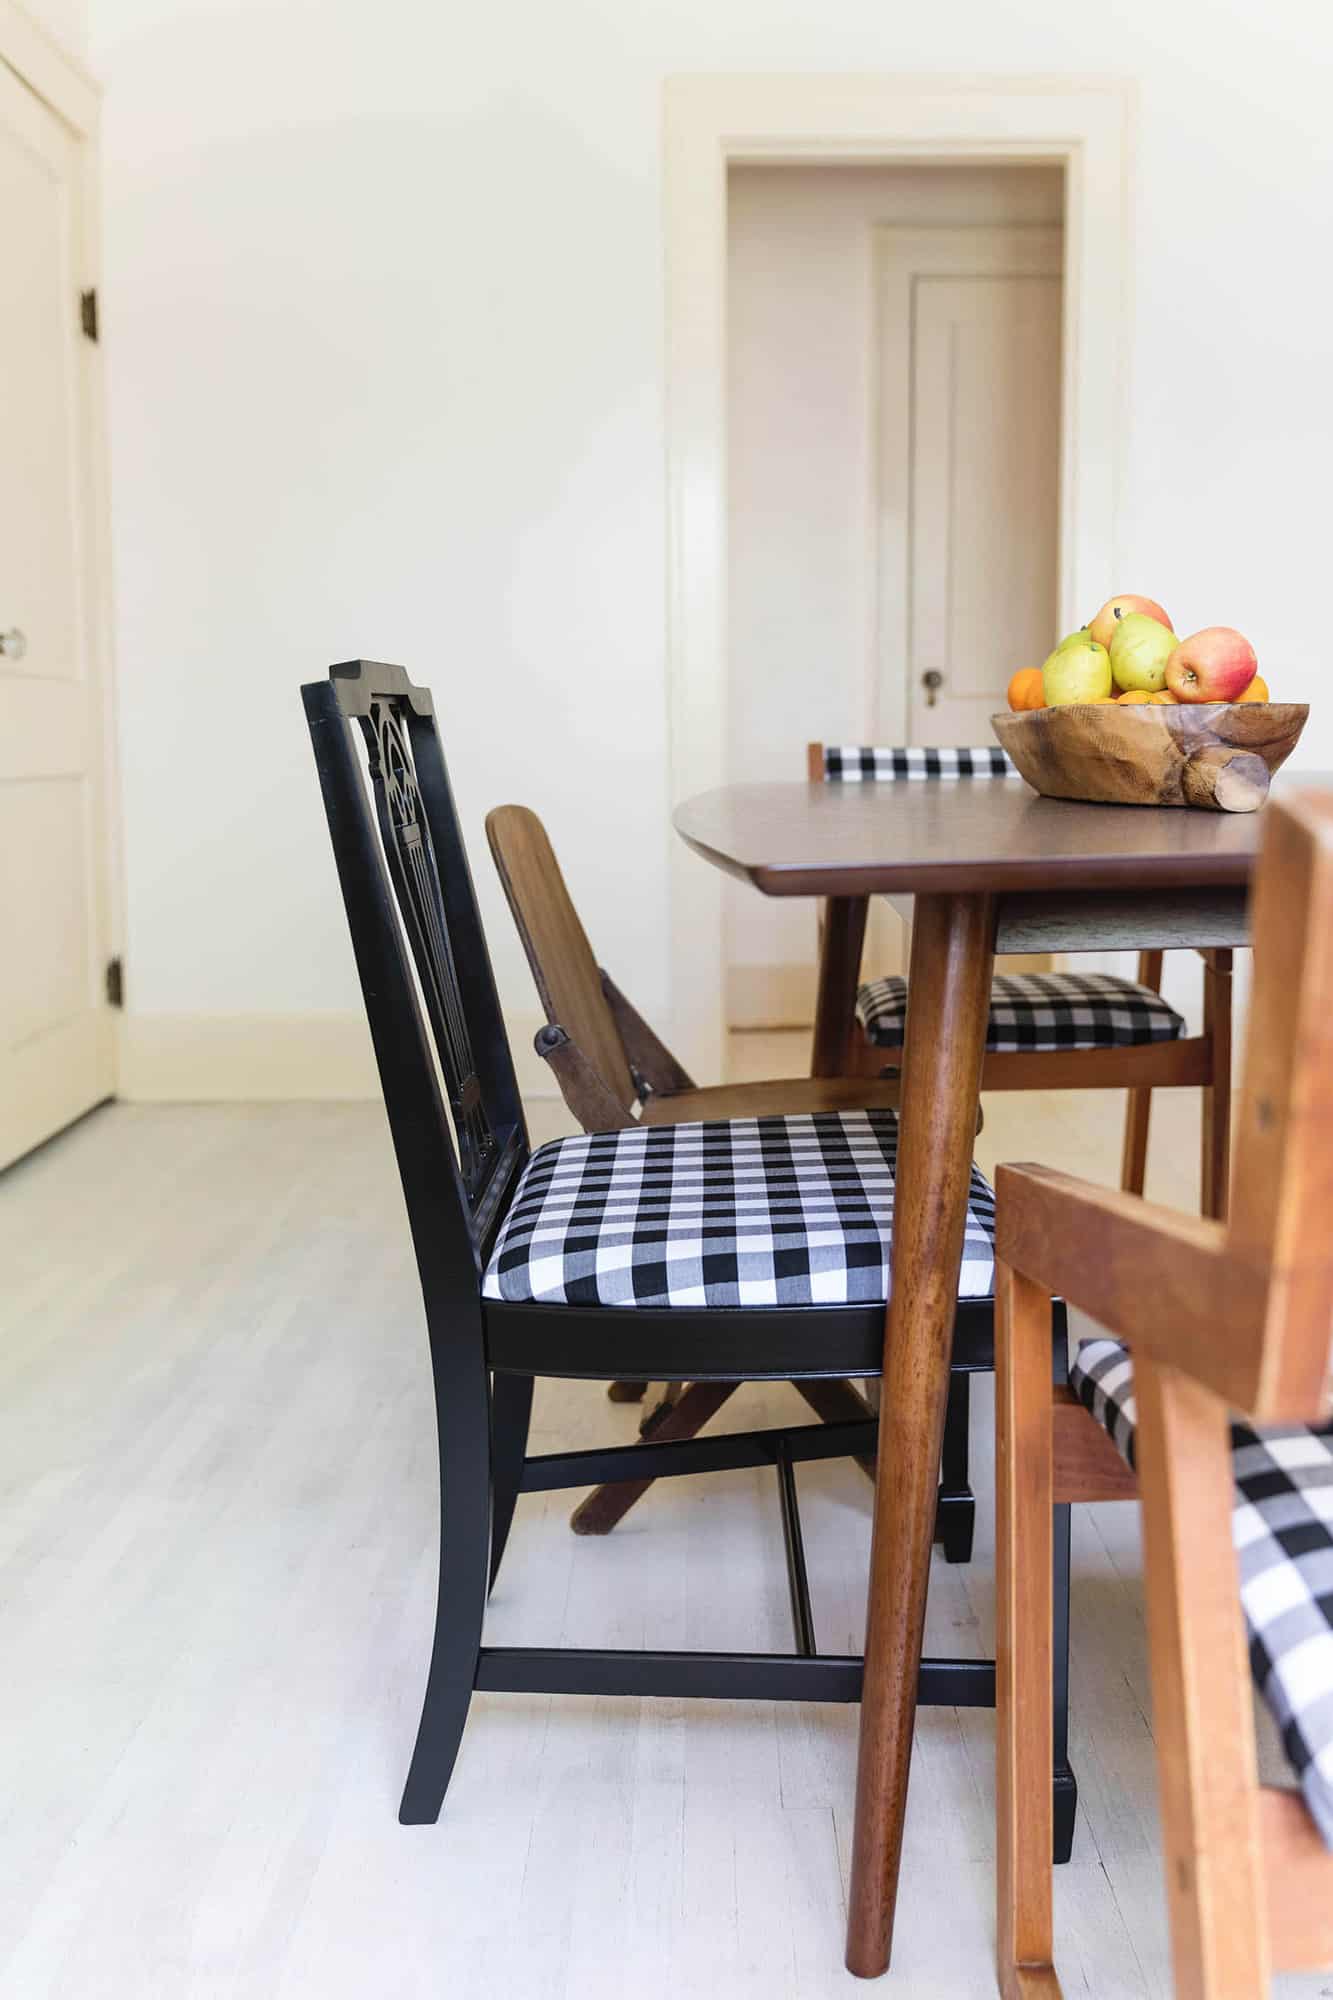
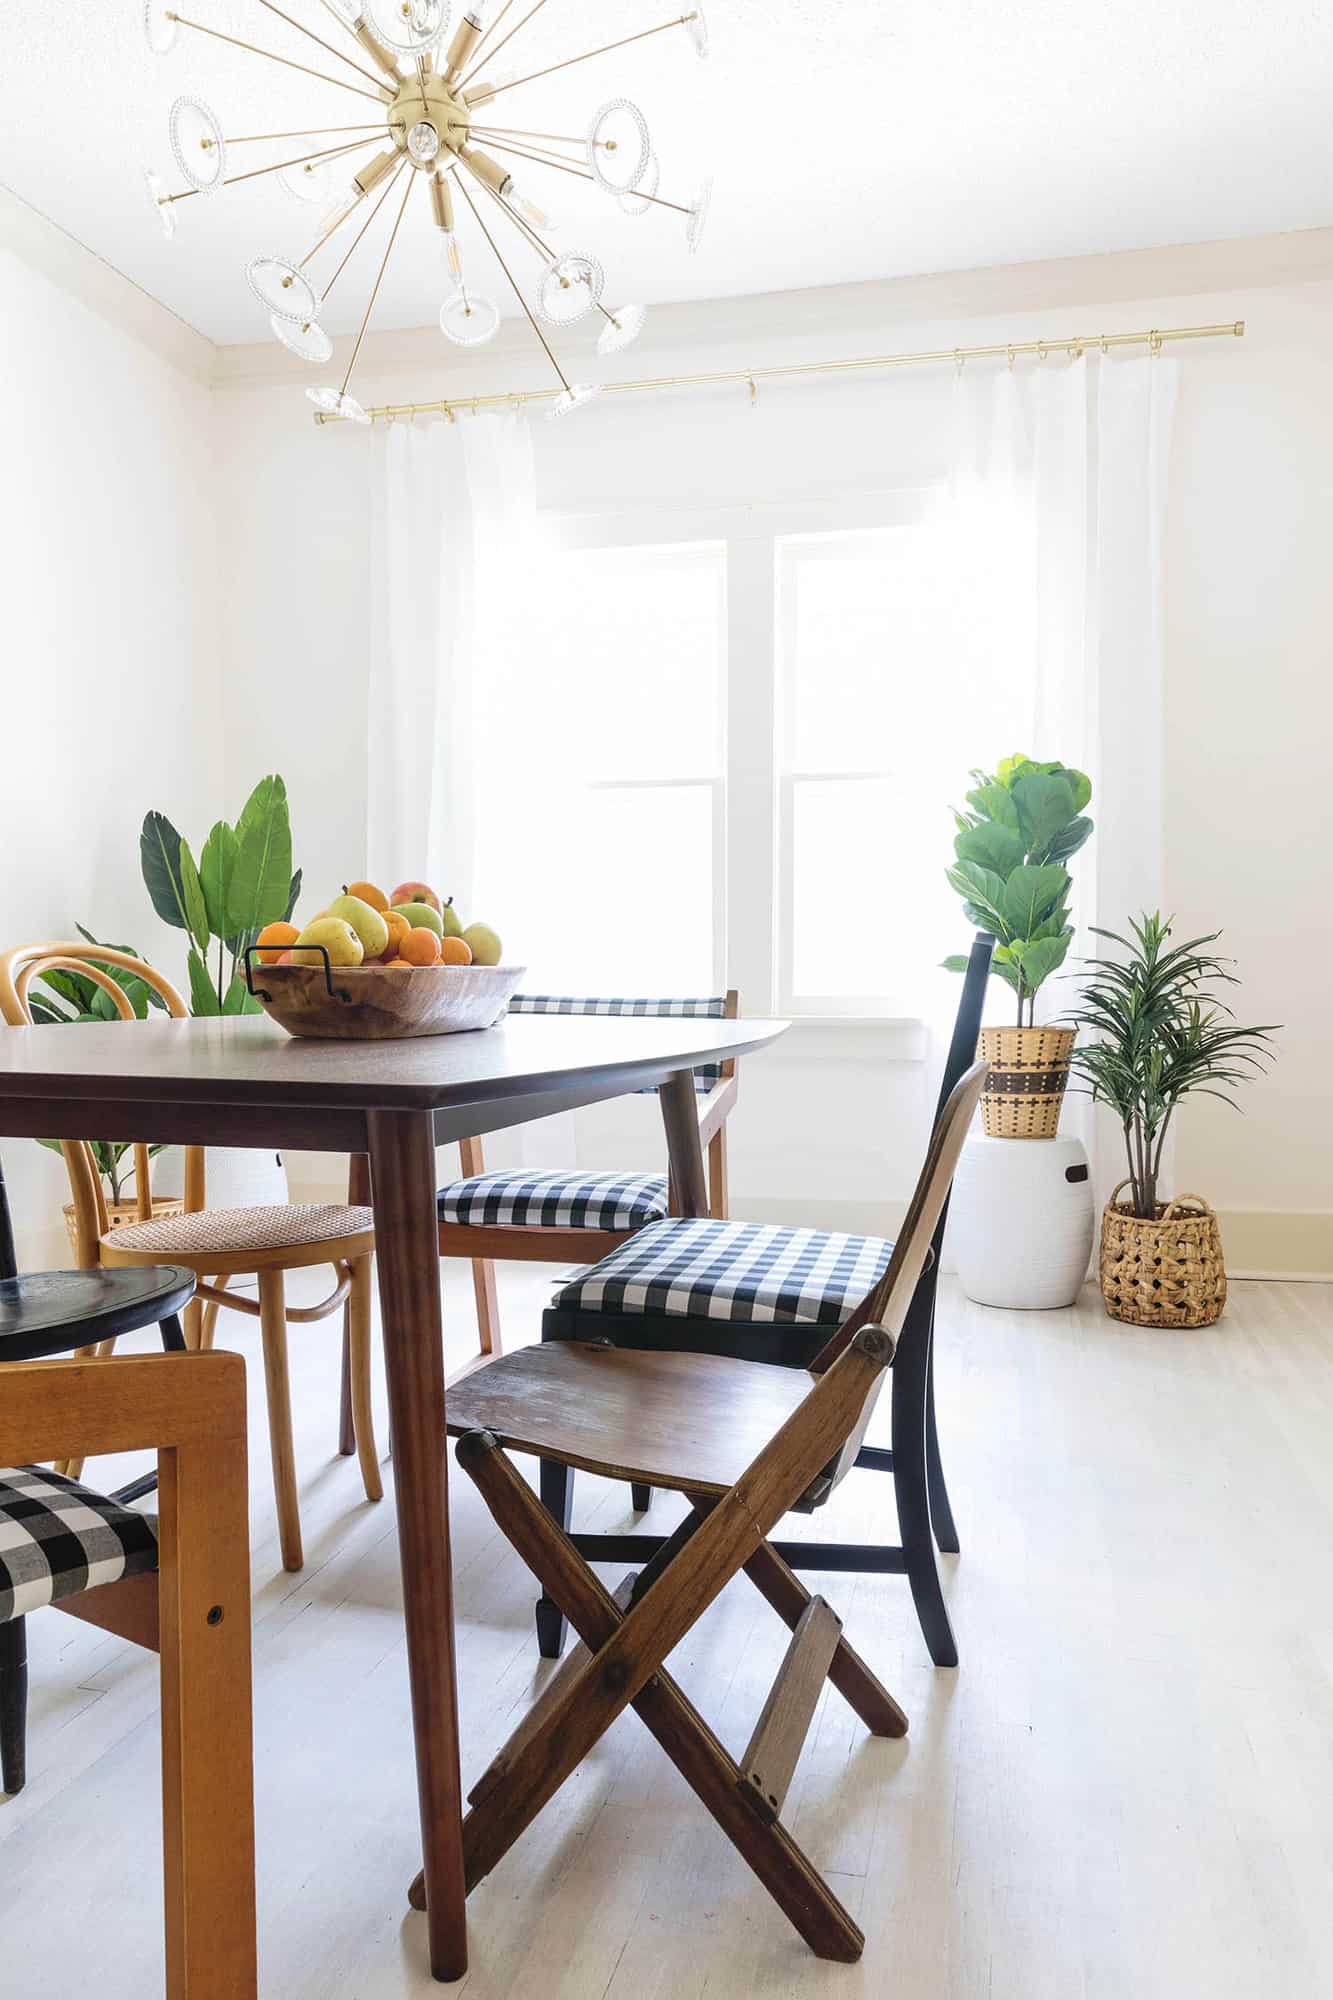
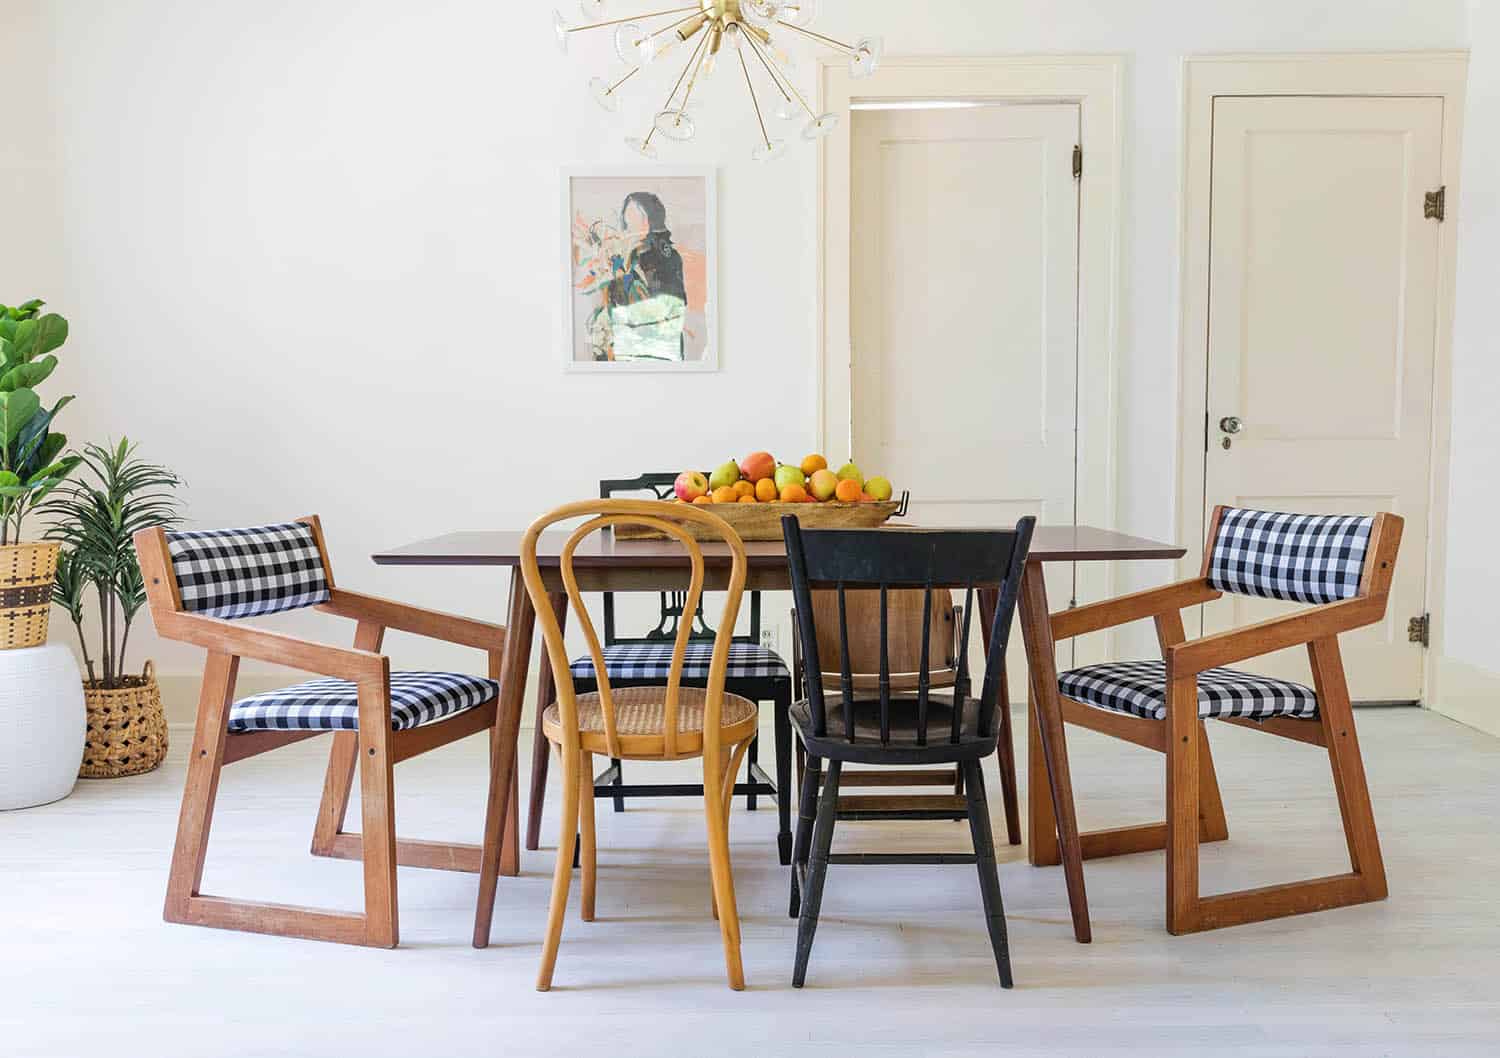
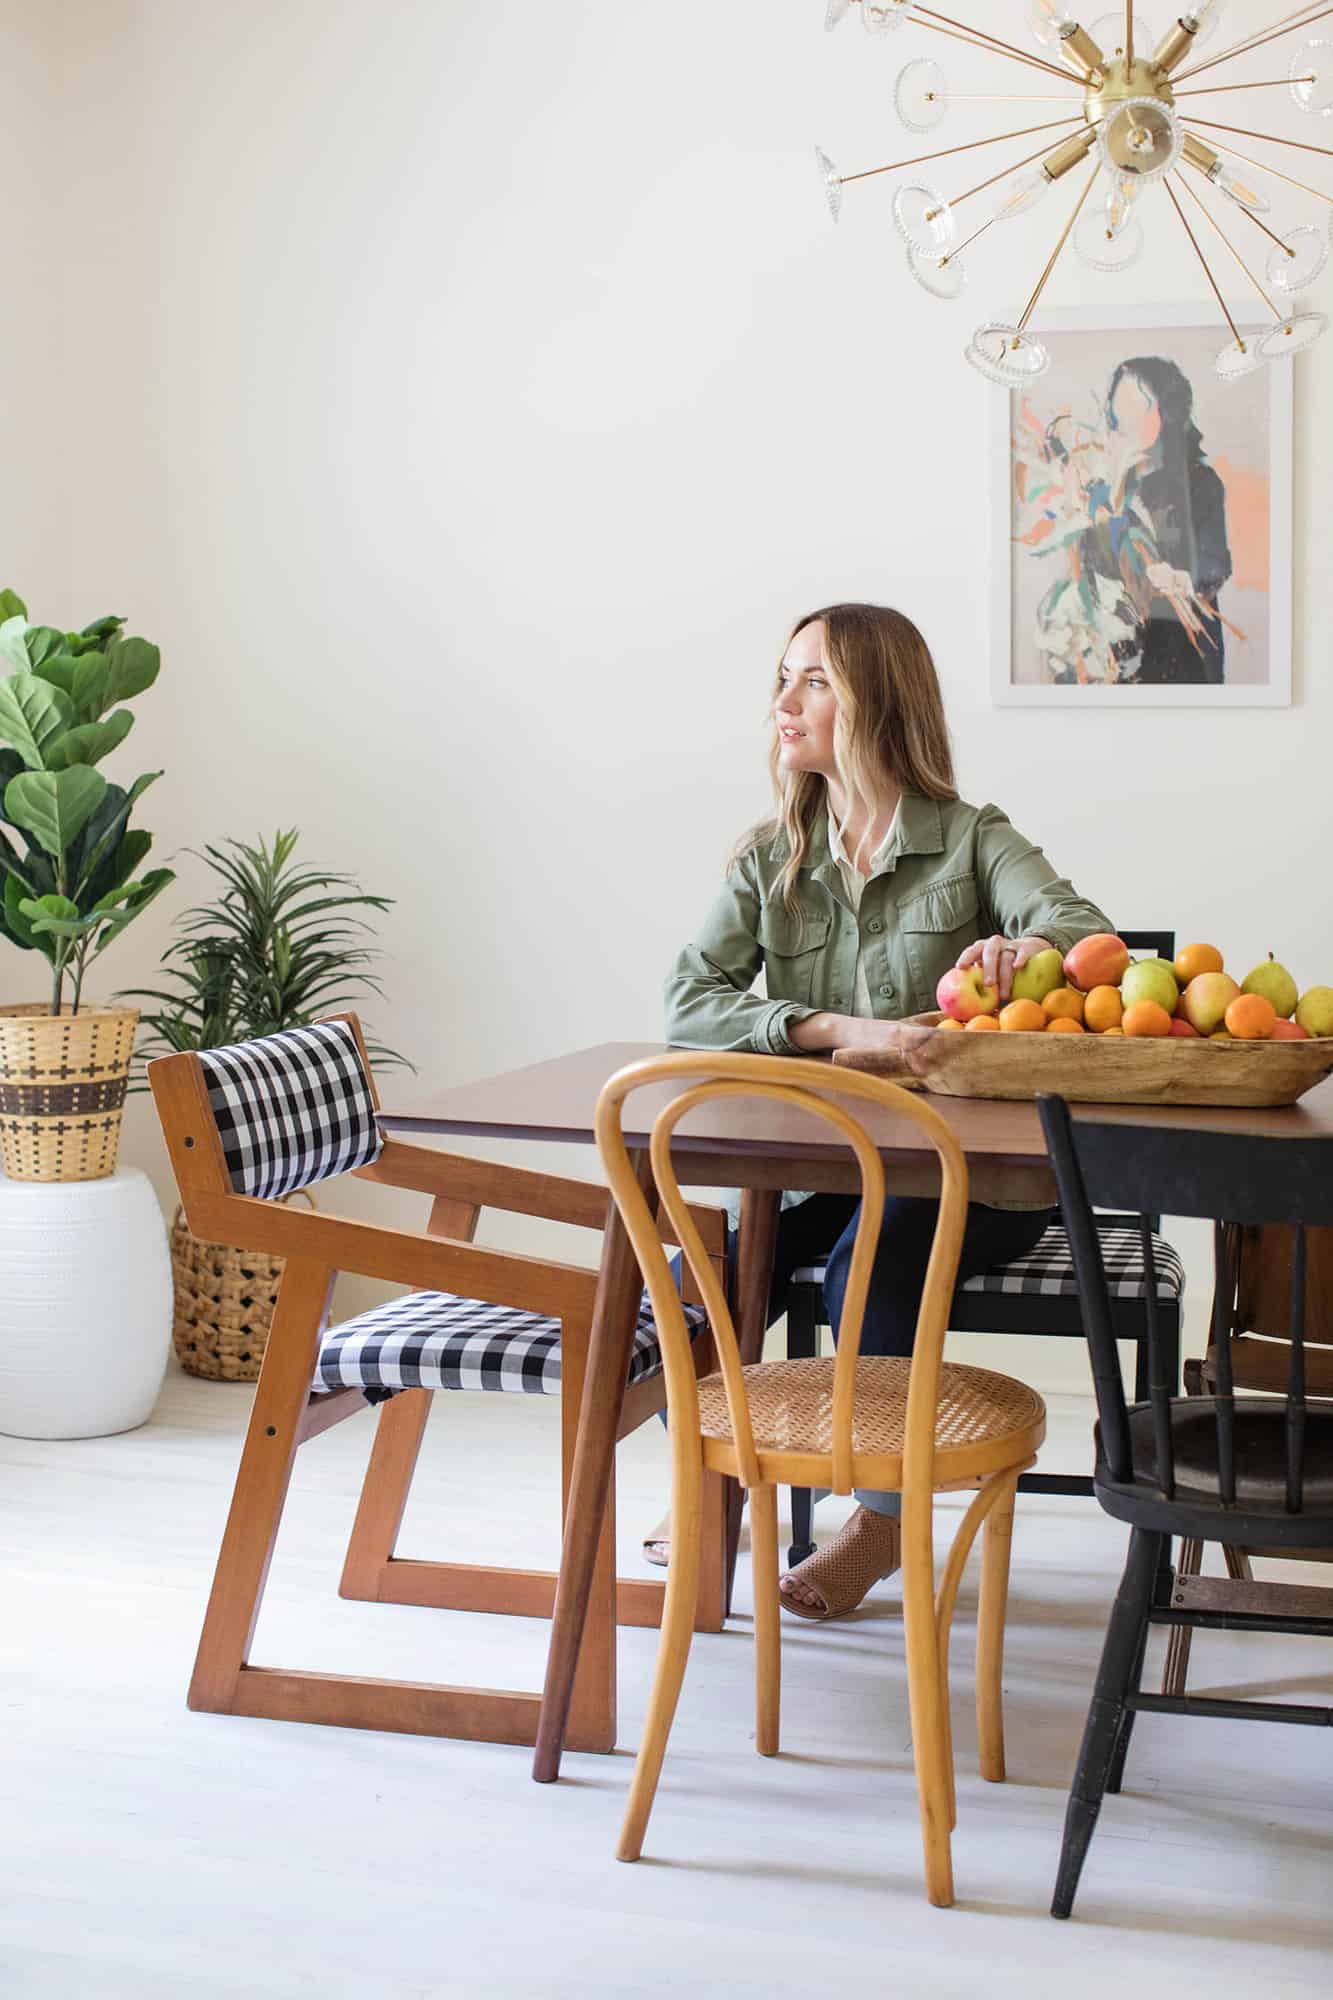
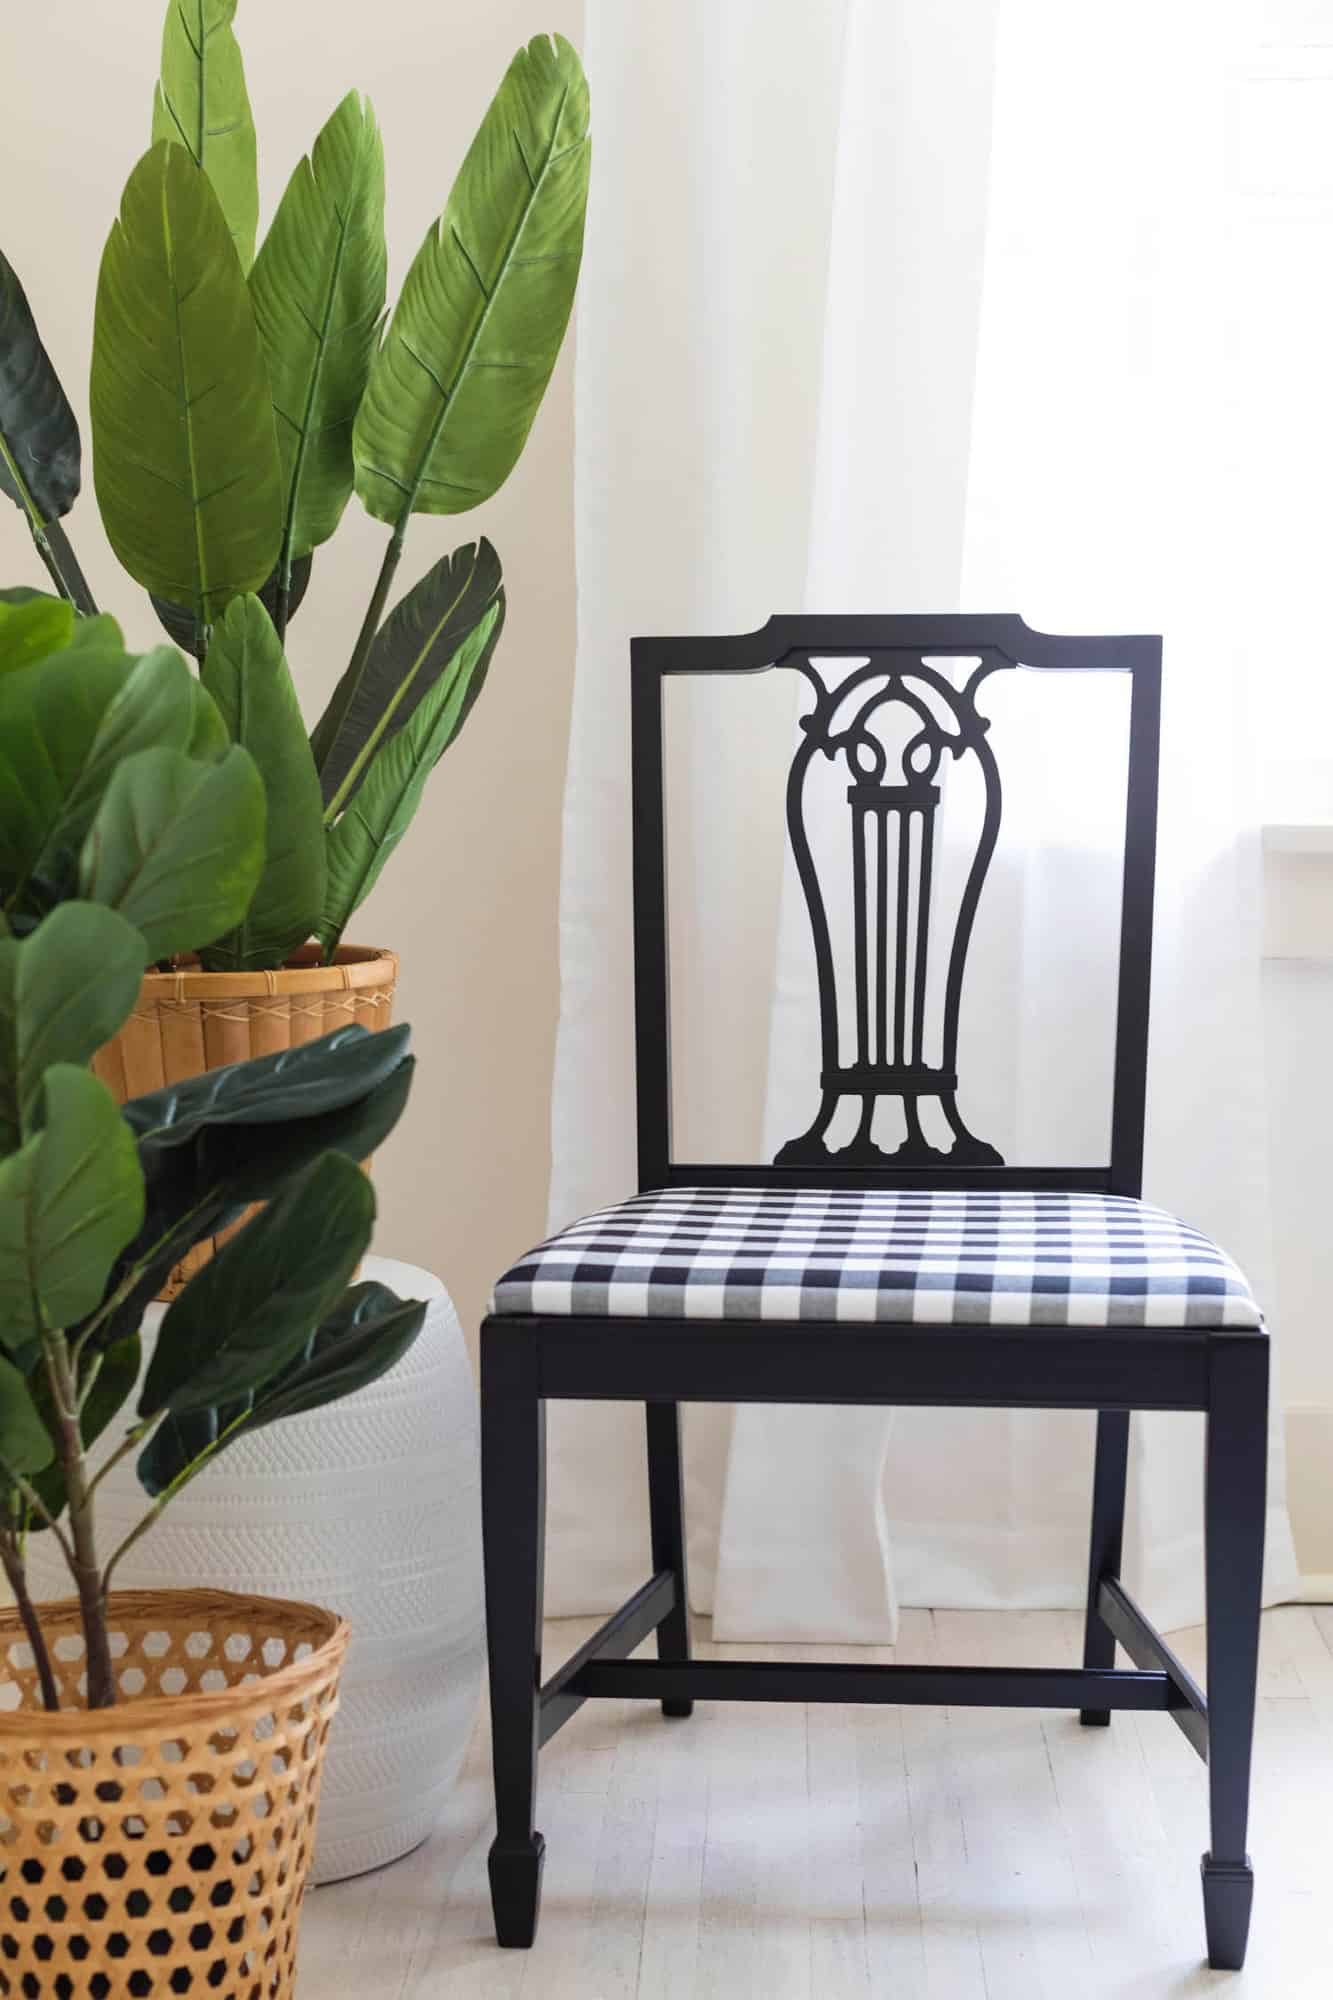
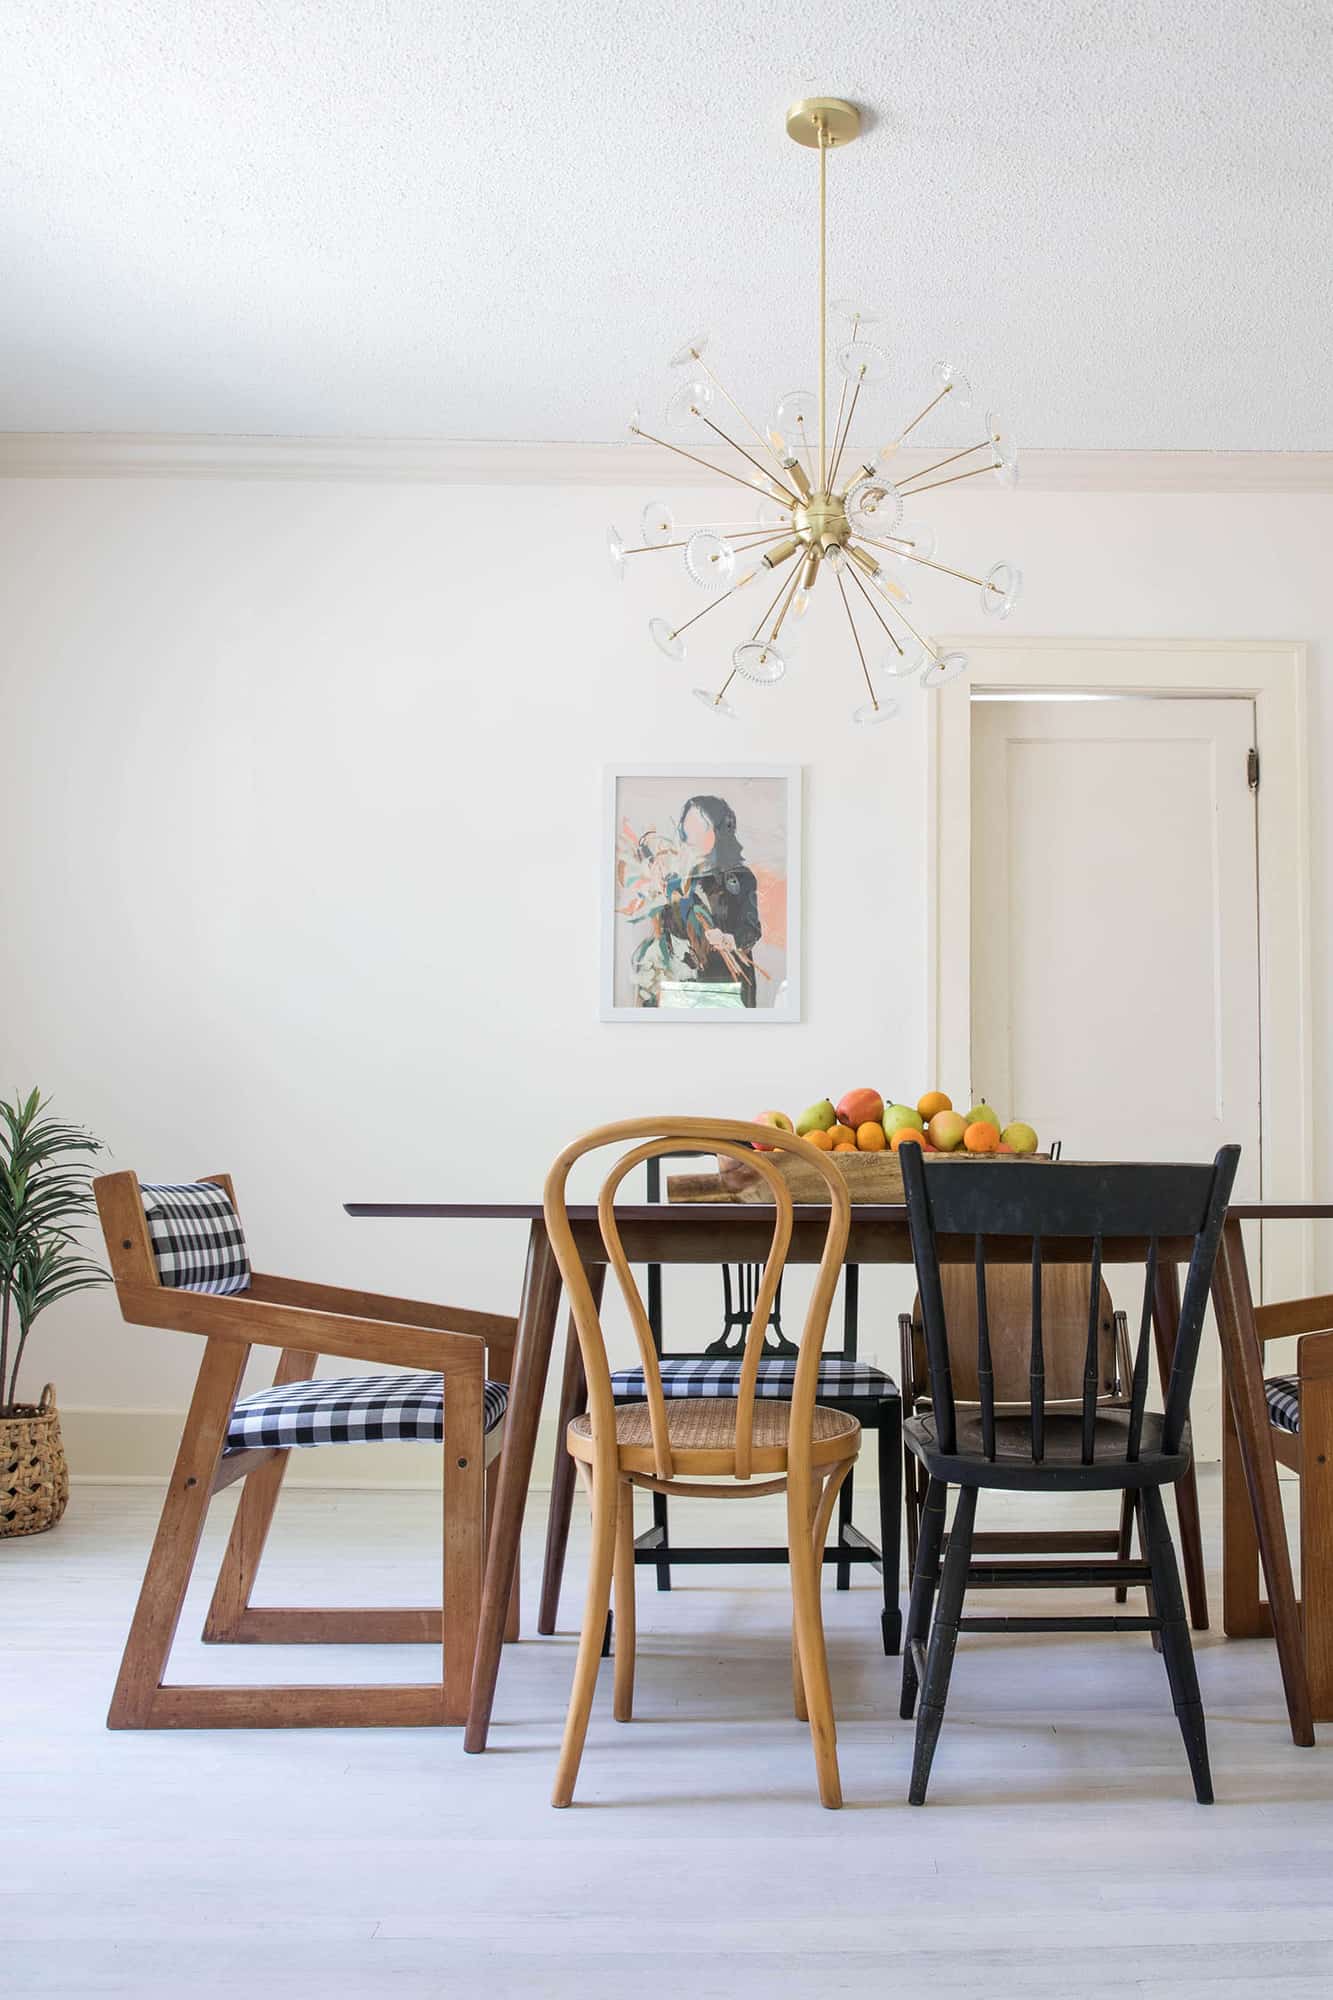 Even though I am not 100% done decorating this room yet, I knew it was going to be a fairly simple space, which is why I thought mismatched chairs might be a cute look for this dining room. What do you think? I also felt a little unsure on what fabric to choose, so I went with a classic black and white gingham. But I may swap this out six months or a year from now for something darker if things end up getting stained. I am still a little unsure how “high traffic” this home may be. But the good news is if I want to reupholster these again next year, it will only take me a few hours. So it’s a pretty simple weekend project. Anyway, thanks for letting me share! xo. Emma
16 Comments
Love the checked print of the chair cushion! It looks good! 🙂
Charmaine Ng | Architecture & Lifestyle Blog
http://charmainenyw.com
Thanks!
I love the shape of the two matching chairs! And they look so much better in that black and white gingham! Great choice!
The shape of those chairs really got me—I felt like really lucked out that day at my local DAV thrift. 🙂 I think they turned out pretty cute, so thanks!
The chairs look amazing!! Love the fabric you guys used. Thanks for sharing, hope you’re having a great day!!
-Kate
https://daysofkate.com/
This is such a helpful tutorial! Thanks, Emma!
To be honest when I reference gingham in my mind for home decor I either think traditional or cabin decor. It definitely gives the place a more casual feel especially with the mismatched chairs, but if you were to redo it down the line, I could see a smaller plaid or gingham if you want to stick with gingham working better, especially if you fear it getting stained from use. Stains would be easier to disguise and spot clean that way. Smaller patterns tend to work as a texture too, so it doesn’t become a focal point if that’s not your intention.
I also like that with the mismatch, the black chair should work very well for a travel highchair/booster seat and it’s not padded so it can be wiped down easily. 🙂
This turned out great! I’m super curious as to how you ended up treating the back cushions. Do you have any photos of the back finished?
I don’t think I got a close up that day. I’ll have to show you next time I’m there and doing some IG stories. But basically I folded the fabric over so it looks like a seam and then stapled only 3 staples in the black areas of the fabric design. Then I used a fine brush and painted the tops of the staples with black acrylic paint, just to completely hide them. It’s probably not what a professional would do, but it looks really nice (or at least I think so 🙂
This post makes me so happy! I didn’t reupholster everything but I purposely thrifted mismatched brown chairs for my dining room.
I think that this is awesome!
Nice chairs – looks easy to do… Thanks for the post!
Nice..
Redoing upholstery has been on the back burner for so long because it has always seemed so daunting. Thanks for the tips! I feel like I can do it now 🙂
Love this!! I especially love that you show folks how reasonable it is to take an older chair with good lines, but crap fabric and turn it into a stylish new set!!! Love love!
i’m doing dining chairs tomorrow now! this tutorial feels totally manageable and i just ordered my fiskars utensils from the local joann’s store.
QUESTION – if you had to buy a filler for the seat, how do you determine which kind and how much?
I would measure the area of the chair sitting area (that will require the filling) and then go to the store and look at the options and get what you need. There are lots of different kinds of foam filling and it will depend on the type of chair you’re doing and what you want it to look like once you’re done. There are lots of filling options at JOANN but other craft / fabric stores will have options as well. You could try ordering filling online but you may end up with too much or too little, or it may not be the depth you end up wanting. So I would just get measurements and head to the store and look. Good luck!