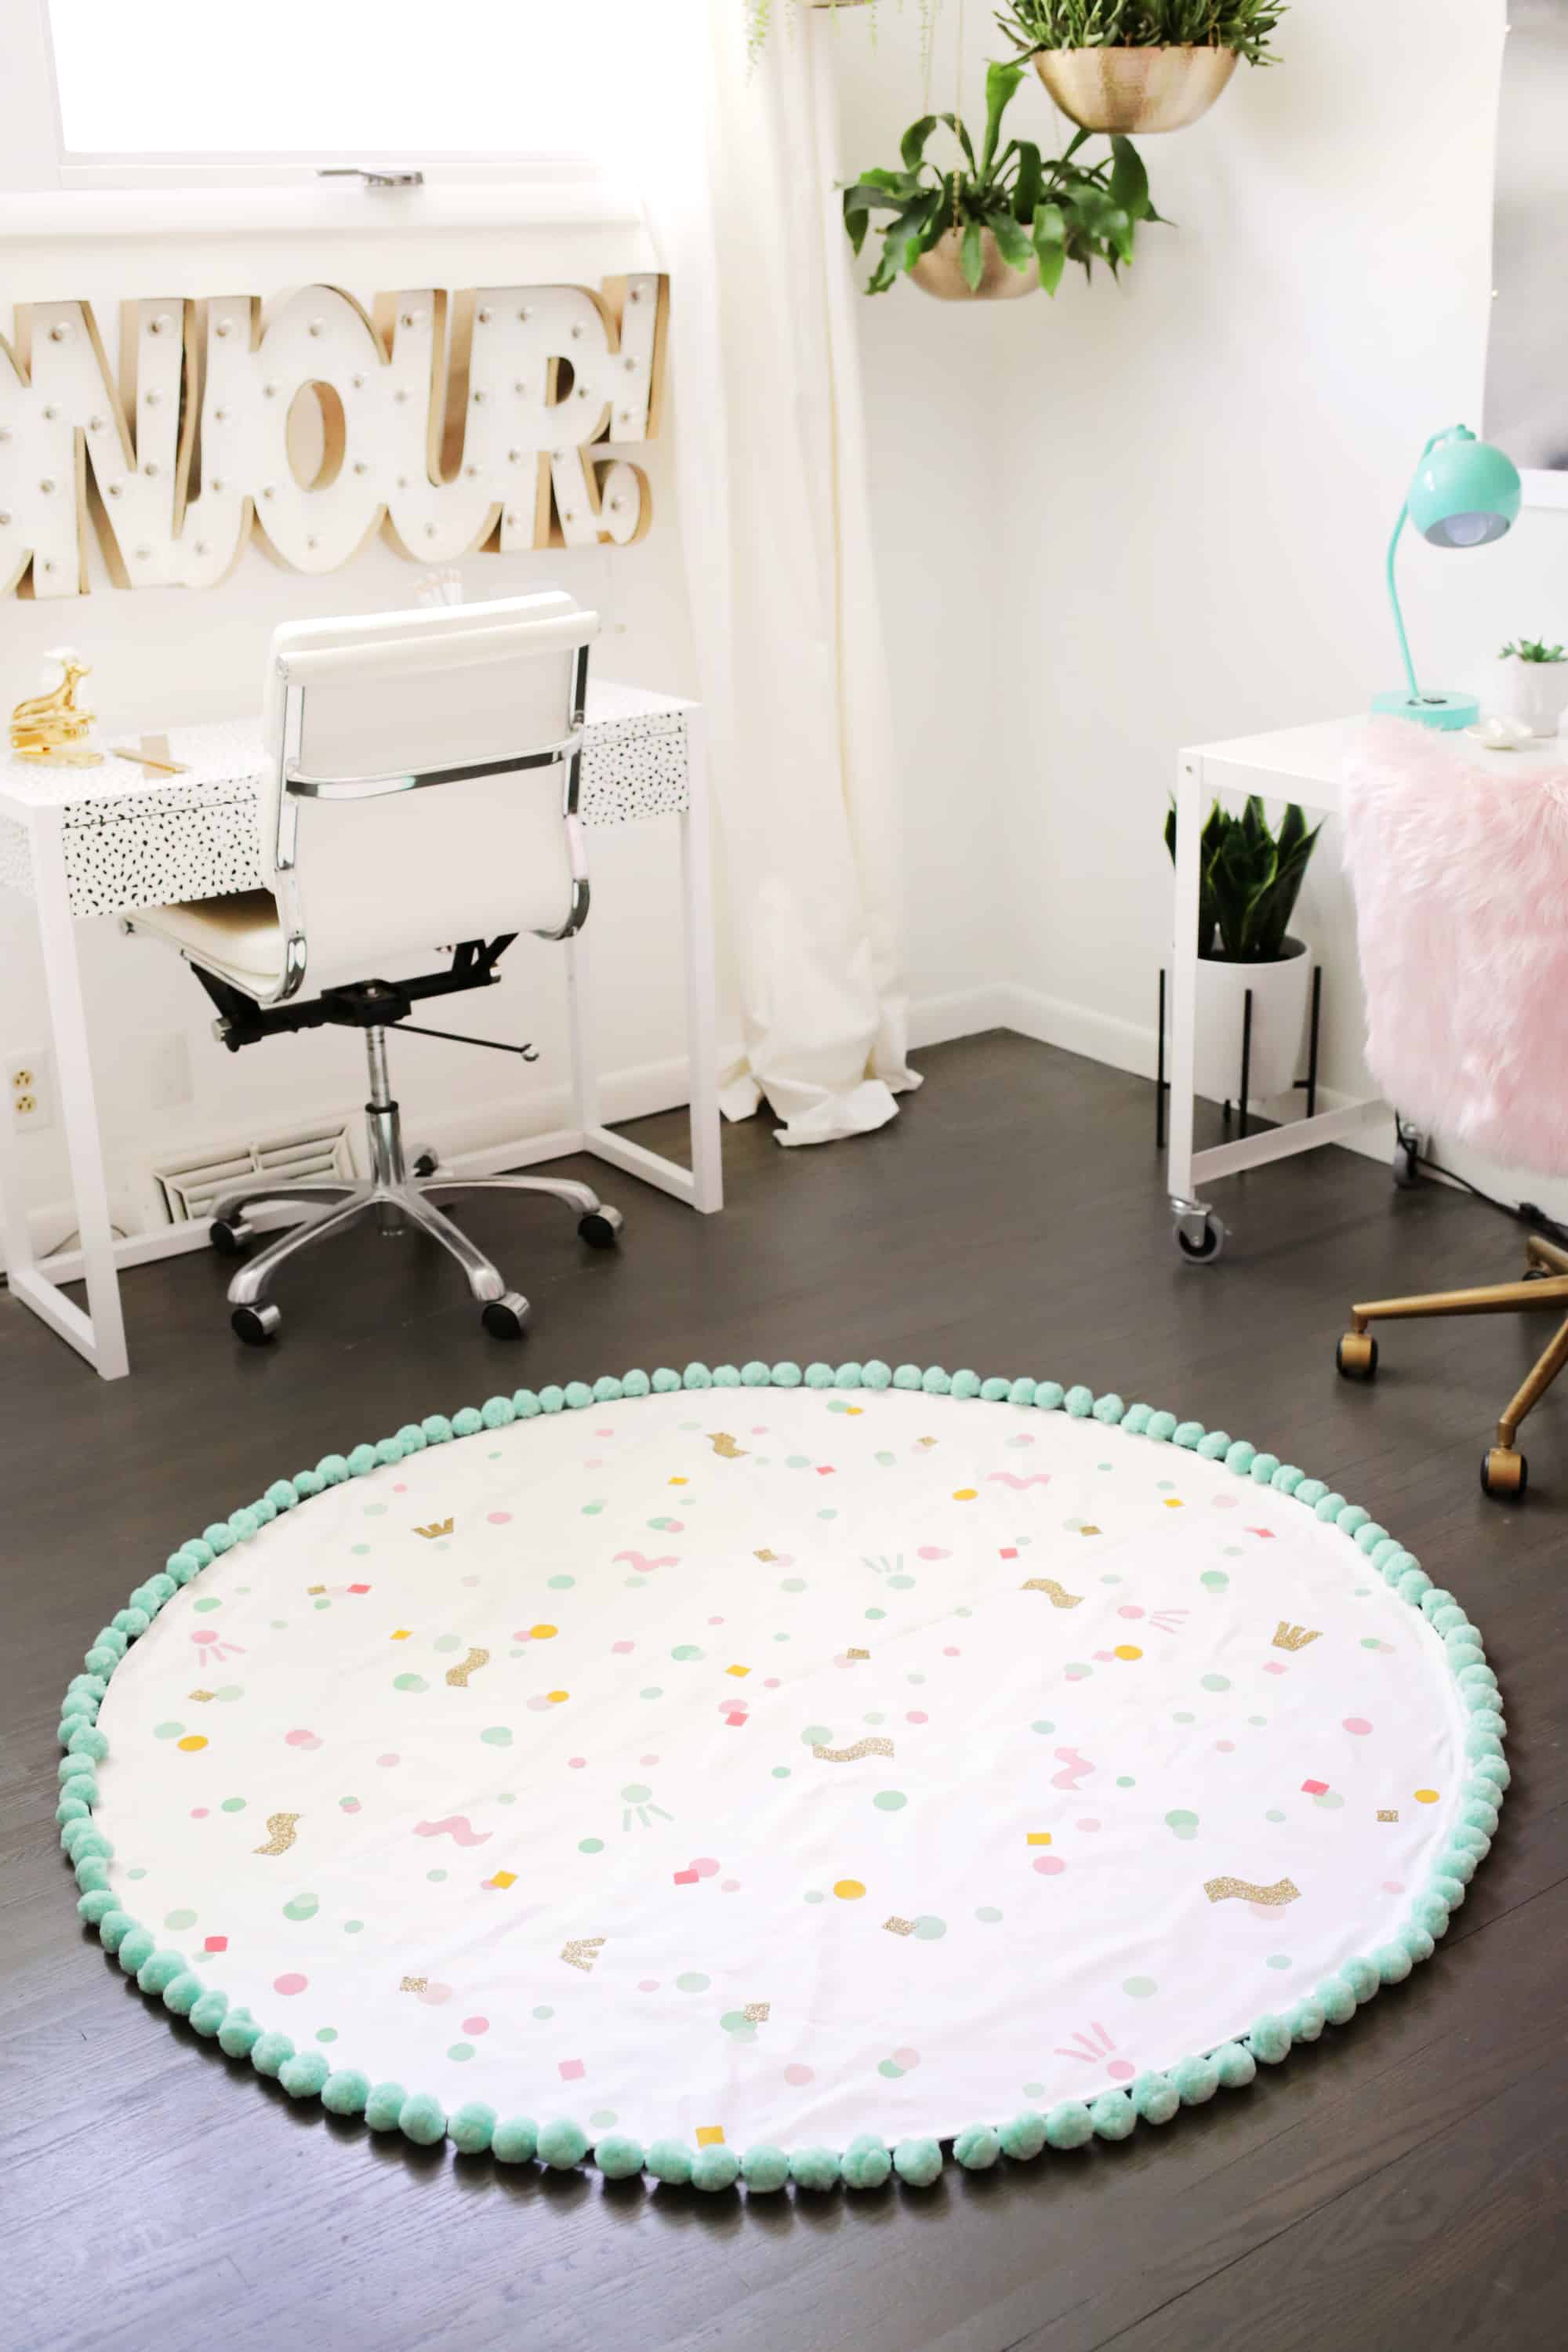
 I feel like once you hit that point in life where you get pets or have kids (or both!), you start to ask the same question every time you consider buying something—”is this washable?” I wanted to make a rug for my office that I could throw in the washer anytime there’s a pet accident or a sippy cup gets spilled, so I thought about what craft supplies are washable and set out to put them all together! Of course, you can totally customize yours in whatever way you want, but I thought a colorful confetti-type pattern would add some fun to the space …
 Supplies:
-large scale trim like this that is washable (enough to go around the circumference of the size you want)
-canvas fabric or thick duck cloth material for the main body of the rug (it’s helpful to use a more heavy-duty denim needle for your machine when sewing several layers of those). You can also use an inexpensive drop cloth as well
–fabric paint
–round foam pouncers
–glitter or solid colored iron-on vinyl for fabric
-sewing machine
-ruler or measuring tape
–fabric pen and fabric scissors
-straight pins
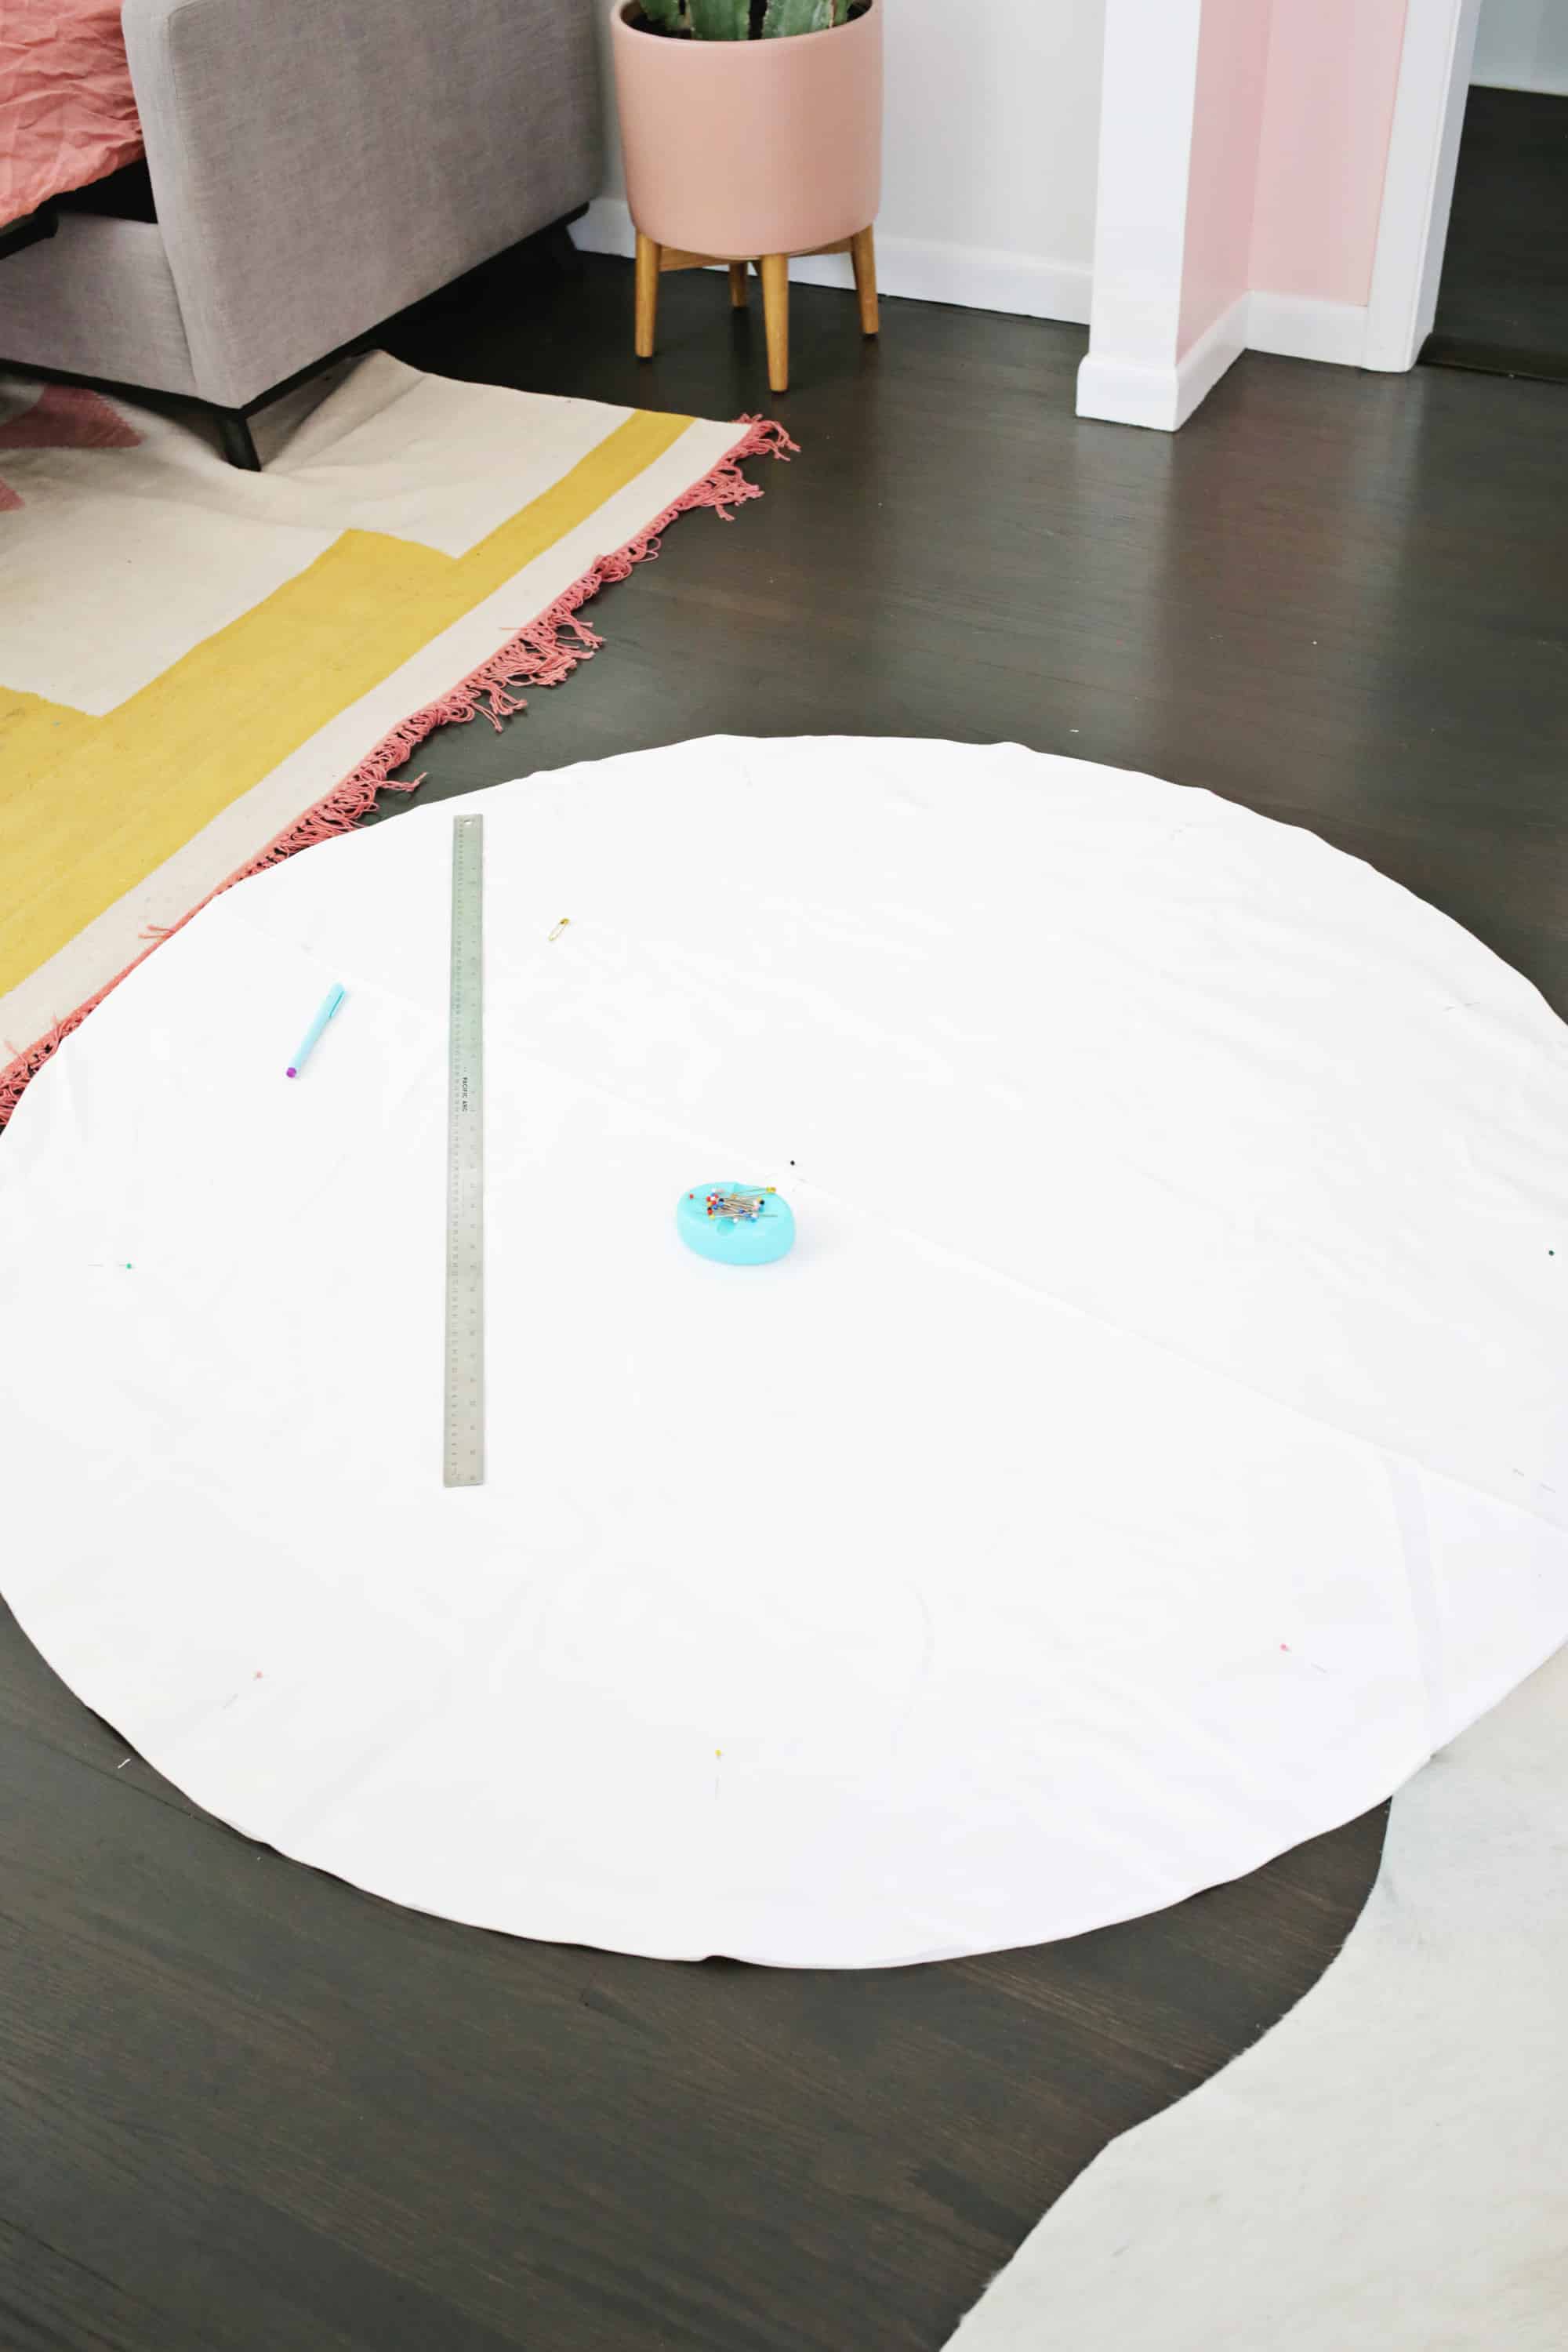
Wash your fabric and dry it. Iron out any wrinkles so that your fabric lays flat. I found the widest bolt of canvas fabric I could (it was 58″ wide) and so I got double that length (116″ of fabric) so I could fold the fabric in half and have enough for 2 circles that were 58″ wide. Once my fabric was laid out and folded in half, I used a ruler to draw as big of a circle as would fit on the fabric and cut through both layers of the fabric to create my circle.
 Sew all the way around your double-layered circle with a 1/2″ seam allowance, leaving a 5″ gap. Turn your circle right side out through that gap.
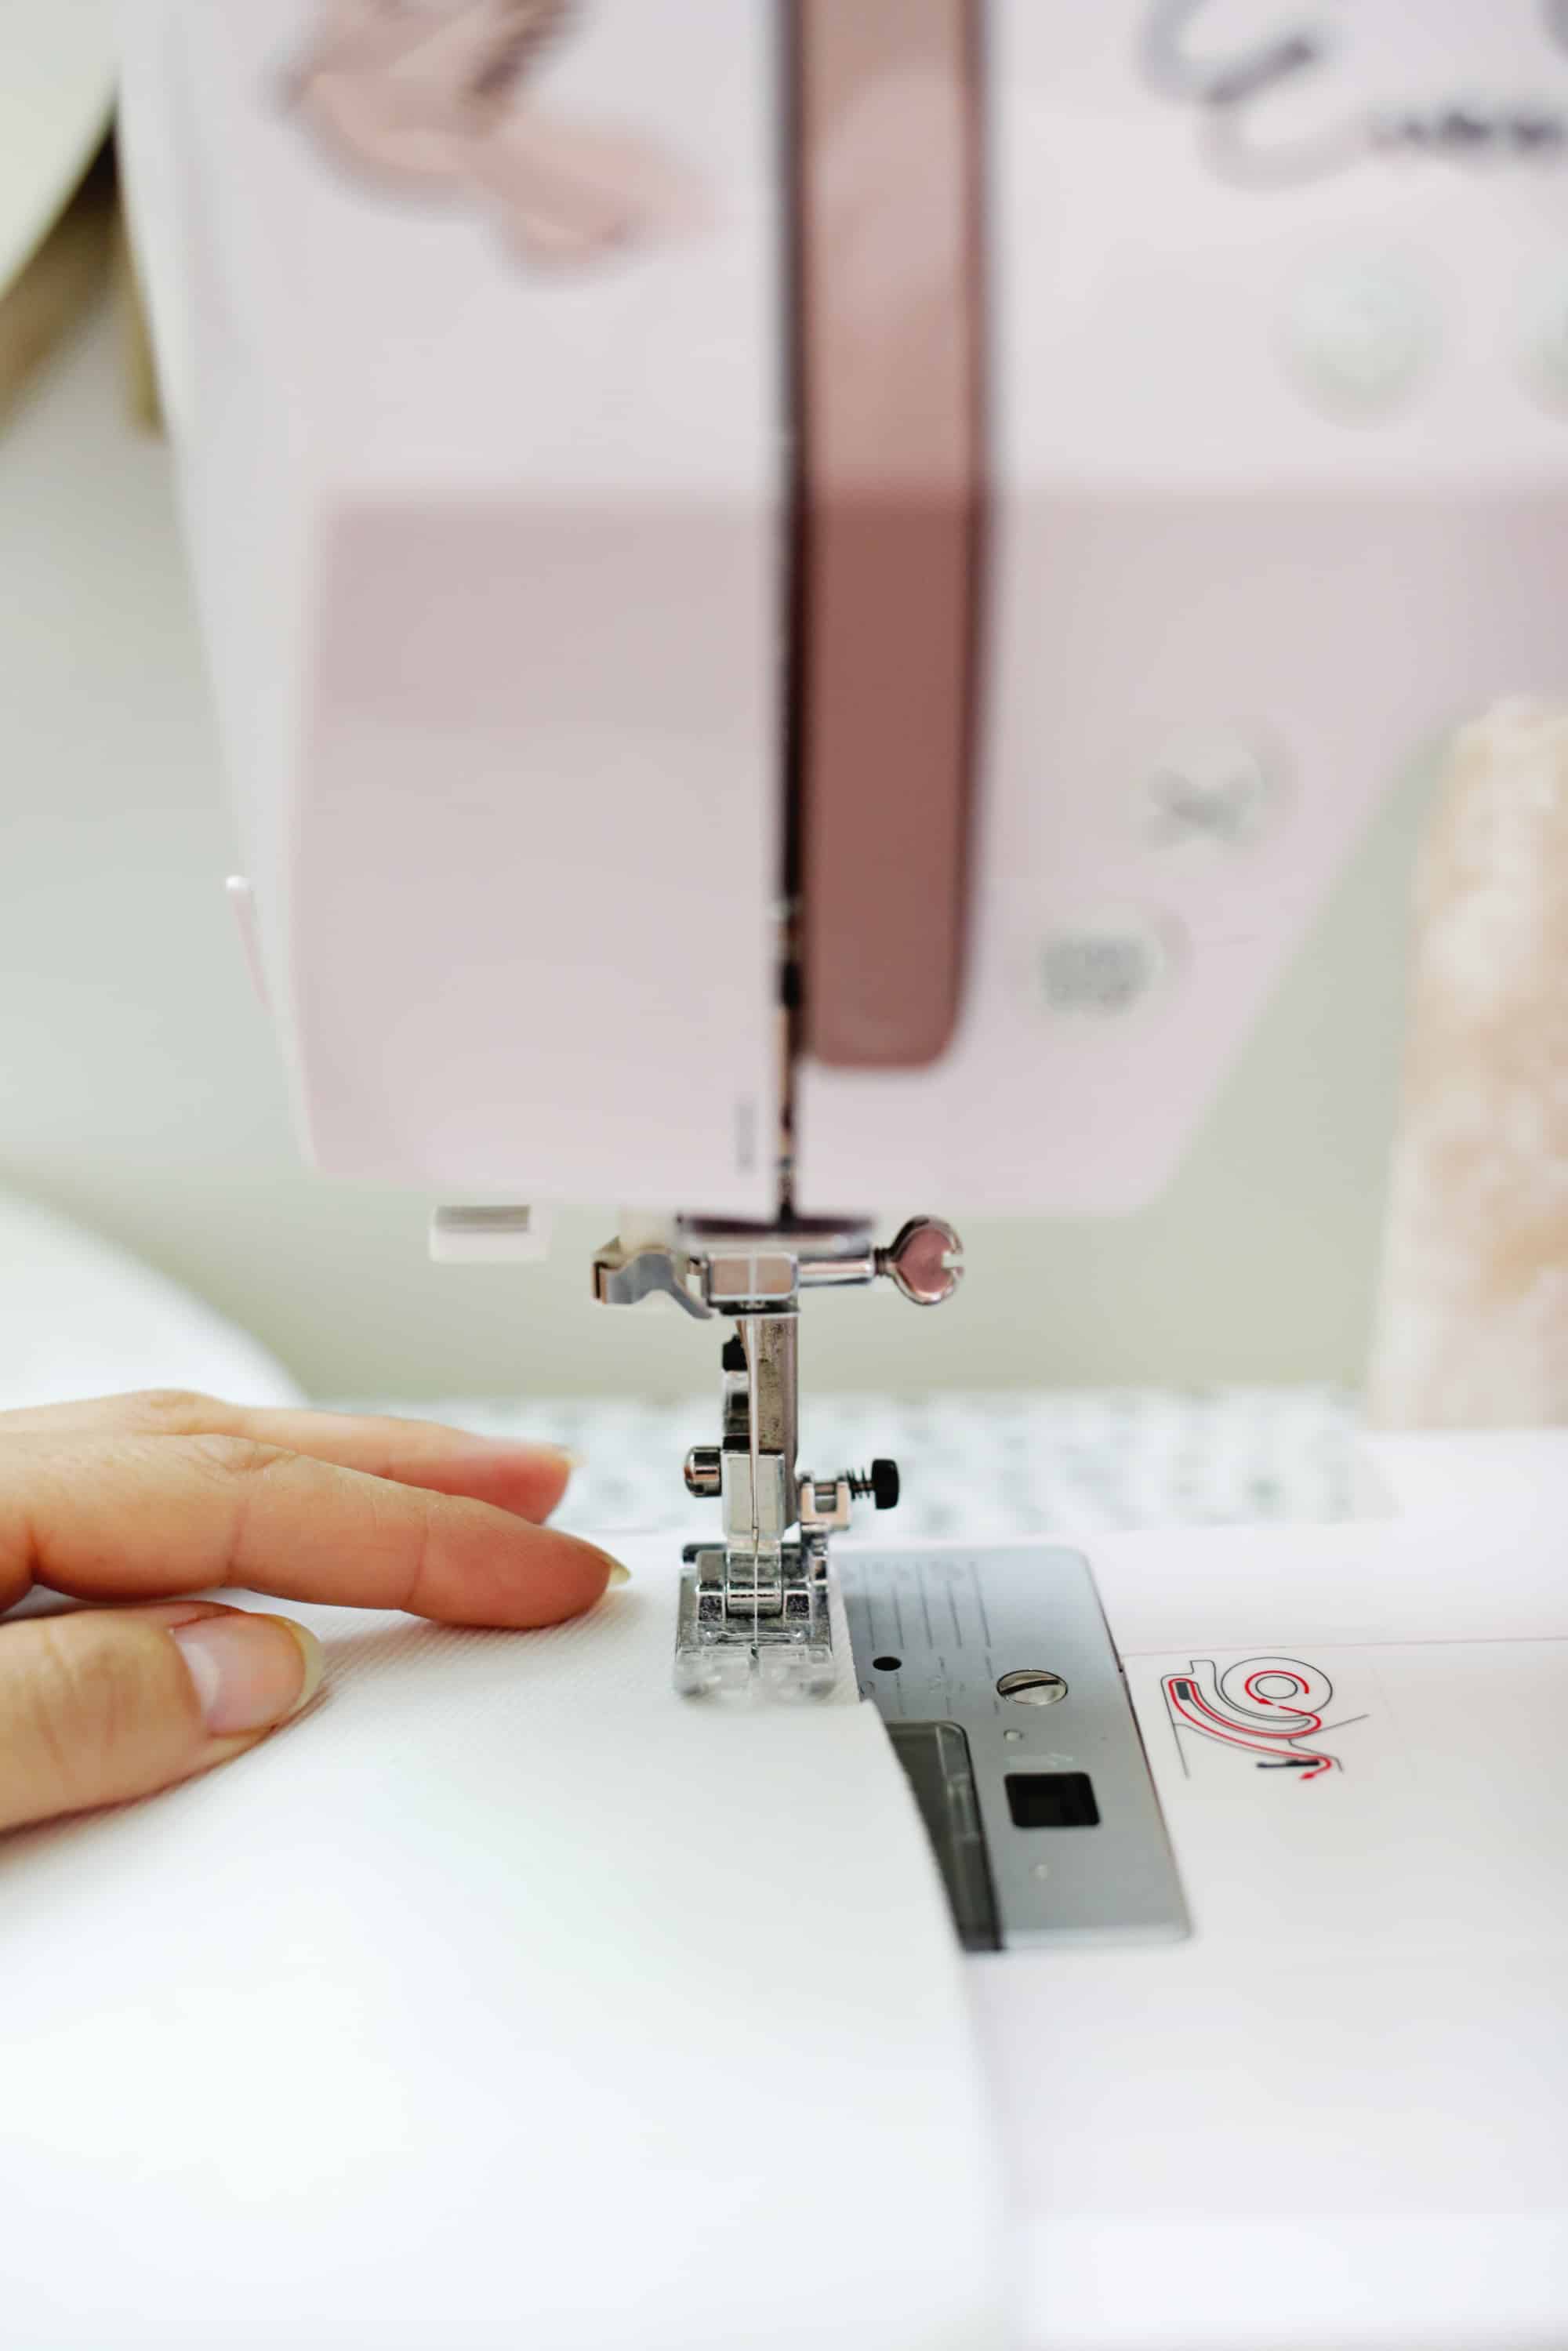
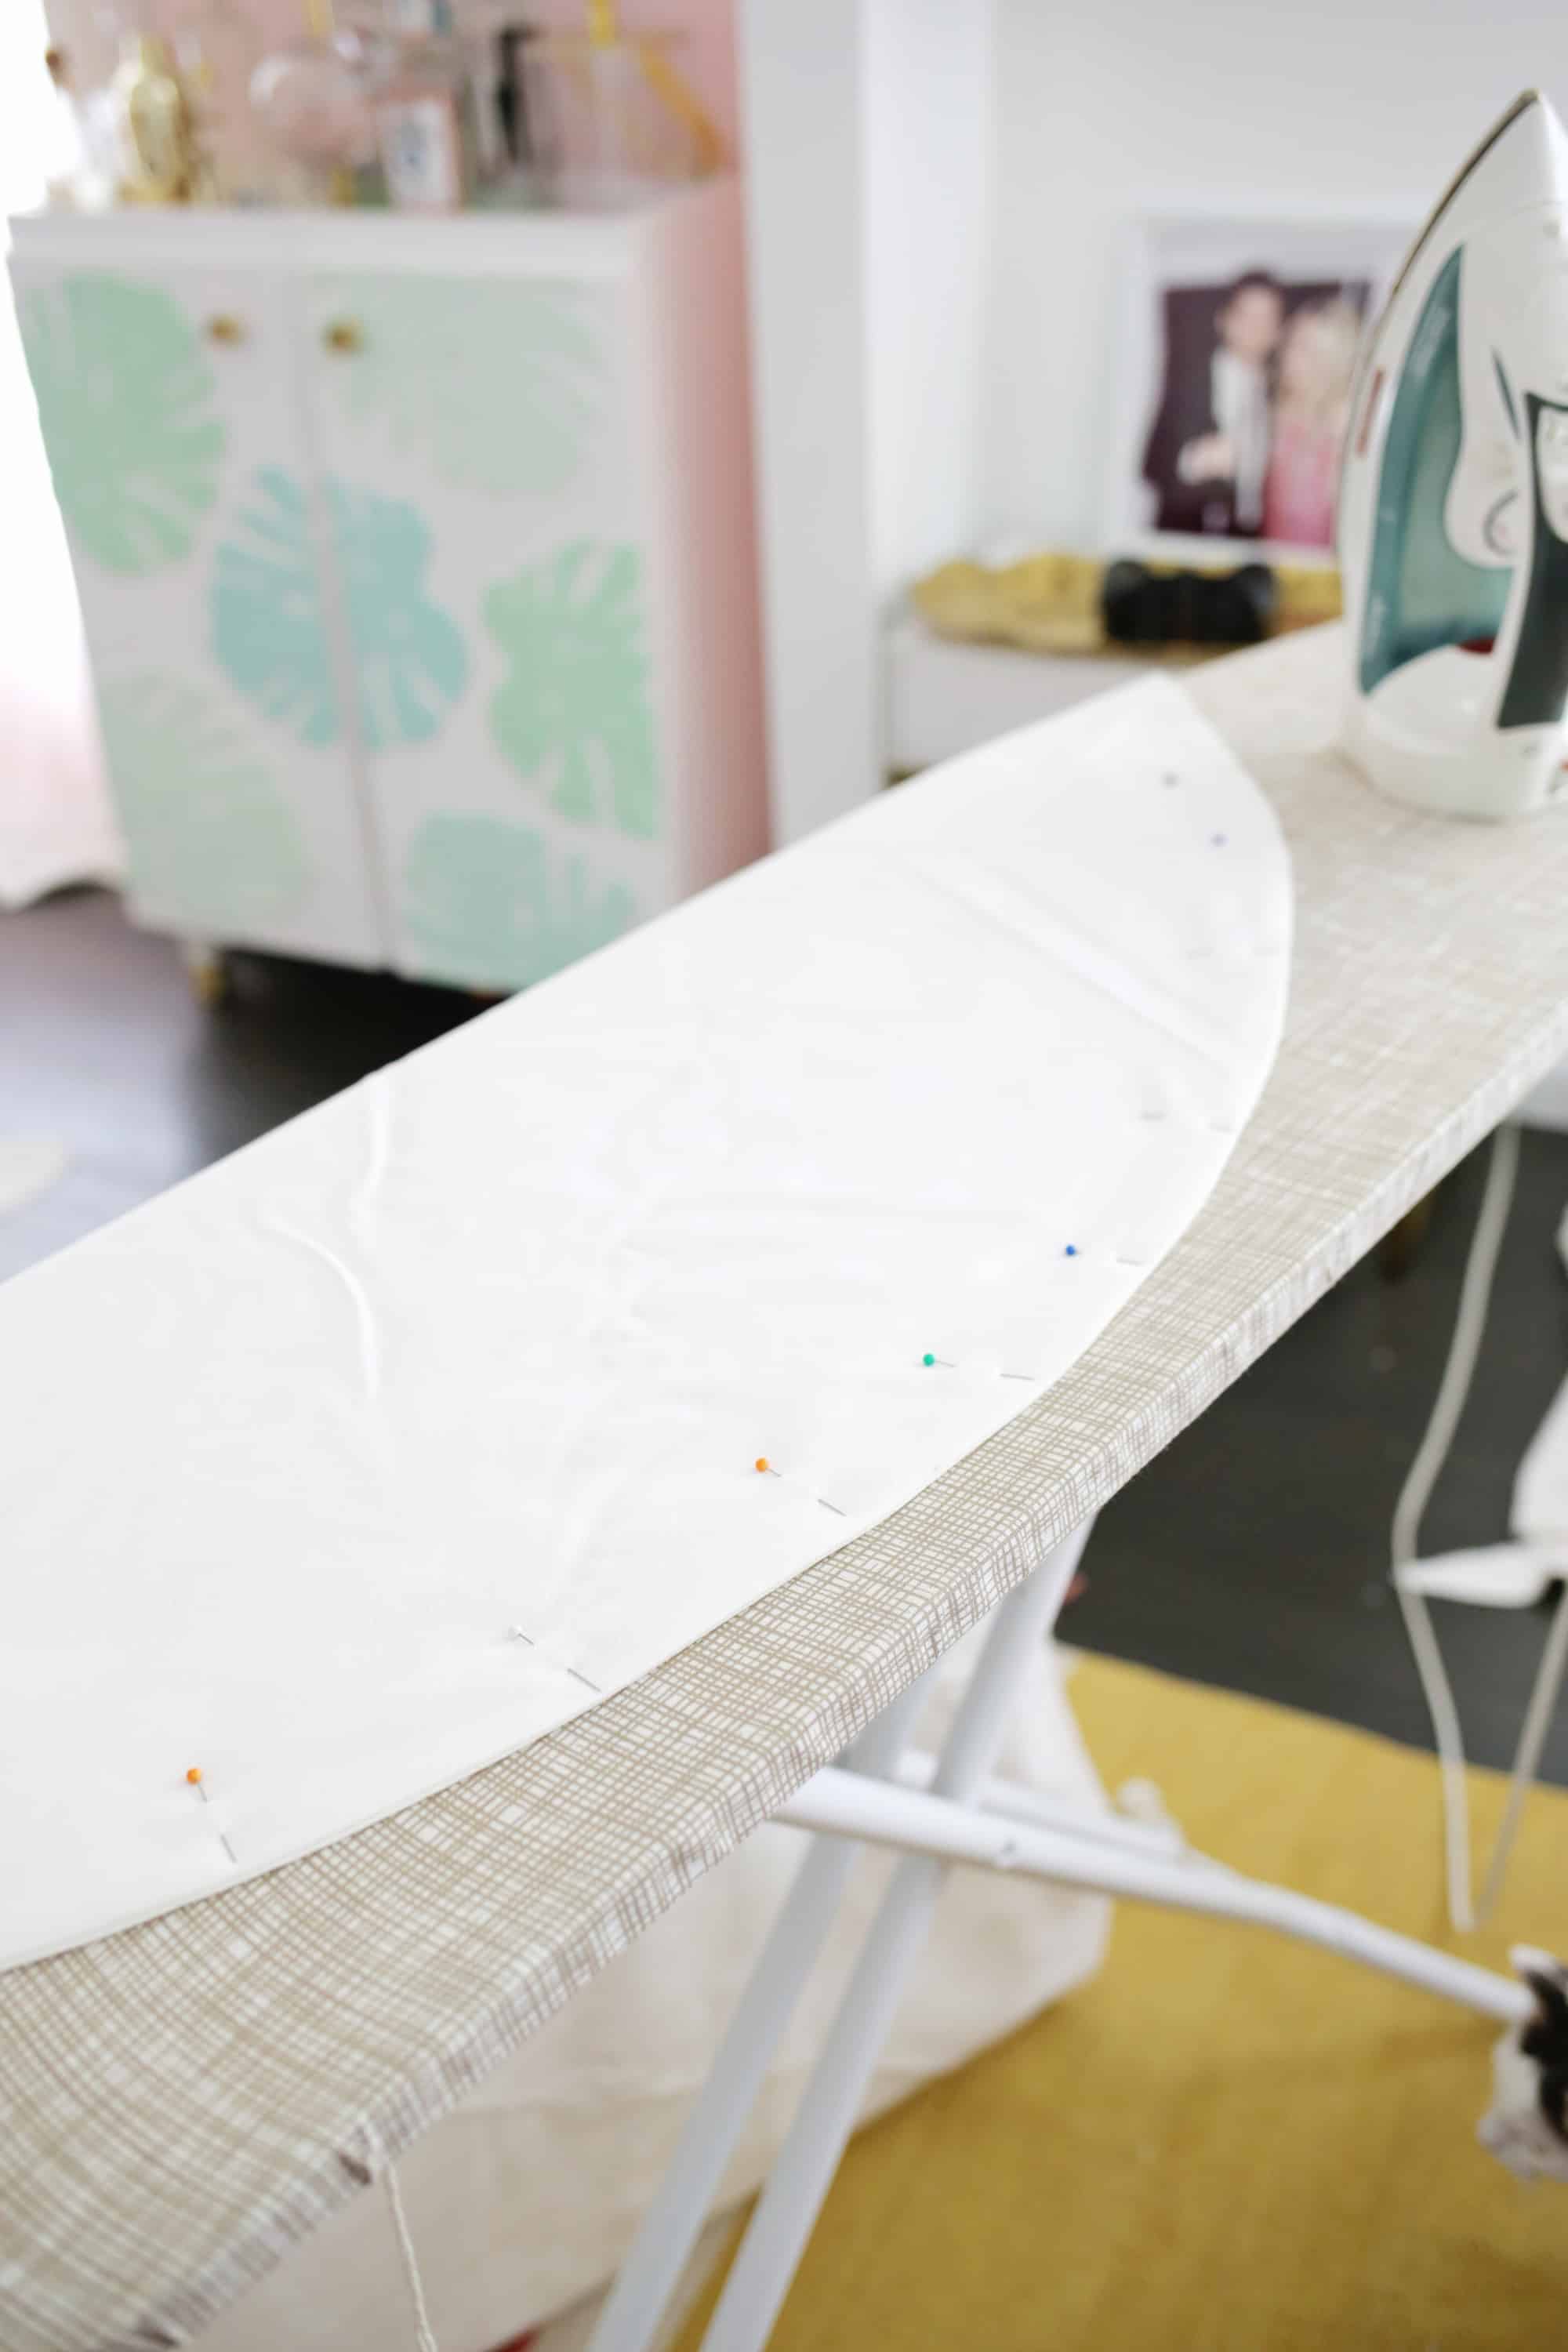 Once your circle has been flipped right side out, smooth the outside seam down flat and pin in place. Press flat with an iron. You’ll also want to fold under and press flat the opening where you turned the circle through (it should look like the rest of the edge does) so you can sew it closed on the next step. Once your edge seam is pressed, sew around the circumference of the circle with a 1/2″ seam allowance the whole way around. I would also suggest tacking the rug with a few stitches in the very middle and then again halfway between the middle and the top, the bottom, and each side. That way the two layers will stay together in the washing machine.
 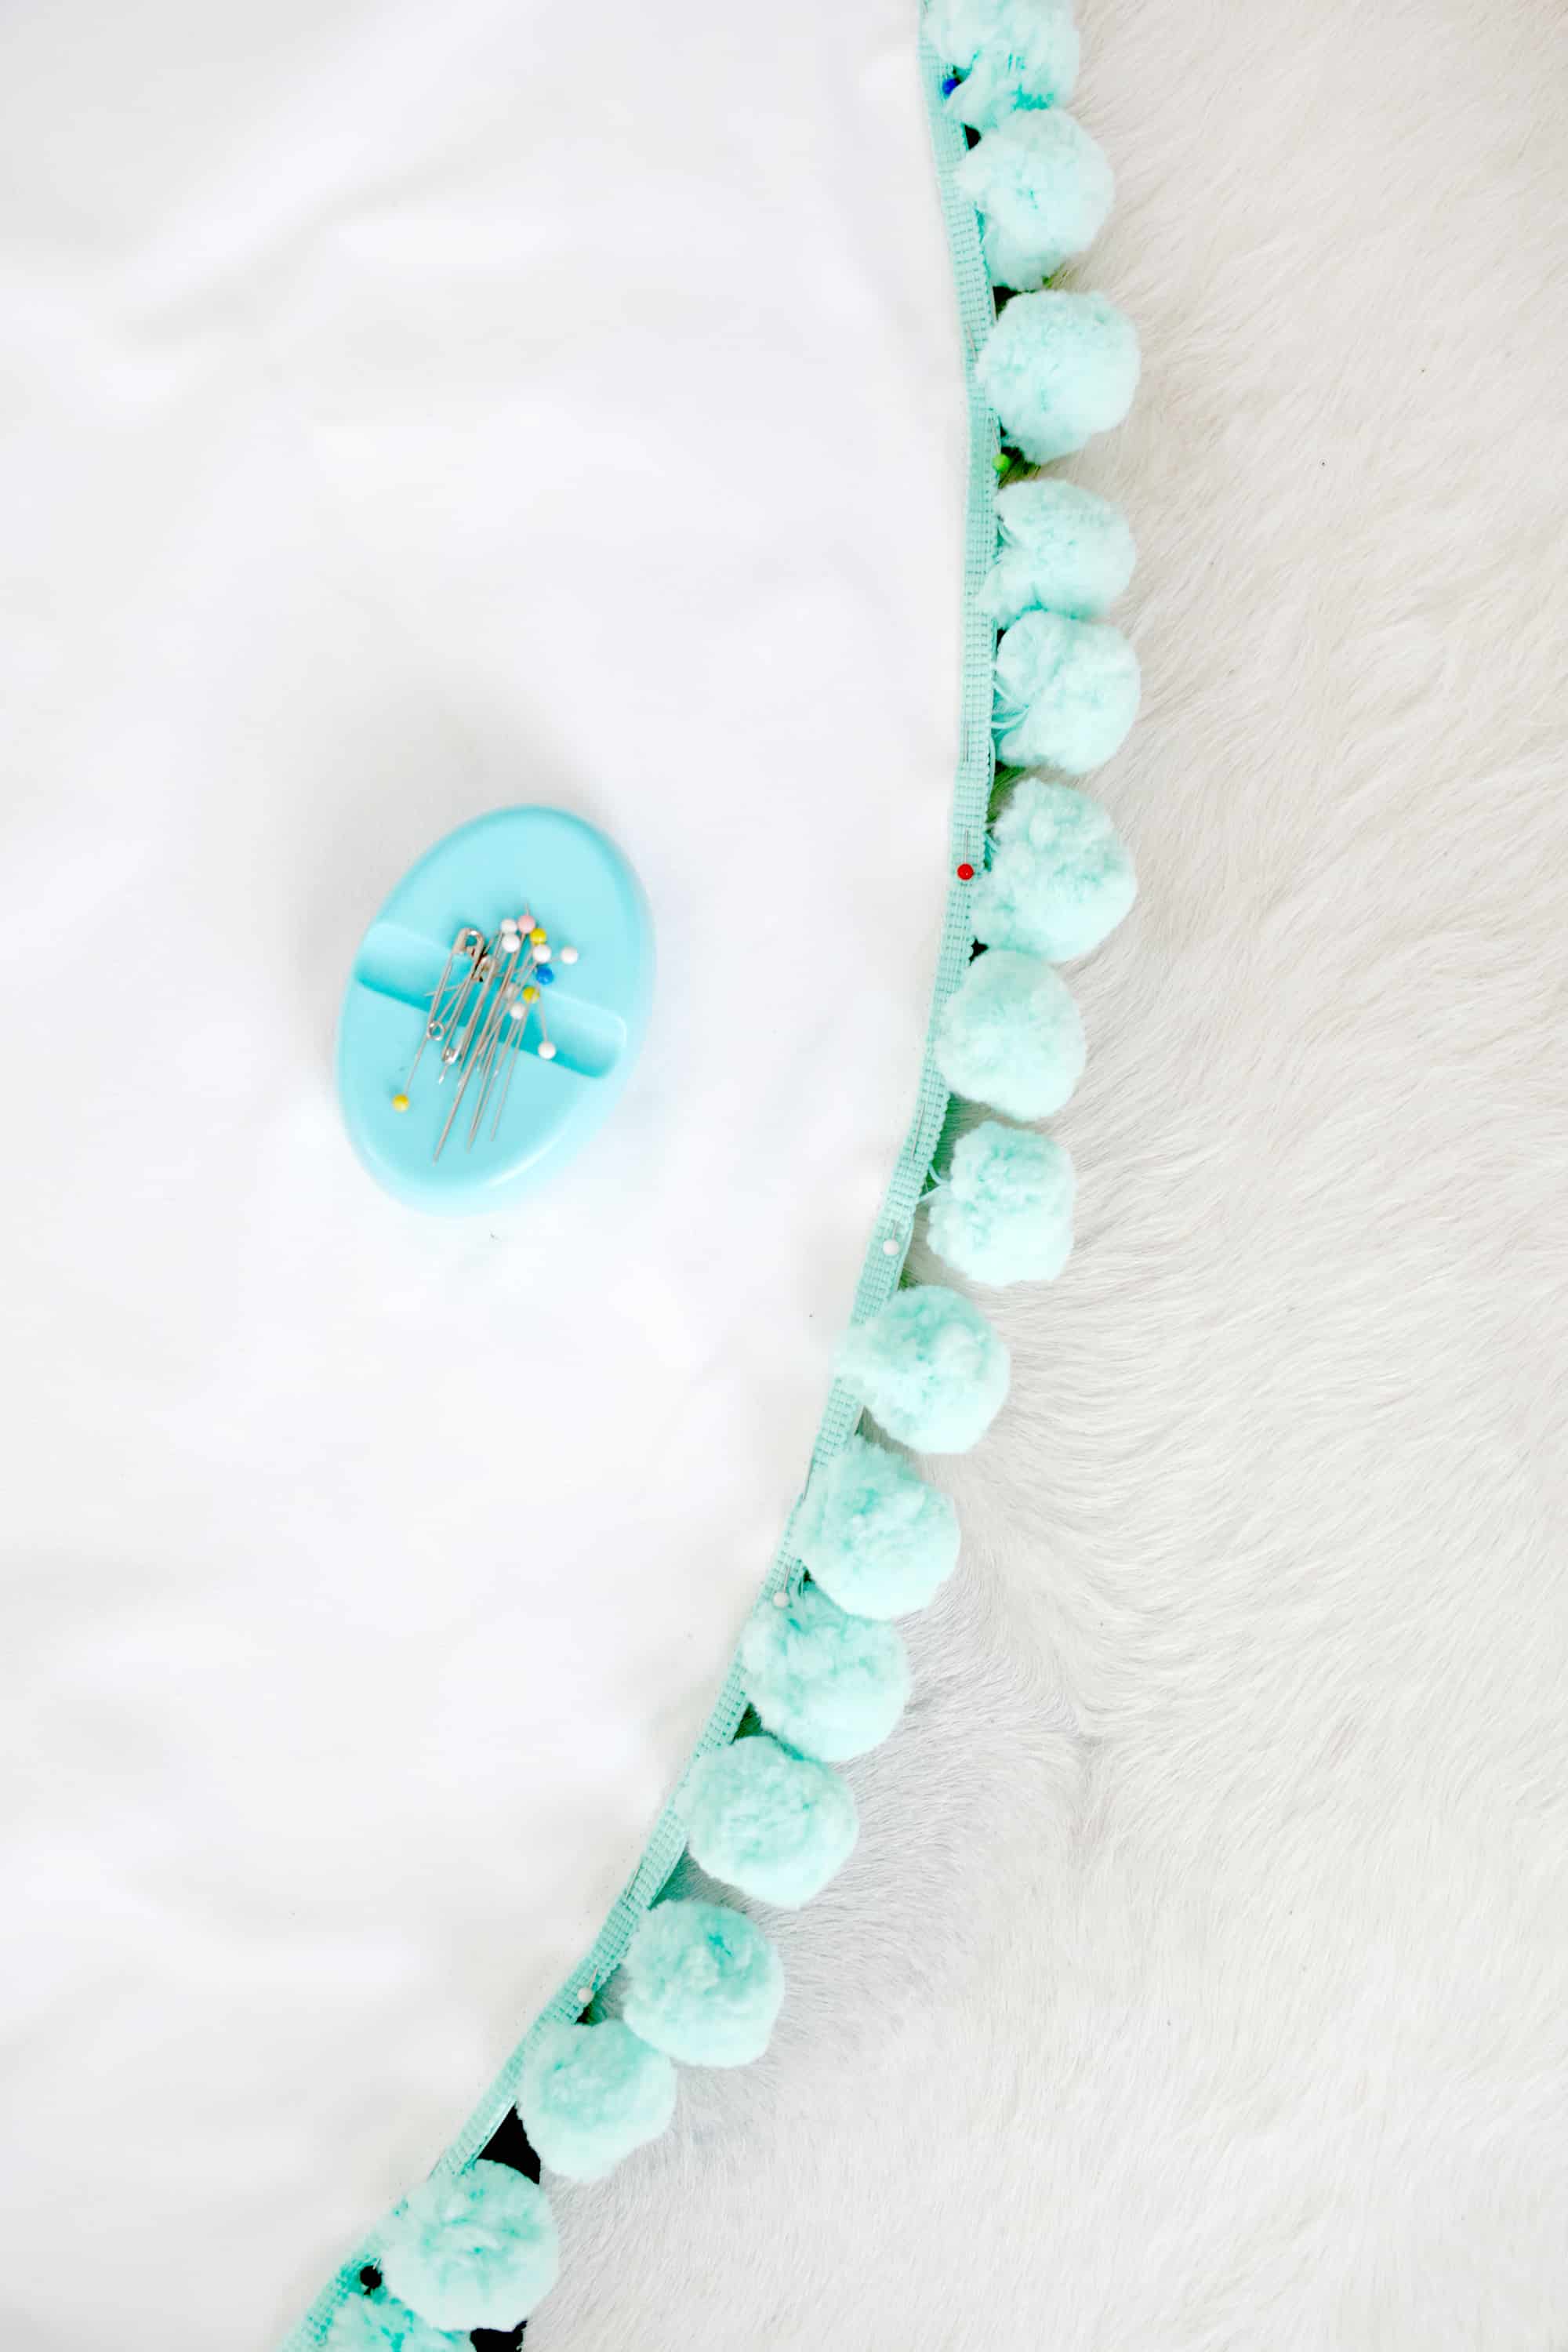 Take your trim and pin it all the way around the edge of your rug, folding under the very beginning and end of the trim and overlapping both ends so they stay put when sewn. If you want to see that trim band, sew it to the top, and if you want it to be hidden while still seeing the trim, sew it to the bottom side.
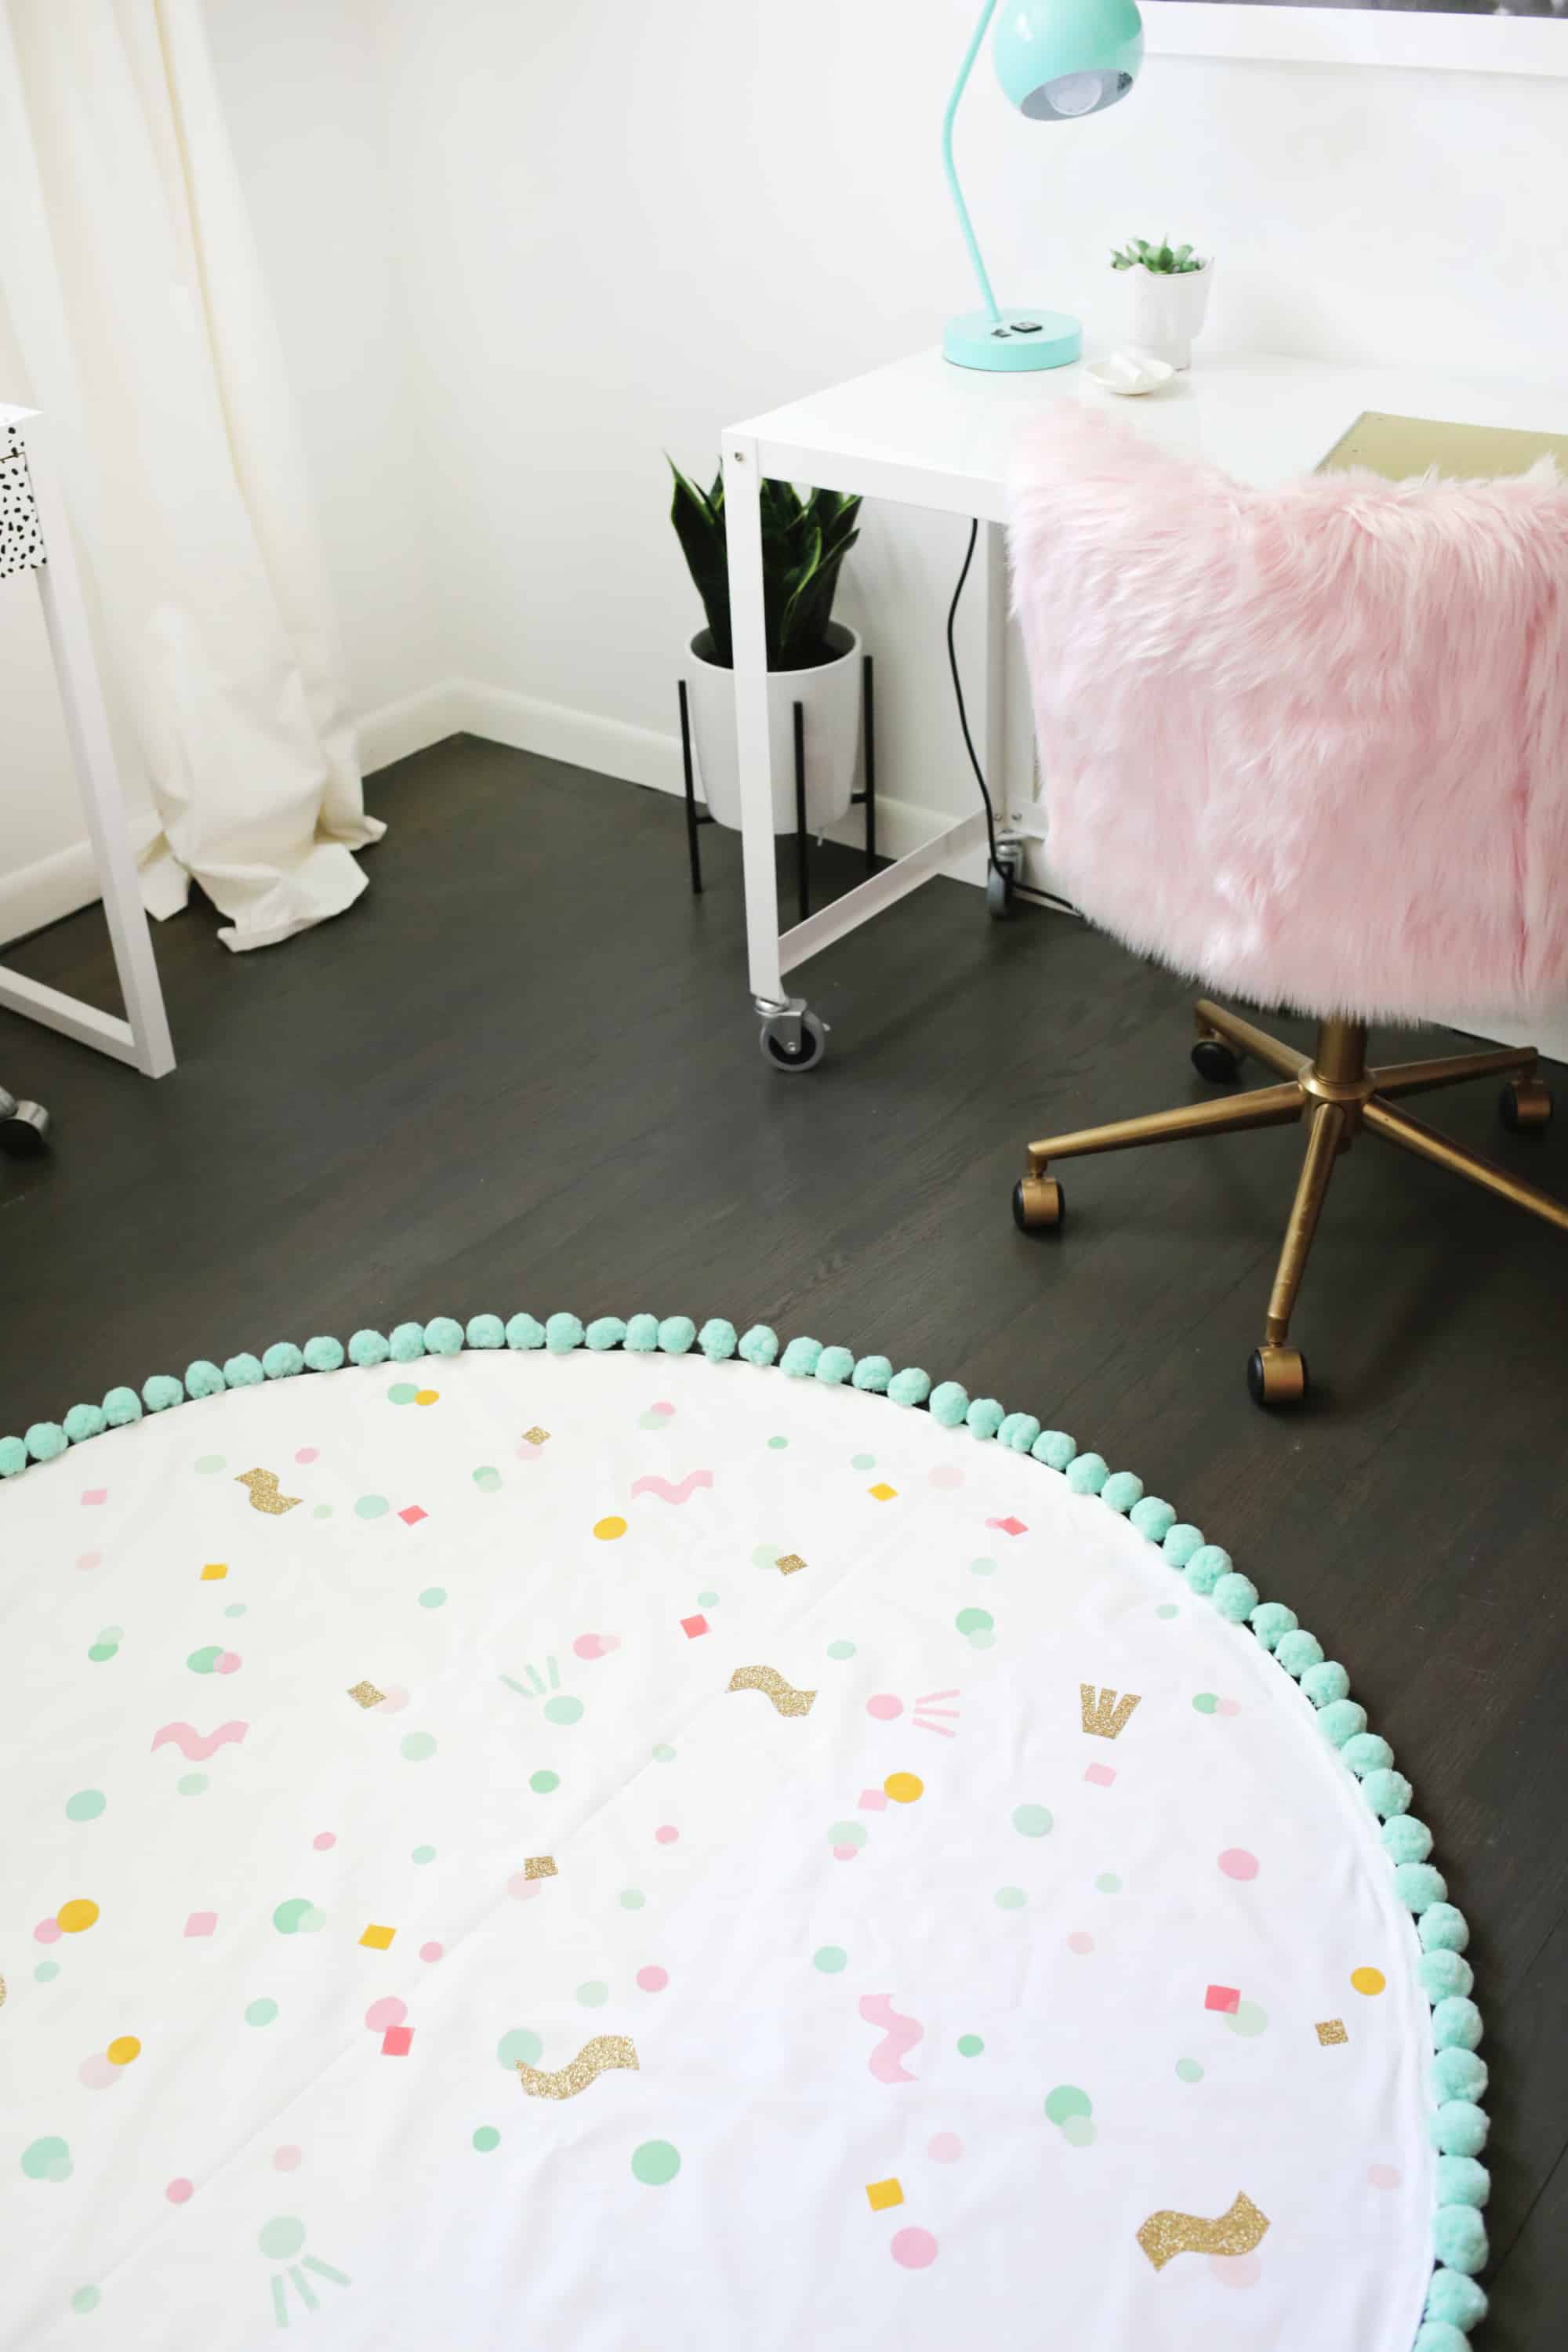
 Once the trim is on, it’s time to add your design! I did three different treatments to get the finished product, but you can just stick with one method if you’d like to …
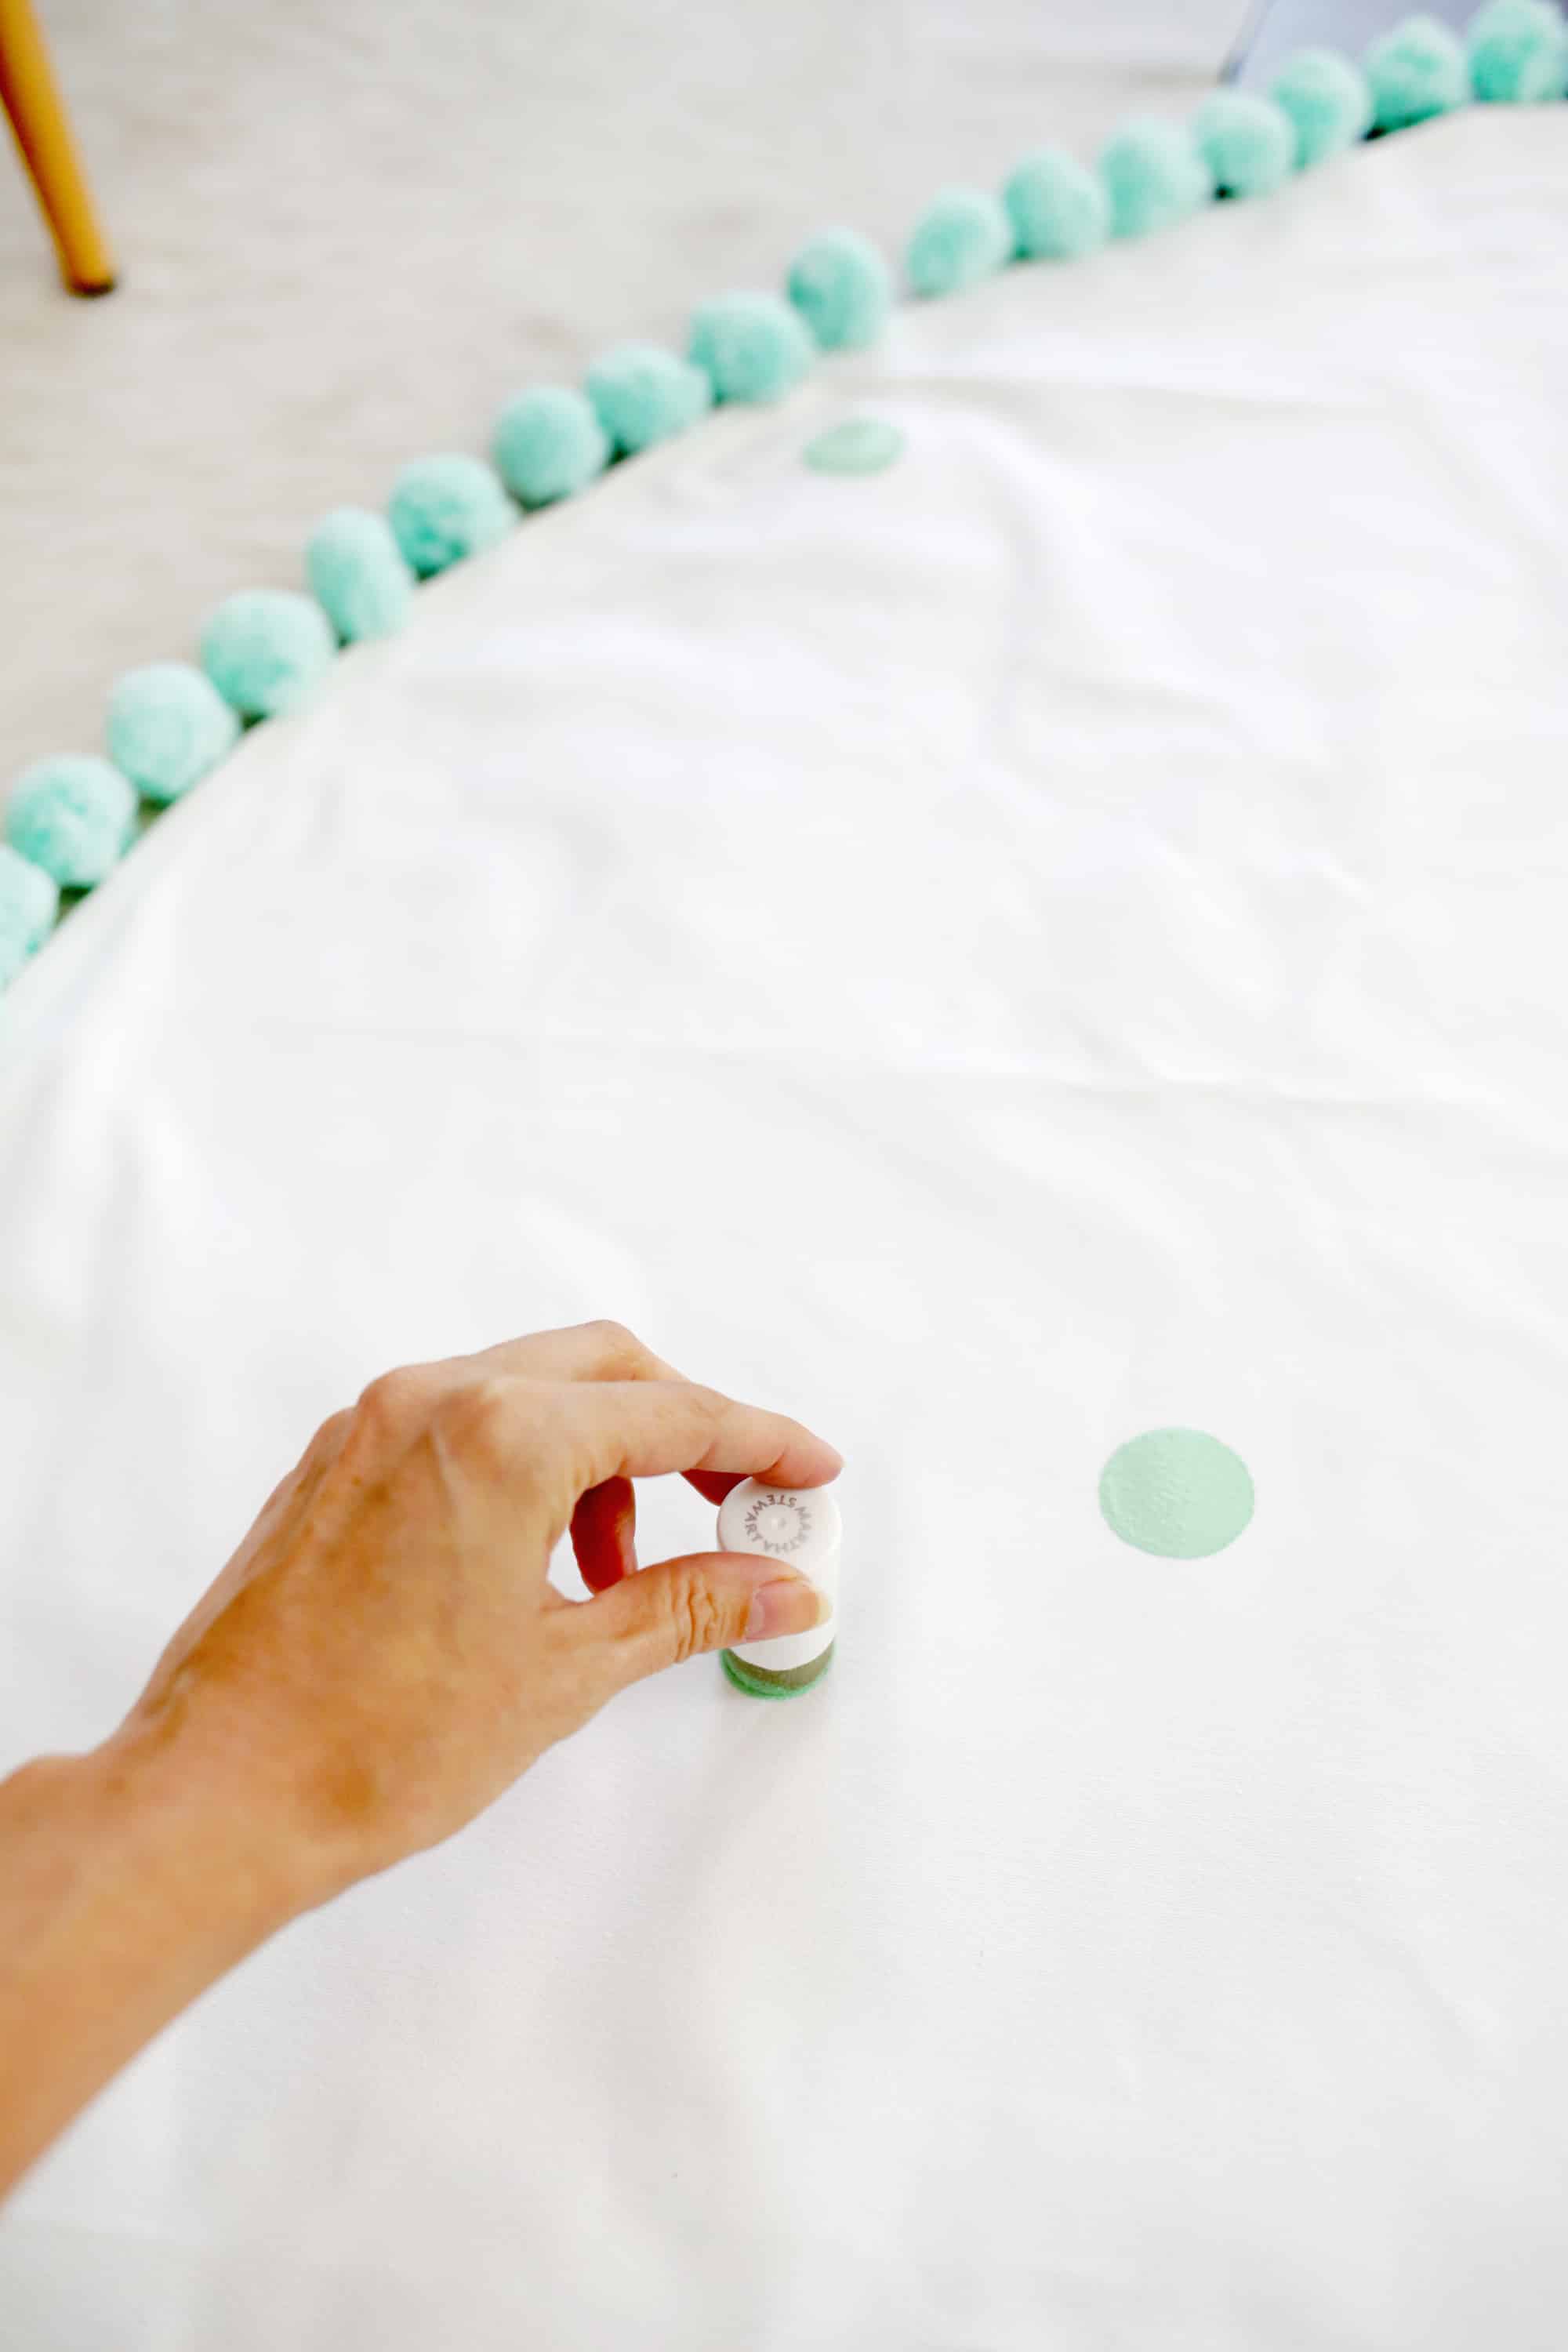
The first design I added by using fabric paint and several sizes of round sponge pouncers to create dots all over the rug. Since I wanted it to look like sprinkled confetti, I overlapped some of the dots a bit once the previous color had dried.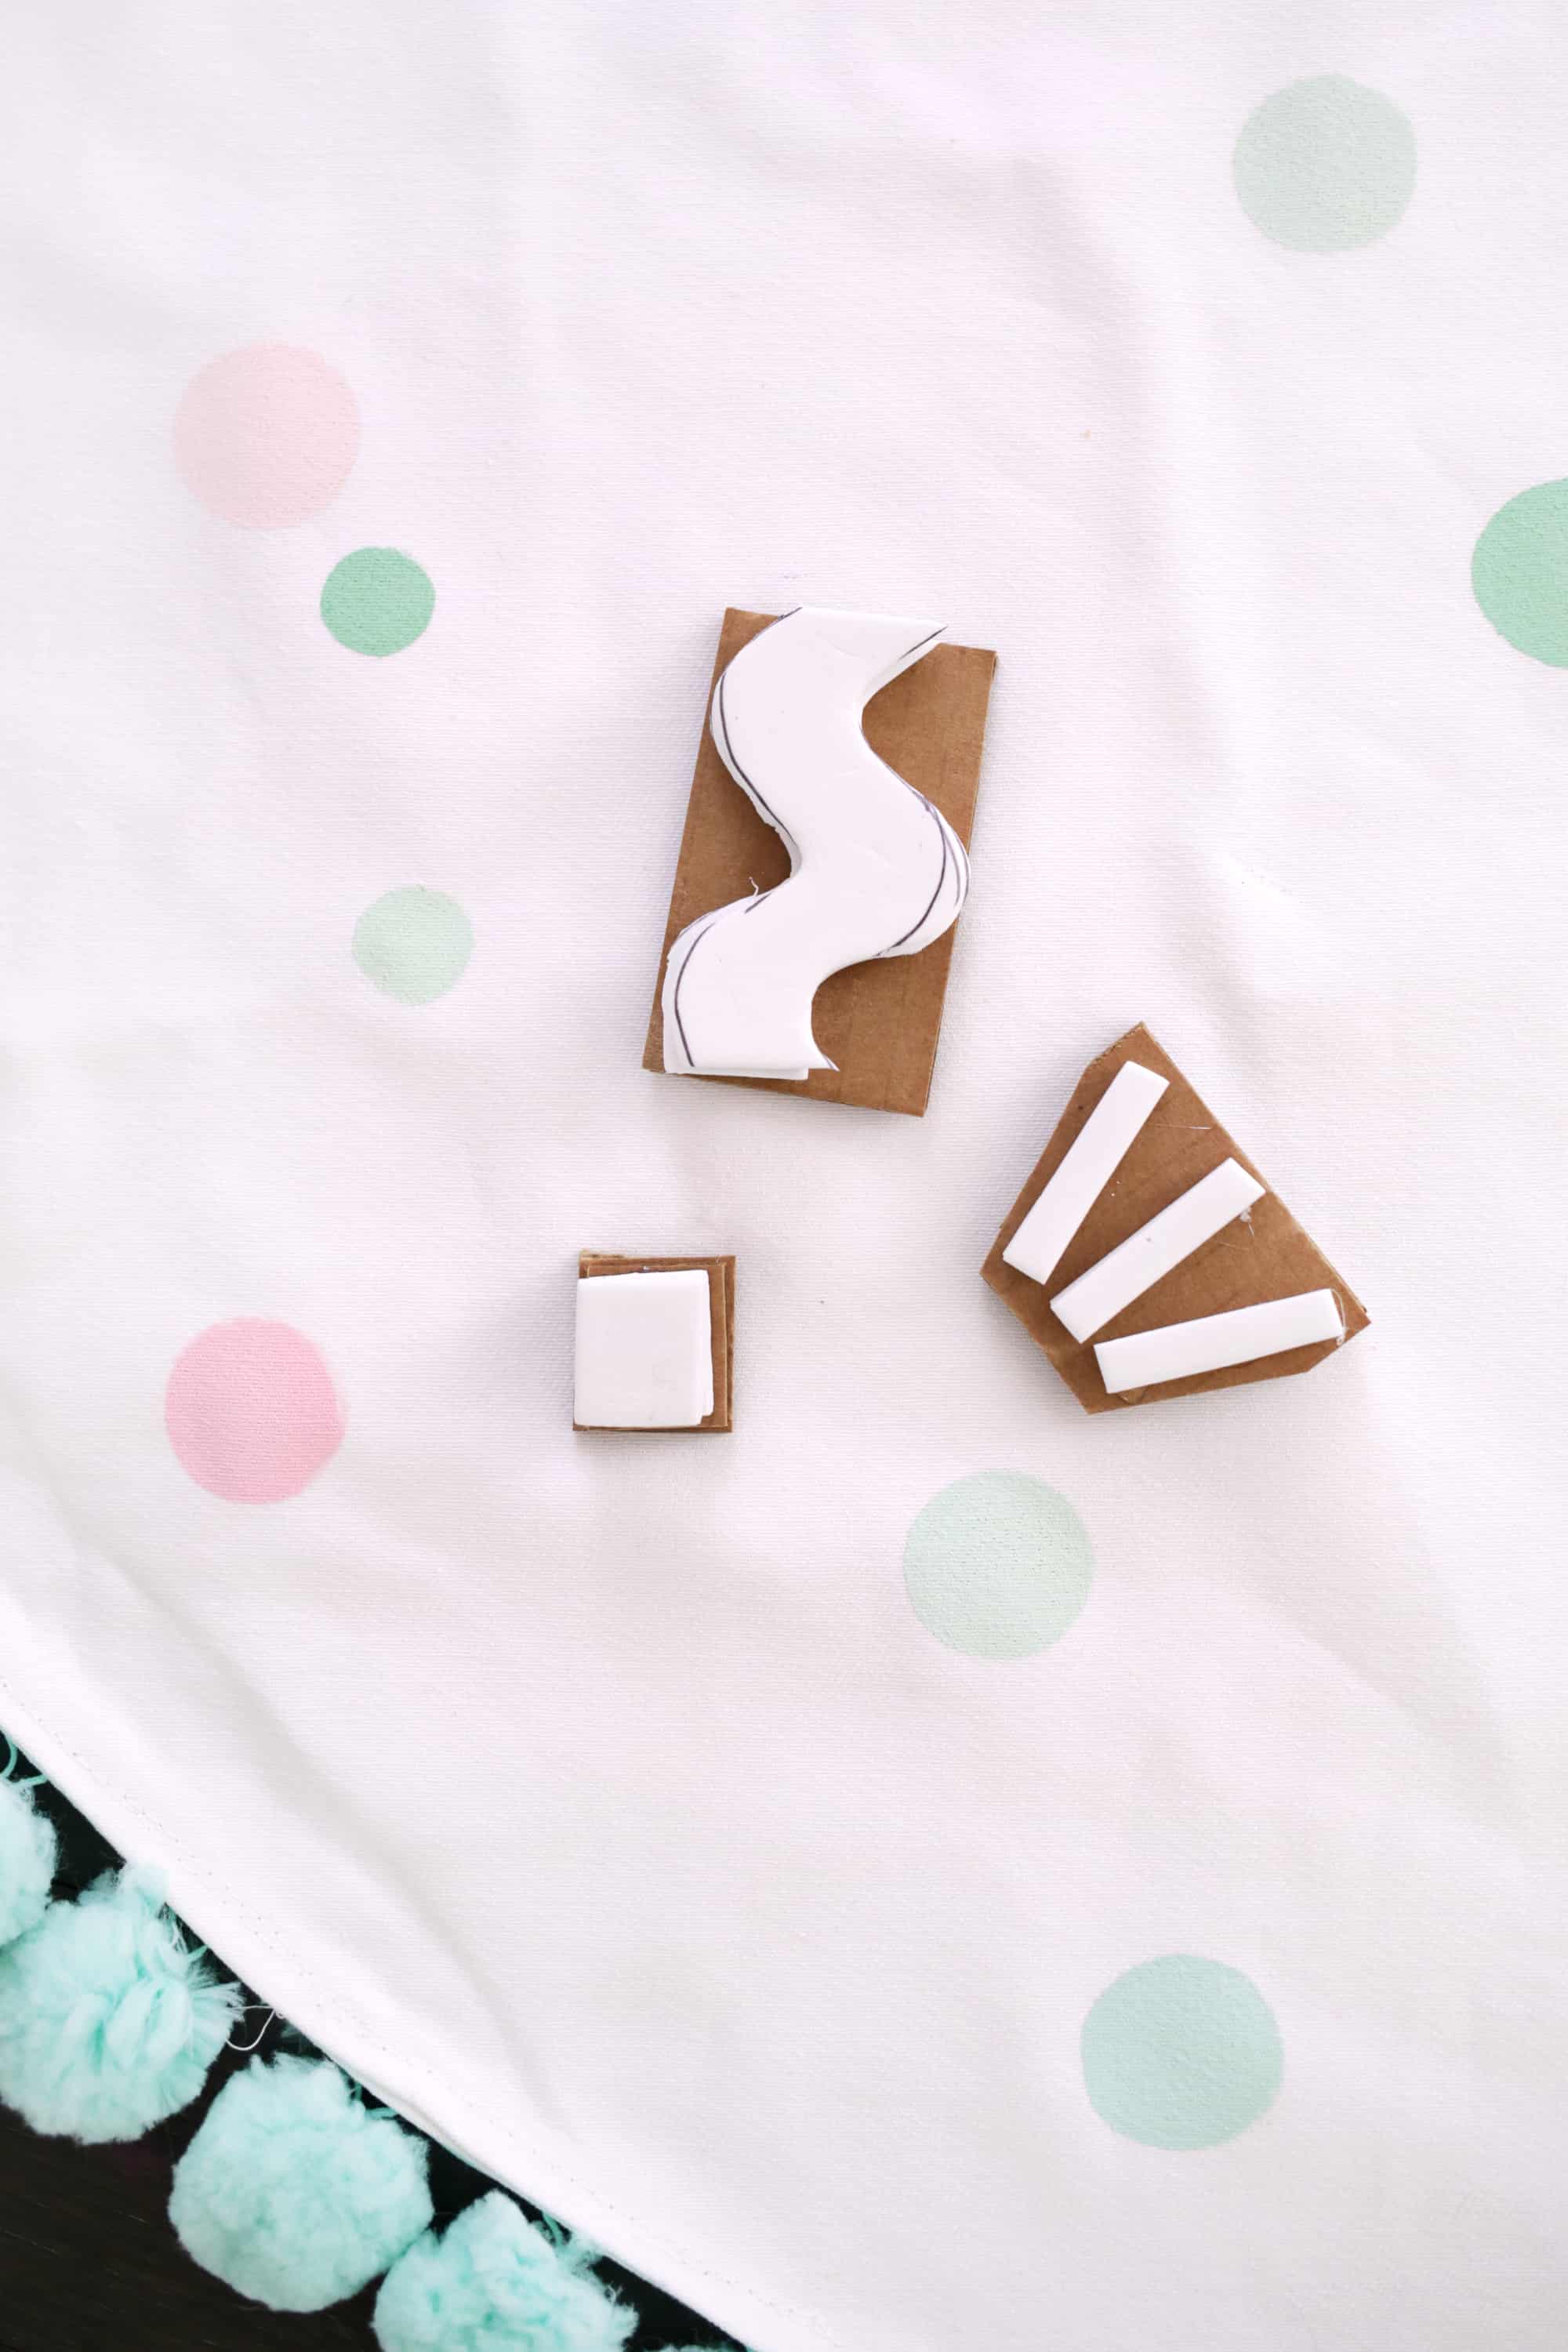 Then, to get some other shapes besides circles, I made a few stamps by cutting shapes out of foam sheets and glueing them to cardboard scraps. Then you can use a brush to brush paint onto the stamps and stamp away!
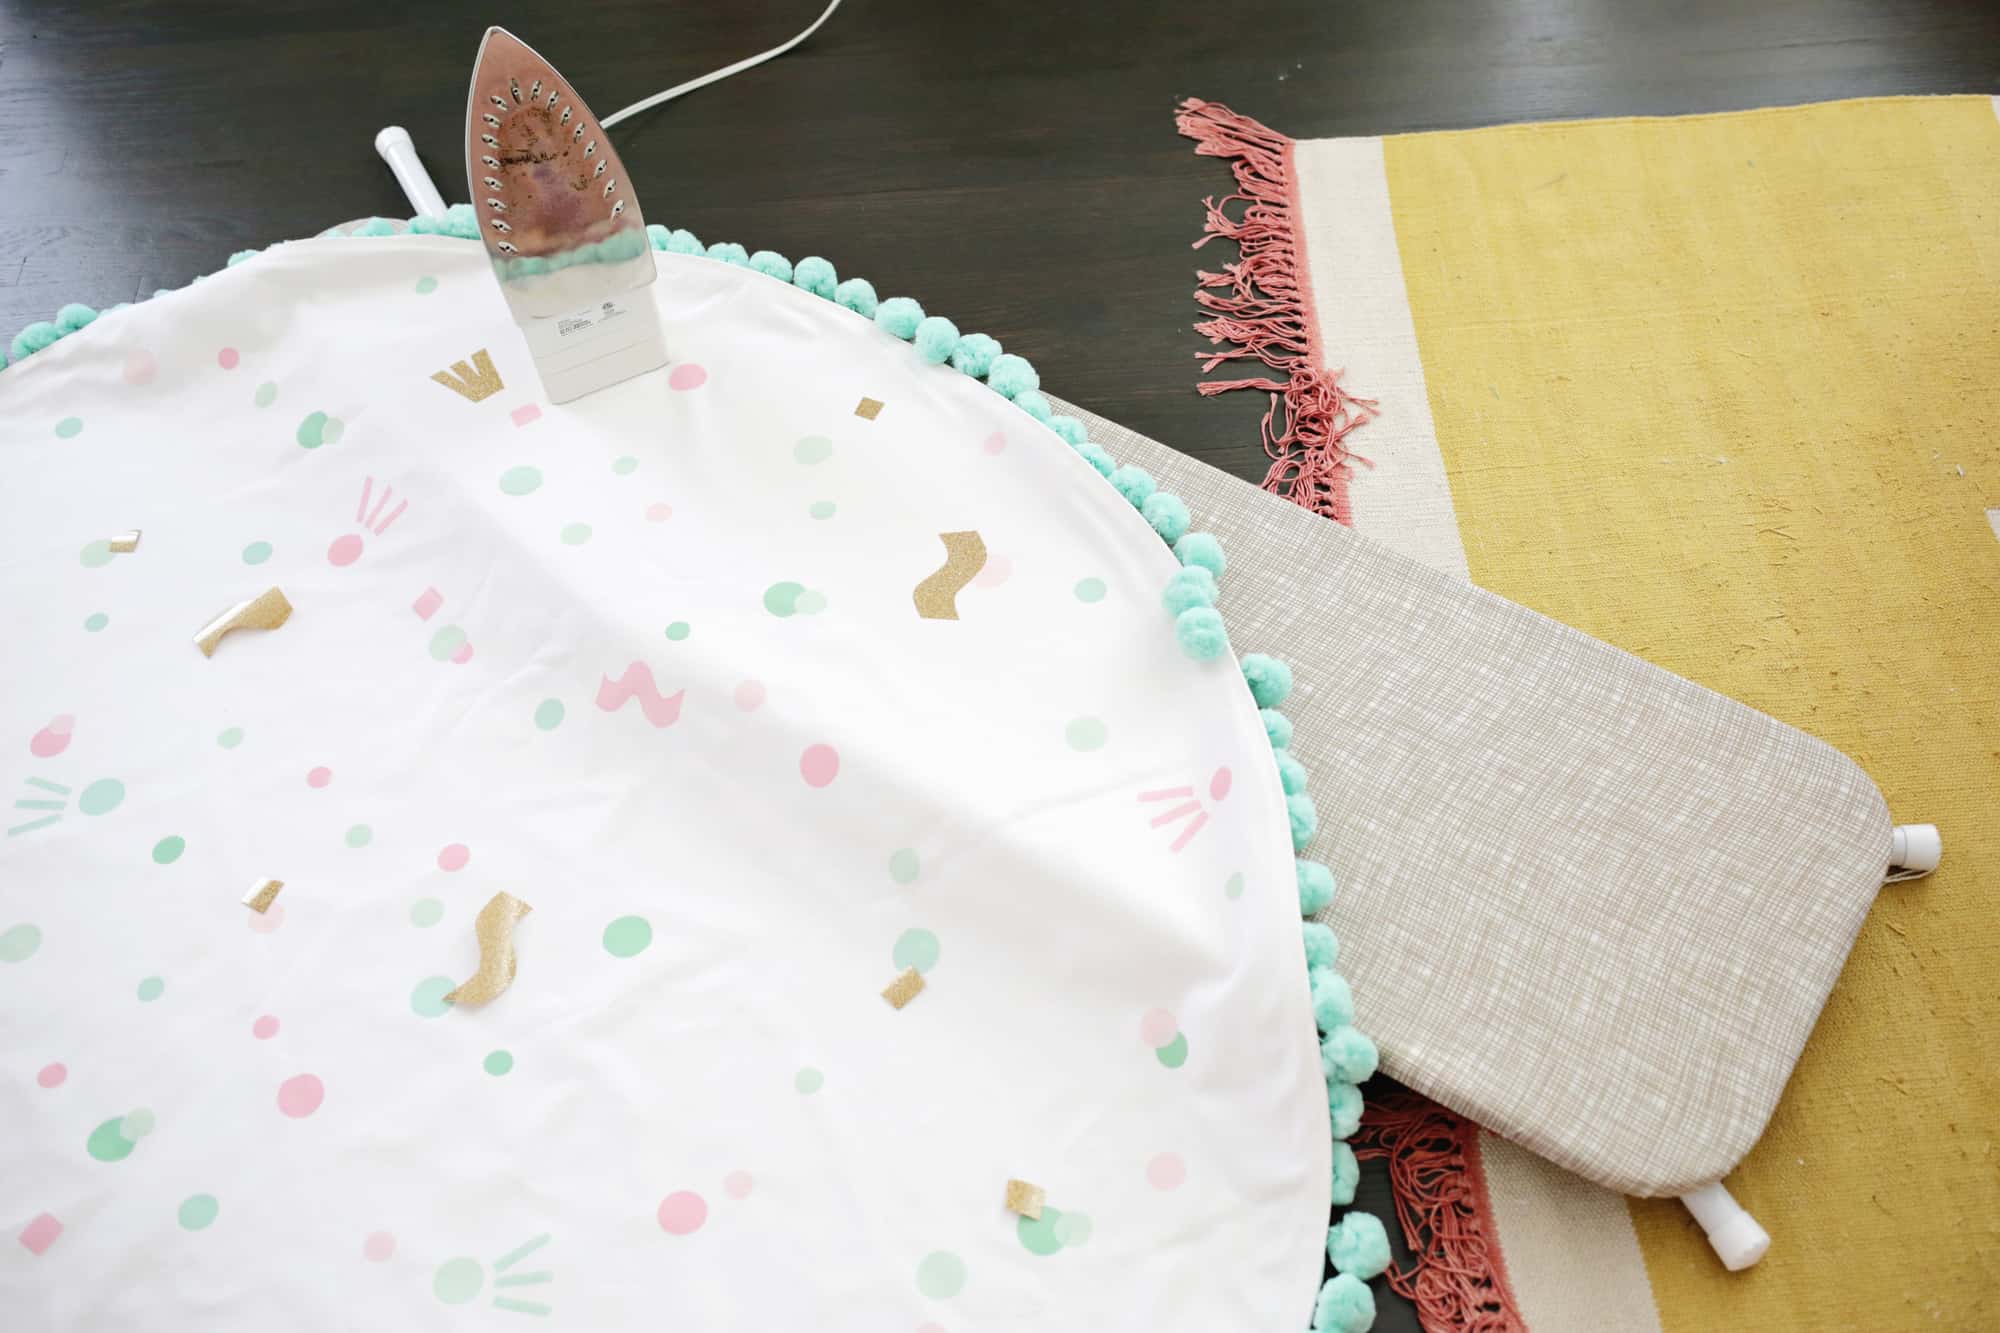 For the final shapes, I used iron-on glitter vinyl and placed the shapes in the spots where I wanted them to be attached. I put my ironing board on the floor (leaving the legs folded flat) and gently pulled areas of the rug up onto the board so I could iron the shapes in place. I will say though that any painted areas that were right next to a shape I was ironing did bubble a bit when the paint was heated by the iron, but i was pretty minimal and you definitely can’t see it once you are standing on the rug. So ultimately that didn’t bother me at all. Once my iron-on shapes were cool, I could peel off the top clear layer and my rug is ready to go!
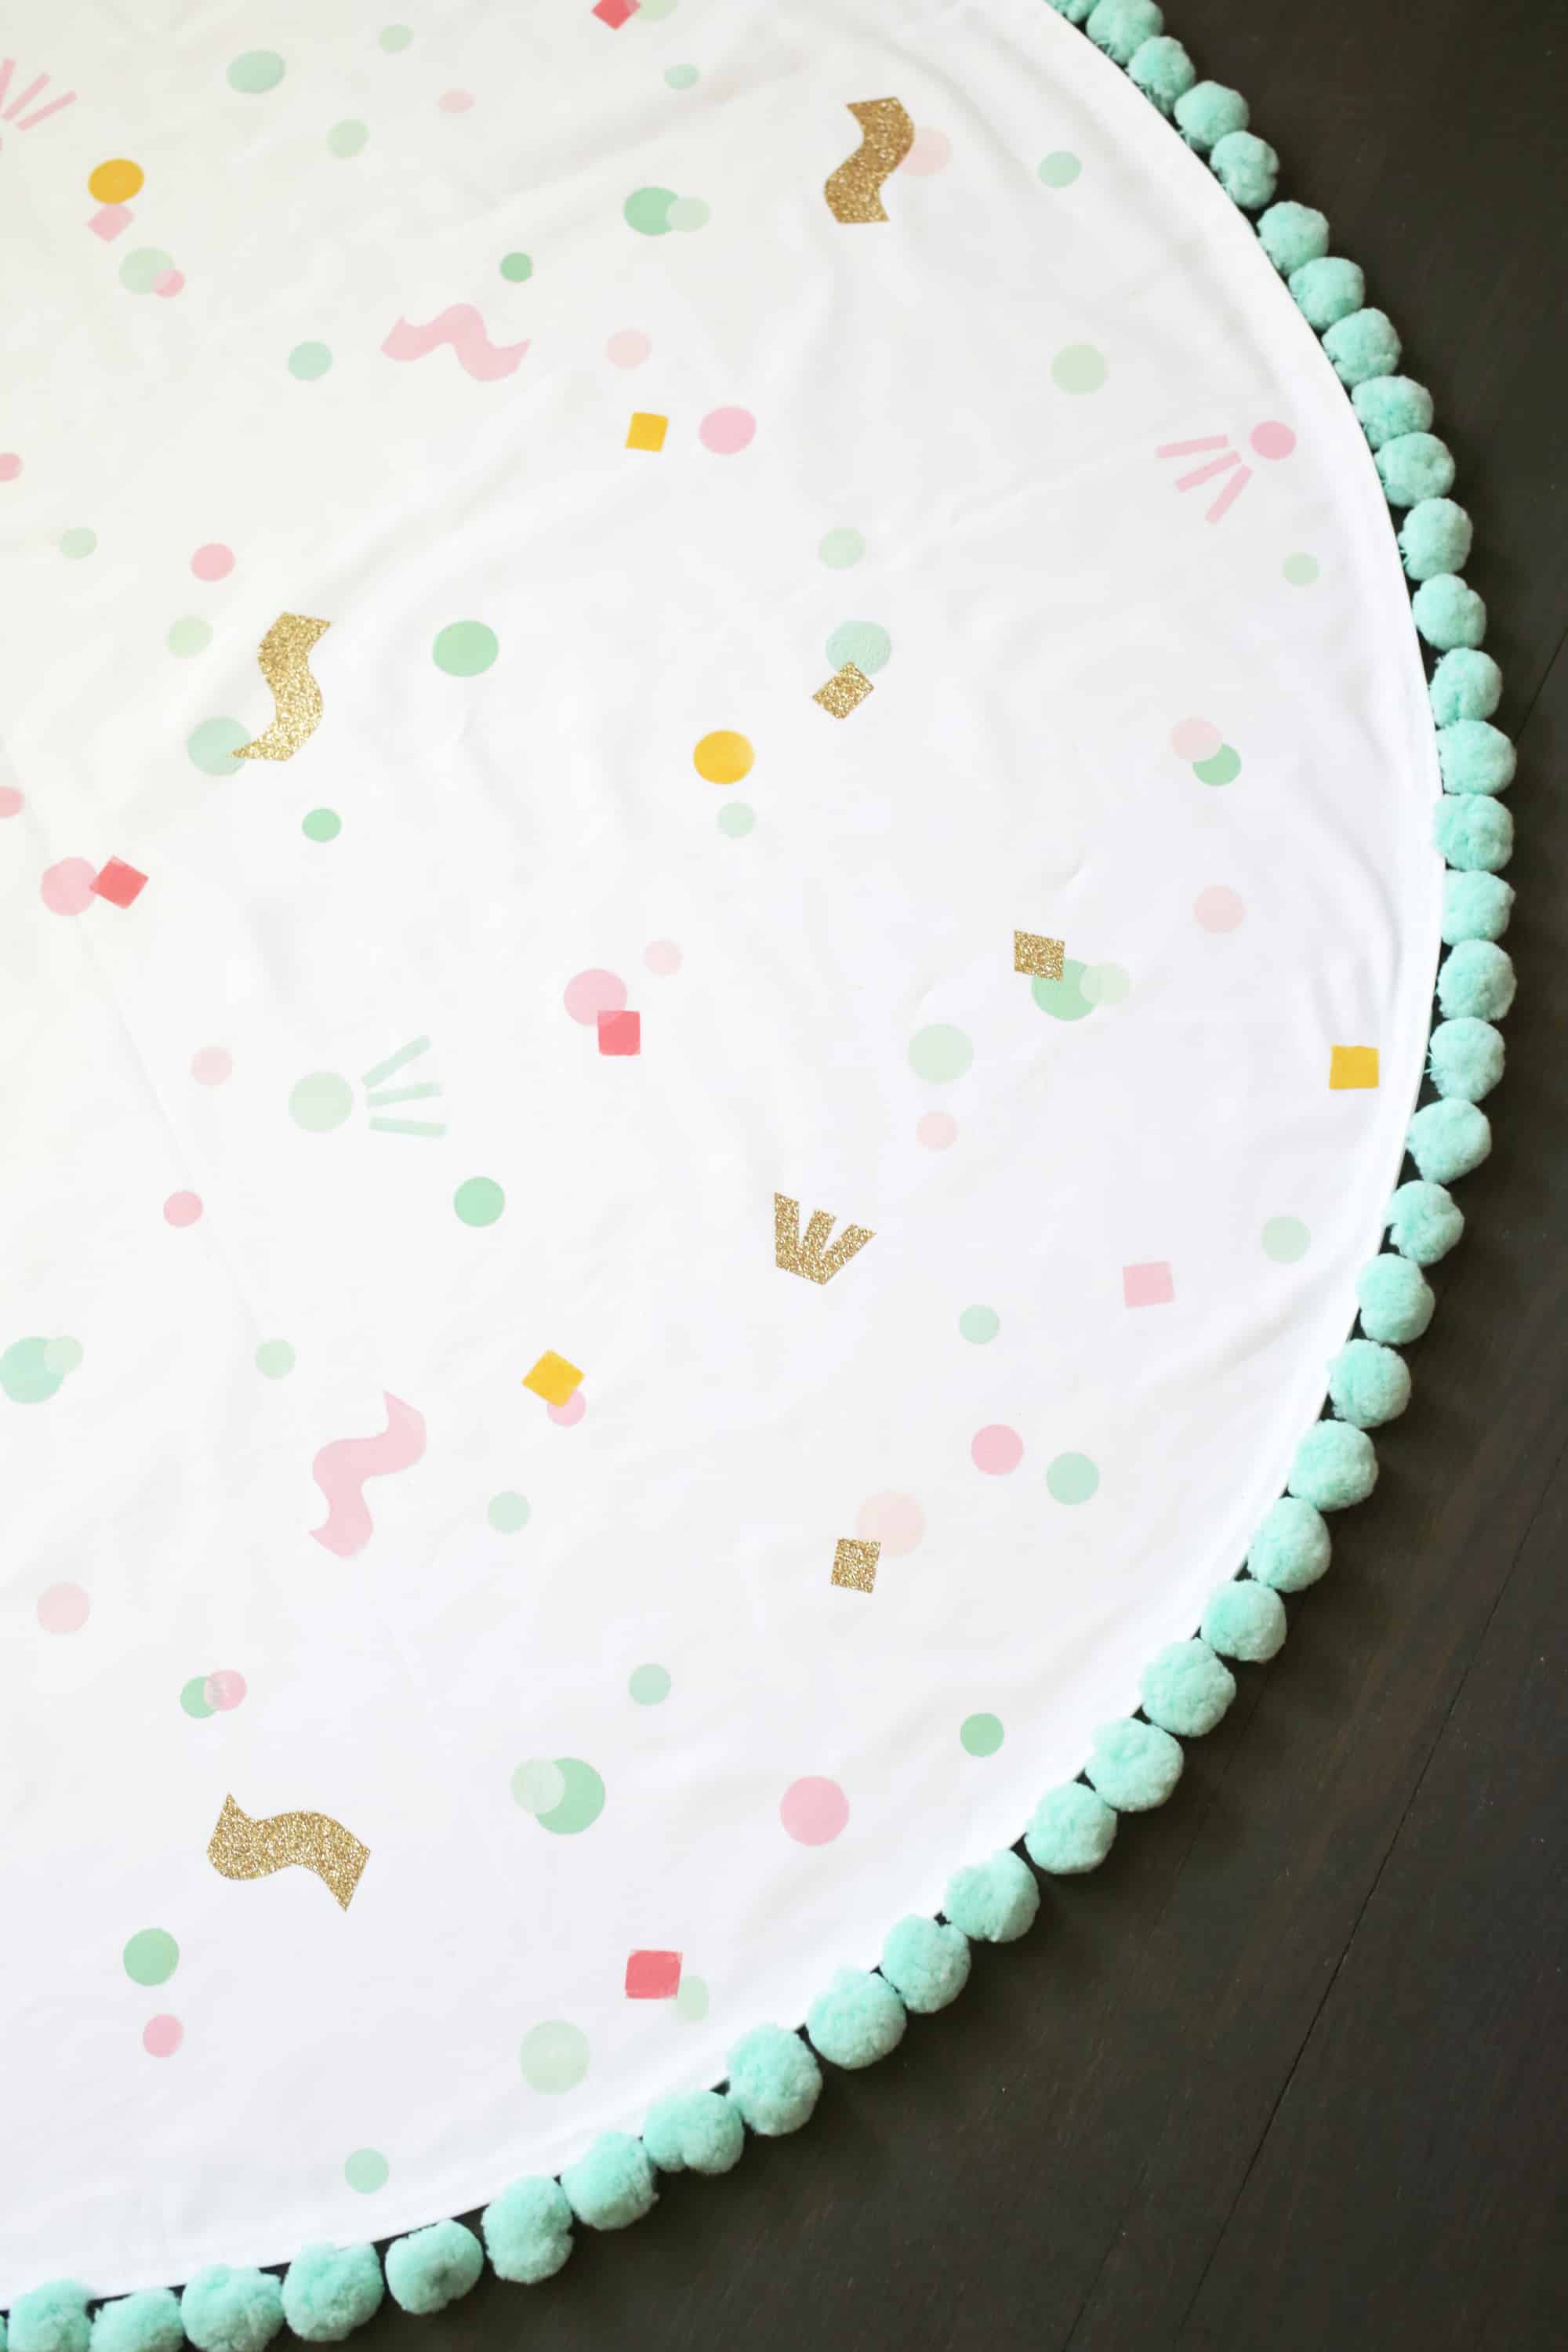 Isn’t that such a fun and happy pattern?
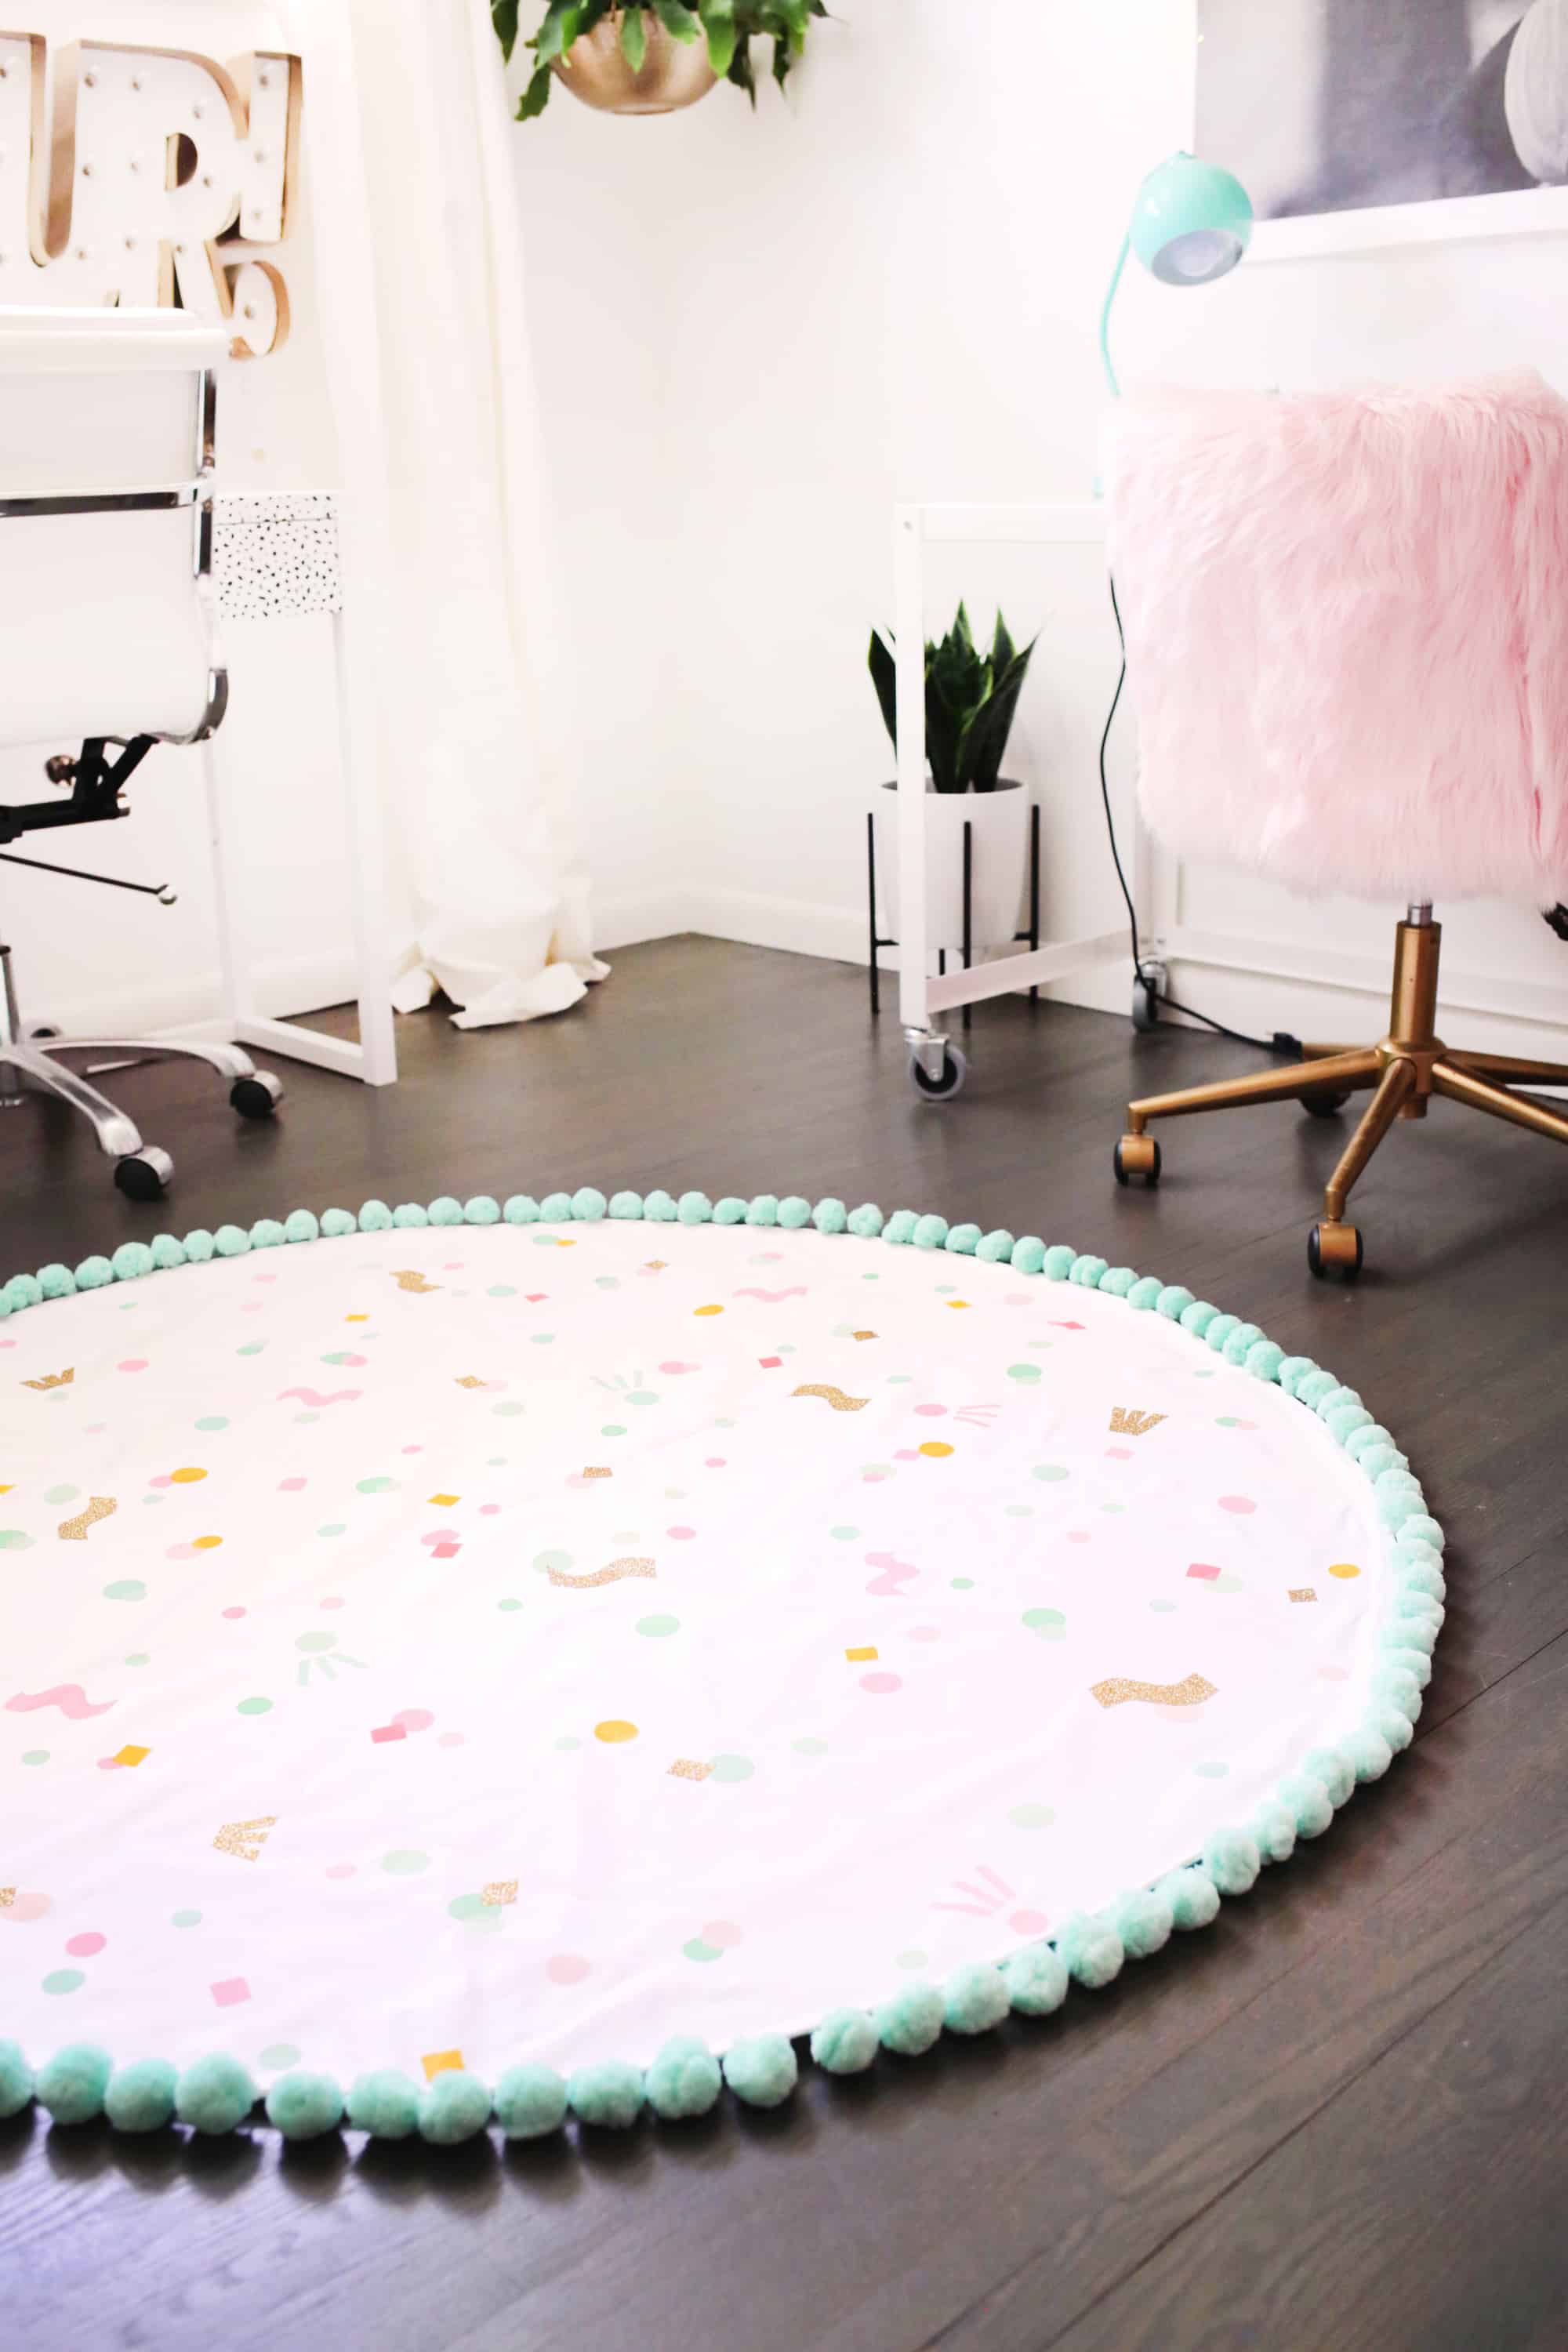
 If you want to make this even easier, you can do just one layer of the canvas and simply hem all the way around it before adding the trim and design on top. The double layer gives it more weight like a “real” rug would have and that helps it stay put better (and a non-slip rug pad would do wonders as well), but a single layer would look almost the same. If you were making a really large version, I would do a single layer so it will fit in your washer easily. To wash this, you’ll want to check the fabric paint or vinyl for anything you shouldn’t do if it gets dirty (some may be cold water only, some may not want you to put it in the dryer so you’ll have to air dry).
And if you don’t feel like making your own washable rug but you still have a need for one, I have this brand of washable rug in my house and it’s great! I like how customizable this project is since you can make it a variety of sizes/colors and you can stamp or iron whatever pattern you want! You can also check out more of our DIY rugs here—happy rug making! xo. Laura

13 Comments
This has got to be the cutest rug I’ve ever seen! Sounds great for families with toddlers too. 🙂
Charmaine Ng | Architecture & Lifestyle Blog
http://charmainenyw.com
This is so cute! I want to make one for our little girl’s bedroom!
Paige
http://thehappyflammily.com
Fantastic idea/project!
If I may ask- where is the mustard/coral fringe rug (that’s peeking into the shot) from?
Thanks!
That’s an Arro Home rug 🙂
Laura
OMG I have 4 kids and 2 hairy dogs. This DIY is genius! How do you guys never run out of ideas?! Seriously?! I love the idea of making this rug reversible as well for the different seasons or ….. a can’t-get-it-out spill. 🙂
What a cute rug, I love the design!
https://www.makeandmess.com/
Great post, you are so creative. Love it.
I think this is a great idea, but how do you make it so it doesn’t slip, slide around?
Pinning for later ♥ I absolutely love the poms around the edges!
This is amazing! We have a crazy furry on my daughters floor and she pushes it aside to get it out of the way and play on a smooth surface. This would be soft to play on but a smooth surface so the polly pockets don’t drown in fake fur.
Absolutely LOVELY! Thanks for sharing. Love this!
What a cute rug, Really creative design!
Adorable but you are a glutton for punishment making it white. >=)