
 I love having mirrors around the house. Sure, they are great for checking to see if you have food in your teeth before heading out the door or helping you see while you attempt that new hairstyle you’ve been seeing all over Pinterest. But they also are great for making rooms feel bigger and bouncing more light around a space as well (you can see our top 5 spots for mirror placement here). They just kind of open up a room in a magical way that a print or wall art can’t. All that being said, “regular” mirrors will do the trick just fine when it comes to all those things, but I thought a novelty mirror might be a fun addition to our den so that we could get all that mirror magic while having it still feel like a piece of art as well. I found a wood framed oval mirror that was the perfect size for my spot (you could also do this with a circle mirror as well!) and thought it would be fun to turn it into an eye for a little twist …
 Supplies:
-wood frame mirror (I used this one)
-wooden dowel rods (I used ½” thick)
-drill bits the same width as your dowel rods
-wood glue
-saw to cut dowels (either hand saw, jig saw, or miter saw)
-gold ring (I used a 10″ size)
-super glue
-paint for mirror
-painter’s tape
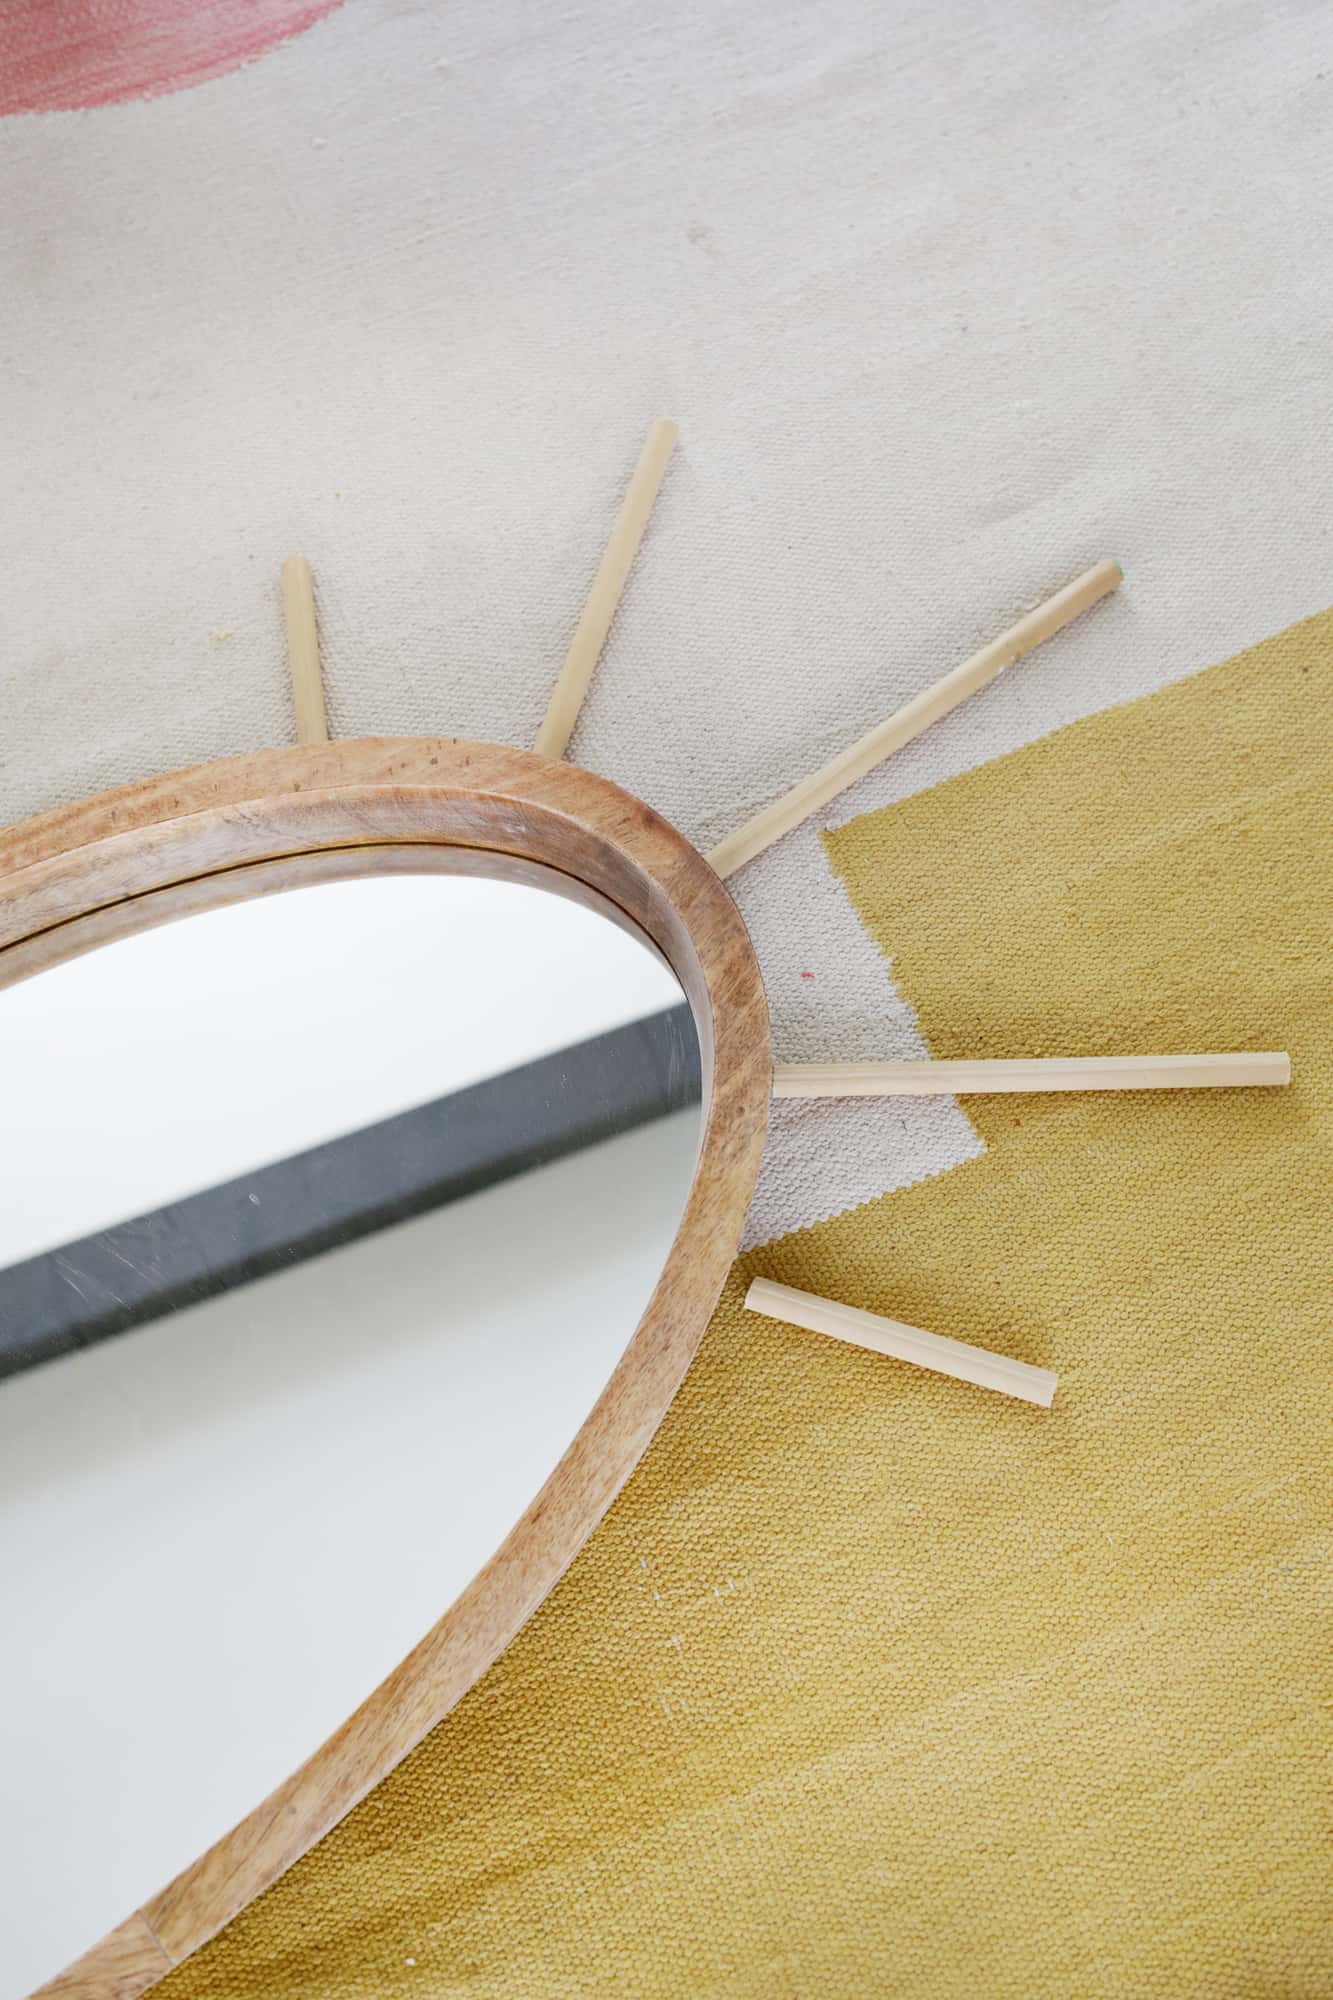
 Cut your 10 dowel rods to the following lengths: 4.5″ (cut 5 of these for the bottom lashes), 5″ (cut 2 of these for the top), 8.5″ (cut 2 of these for the top), and 10″ (cut 1 of these for the top). You can use a power or jig saw to cut them if you have one, but a regular old hand saw will work just fine as well.
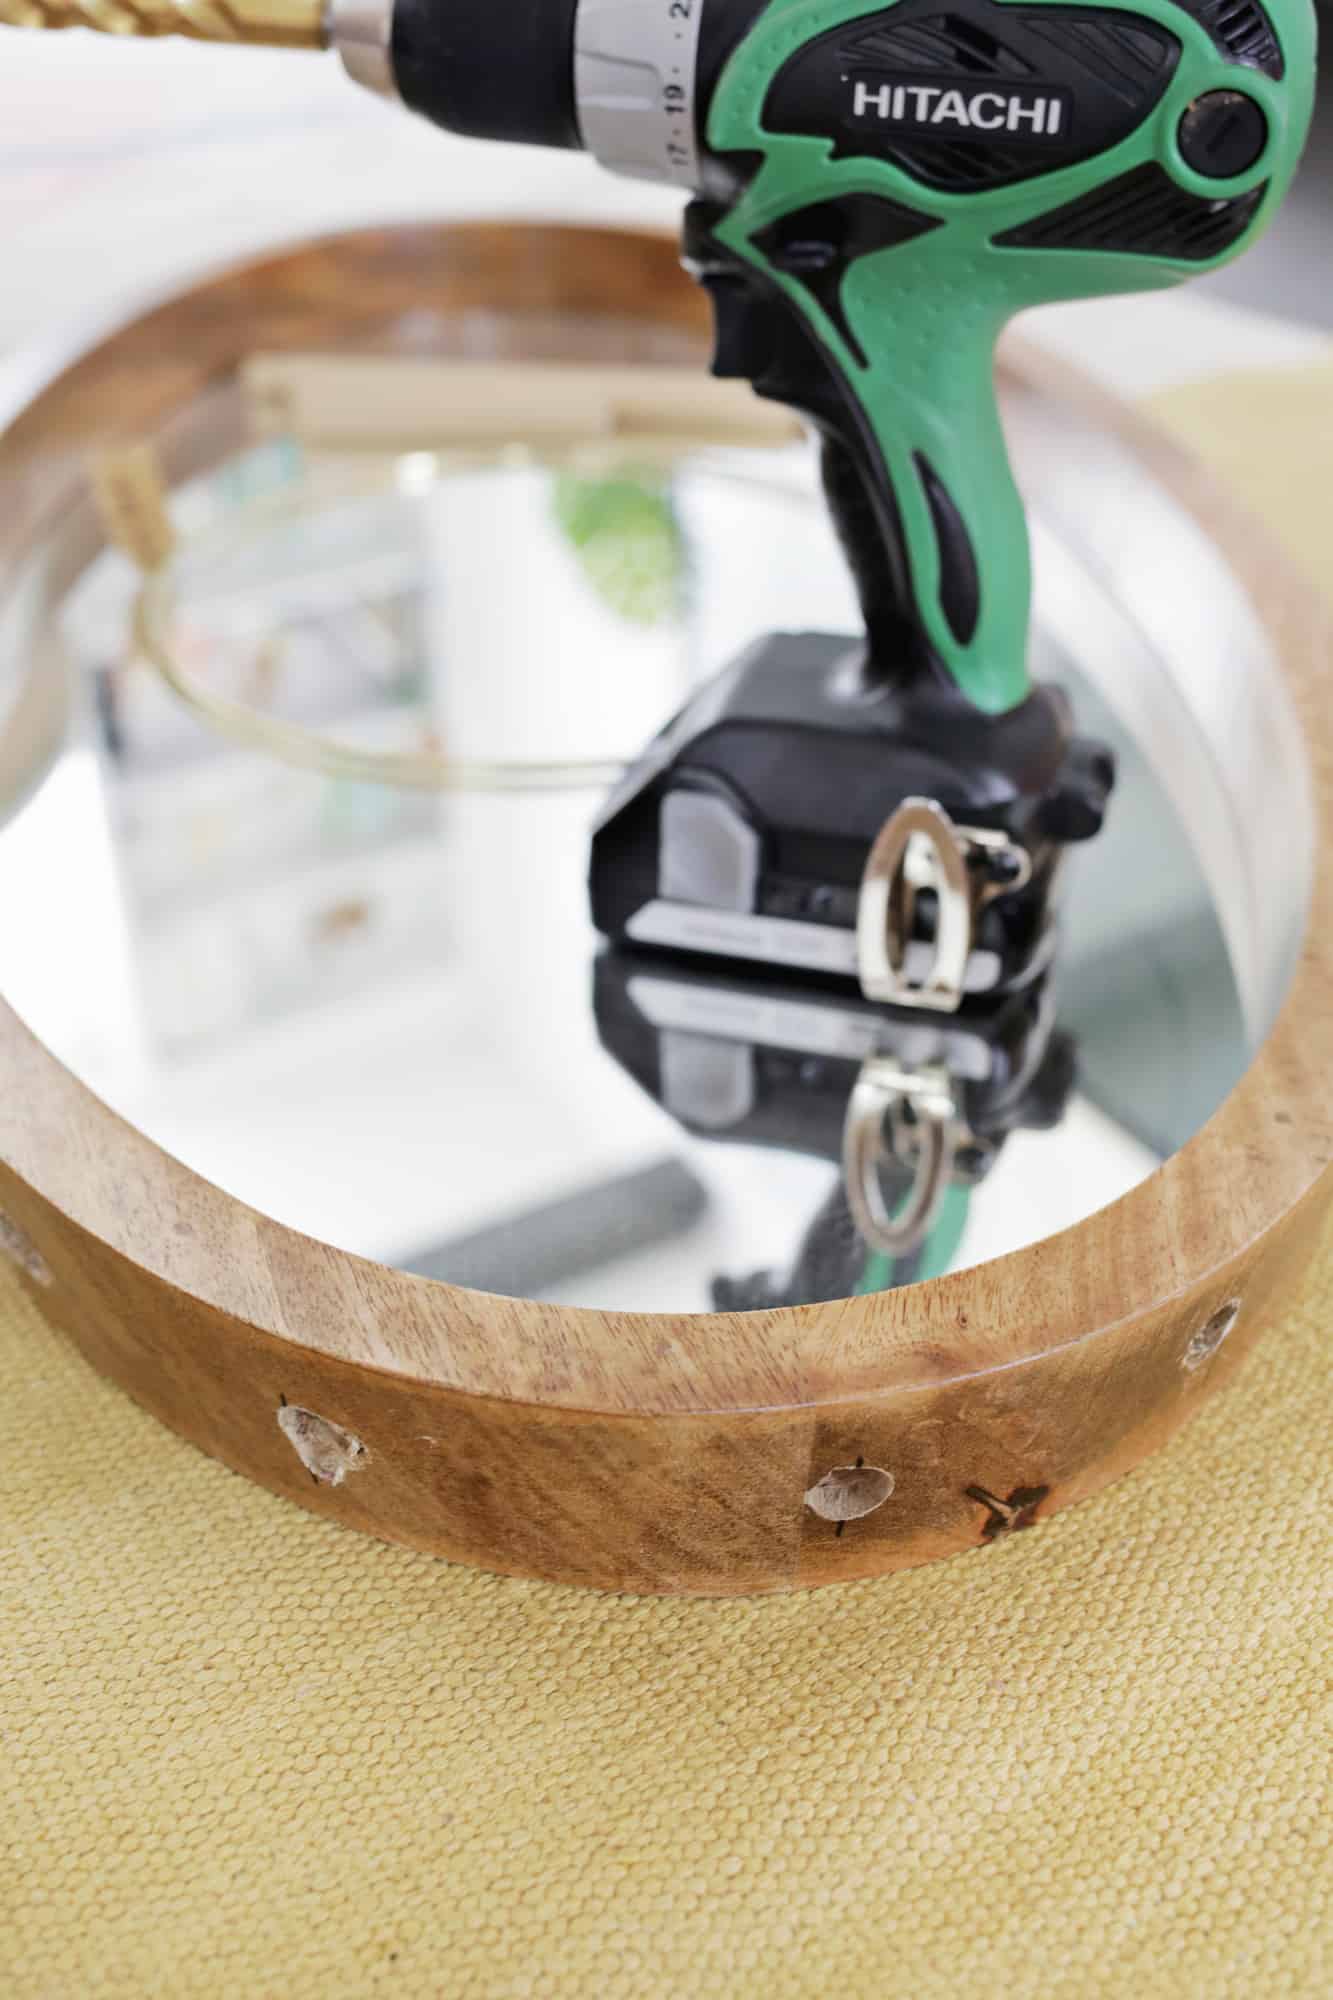
Make a mark at the center top of your mirror. Measure and mark 4” out from each side of the top mark and another mark 4” down from that mark to create 5 marks at the top of your mirror. Repeat the process at the bottom of the mirror as well. Use your 1/2″ drill bit (or whatever size your dowel rod is if different from that) to drill a ½” deep hole (or a little deeper or shallower depending on the thickness of your mirror frame) at each location. Remember that when drilling a hole for a rod to go into, you’ll want to drill at the same angle you want the rod to stick out at—you’ll have some wiggle room to move the angle a bit with only a 1/2″ hole, but just keep in mind when drilling. Also, when drilling a hole that large, I like to start with a much smaller bit and then keep drilling into the same spot with bigger and bigger bits until I reach the right size. If you wanted to do a no-drill option, you could use wood glue to attach the dowel to the frame of the mirror where you would have drilled, but then use large clamps to keep the rods in place until they dried.
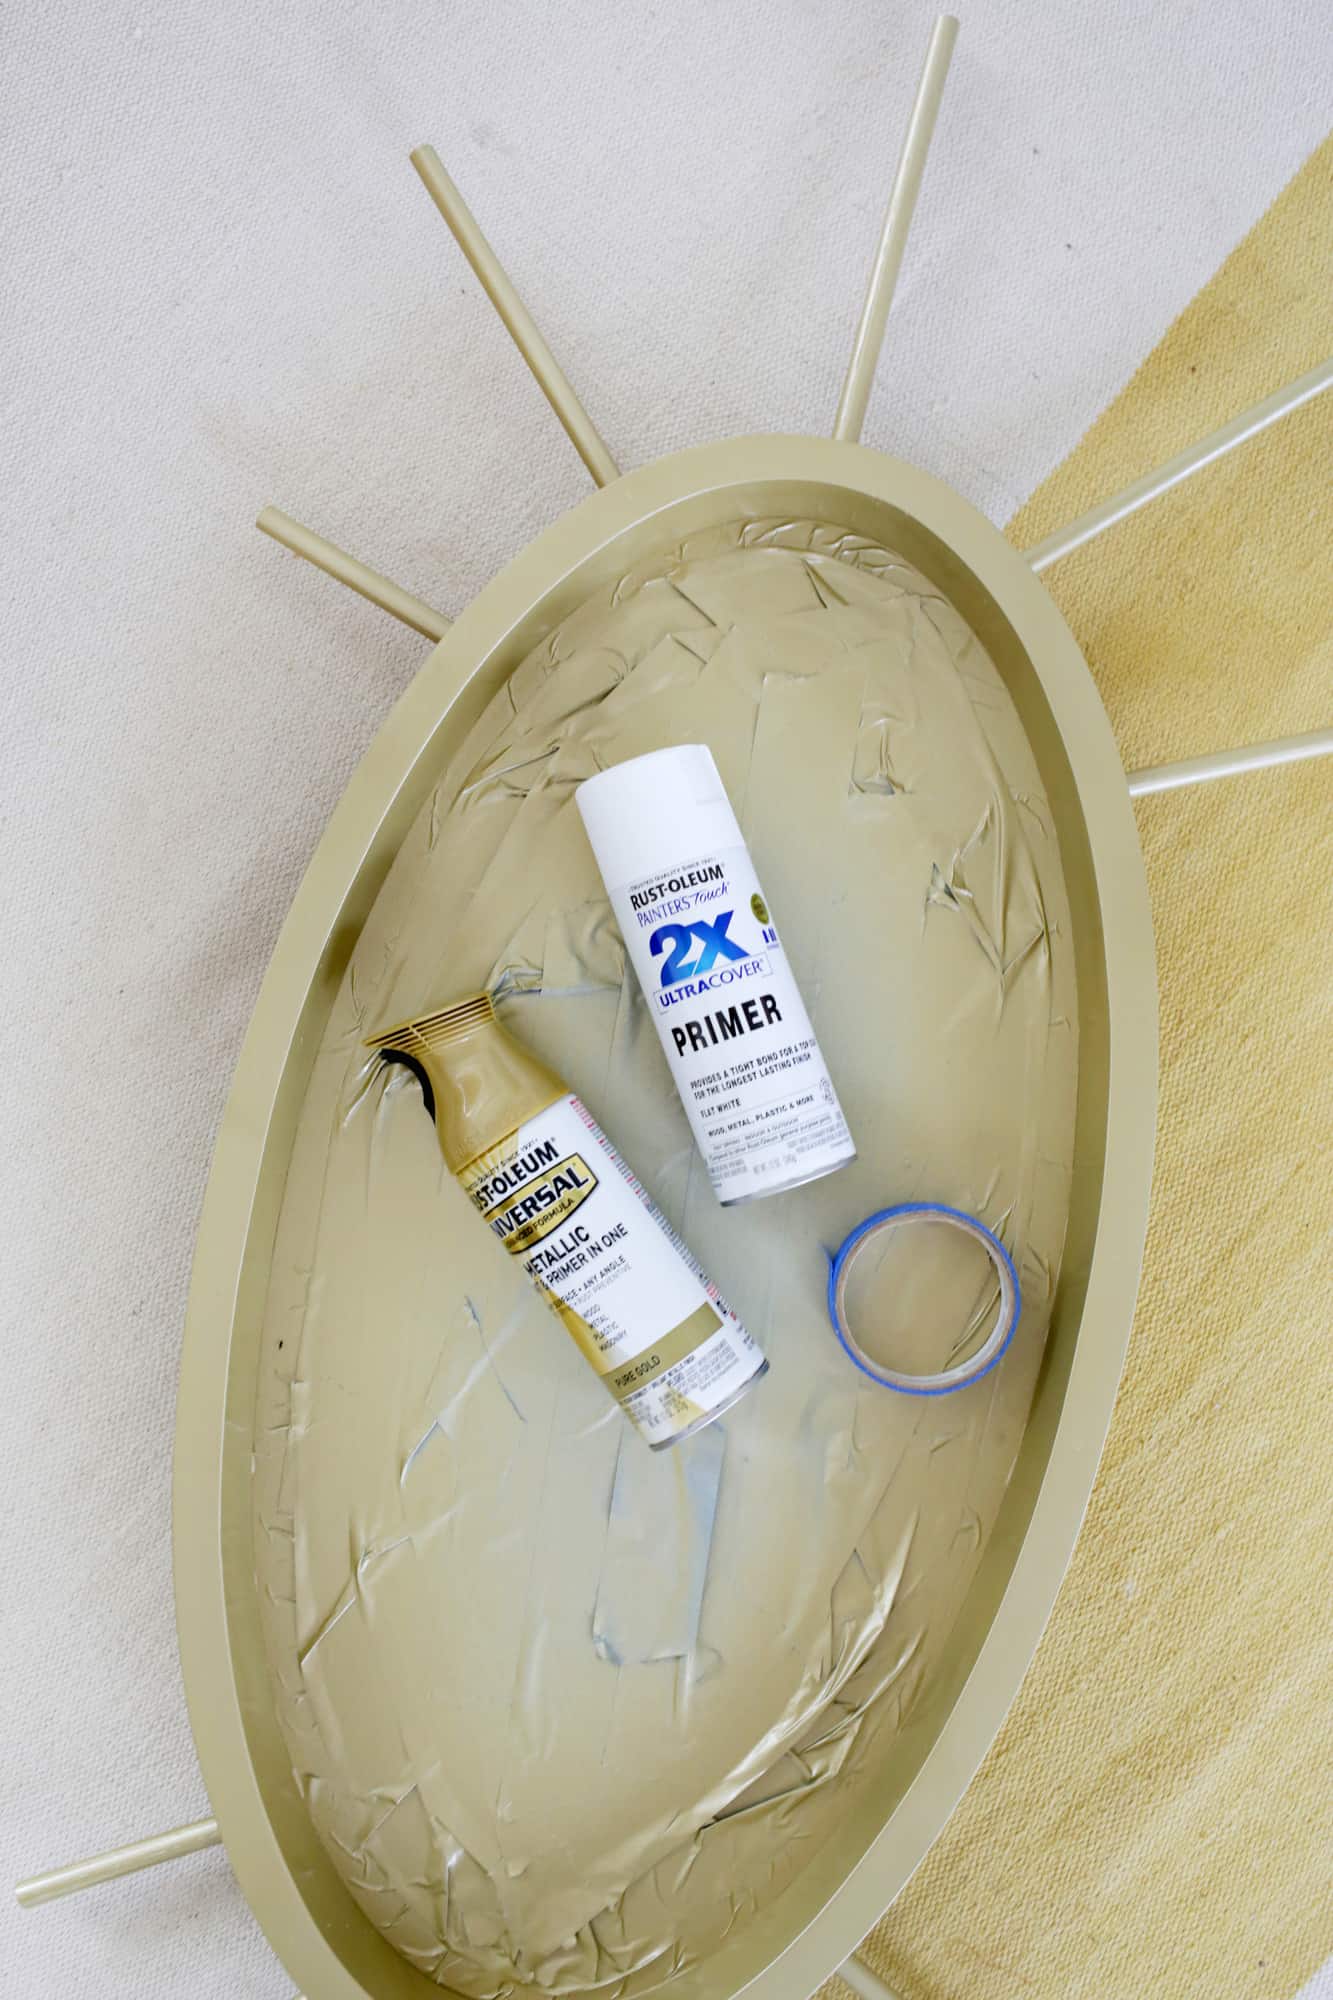 Sand your frame lightly and smooth out the wood around your drilled holes. Use some wood glue to glue your dowel rods in place with the short pieces going into the bottom holes and the longer pieces at the top with the tallest one in the middle. Use painter’s tape to tape around the inside edge of the mirror and paint your frame and your dowel rods. When painting wood with a gold spray paint, I like to use a flat white primer on the wood first as I find the metallic paint looks better than if I sprayed it directly onto the wood.
 Once your frame is painted, add a few very small drops of glue to the back of your brass ring and place that on the center of your mirror to be the iris of your eye (try to go super light on the glue so it doesn’t squirt out the sides and become visible). It may be helpful to use some pieces of painter’s tape as a guide for where to place your ring so you know right where to set it once the glue is applied. Pile some heavy books on top of the ring while it sets. Allow the glue to dry, remove the tape, and hang your new mirror!
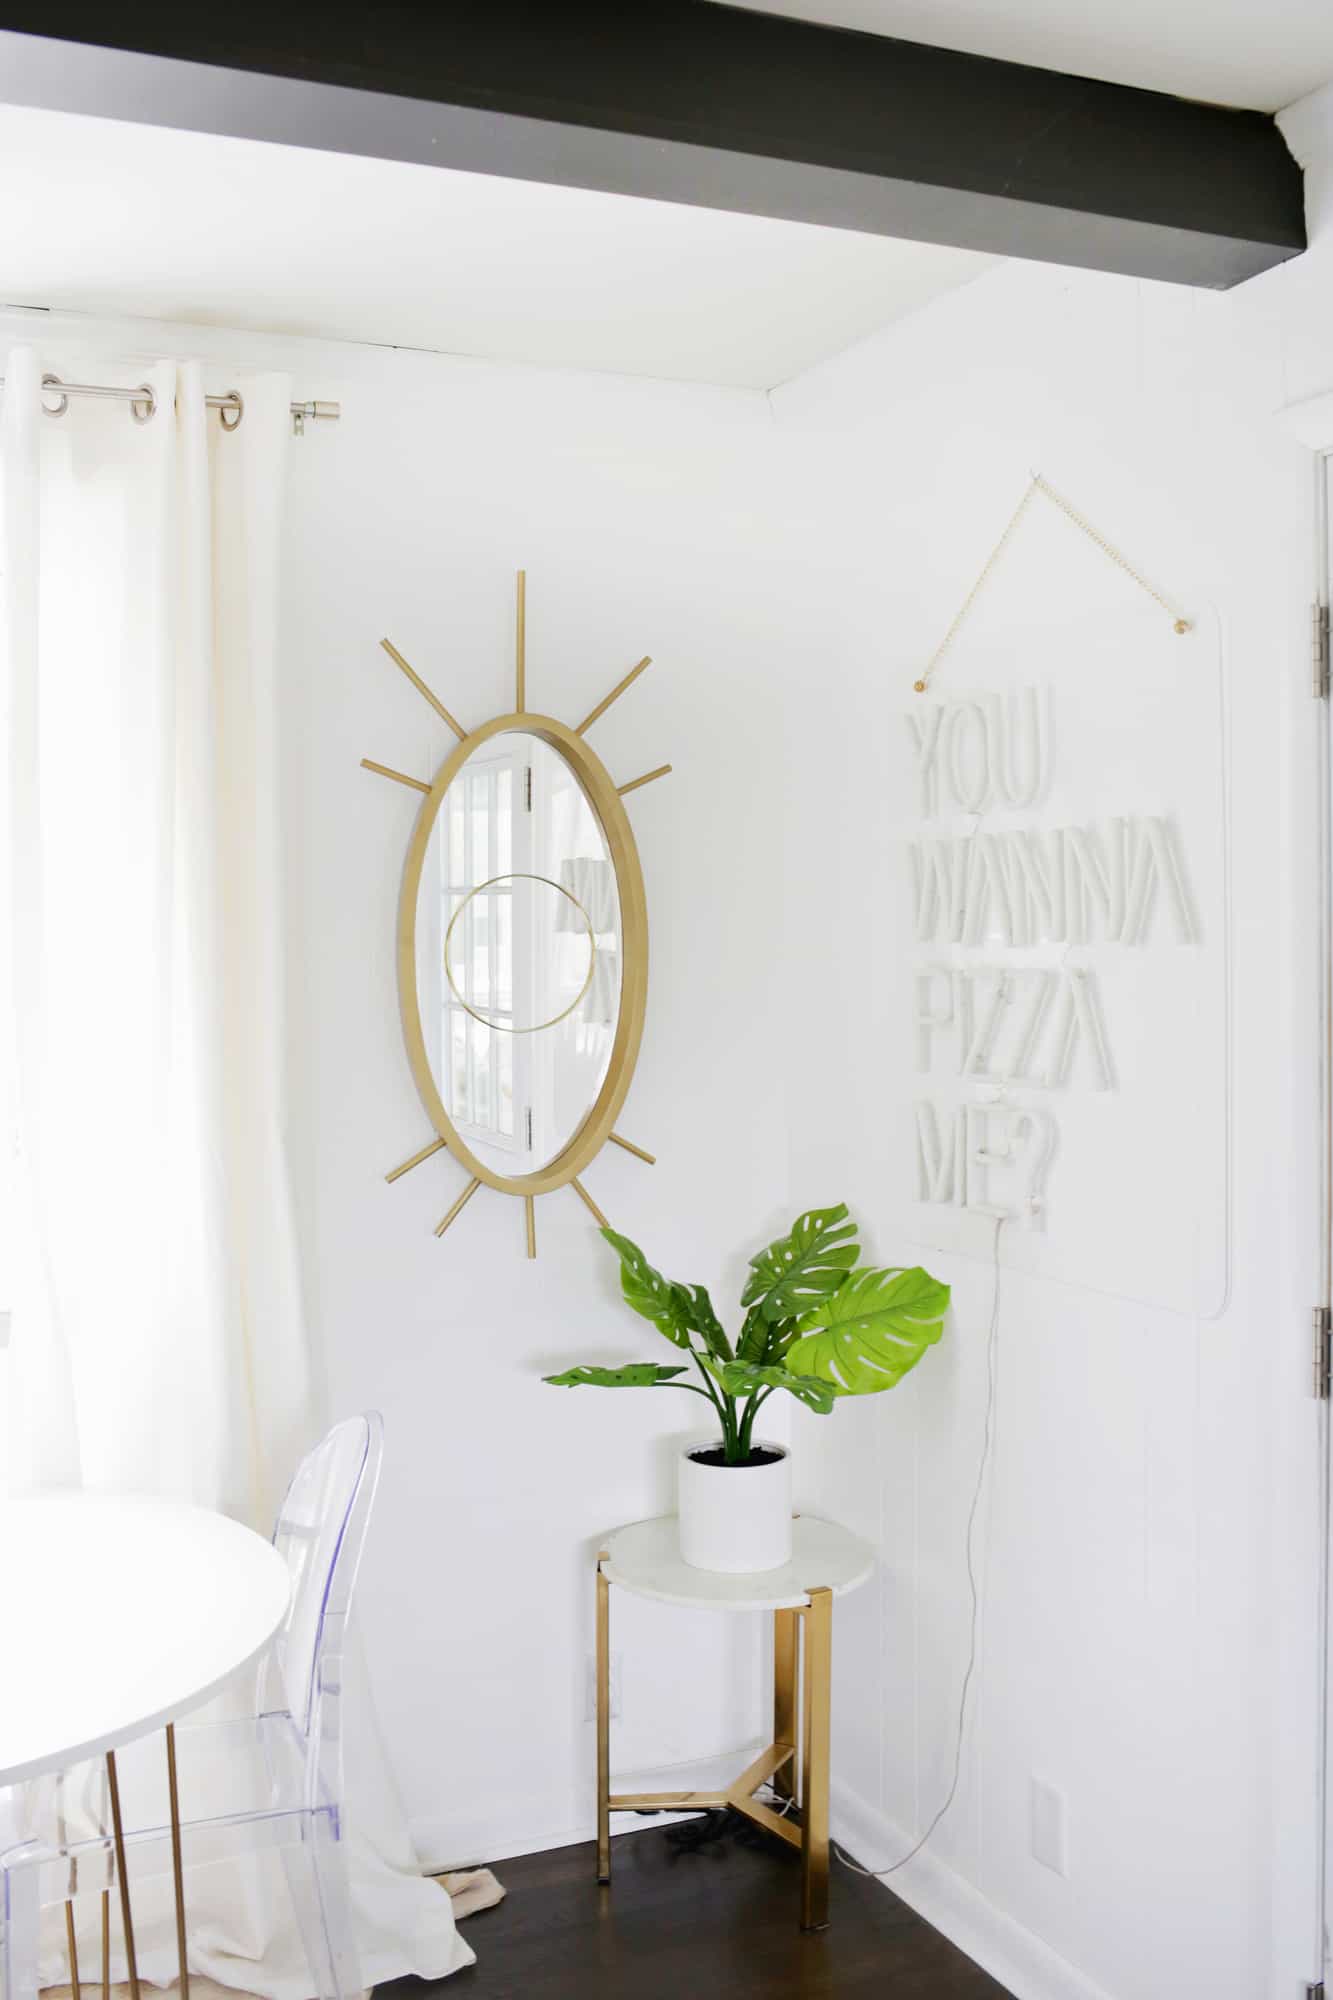
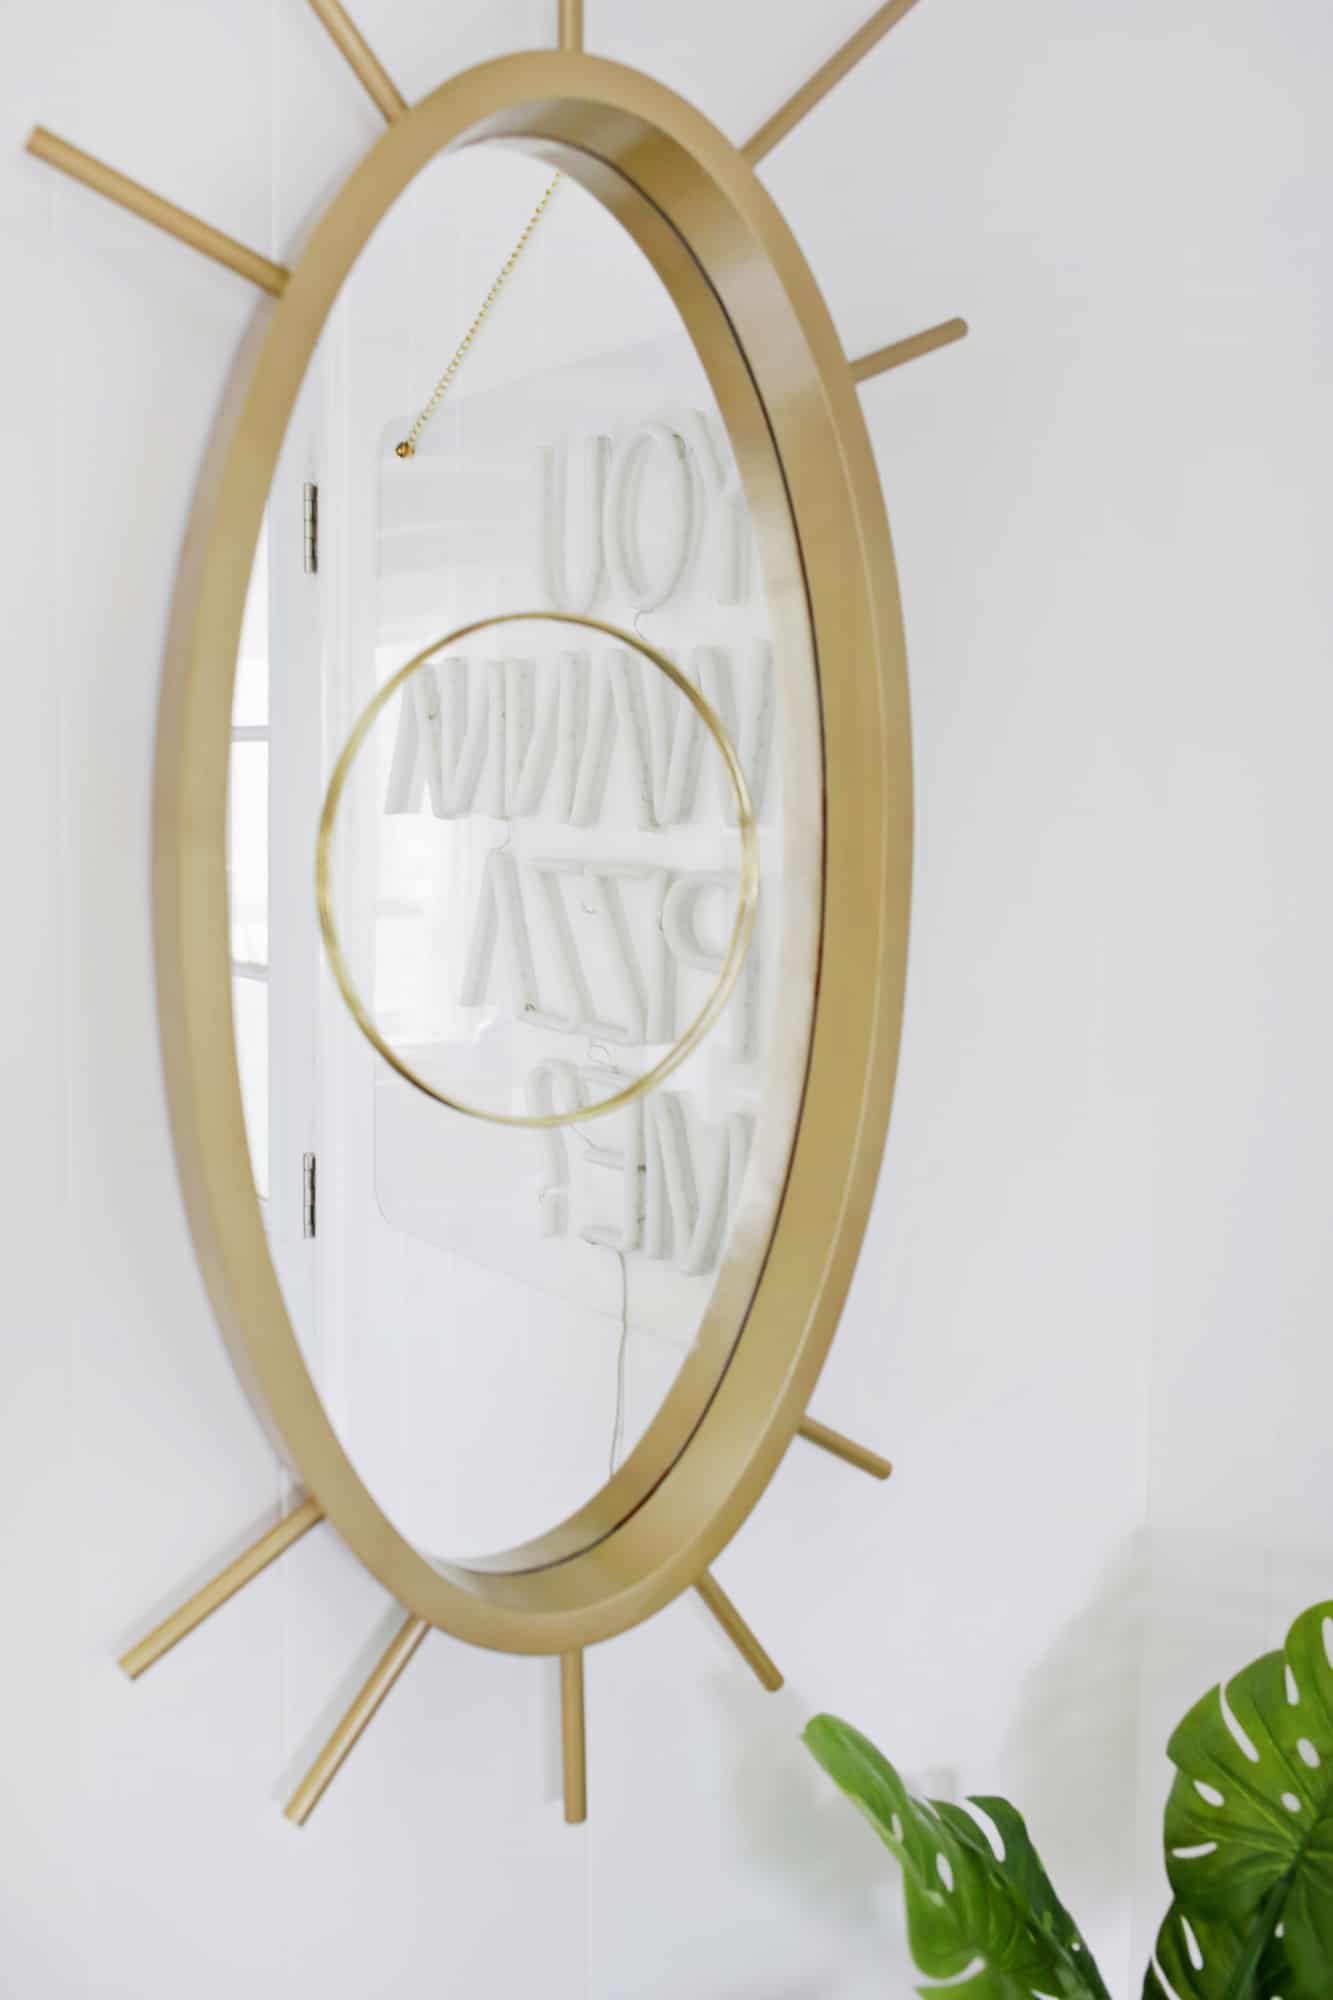

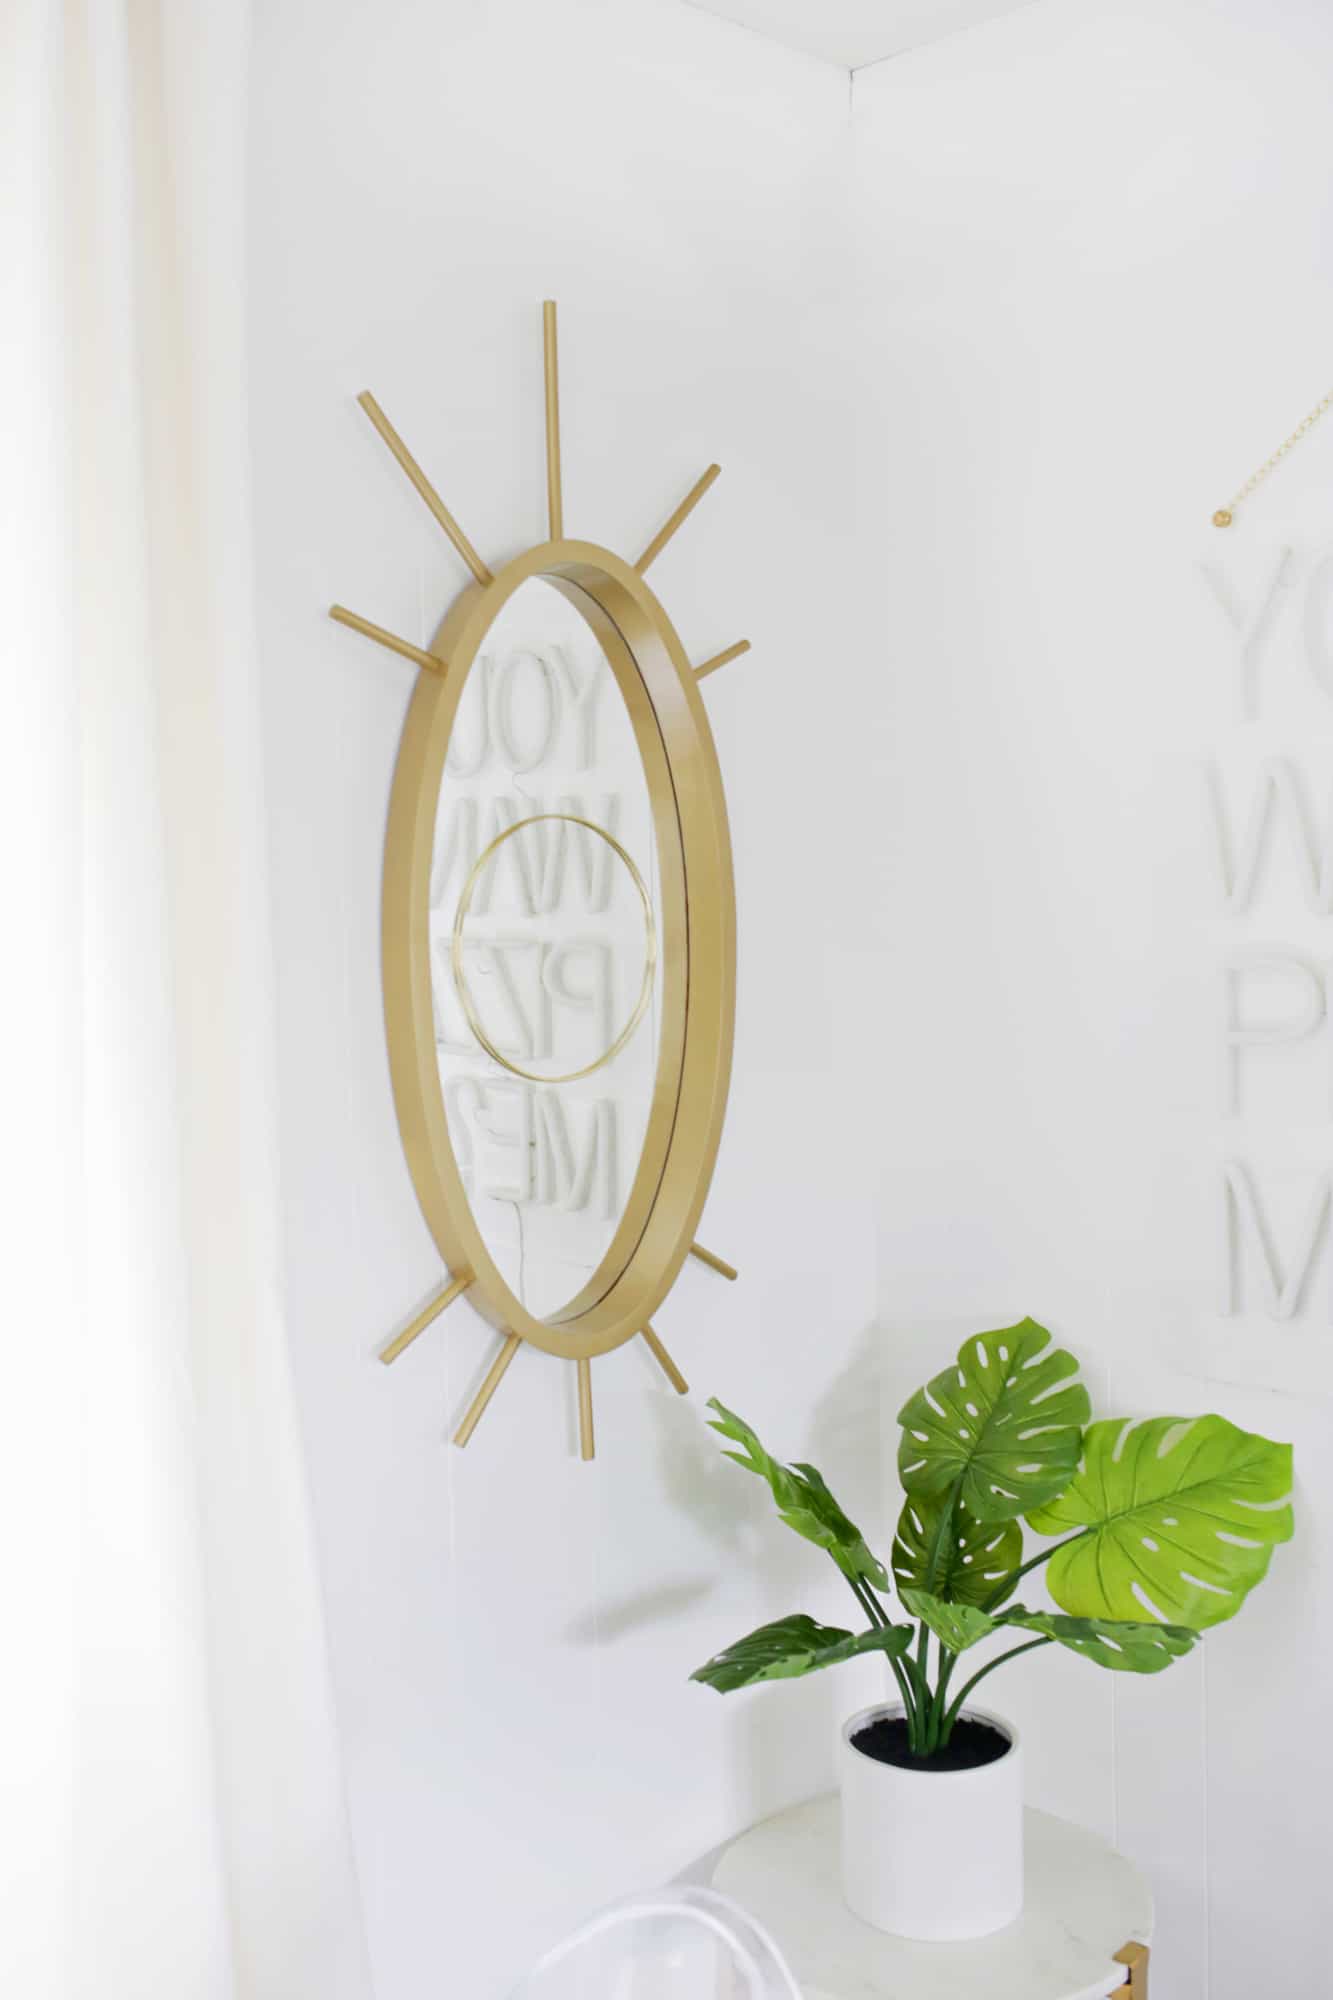 How cool is that? I like the vertical orientation of the eye to make it feel a little different and a bit more abstract, but you could also place it horizontal instead and just more dowels at the top and bottom for the lashes for a more traditional looking eye. I’m always looking to add some whimsey to a room and this was a great way to add some fun and function at the same time (so, is it “fun-ction” then?) xo. Laura


7 Comments
That mirror looks gorgeous! And where did you get that neon sign?
https://www.makeandmess.com/
It’s from Electric Confetti (http://electricconfetti.com/products/you-wanna-pizza-me) 🙂
Wauw, this is really cute! Love it!
http://www.fablouise.nl
Love it, so cute!
Alisha x | https://alishaxali.blogspot.com/2019/03/pregnancysofarfirsttrimester.html
This is really cute! Also, where did you get the neon sign? Or did you make it? Thanks!!
I think I remember this mirror (or a similar one) featured on one or a few of your blog posts! I love it! It’s such a beautiful statement piece. 🙂
Charmaine Ng | Architecture & Lifestyle Blog
http://charmainenyw.com
Love this! It is so cute!
-Kate
https://daysofkate.com